
How to Light photos with Clipping Masks in Photoshop
This Photoshop tutorial will help open new way to work in Photoshop. I did a previous tutorial on Lighting in Camera RAW and Lightroom with the new masks. I had a number of people ask, how to do this same thing in Photoshop. This tutorial shows how to make Lightroom style masks in Photoshop, but a whole lot more too. Photoshop’s layers, masks and selections are more powerful and flexible than Lightroom or Camera RAW. They are faster and simpler in LR and ACR though.
How to Use Clipping Groups in Photoshop
The first part is a quick primer on how Clipping Groups work, then we will do the lighting effects,
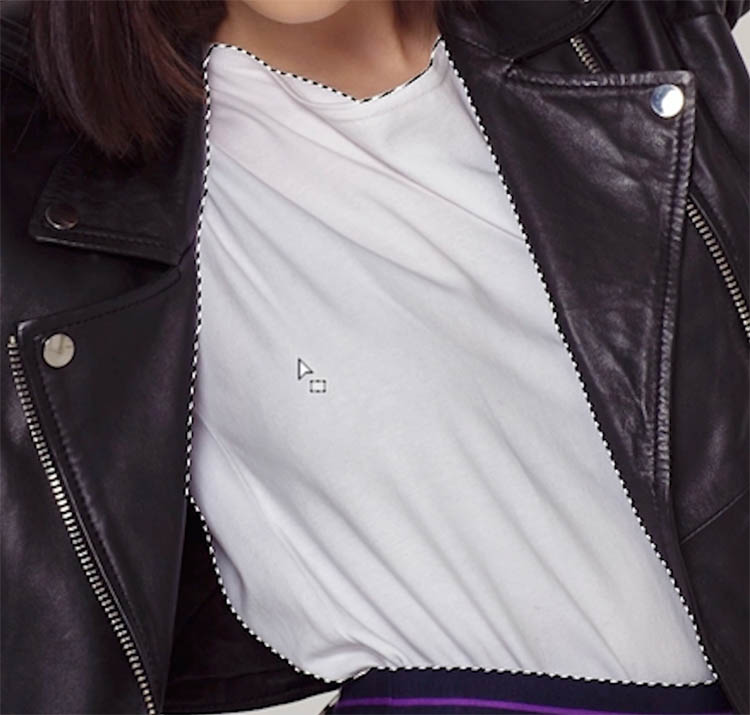
We are going to select the shirt on the photo.
Choose the Object Selection tool.
Make sure the mode is set to Lasso at the top.

Make a rough selection around the shirt. With this AI tool, you aren’t really making the selection, you are telling Photoshop what you want selected.

Photoshop will make the selection for you. (You can use the lasso or other selection tools to improve the selection if needed).
Press Ctrl/Cmd+J to copy the selected shirt to a new layer. (Normally I’d use a mask, but I’m just demonstrating clipping groups here and want to keep it simple, we will use a mask in a moment).

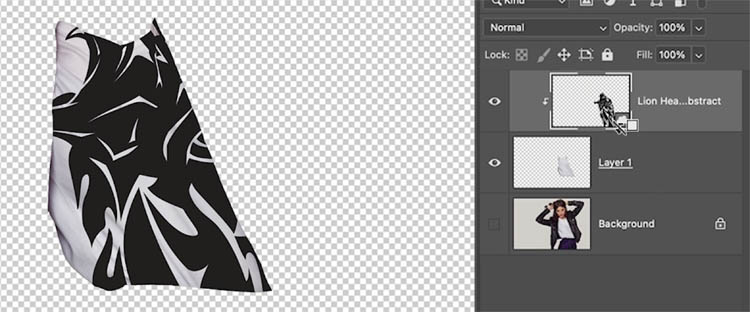
Here I added a graphic to put on the shirt. (I dragged it from the Library, you can see on the video).

If I hide the background, you can see just the shirt and the graphic.
I want the graphic to fit INSIDE the shirt, and not show outside.
Move you curser between the 2 layers in the Layers panel.
Hold down Alt/Option and you will see a square arrow.

Click to add a clipping group.
Notice the top layer displays as indented
Notice the graphic is now contained within the shape of the shirt.
A clipping group constrains the visibility of the top layer to the pixels (or shape) of the layer underneath.
If I turn the background back on.
You can drag the top layer around and reposition, or resize it and it will stay constrained to the shape. (Alt/Option Click to ungroup it again).
I changed the color of the graphic and changed the blend more to make it look better. Learn About Blending Modes here. | Add a displacement Map to wrap to the wrinkles

Ok, onto the tutorial
Making Clipping Masks in Photoshop
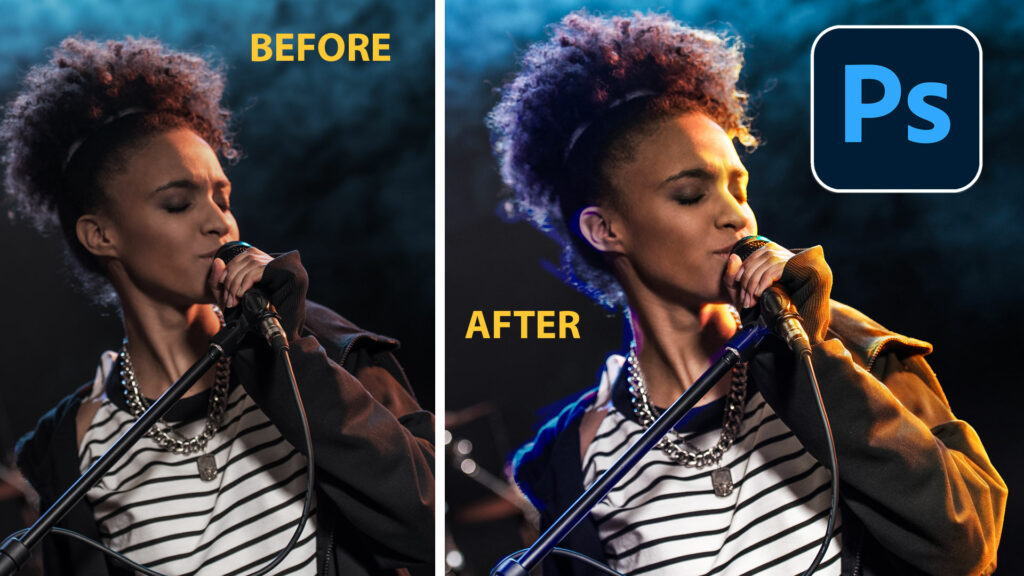
In this image, we are going to make a clipping mask in the shape of our singer in the photo, so we can add some nice lighting to her.

Start by duplicating the layer. Cmd/Ctrl+J

Choose the Object selection tool

Click the options arrow in Select Subject

Choose Cloud as the option, if you are connected to the internet. (This makes a better quality selection than Device)

Click select subject and you will get a selection around the woman

Click the add mask button in the layers panel. (We are doing this instead of cutting out our subject. A mask allows modifications to the edges and is non destructive).
In this screen grab I hid the background, so you can see the transparency. (You don’t need to hide the background.)

Click on the foreground picker at the bottom of the tool bar.
Choose a golden color

Grab the gradient tool
Choose foreground to transparent option (in Basics)
Choose linear Gradient

Apply the gradient to the image by dragging.
Notice the gradient covers the background and the person. We just want it on the person

Just like we did with the shirt example, lets make a clipping group.
Hold your pointer on the line between the masked layer and the gradient layer in the layers panel.
Hold Alt/Option, wait for the square arrow, click

You can move the gradient around and notice it stays constrained to our person. This is our clipping Mask.

Change the blending mode of the gradient to Soft Light and reposition it to add a more subtle effect on the edge.
You can also adjust the gradient layer opacity if you like.

Here we repeat on the left side, but with a blue gradient

Hold the Alt/Option key and move it between the 2 gradient lAyers and click.
Notice we can stack layers above each other and they can all share the same mask as long as they are clipped. See the indentation and arrows to indicate they are in a clipping group.

This time I used an Overlay blending mode. Just use the Blending mode that looks the best for each color, there is no rule, but I find I use Overlay, Screen and Soft light a lot when Lighting.

Using Adjustment Layers with Clipping Groups
Ok, let’s do some custom lighting now.
Choose the New Adjustment Layer in the Layers panel

Grab Curves

Let’s increase the brightness by dragging up in the Curve in the Properties panel.

We are going to change the color too. Choose Red in the top of the Curves

Drag up to add Red

I want Orange, Red+Yellow= Orange
We now need yellow. You will find Yellow by dragging down the the Blue channel. How to use Curves for Color in Photoshop (Curves are super powerful and can do a LOT. I made a course on Photoshop Curves here)
We have our colored light, but it’s everywhere. Lets contain it.

As before, move your cursor between the 2 layers and hold Alt/Option and click to make a clipping mask.
Now the curves can only appear within our person.

But we want to hide the lights and only paint them where we want them.
Click on the mask on the Curves layer (White rectangle)
Press Ctrl/Cmd+I to invert our mask.
It now shows as Black and the effect is hidden.

Grab a Brush (B key)
Set the foreground color to White
Drag on the right edge of our person. Notice it now lights up with the orange light.

The beautiful thing about the Clipping Mask, it’s impossible to paint outside the shape of our person.
This makes it easy to add a Rim light, or paint on the edges.

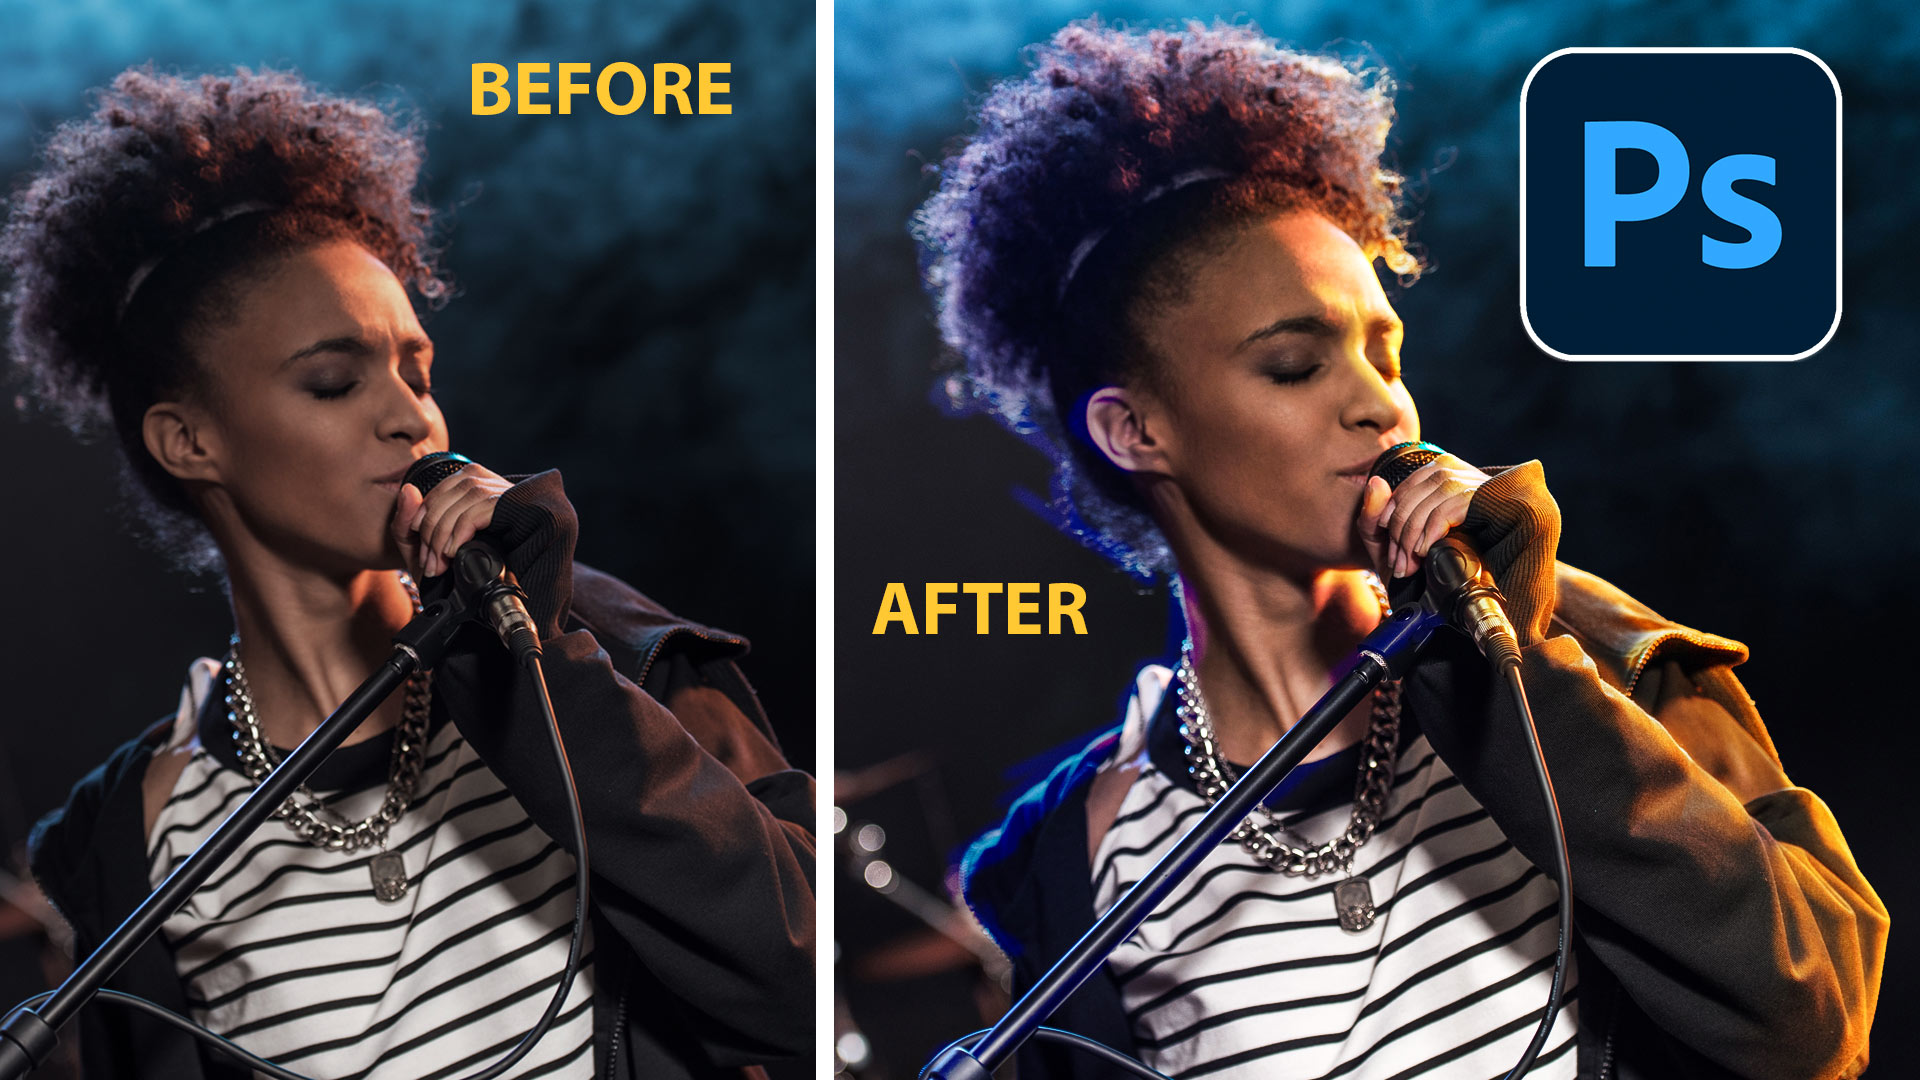
Here I added a Blue light on the other side, following the same steps.

Here you can see the before and after of this effect
I hope this tutorial was helpful for you! Let us know in the comment.
Great to see you here at the CAFE
Colin
Browse the other free photoshop tutorials here at the cafe
Download 100s of dollars worth of Photoshop adds on for free here at the Vault.

Also follow me on Instagram, Tik Tik, Threads and Twitter. for shorts and reels.
PS Don’t forget to follow us on Social Media for more tips.. (I've been posting some fun Instagram and Facebook Stories lately)
You can get my free Layer Blending modes ebook along with dozens of exclusive Photoshop Goodies here
10 thoughts on “How to Light photos with Clipping Masks in Photoshop”
Leave a Reply

How to make a sticker in Photoshop. Add a posterized look to a photo and export picture from Photoshop with...
All new local adjustments with the new Filter Brushes in ACR 9, allow you to paint on or subtract from...

How to realitically place a pattern or logo on a shirt or other clothing in Photoshop. In this Photoshop tutorial,...


Fantastic, Colin! I use clipping masks all the time. Never considered using a layer mask as the clipping mask. Can’t wait to put this to use!
This is great. Thanks so much for giving us these in our emails!!
Thanks for sharing how to do this.
Fantastic work. Many thanks for your informative tutorials. I am amazed how far Photoshop has developed since I started using it in the 1990s
Goog
That is sooooo cooool and creative. Love it.
Really great Colin. Plus it cleared-up some other general questions I had about clipping masks. Big Thank you.
Anytime
I have followed you and your Tutorials for some time ( and recommended them to my friends). This one I have seen several times, and made great use of. If we ever met – which is not likely since I live in Southern Norway – I would shake your hand for a while , just to say Thanks . 🙂
Thanks for the kind words! I have never been to Norway yet