Illustrator CS6 New Features super guide

By Chana Messer
Adobe Illustrator CS6, is featuring new tools, enhanced tools and productivity tools that enables the artist, designer to work more efficiently, with larger and more complex files. Spend less time waiting, more time creating
Top Feature List:
- Efficient, flexible interface:
- Dockable hidden tools
- Adjustable UI brightness
- Color panel enhancements
- Type panel improvements
- Transform panel enhancements
- Transparency panel improvements
- Control panel enhancements
- Image Trace
- Pattern creation
- Mercury Performance System
- Gaussian Blur enhancement
- Gradients on strokes
EFFICIENT, FLEXIBLE INTERFACE
Adjustable UI Brightens
New controls in Illustrator Preferences include adjustable UI brightness
to keep the focus on your artwork. With smooth, continuous control of the background’s gray
scale, you can quickly match the look of Adobe tools such as Adobe Photoshop and After Effects.
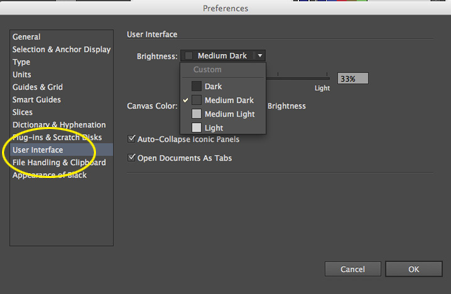
From the Preferences Menu (Command/Control K) click on USER INTERFACE.
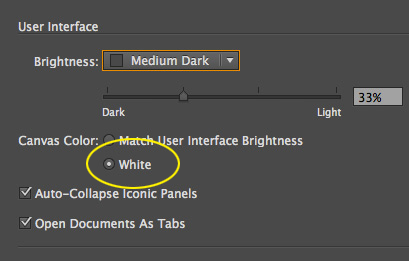
True white canvas color set your workspace canvas to White for fast color sampling
when you need to quickly grab a pure white.
Dockable Hidden Tools
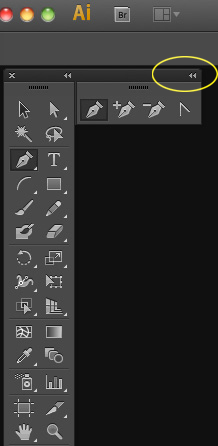
Tear off and dock tools with more flexibility than ever. Find your frequently used tools and created your own tool workspace. In the Tools panel at the left, click and hold the Pen tool to reveal hidden tools. Tear off the tools by clicking the vertical bar at the right of the tool area. Simply drag the tools over to the right margin of the toolbar to activate the blue line that indicates you can drop the tools to dock them. Click on the arrows to
arrange the tools vertically or horizontally.
Panel Enhancements
Many of the panels in Illustrator CS6 have been improved so that you can work with your favorite
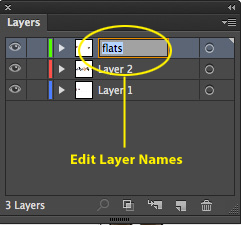
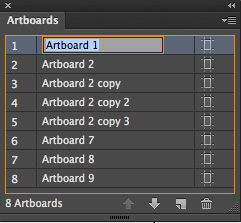
tools more easily and smoothly than ever before. Now we can name the layers and
Artboards by double clicking on the name to change it.
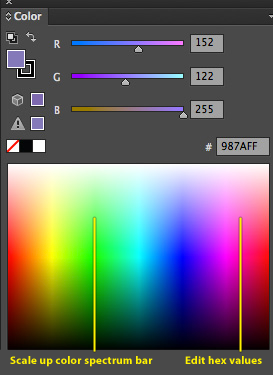
In the Color panel, extending the option will reveal a bigger area of colors and you can edit hex values directly or copy and paste into HTML code or into other Adobe tools.
In the Character Panel you can choose type style directly from the panel.
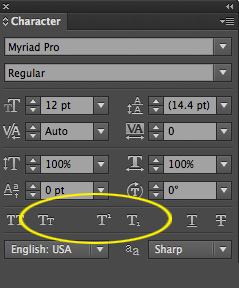
Choose type options
Transform Panel
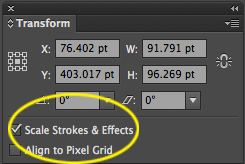
Long awaited feature, the ability to access the critical Scale Strokes & Effects option right in the Transform panel.
Transparency Panel
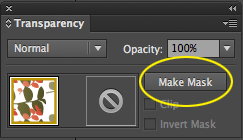
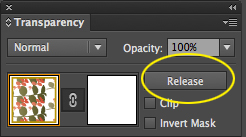
Now you can create/Release Opacity Masks as quickly as a click on a button right in the Transparency Panel.
Control Panel
Control panel more efficient with increased consistency, including placement of anchor point controls, clipping masks, envelope distortions, and more. As well as the ability to reset the workspace to a default position by clicking on the Reset work space.
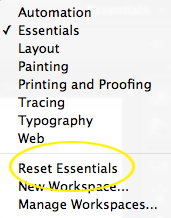
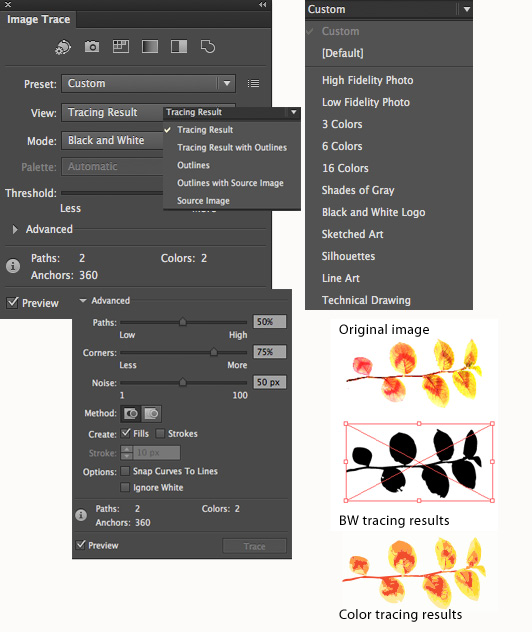
Image Trace
Convert raster images to editable vectors using a completely new tracing engine. With this new approach to
tracing, you can quickly get premium results with image sensing that automatically applies the most appropriate preset. And you have ultimate control in an Image Trace panel that surfaces options all in one place. Not only is the interface more intuitive and interactive, you get clean lines, accurate fitting, better color recognition, and reliable results thanks to brand new underlying technology. Use either the context-aware Control panel or
the Image Trace panel to quickly apply.
Pattern Creation
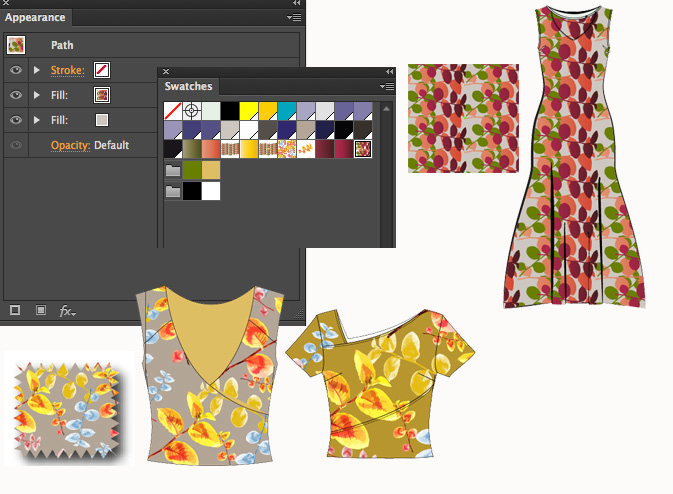
After tracing an image or drawing a shape we can create a pattern using the New Pattern Creation Panel.
With the New Panel the creation of seamless Pattern are not only feasible, but creatively fun.
Using a completely new approach, you can experiment freely with different types of repeating tiles and pattern
shapes that can be edited at any time. The new Patterns Options panel provides easy access to controls for
maximum creative exploration enhanced by instant previewing.
Starting with a simple Trace or Shape

![]()
Use the Pattern Tile tool to resize the tile area and adjust tile spacing—right
on your artboard.
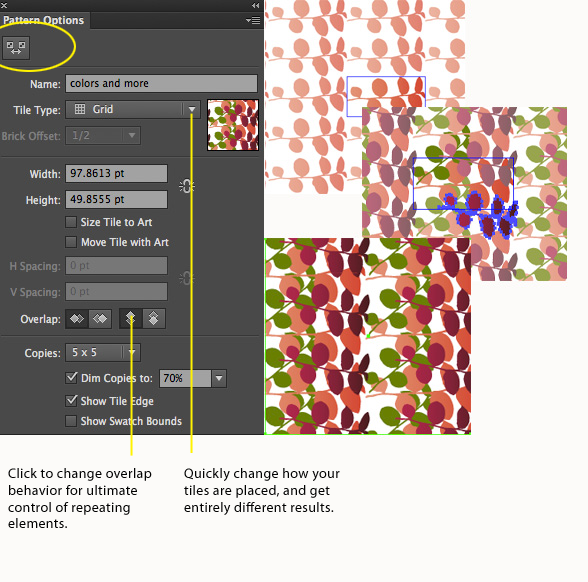
See that newly created patterns are automatically saved as Swatches. You can then quickly apply them
using the Appearance panel.
Mercury Performance System
Mercury Performance System Work with precision, speed, and rock-solid stability on large, complex
files due to native 64-bit support on Mac OS and Windows. Full use of all the RAM on your system enhances overall performance optimization and is apparent in many different ways. For example, the Mischievous Venus
artwork has hundreds of layers, many with multiple effects applied. In this piece, the background was created by
using Pathfinder tools on the texture—in seconds rather than minutes. Working smoothly with this complex a file would not have been possible prior to the release of CS6.
Gaussian Blur Enhancement
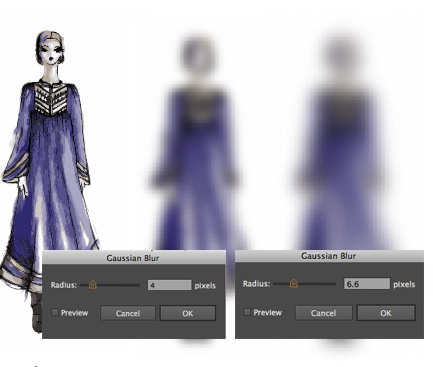
Gaussian Blur and effects such as drop shadows and glows are significantly faster than before, and
interaction with the tools is improved. With Gaussian Blur, you can now set blur radius using a
slider and preview instantly, directly on the artboard, rather than in an intermediate dialog box.
Gradients on Strokes
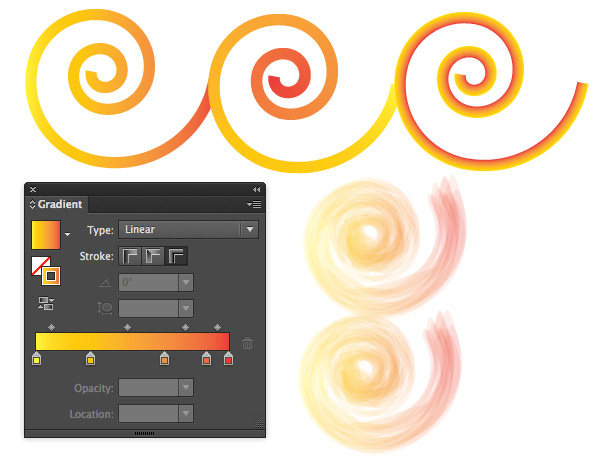
Apply gradients to your strokes—along the length, across the width, or within the stroke itself—all
with complete control over placement and opacity.
Extra Enhancement
Quitting illustrator? Now you can purge unwanted data from your clip board to quit faster.

I am sure there are some more hidden gems! Keep creating and exploring!
About the Author
Chana Messer Fine Artist, Designer, Trainer and Software Evangelist
Teaching at the university level for 25+ years in the fields of Fine Art, Digital Imaging in the Departments of Visual Arts at UCLA. Lead Instructor at the Walt Disney Company.
Chana is an Adobe Certified Expert, Adobe Partner, Adobe Community Professional, part of the Adobe Professional Freelance Team, and an Adobe User Group Manager. As such she has been invited to present at Adobe events at Mac World and AIGA, Adobe MAX and other events in Los Angeles, San Francisco, Portland, Chicago, New York and Tel Aviv.
The recipient of a BFA from Tel Aviv University and advanced degree in printmaking from Pratt University, Chana Messer has been a fine artist for over 30 years. Pursuing her interest in an emerging new field, Chana completed an advanced degreee in Computer Graphics in 1986, and has remained ever since at the cutting edge of electronic digital design.
PS Don’t forget to follow us on Social Media for more tips.. (I've been posting some fun Instagram and Facebook Stories lately)
You can get my free Layer Blending modes ebook along with dozens of exclusive Photoshop Goodies here

How to use new Content aware fill in Photoshop CC 2019. How to remove objects in Photos, new Content Aware...
How to use the new features in Photoshop 21.2, June Photoshop 2020 release. See all the new features and the...
By David Blatner et. all Time stoppeth for no man… or InDesign user, apparently, as Adobe today rolls out their...

