
How to add a rim light to a photo in Photoshop
How to make a photo realistic rim light for a photograph in Photoshop
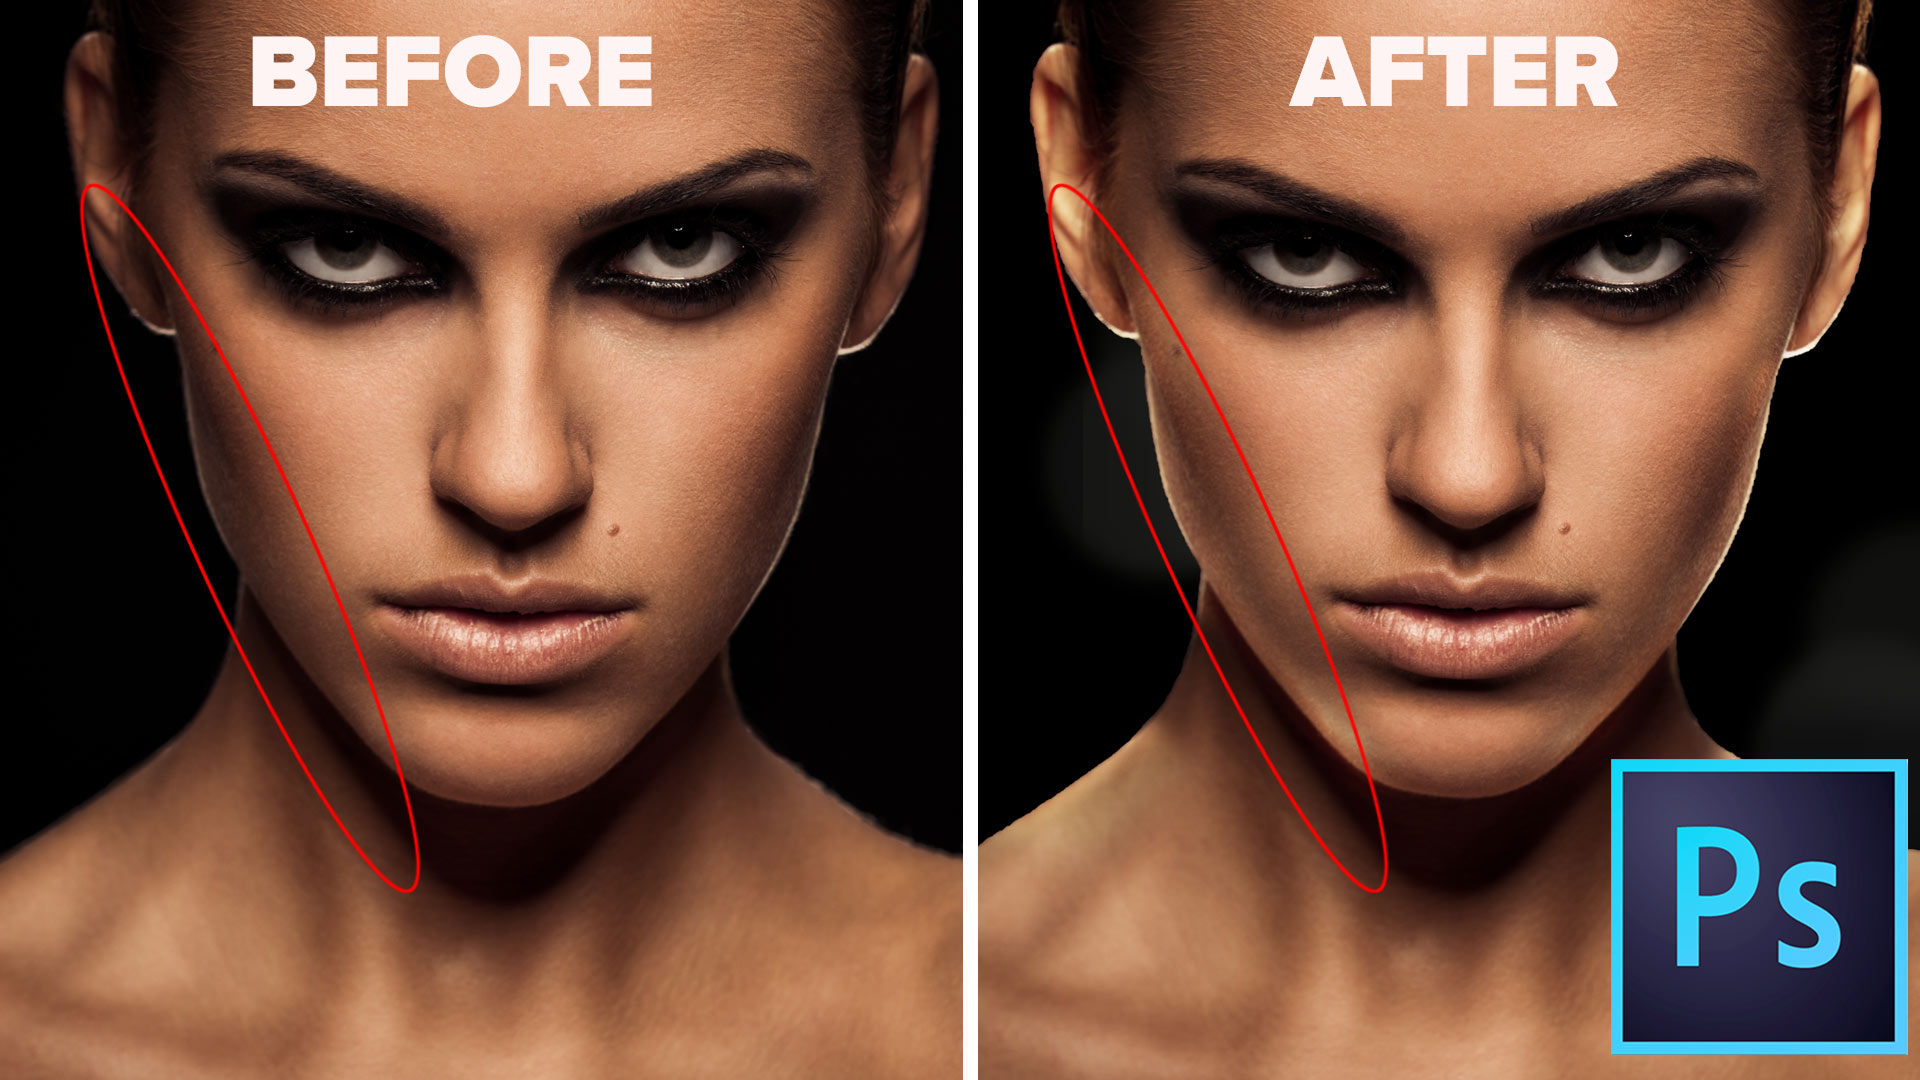
This Photoshop tutorial shows you how to create a very realistic looking rim light. This backlight will add a lot of drama and separate any photo from its background. Watch the video and then use the written steps for easy reference.
This tutorial will really make your photos pop from their background and a add a ton of drama. No more boring photos.
I’m sure there are other ways of making rim lights in Photoshop, but here is “the Colin Smith method“. It works in all versions of Photoshop.
Here is the photo I used from Adobe Stock
Step 1: Make a selection around the face
We are going to make a selection around the face, its will just be a rough selection. I have created many tutorials here on PhotoshopCAFE on making different types of selections, so check those out.
(1) Choose the quick selection tool
(2) Click on Select subject. If pre-Photoshop CC 2019; drag the quick select tool to make a selection.

Step 2. Refining the selection
Click on Select and Mask at the top of the screen
(1) Choose On White, under view to see a white background
(2) Set the edge to 1 pixel
(3) Use the refine selection tool on the edges of the hair
(4) Choose New Layer with Layer mask and click ok.

Turn on the background layer. Your layers panel should look like this, with a mask for the cutout.

Step 3. Lighting the face
Let’s illuminate the entire face before constraining it to a rim.
(1) With the top layer selected; Choose a Curves adjustment layer
(2) Drag up on the highlights section in the Curves to brighten the photo. (Curves tutorial here)
Let’s add some warm color to the light.
(3) Click on RGB to open the channels, choose Blue.
(4) Since there is no yellow channel in RGB mode, reducing some blue will make the color look yellowish to simulate a tungsten light.

Step 4. Masking the light.
Now we will hide the light by using a layer mask.
(1) Ctrl/Cmd+Click on the Layer mask to load the selection of the head.
(2) Click on the Curves layer mask.
Press the D key to reset Photoshop colors.
Press Cmd+Delete (Mac) / Ctrl+Backspace (Windows) to fill the selected area of the mask with black.
The curves adjustment should now be hidden by the mask.
 Step 5. Adding the rim light in Photoshop
The trick is moving the mask, so only the edge of the light is seen.
(1) Click on the Curves layer mask. Drag on the image to move the mask. For more precise control, use the arrow keys on the keyboard. TIP: (holding down Shift will move by 10 pixels each time you tap the arrow key).
The edge of the mask looks really hard and fake. Let’s fix it.
(2) Open the properties panel (double click the mask to open it). Increase the feather until the edge looks soft and the light looks natural. We now have a rim light, but there are a couple more steps to make it look more realistic.

Step 6. Adding a double rim light.
Why don’t we add another rim light to the right side of the face. It’s really easy, now that we have already done the work.
(1) Using the rectangular marquee tool, make a selection around the right half of the face.
(2) Make sure you are working on the Curves Layer mask. Choose the move tool.
(3) Drag the selection to the left and reveal the rim.

Step 7. Refining the light with a paintbrush
Lets make the light look more realistic. TIP: Look at references of rim light photos and study them for a more realistic result.
Adding highlights
Choose a soft edged brush and white for the foreground color. When we paint on the mask, we will be adding light. To paint on a mask, select the mask and paint over the photo.
Paint on the edge of the chin to extend the light. Also add a little more to the ears and areas that need more light.
Removing Highlights
With a black brush on the mask, we can hide areas of light.
Clean up the overspill on the chin, darken above the cheeks, around the eye sockets. Also touch up bits of the neck and shoulders.

And here is our rim light, thanks to Photoshop.. but wait, there’s more.


Xtra Credit: Making Colored Gels in Photoshop
We can simulate different colored gels, that add a colored light effect. In step 3, we changed the color channels in curves to get a color. Try some variations like shown here for some really great effects.

I hope you all enjoyed this weeks written and video tutorial here at the CAFE.
I enjoy making these for you. As time permits, I’ll keep making one each week. Drop a comment and let me know what you would love to learn in photoshop. Also don’t forget to check out my premium tutorials, it’s what supports this website and enables me to do what I do,
PS Don’t forget to follow me on Social Media>
PS Don’t forget to follow us on Social Media for more tips.. (I've been posting some fun Instagram and Facebook Stories lately)
You can get my free Layer Blending modes ebook along with dozens of exclusive Photoshop Goodies here

One thought on “How to add a rim light to a photo in Photoshop”
Leave a Reply
Learn how to make your own icon Library in Photoshop. As a bonus you will get an introduction into the...

How to use ai masks in Photoshop and Lightroom for 1 click retouching of faces


This is SO helpful! I am not a professional photographer (I’m a graphic designer) but have been searching high and low for a quality, realistic gel lighting effect tutorial. Thank you!!!