
The Lightroom Editing Blueprint I Always Follow. Lightroom Editing for beginners and intermediate users.
Discover the simple 3-step Lightroom editing workflow I use on every photo. In this tutorial, I show you the exact order to make global adjustments, local edits, and finishing touches for faster, more consistent results in Lightroom Classic and Adobe Camera Raw.
This is a 3 step process. This tutorial isn’t exhaustive, quite often, there are other tools or other things that I do, because each photo is different, but this tutorial shows the basic frame work.
Part 1 Global: These are the changes that affect the entire image.
1a. Color Profile
The first step is to choose a color profile if you are working on a Raw file. You can use a profile on non Raw files, but there will be a more limited selection available.
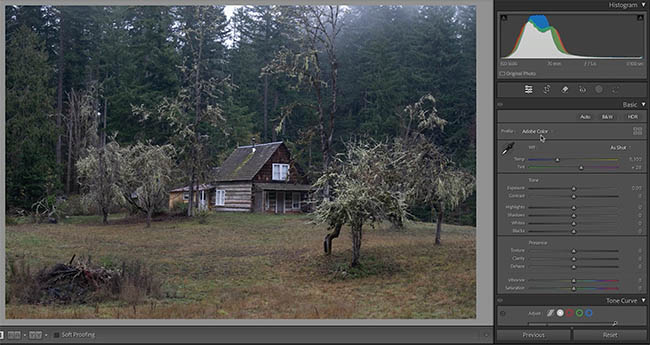
In the develop module, click on the drop down on Profile. Adaptive is a good place to start. The Adaptive Color profile is generated by ai, it analysis the image and builds a custom profile for that image. This only works on Raw files. I have a more in-depth tutorial here on Adaptive Profiles.
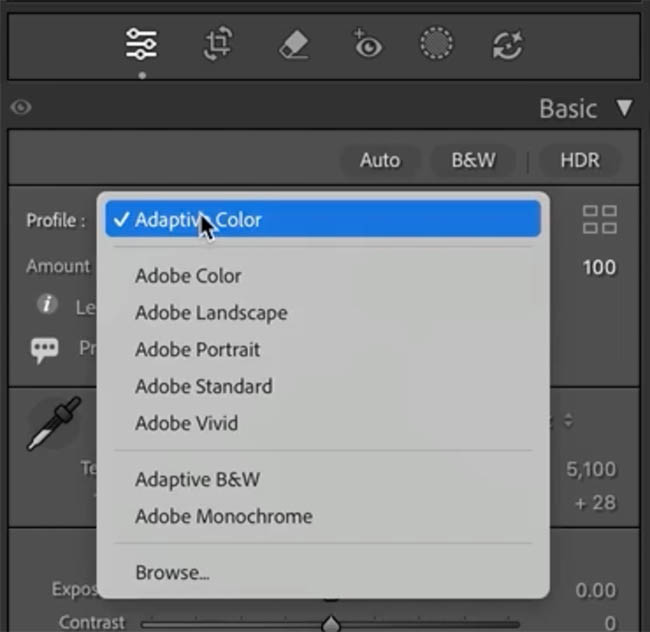
Quite often the Adaptive Profile will apply a strong adjustment.
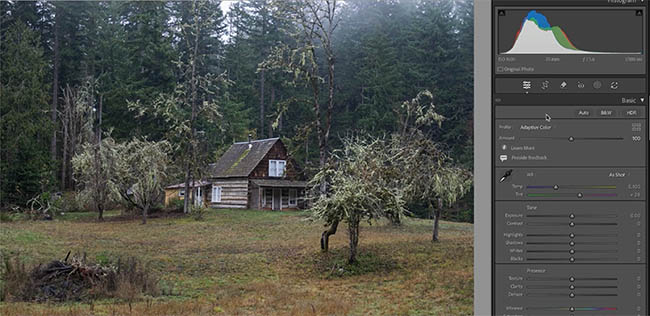
In this case, we don’t want to use the Adaptive profile because we want more control over manual adjustments. Click the 4 rectangles next to profile.
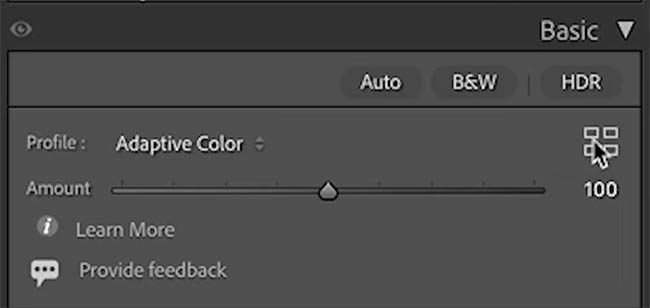
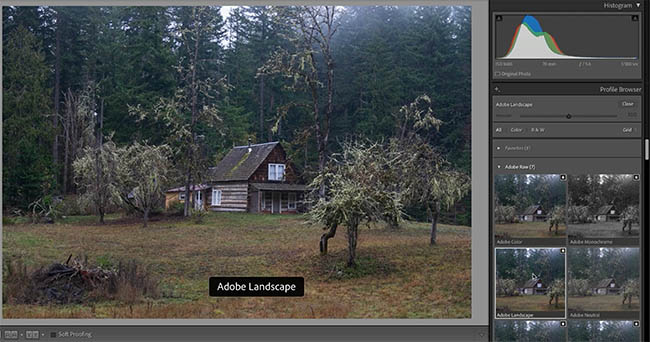
This opens the Profile browser. As you roll over, you can see how each profile will look.
We are using the Adobe Landscape one.
1b. Tone controls
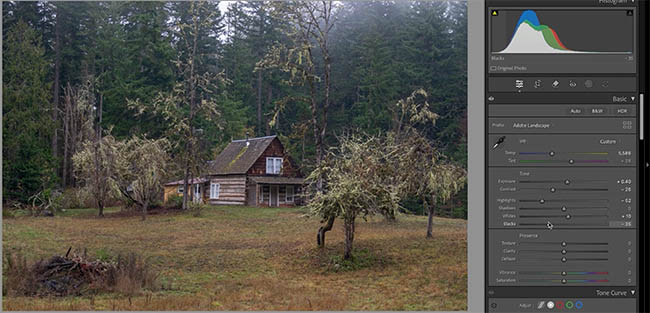
Now we change the basic tone control sliders. (You can see this in action on my video at the top of the page).
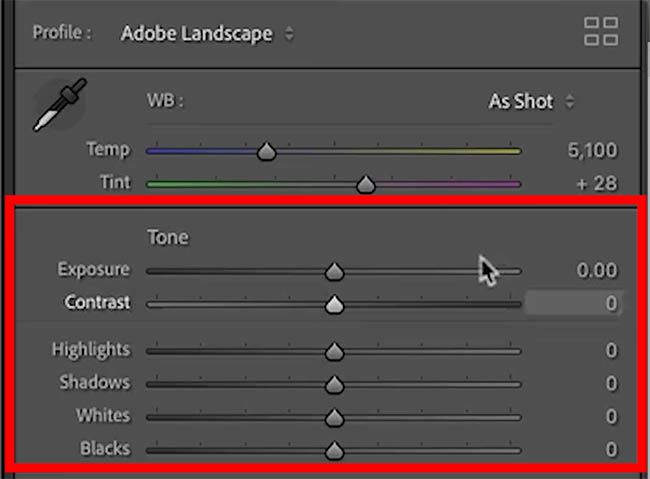
The goal of this step is to set the overall brightness. We will also maximize the visible dynamic range. This means we are more interested in showing details in shadows and highlights than we are a punchy image at the point.
Exposure: We increased this a little bit to brighten the image. Most of the time, you won’t need to adjust this much, usually a little tweak, unless the image is underexposed (too dark), or over exposed (too bright).
Contrast: Lightroom adds a little bit of contrast to the image and some cameras do too. I usually lower the contrast a little bit to show more image details in shadows and highlights. I feel my images have improved a lot since I started to do this, especially on the Sony cameras, which often have incredible dynamic range but often add too much contrast for my tastes.
Highlights: I usually move the slider to the left to recover bright areas, especially in the sky and clouds. Don’t be afraid to be a little heavy handed with this one.
Shadows: Use this slider to recover details in the blacks. Move it to the right. I am more subtle with this one as your image can appear unnatural very quickly with too much shadow adjustment.
1c. White Balance
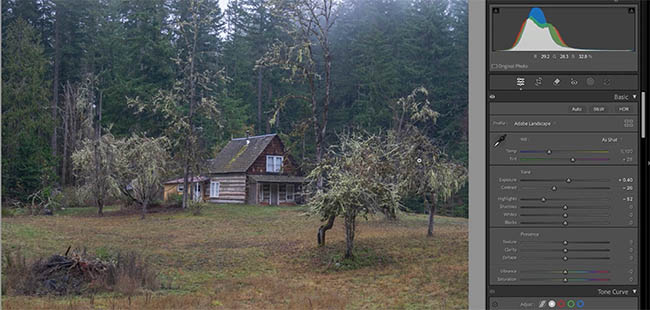
The next setting is to set the white balance and color temperature. The usual goal is to make the color match the way the scene looked when you made the photograph. This is done by changing the WB settings if there is a noticeable color cast (colors look too blue or too yellow often). This isn’t a lesson on color temperature, but I have a tutorial here. There are times you will desire a color cast for creative purposes.
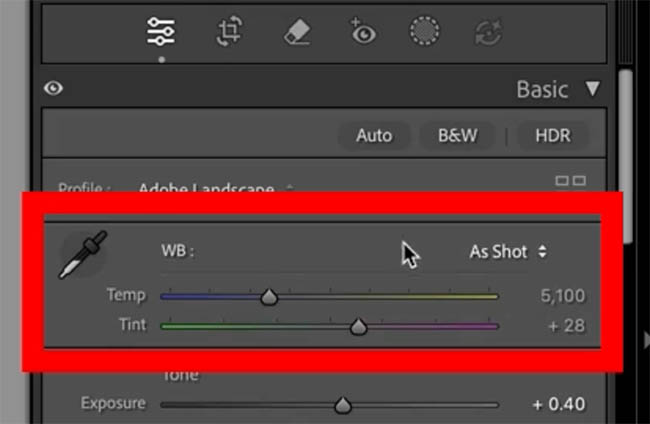
Very often, I will slightly warm up the image by moving the Temp slider to the right, just a little bit. You will be able to see when it’s too much. This is personal taste.
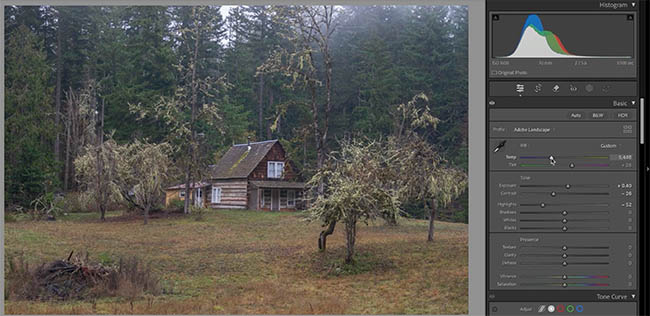
1d. Adding back the contrast
Now, we will add back some of the contrast with Black and white. It’s worth noting, if I’m going to be dodging and burning, I often leave these settings until the 3rd part, the finishing steps. For this tutorial, I want to keep things as simple as possible, so we will do it now, which is perfectly acceptable.
Whites: The way I use this slider, is to brighten the whites. When we recover with the highlight slider, sometimes the bright areas can get a little milky, so increasing the whites can clean up those brights. This is another of those sliders to be very subtle with, and many images don’t require an adjustment of the whites.
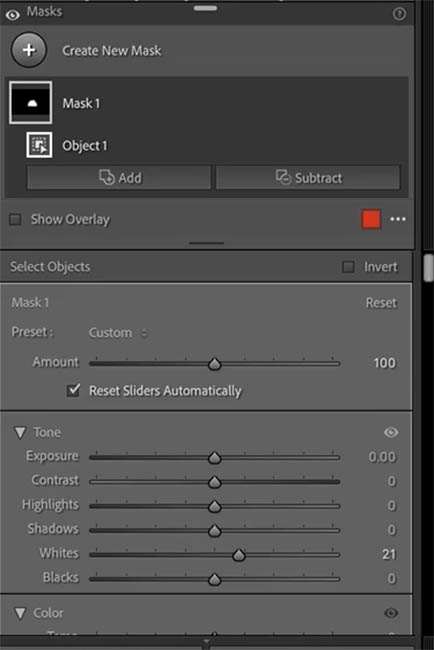
We increase the whites a little to brighten the window frames and other bright parts of the image. Don’t fully brighten the entire image for the window frames, because we can target those in future steps.
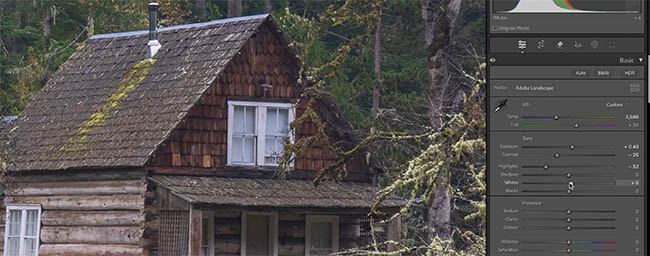
The Blacks are a great way to bring back the nice darks in the shadow areas. This added body to the image. Slide the blacks to the left to increase those nice darks. Be careful not to go too far and clip the image. Clipping is when the darks are pushed so dark that image details are lost and forced to black. (Clipping can also occur in the highlights and in colors).
Tip: When you push the Blacks slider (or any slider in the tone panel) Hold down the Alt/Option key. You will see the areas that will clip.
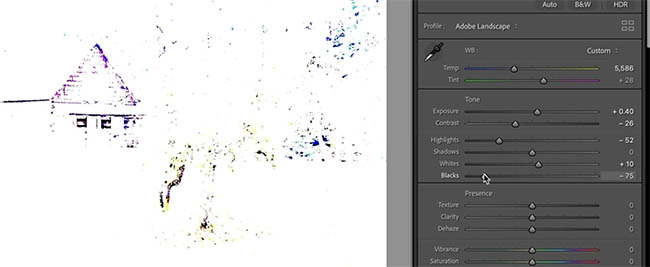
You can also see clipping in the histogram. This is where the histogram “mountain” is against the edge and cut off abruptly.
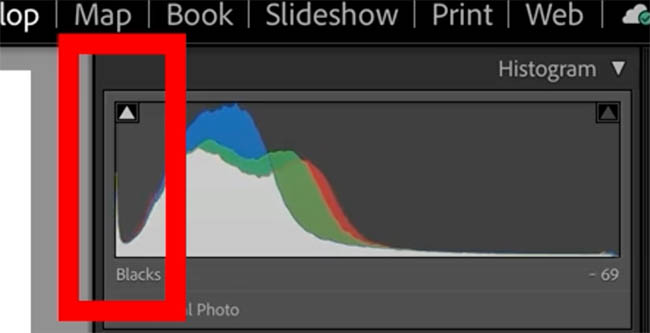
Make an adjustment in the blacks that adds some nice dark blacks without clipping the image.
1e. Lens Profile
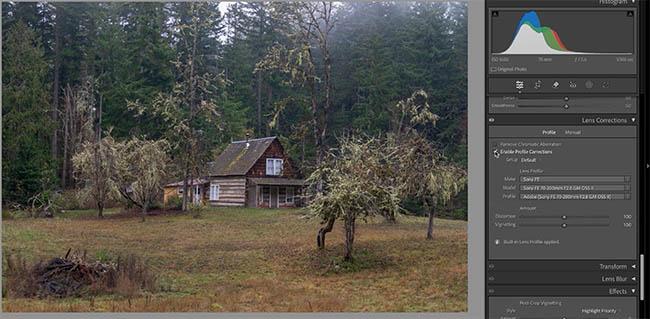
While some people apply this adjustment to every image, it’s more important with a wide angle lens. I shot this photo at 70mm so its not as important as if it was shot with a 17mm for example. You will see more lens distortion on wider lenses.
Scroll down to lens profile. Turn it on and distortion from the roundness of the lens will be reduced. A wider lens will see more of a change than a zoom lens.
It also reduces the vignette around the edges when the image can get darker than the center. This is actually noticeable on my 70mm. (YMWV) You milage will vary from lens to lens.
1f. Cropping
The last step is to apply cropping. This is could be to straighten the photo, by clicking on the corner of the photo with the crop tool and dragging. Sometimes people crop to remove distractions, as a better alternative to digital zoom or to tighten up the composition.
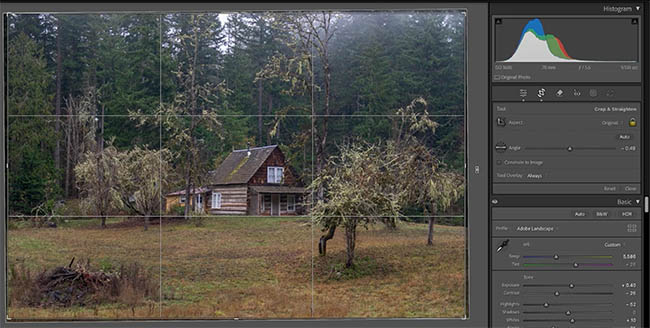
We are done with Part 1 the global adjustments. now we move onto part 2.
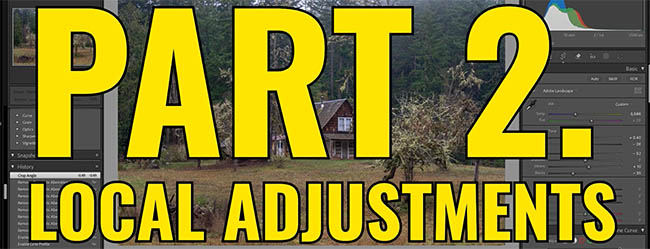
Part 2, Local Adjustments. Editing specific areas on a photo.
2a. Remove distractions
This is where we remove spots on the image, sensor dust and unwanted distractions in the photograph. For larger and more complex removals, you can use the ai removal tools, I have a tutorial here.
For this tutorial, we won’t be using ai, because there is nothing difficult to remove in this image. I usually only use the ai remove tool in Lightroom when necessary.
Choose the old school remove tool
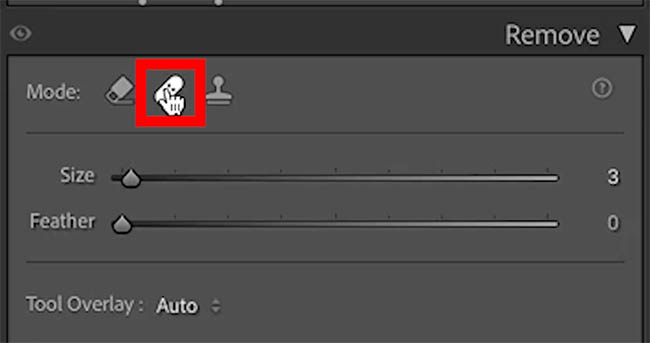
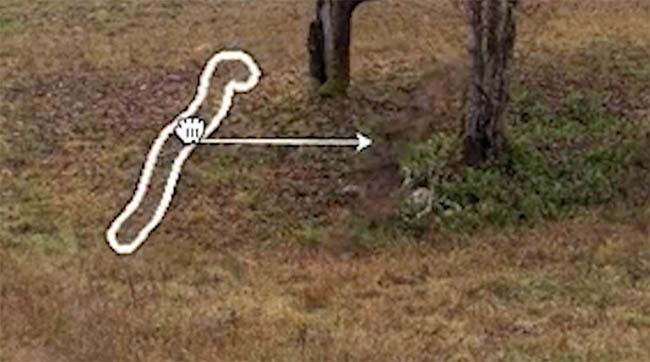
Drag over the area to remove.
Drag the sample point if its doesn’t look right and find an area that matches better.
2b. Masking
When you want to adjust a specific part of a photo, you need to use masks. There are 2 types of masks in Lightroom, ai auto masks which detect objects and manual masks like the brush or gradient tools.
Choose the mask tool.
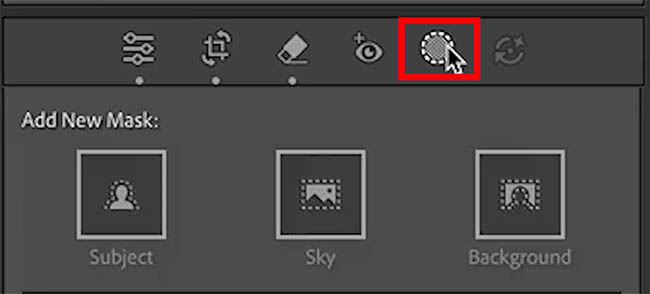
Let’s try objects because I want to select the building.
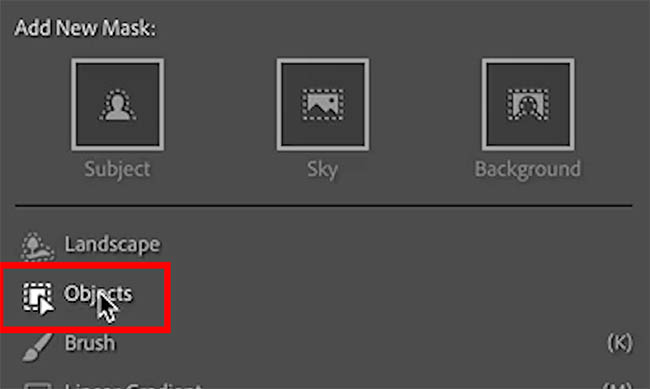
Roughly cover the area you want to select.
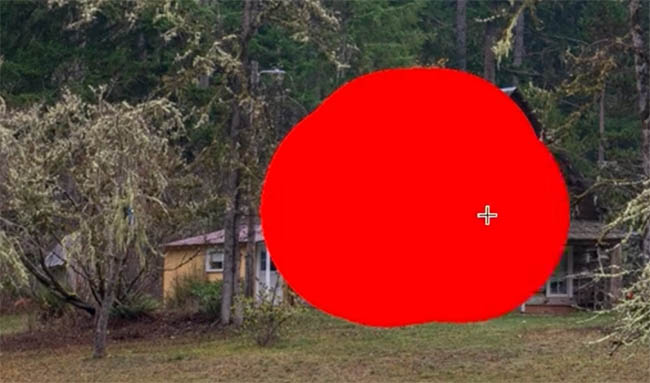
The object mask will recognize the shape and automatically make a mask for you.
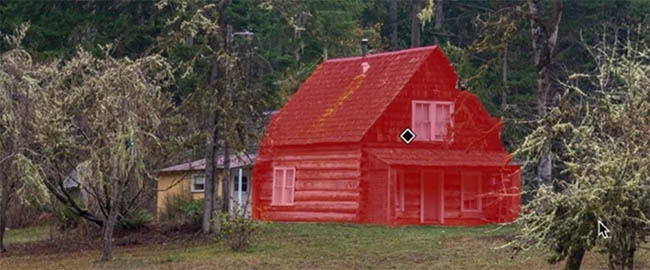
Lets increase those whites some more for the window frames and building. Simply, move the slider with the mask selected. Only the selected part of the image will now change.
You can create a brush mask. Click, Create New Mask, and choose brush.
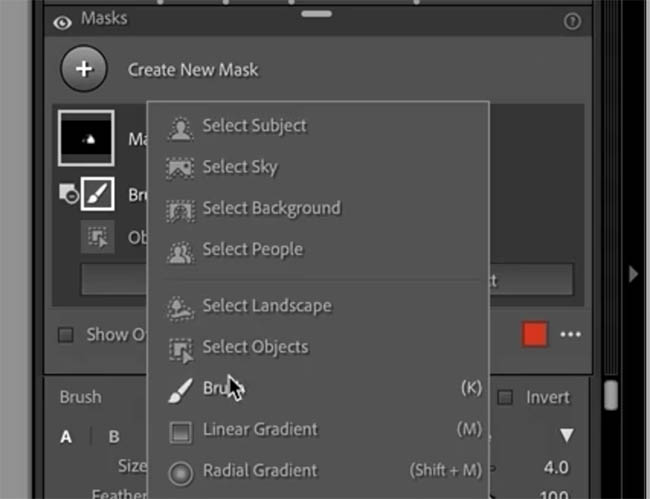
Now you can paint anywhere on the image to brush on a mask.
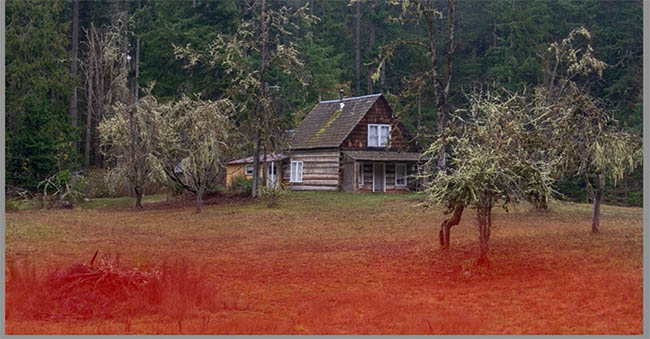
Make an adjustment. In this case, darken the brush stokes to make a U shaped vignette around the bottom and sides.
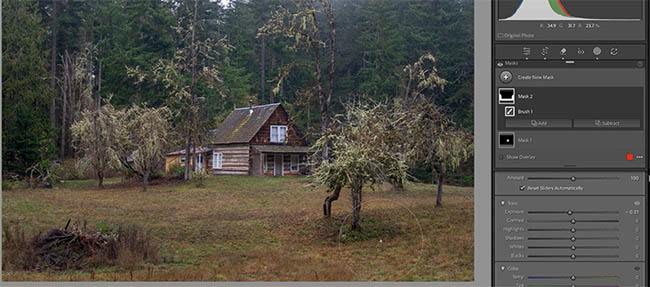
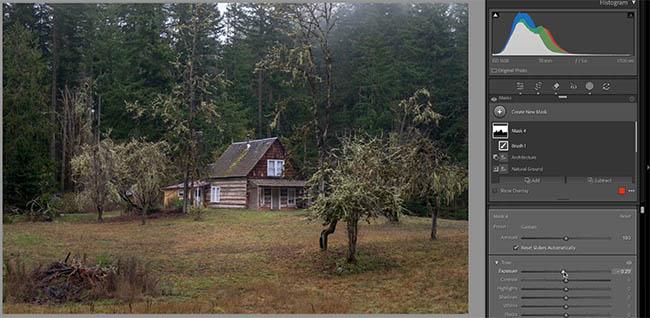
We want to darken the trees in the background. You can make auto masks.
Choose Create New Mask>Select Landscape.
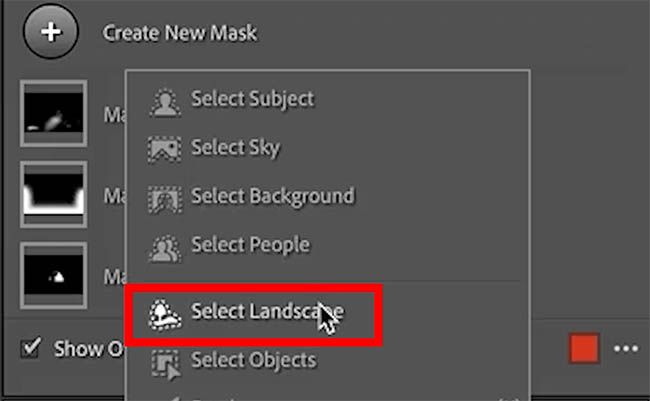
You will see the landscape features that you can have selected.
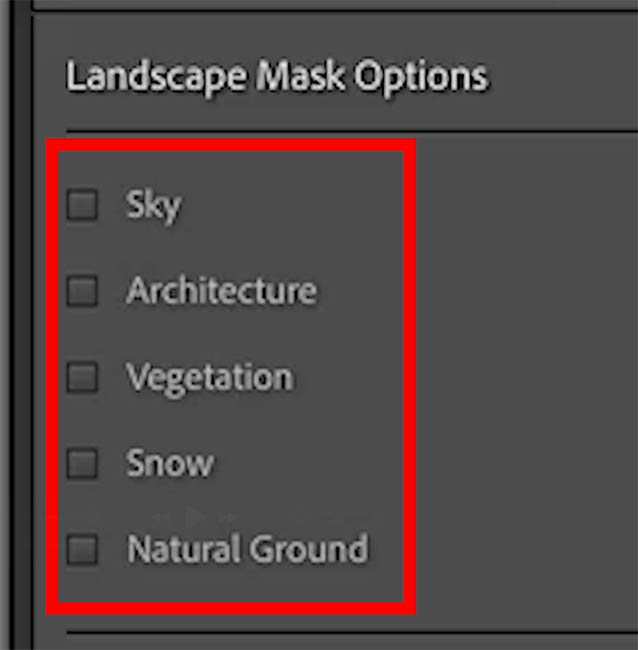
As you roll over the different features, you will see a mask appear over you image.
Click Vegetation or the feature(s) that you want to select and then choose create Mask.
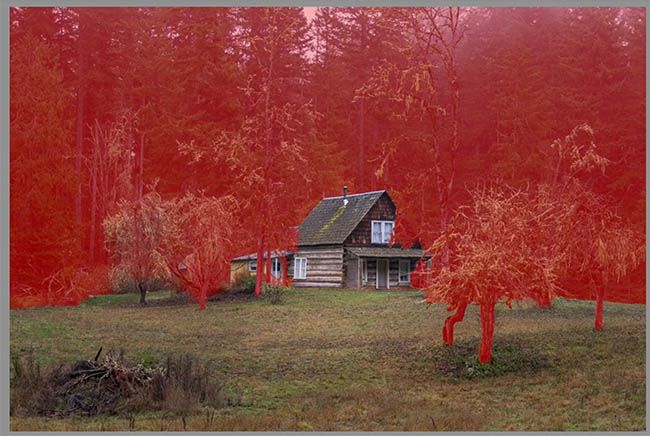
Now we adjust the trees in the background to make the foreground pop.
Part 3, which is Finishing. Where we add the finest details.
3a. This is the time to use the presence sliders.
Personally, I like to use the Texture the most. They all have their place and I made a very popular tutorial on the difference between Texture, Clarity and Dehaze.
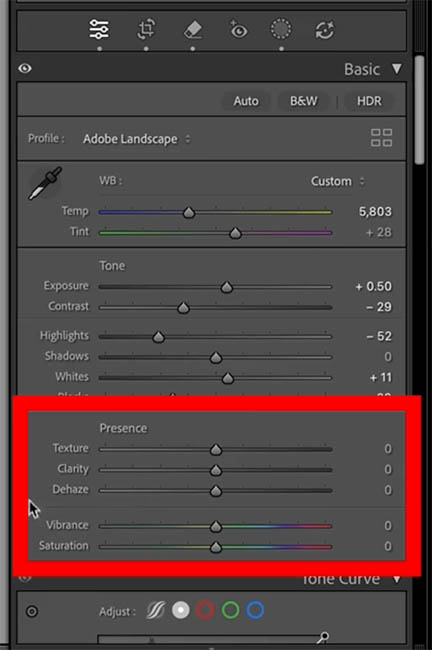
For this particular image, just a little bit of texture is all thats needed.
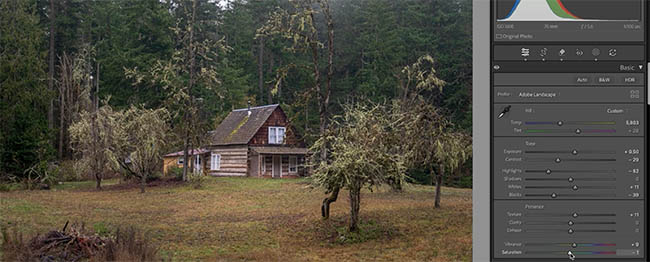
3b Noise Reduction
Zoom into 100% view to see if there is noise in the image. (To oversimplify, lets just say too much grain). For really bad noise, you can use the ai Noise Reduction. In this case, we will use the regular noise reduction and increase the luminance a little bit.
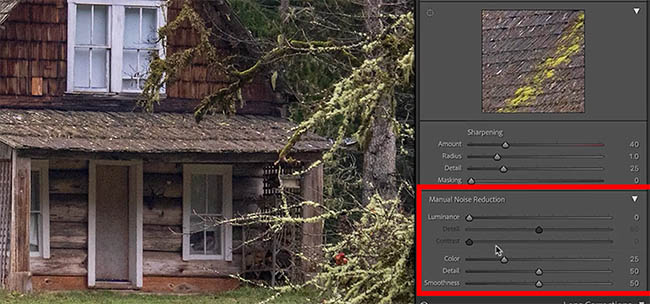
Here in the doorway, you can see the image is now smoother.
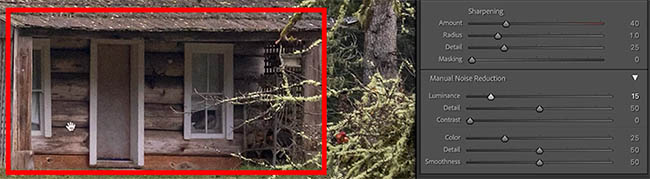
3c Sharpening
Now you can add a little bit of sharpening if the image is looking too soft. Most images will appreciate a little bit of sharpening. In some ways sharpening is the same as the detail slider, except sharpening affects even finer details. (It can be adjusted to affect larger areas too, but that’s outside of the scope of this tutorial).
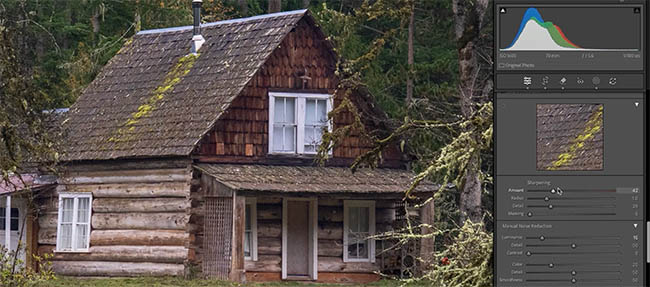
Finally, I like to revisit the tone panel and make any last minute, fine adjustments.
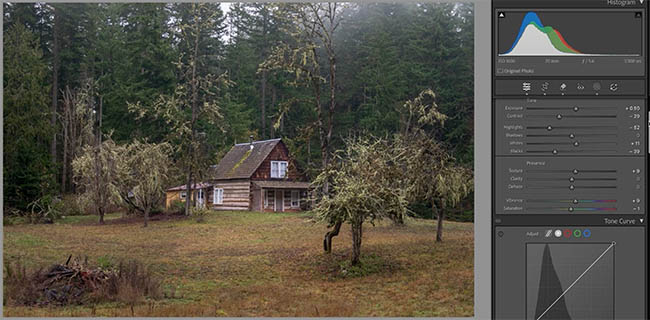
Before and After
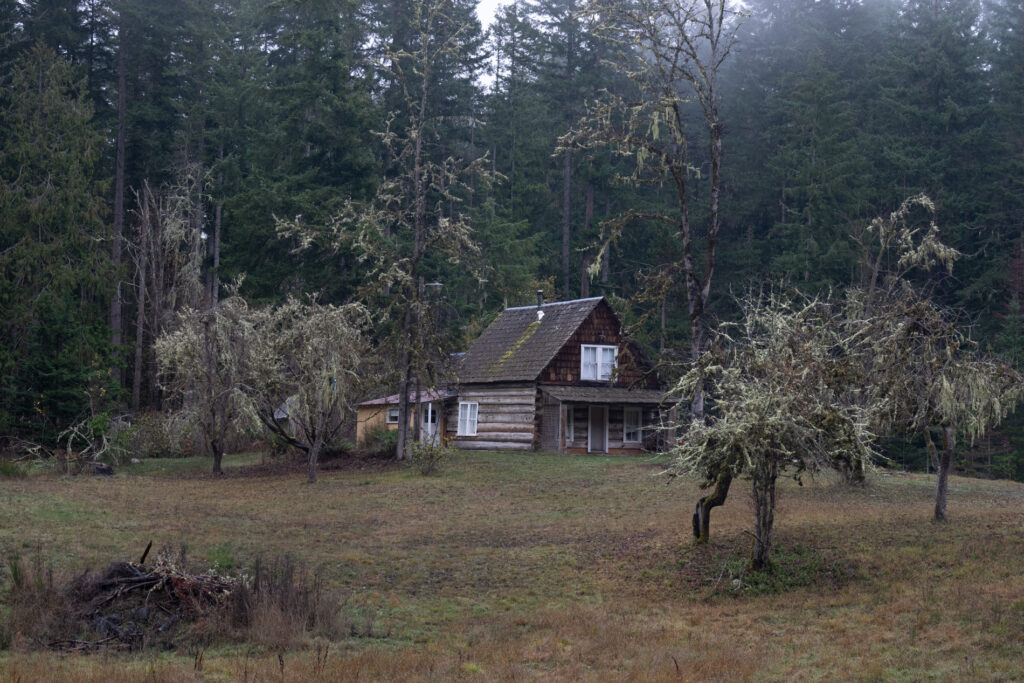
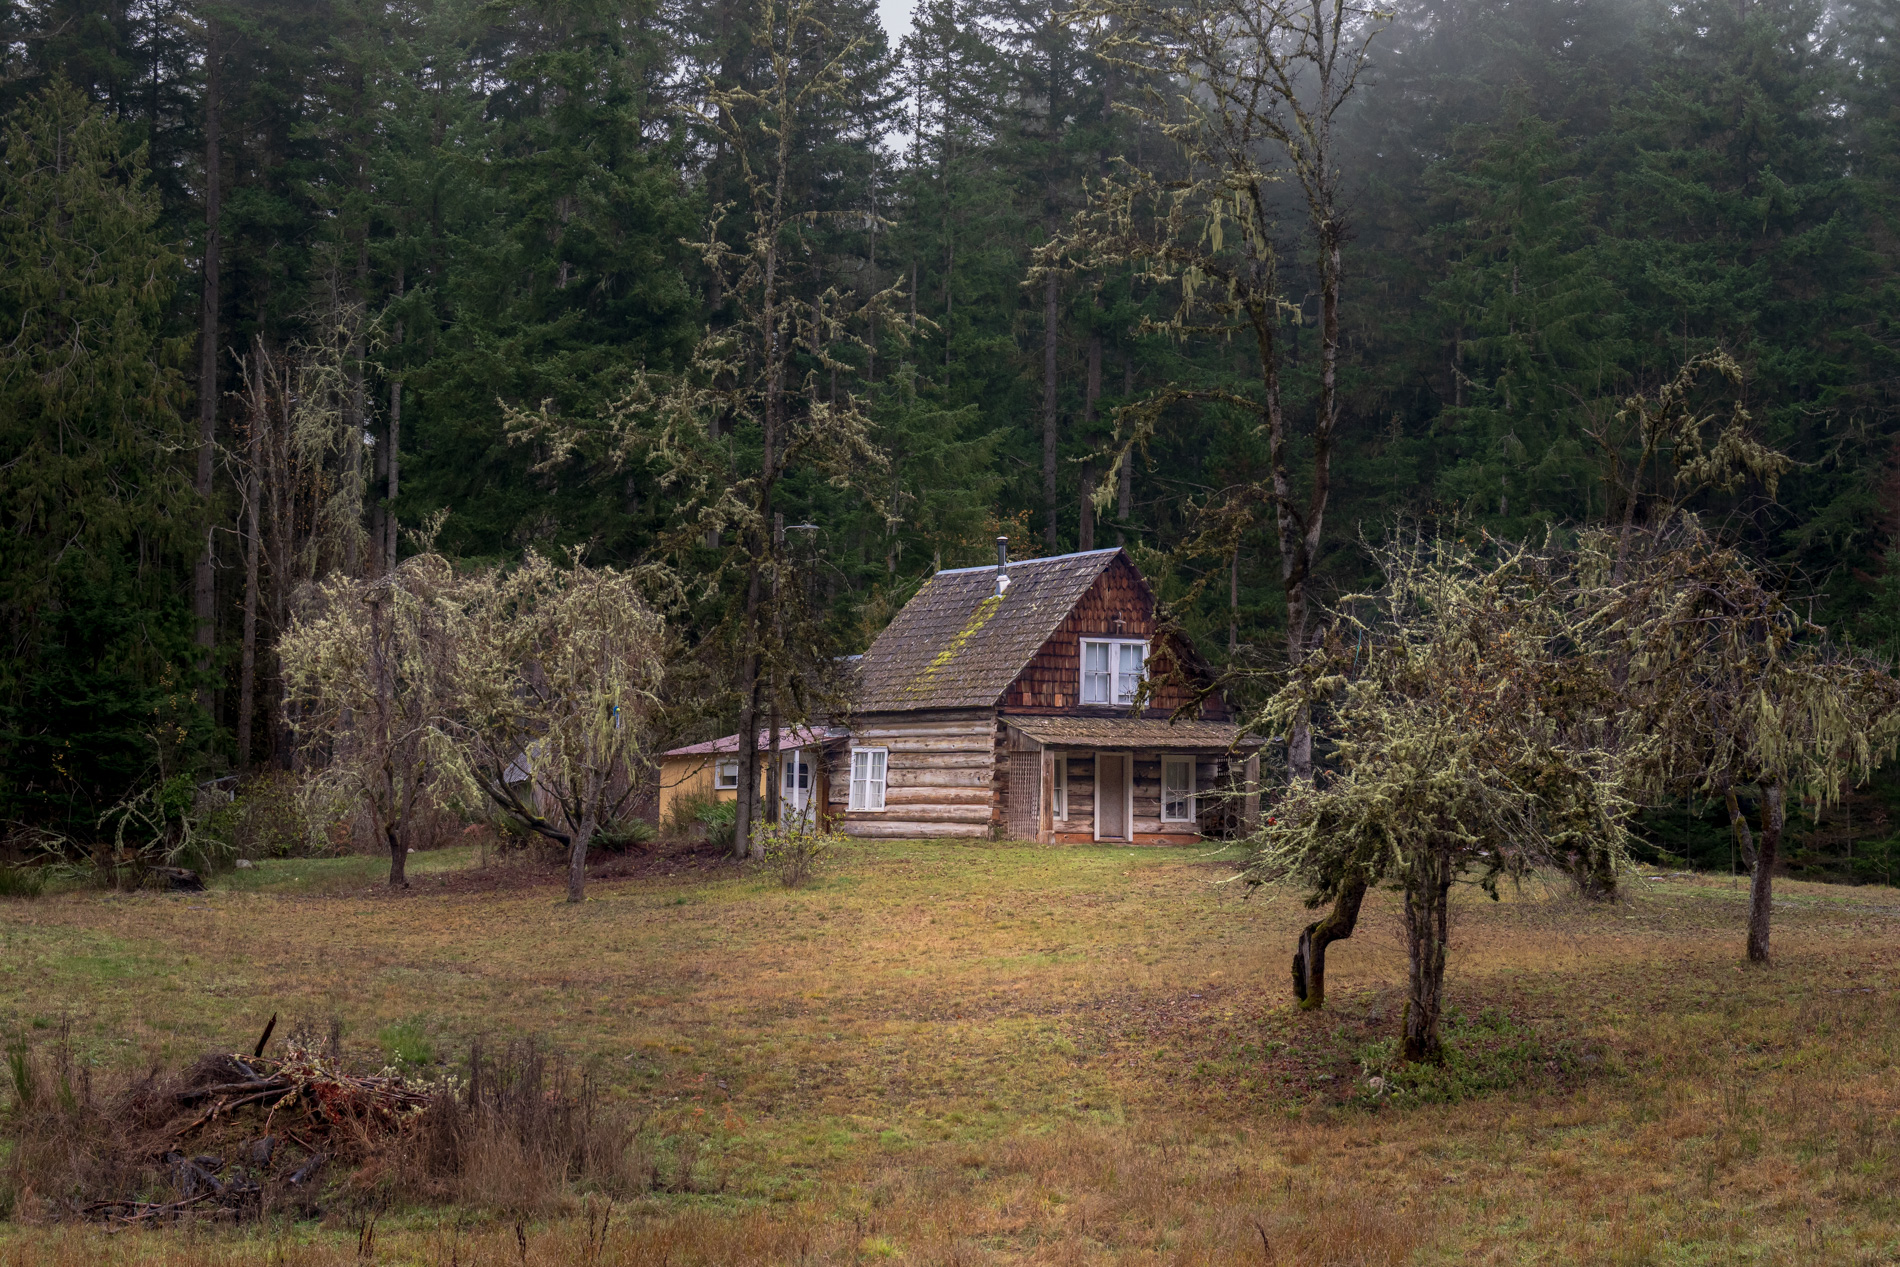
Here is a closer look at what I did. (Right-Click > Open in New Window to see larger versions)
The beginning image straight out of camera
The image after adjustments in this tutorial.
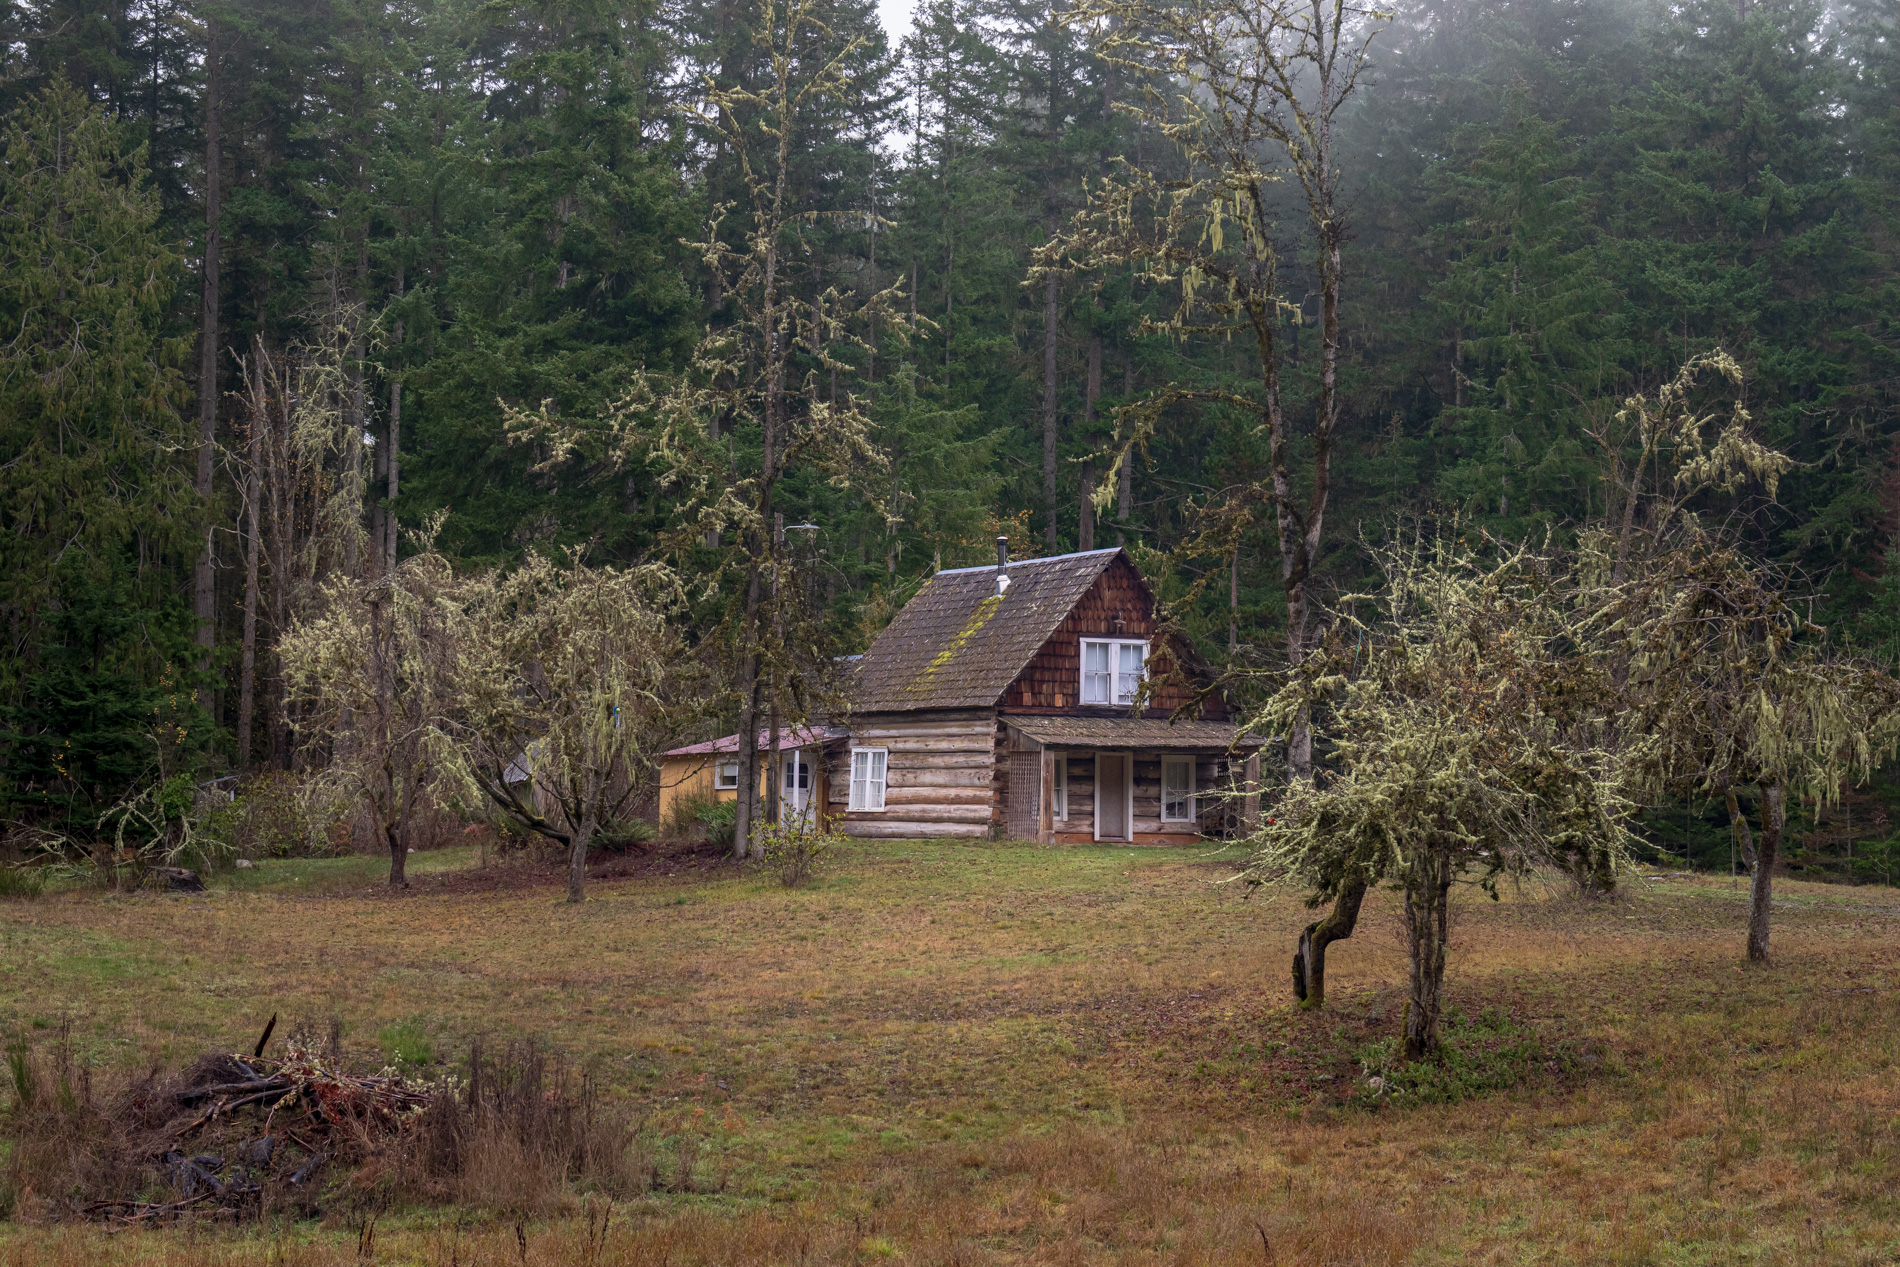
The same image with a little stronger mask slider adjustments.
I hope you enjoyed this tutorial.
Let me know in the comments if you learned anything new, or if you have any questions.
Great to see you at the CAFE,
Colin
PS Don’t forget to follow us on Social Media for more tips..
(I've been posting some fun Instagram and Facebook Stories lately)
You can get my free Layer Blending modes ebook along with dozens of exclusive Photoshop Goodies here

7 thoughts on “The Lightroom Editing Blueprint I Always Follow. Lightroom Editing for beginners and intermediate users.”
Leave a Reply

This free tutorial explains one of the hottest trends in photography; HDR. High Dynamic Range. Learn how to shoot, merge...
You can pull the viewers eye into a portion of a photograph by simulating an in-camera zoom effect. This zoom...

How to create atmosphere in Photoshop. This Photoshop tutorial shows you how to use the History Brush to easily paint...





Nice. Very useful Colin. I wouldn’t mind if you did more like this with different backgrounds, subjects, time of day, and where you apply different masks in raw. Thanks!
Thanks for the feedback, I will make a note!
I was wondering if there is a reason why you ignore the “order of operations” as recommended by Adobe (1. HDR 2. Denoise, Raw Details, Super Resolution 3. Distraction Removal 4. Generative Expand 5. Remove, Heal, Clone 6. Lens Blur 7. Lens Profile 8. Crop and Transform 9. Adaptive Profiles 10. Global Adjustments 11. Masking)?
Hi there. Great question. There are really two parts to the answer.
First, Adobe’s recommended order is largely based on the technical requirements of AI and file-altering tools. Using tools such as Denoise, Super Resolution, Generative Expand, or certain AI removal features later in the process can cause Lightroom to recalculate earlier edits or display the yellow warning wheel.
In this tutorial, however, I specifically mentioned that we weren’t using AI, so this is a non-AI editing workflow focused more on the creative process.
Second, this is a basic everyday workflow. Specialized tools such as Lens Blur, Generative Expand, and Super Resolution aren’t part of every edit. Those fall under the “other tools” I mention toward the end of the tutorial.
Let’s look at where the workflows differ.
1. HDR
2. Denoise, Raw Details, Super Resolution
3. Distraction Removal
4. Generative Expand
If I were using any of these tools, I would generally use them near the beginning because they can alter or regenerate the underlying image data. We simply aren’t using them in this tutorial, and many of them are intended for more specialized situations.
5. Remove, Heal, Clone
6. Lens Blur
We aren’t using Lens Blur or AI removal here. It is completely valid to perform removal at this stage, but I personally prefer doing it later. Once I’ve adjusted the exposure and opened up the shadows and highlights, I can see the image more clearly and make better decisions about what needs to be removed.
7. Lens Profile
8. Crop and Transform
9. Adaptive Profiles
10. Global Adjustments
11. Masking
This section is actually very similar to my workflow. The main difference is that I usually choose the profile near the beginning, because it establishes the overall starting point for the image. I also don’t always use an Adaptive Profile, because it can sometimes be more aggressive than I want.
Masking is essentially what I refer to as local adjustments or local corrections.
So, when you break it down, my workflow isn’t actually that different. I mainly prefer to crop and perform removal a little later, while choosing the profile earlier. Neither approach damages the image—it’s simply the order that makes the most sense to me creatively.
Adobe’s recommendations are useful, especially when working with AI tools that alter the underlying file. Beyond those technical considerations, there is room to arrange the creative parts of the workflow in the order that works best for you.
I hope this helps!
Hi Colin and thanks for all your hard work! One small request – is it possible to send the written versions of the tuts in a .pdf so they can be printed? It’s a right pain trying to copy and paste it all, especially if it’s quite a long one like the raw editing, I watch the videos but sometimes you are a little too fast, it’s much better to have the printed version in front of you and follow along with that. Have been on the Cafe for years, since PS4, having to relearn everything! kind regards, Ruth
Hi Ruth,
Thanks so much for the kind words—and for being part of the CAFE since Photoshop 4! That really means a lot.
I completely understand. The videos can move quickly, and having the written tutorial beside you makes it much easier to follow along at your own pace.
I don’t currently create separate PDF versions of every tutorial, as it would add quite a bit of extra production work. However, you can usually create one directly from the tutorial page by choosing Print in your web browser and then selecting Save as PDF instead of a printer. You can also print it directly from there.
That said, it’s a good suggestion, and I’ll keep it in mind as I look for ways to make the longer tutorials easier to use.
Thanks again for sticking with PhotoshopCAFE for all these years!
Colin
Hi Ruth I have same issue so I do what was suggested I print from the tutorial but ugh it turns out to be 42 ? Pages long way too much so I reduce sizing by 50% and get down to 14 pages and I also double side print down to 7 pages so it can be done!! Regards Barbara