
7 new Photoshop tips for Photoshop 2026
I’ve shared a lot of Photoshop tips over the years (I wrote the monthly Photoshop Tips column for Photoshop User Magazine for 15 years or so). Lately, Photoshop has undergone a lot of updates. Here is a brand-new set of tips that focuses on the newer features only. I hope you enjoy! (Let me know in the comments if you found these helpful, I have plenty more if you want them).
Object selection Tool. Refining auto selections.
The Object Selection tool is totally underrated. You just tell Photoshop what you want selected and it does it for you, but sometimes its difficult to refine, this tip fixes that.
Choose the Object Selection tool from the toolbar. Set the option to Lasso. (You can see all the is in the video above, if you aren’t sure where it is).
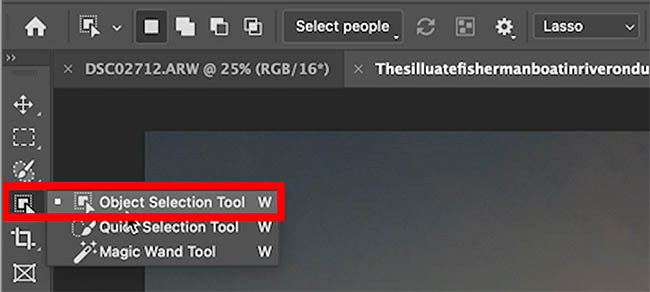
Make a rough selection around the object that you want Photoshop to select.

It snaps to a selection.

We don’t want to select the reflection.
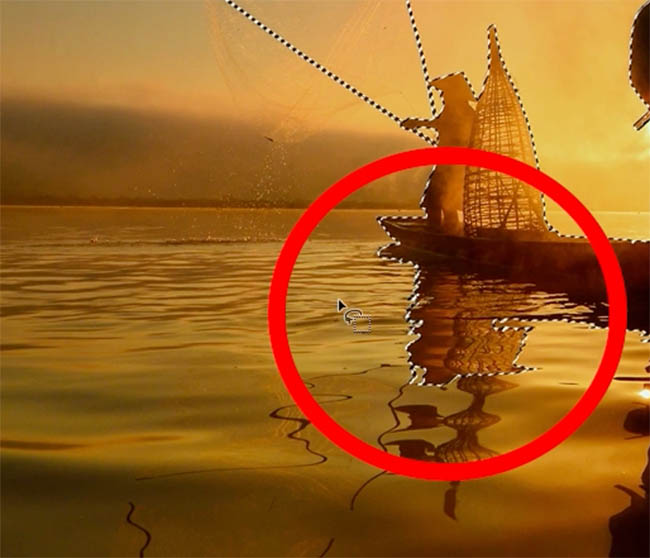
To remove from the selection, hold down the Alt/Option key and select the area to remove from the selection.
Sometimes it misses bits (you might have noticed). No matter how many times you circle the selection, you can’t unselect it.

The solution is simple. Choose the gear at the top for the options.
Turn off the checkmark for Object Subtract
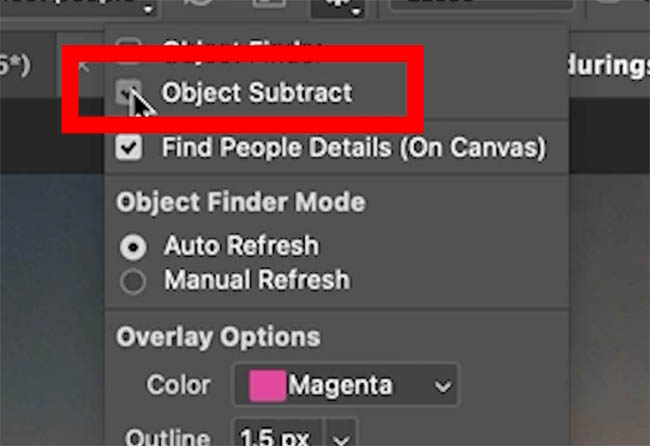
Now when you are removing parts of the selection, it doesn’t try to detect anything, it removes exactly where you use the tool, just like a regular lasso tool.

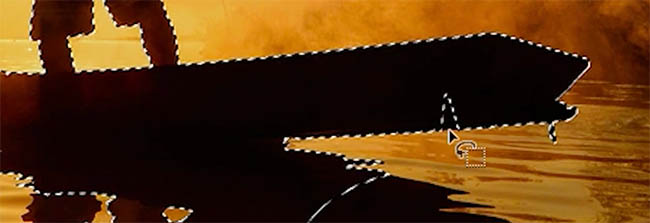
You can even do very specific subtractions, while still in the Object Selection tool.
Adjust Colors: The hidden refine selections setting.
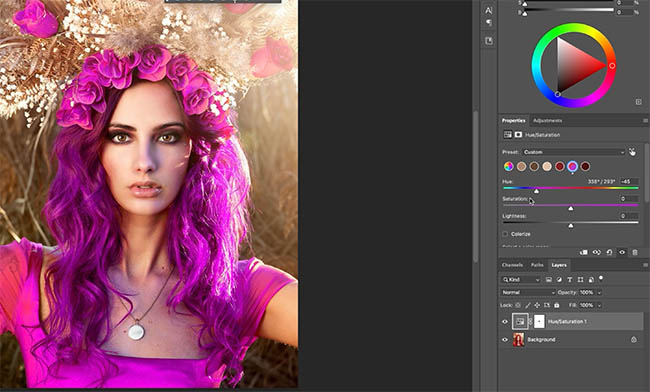
Adjust colors is a great way to quickly change the color of something without making selections. Sometimes it over-selects and includes colors that you don’t want to change. There is a refinement adjustment, but it isn’t obvious.
Choose Adjust Colors from the Task Bar.
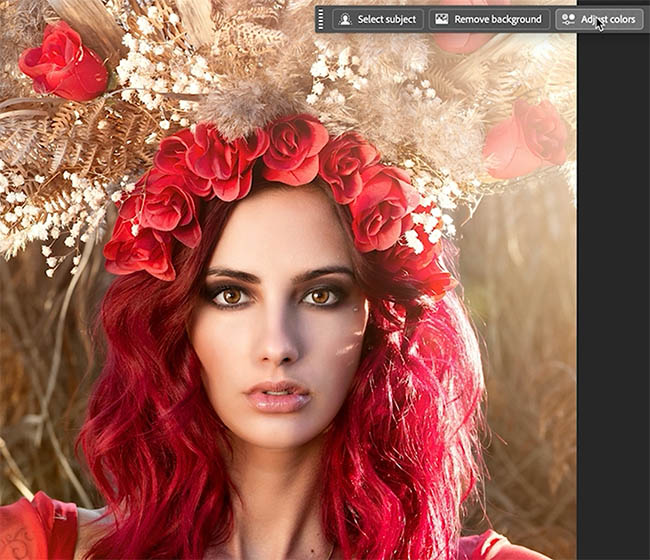
The 6 prominent colors will show as circles.
Click the color you want to change.
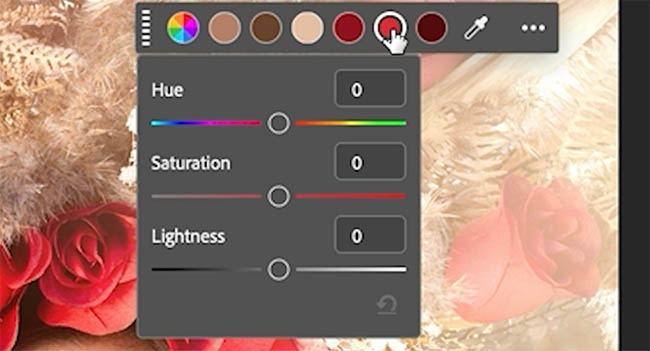
Move the Hue slider to change the color.
Notice the reds in the skin tones are also changing. We don’t want this. But where are the settings?
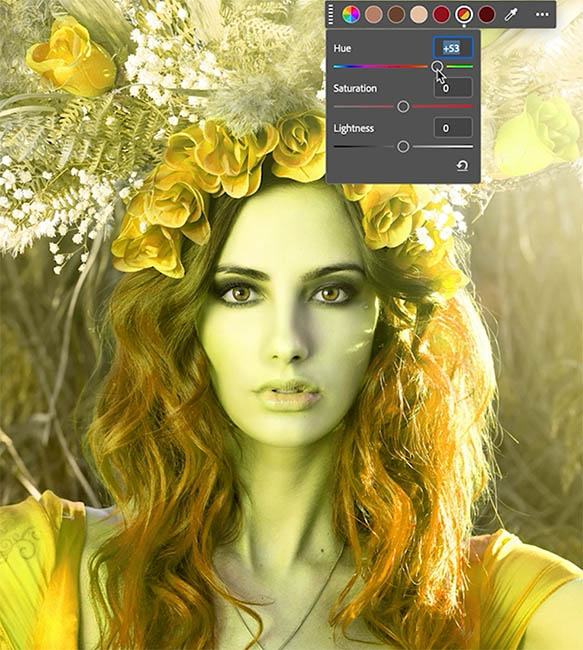
When you use Adjust Colors, it creates an Adjustment Layer.
Click on Properties to see the advanced settings.
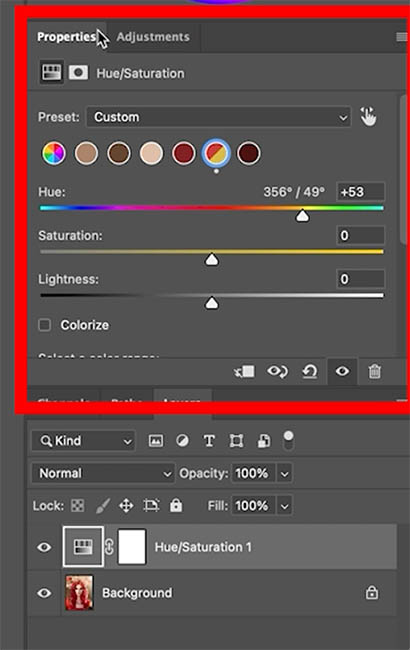
Scroll to the bottom of the Properties panel to see the hidden Adjust Selected color range sliders.
As you adjust the sliders you can fine tune which colors are selected. See this tutorial for a more in depth tutorial on refining the selected colors.
Move the right sliders to the left to limit the reds.
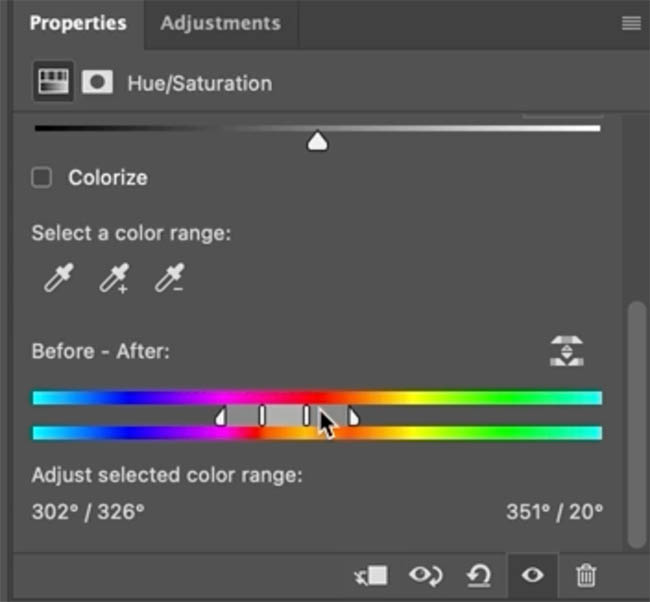
Now the skin tones aren’t affected.
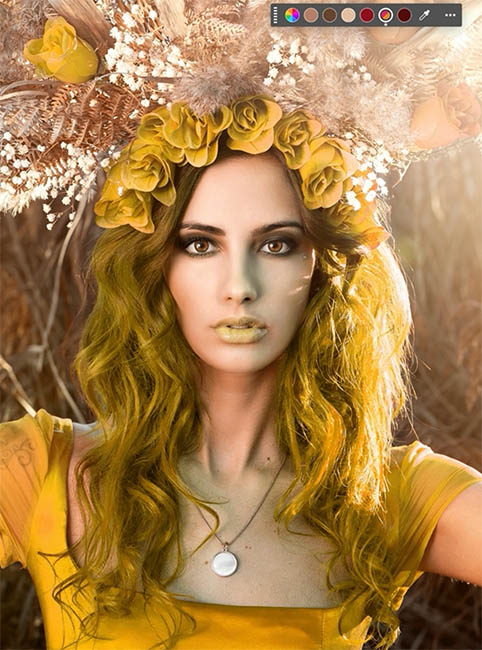
For areas that have the same color as the selected color like the lips, we need to mask them.
Choose the white Layer mask to the right of the adjustment.
Grab a paint brush (b key). Choose black as the foreground color.
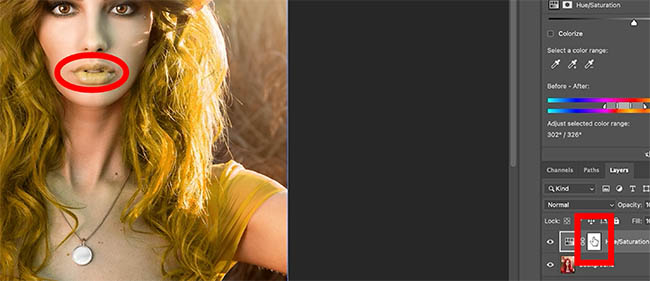
Paint away the color adjustment from the lips.
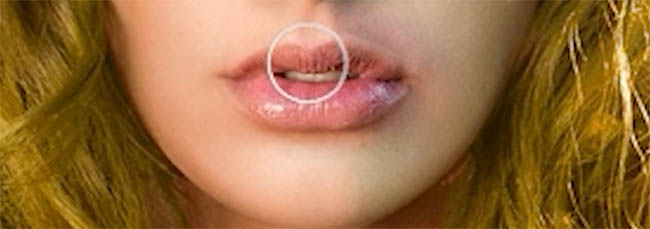
Now you can change to any color and only the intended parts of the photo will change now.
Using the correct Mode in the Remove Tool.
The remove tool is a really powerful way of removing distractions in Photoshop and it doesn’t consume any Generative Credits.
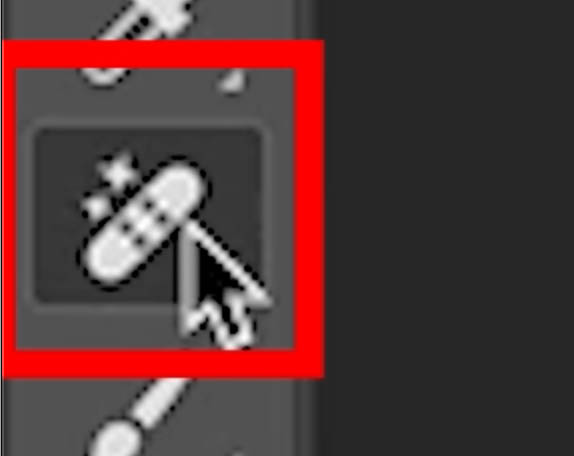
The trick is using the correct settings. Always turn on Create new Layer and Sample all layers. This allows us to work non-destructively.
In this tip we are looking at the Remove after Each Stroke option and when to use it.

With Remove after each stroke ON, the remove tool will engage as soon as you lift your finger from your mouse (or your pen from your tablet if you are using a pen tablet).
This is great when you want to paint over something quickly and remove it.
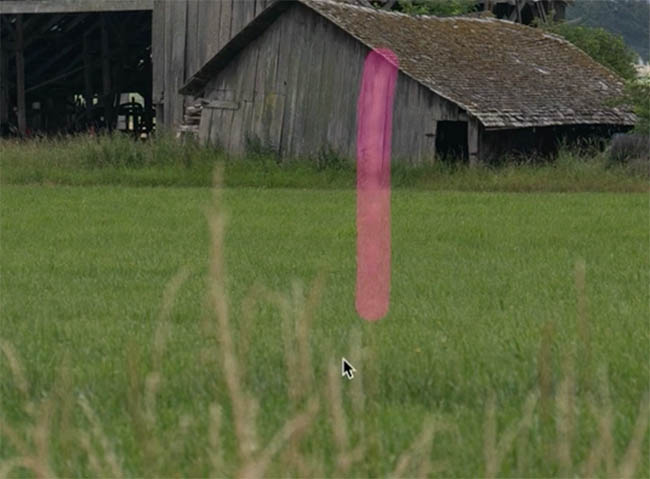
Then we want to remove another, just paint, wait and it’s automatically removed.
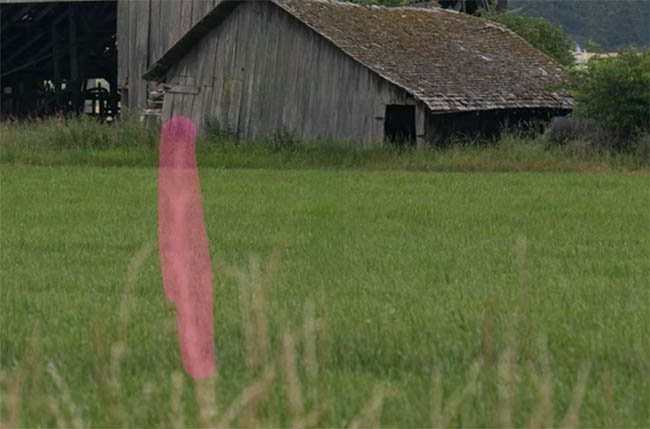
There are other times when you don’t want the remove tool to apply every time you lift your finger off the mouse.
Say we want to remove these 2 grass stems at once.
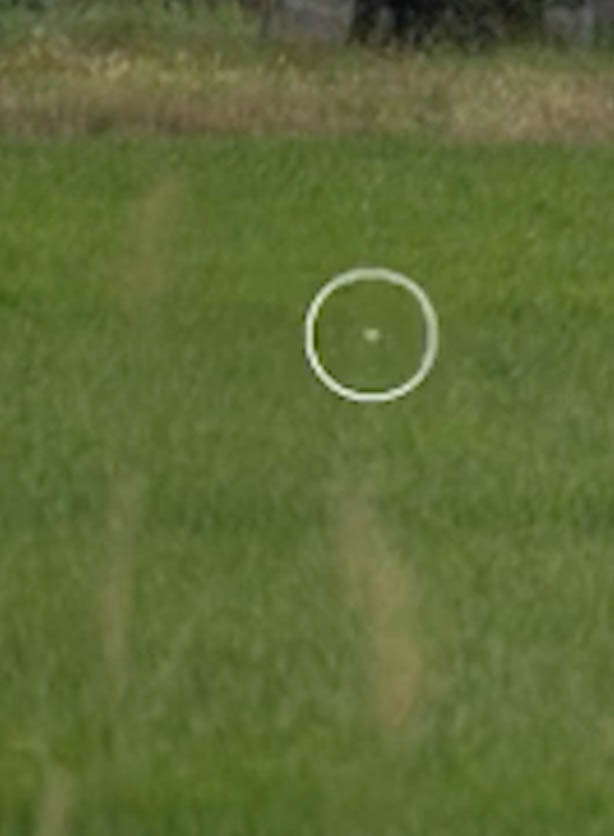
Paint over the first one. Now you want to paint the second one.
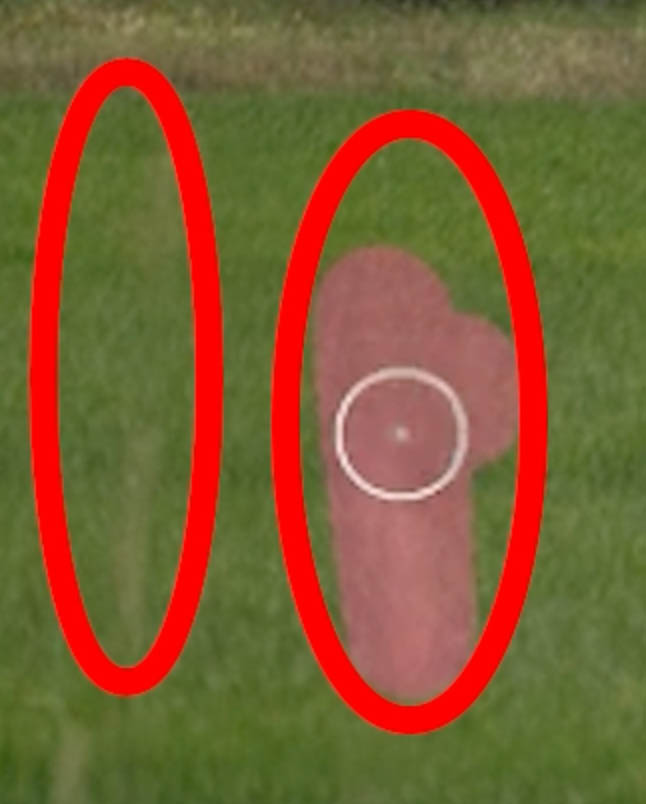
You can’t get to the second one, without painting a connecting line, because we don’t want to lift our finger off the mouse yet, because we want to do both at once.
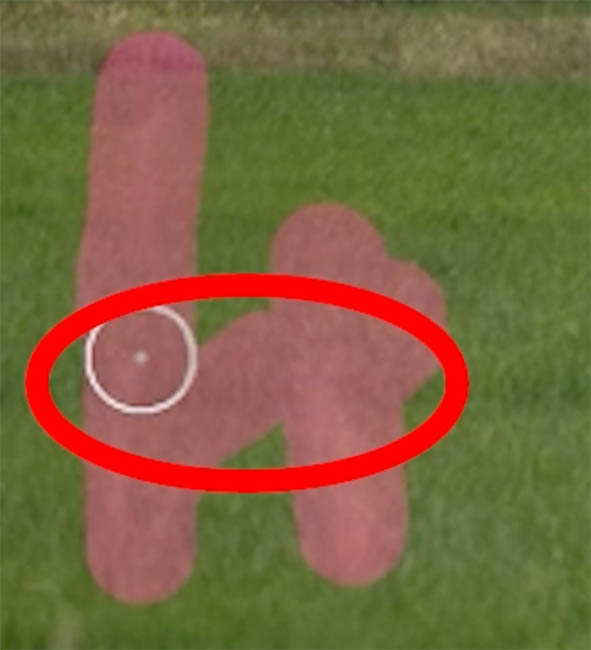
For 2 items, this isn’t a big deal, because you could just paint each one and let it remove and then paint the other. But if you have many more, then it becomes a huge time-suck, waiting for the remove tool to remove every item individually.
Lets turn this option off for a moment.
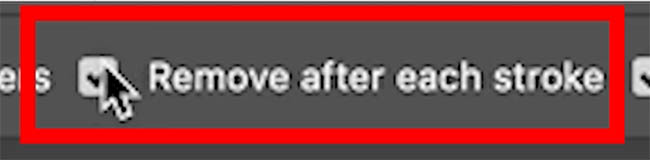
Now, I can select each of the blades of grass comfortably.
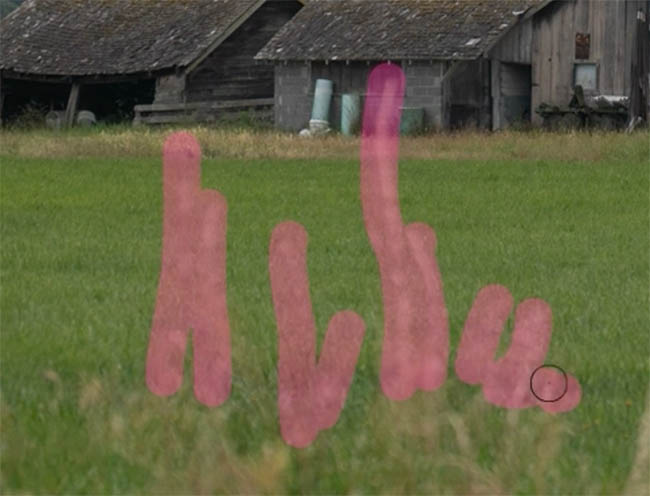
When you have selected everything you want, press the check mark to apply the remove tool.

It removes all the distractions.
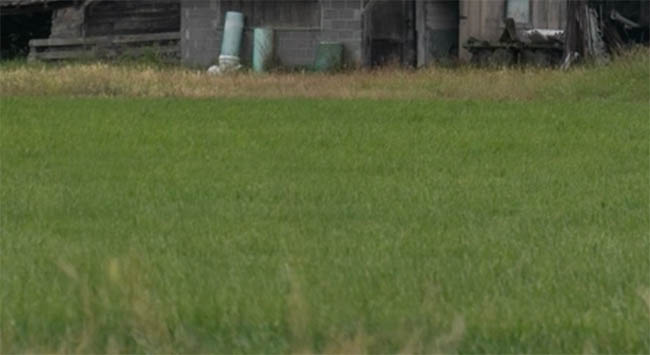
It’s useful to know you have this option. Choose the best option for your task.
Automatically selecting all your distractions.
This is a continuation of the last tip. You may be aware of General Distractions. In this tip we are going to use it to just auto select for us and ignore all the settings. Its a different way to think about this tool.
On the same image and with the Remove tool still selected, Click on Find Distractions at the top.
Click on Find next to General Distractions.
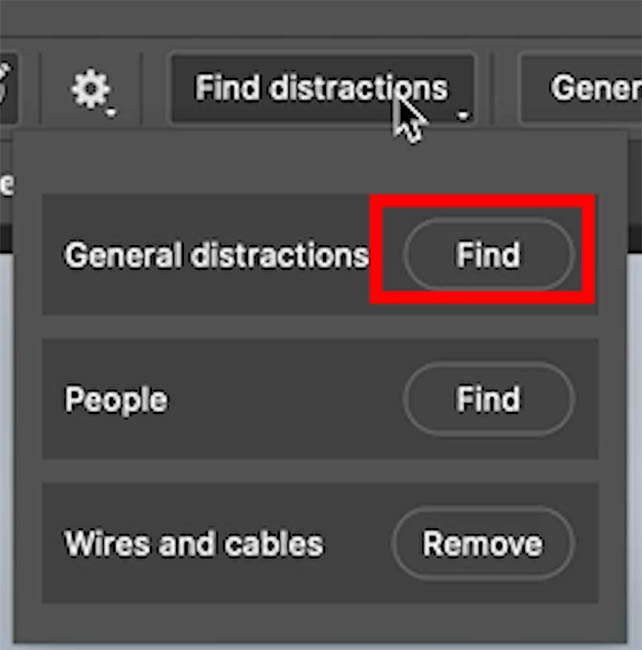
Ignore the panel that pops up. (You can turn off specific types of items, but we are keeping it super simple here) We only want to select the foreground grass.
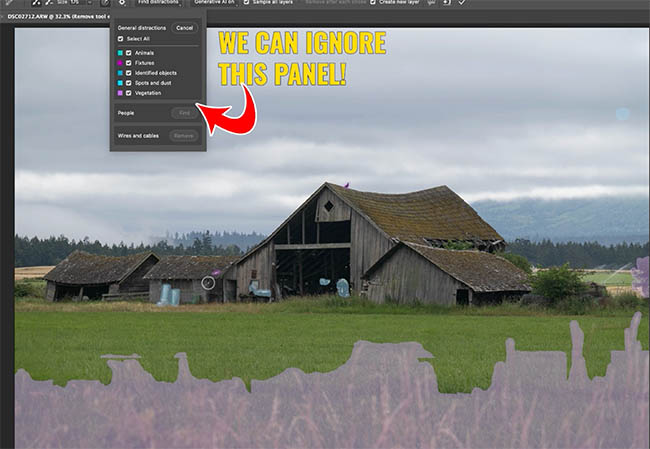
Hold down the Alt/Option key and paint away all the highlights from the image except the foreground grass.
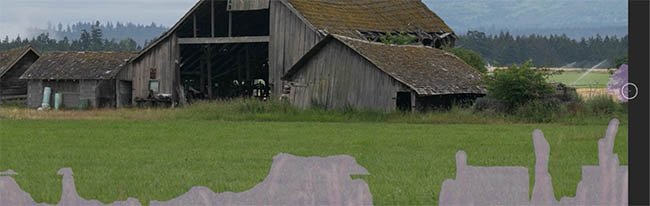
Press the checkmark to apply.
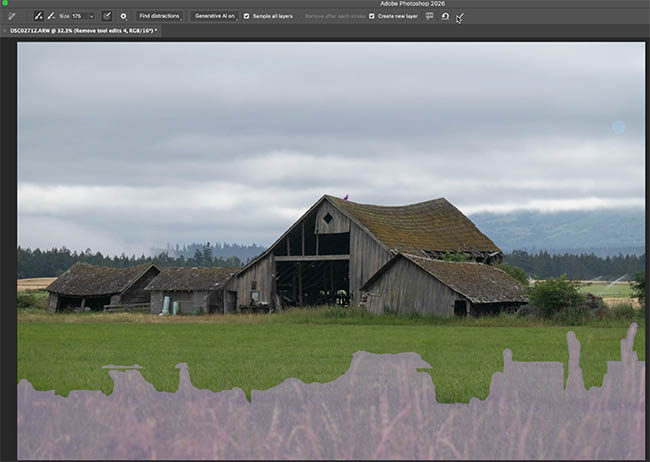
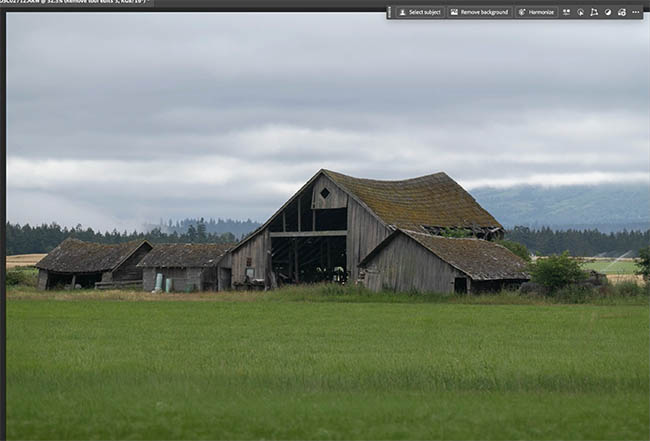
Now all the tall grass is removed and we have a clean shot of the barn.
Using the Correct AI Model saves Generative Credit wastage,
There are different types of Generative ai Models and they are designed to do different things. There are some from Adobe and some from 3rd parties and they all work a little different. My cheat sheet here will help you. (If you are a newsletter subscriber, you don’t have to do anything, it will be in your inbox.)
For an example, lets take this photo of a dog and add a doggie sweater.

Make a selection around the area to add the sweater with the lasso tool.
Click Generative Fill in the Task Bar. Add the prompt “add doggie sweater“.
In the Contextual Taskbar, click on Firefly to open the Model Picker. If we are guessing on the model to use, we might choose Firefly Image 5.
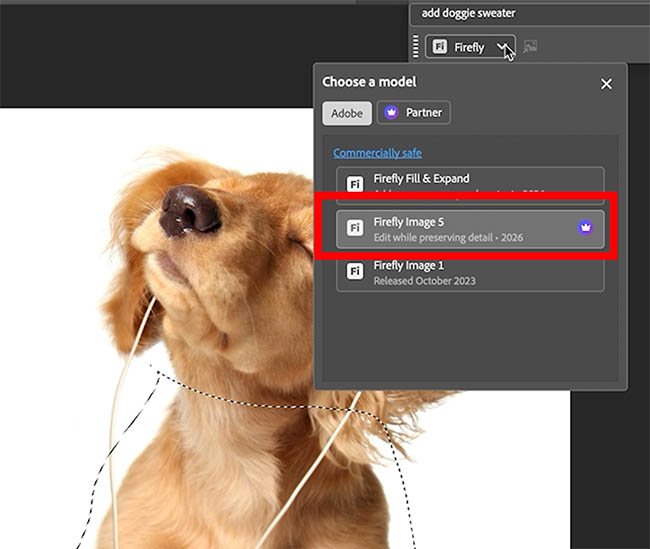
That got weird. What happened? Firefly Image 5 is an editing model, not a fill model and it tried to recreate the dog within the selection.

Firefly was the best choice, because currently these are the only ones that can seamlessly work within any selection. But we didn’t use the correct Firefly model. Firefly Image 5 is a really good editing model, which works better without selections.
(Nano Banana can work within selections also, but it needs to be a square selection).
Firefly Fill and Expand is a Fill Model, this is the one we needed.
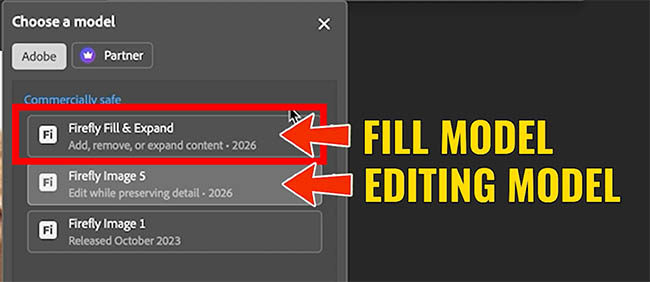
When we instead use Firefly Fill and Expand, we get the result that we expected.

In the Model Picker, we also have a Partner model tab. (More about Photoshop ai Models here)
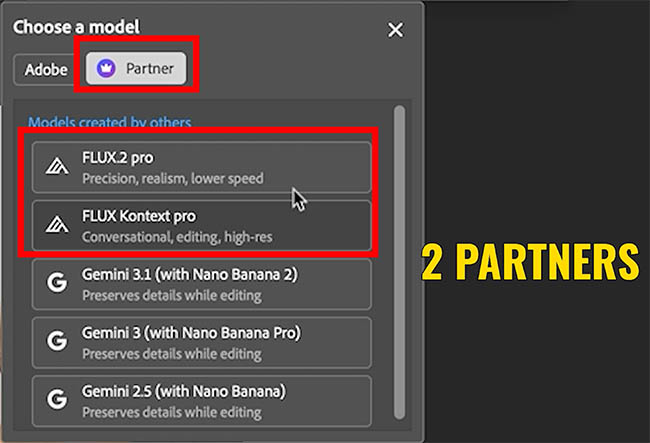
Currently the 2 partners are Flux from Black Forest Labs and Gemini from Google.
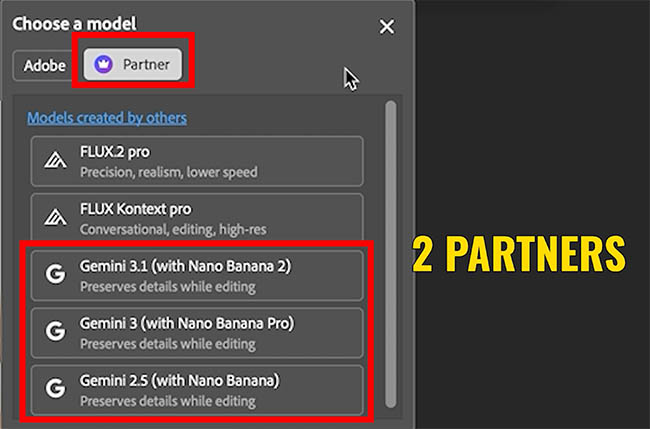
To understand which models to use, check out my free Cheat sheet. It covers the purpose of each model, strengths, weaknesses and how many credits it costs to use each. If you are a newsletter subscriber, check your inbox, I already included in in the latest newsletter. Otherwise you can download it here.

Managing your Generate Credits
People have been asking for an easier way to check their Generative credit balance’s and how much it costs to use the different models. I know people don’t love these Gen Credits, I hear you. Adobe is starting to make it easier to manage your balances. Here are a couple of ways.
To see how many credits a model will use, choose the Model and hover over the Generate button.

Sometimes you will need to put something into the prompt box to enable this feature.

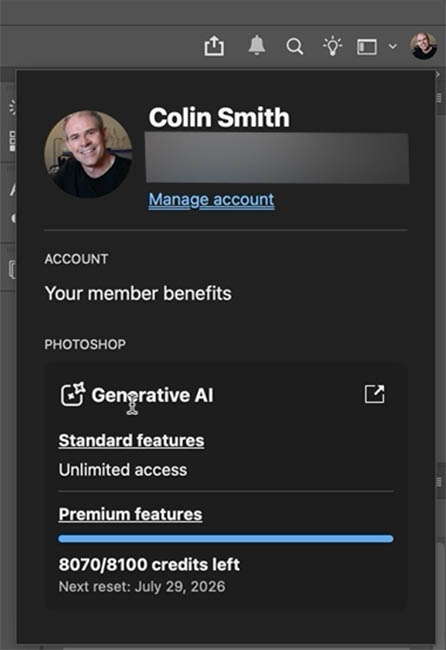
The 2nd tool is in the top right of Photoshop. You can click the circle to open your account.
This shows your plan, how many credits you get and how many are left, as well as the reset date, where they fill back up. Unfortunately, unused monthly credits probably should, but don’t roll over.
Contextual Task Bar tips
You’ve seen it. That bar that pops up all over your screen. You might think it’s just for ai, but its a lot more useful than that. This is a bar that does a LOT and you can place it right under your fingertips. (Figuratively speaking. You clearly can’t put it on your keyboard or mouse.)

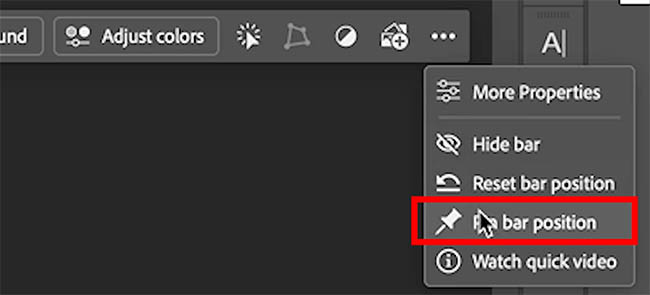
If you are annoyed the bar jumps around every time you choose a different tool, you can pin it in position.
Click the 3-elipse menu. Choose Pin Bar position.
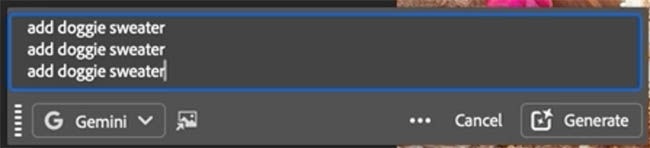
When you are typing a Prompt, it now supports multi-line. As you type it expands, or Press the Shift key and Enter to add a line space.
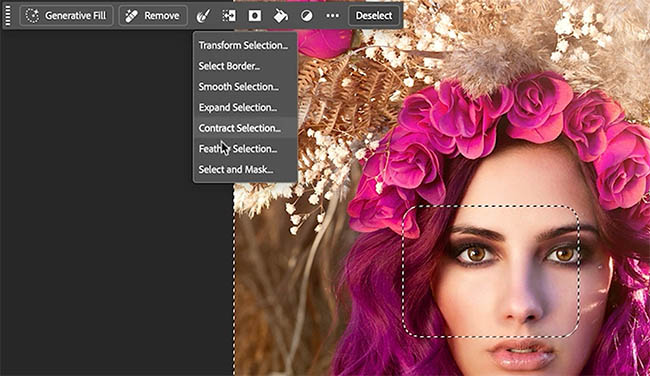
The task bar changes context (why its called the Contextual Task Bar) as you change tools.
When you have a selection active, the important tools from the select menu are available right there.
(I’m still waiting and hoping for live selection modification tools).
You can adjust a shape, text..
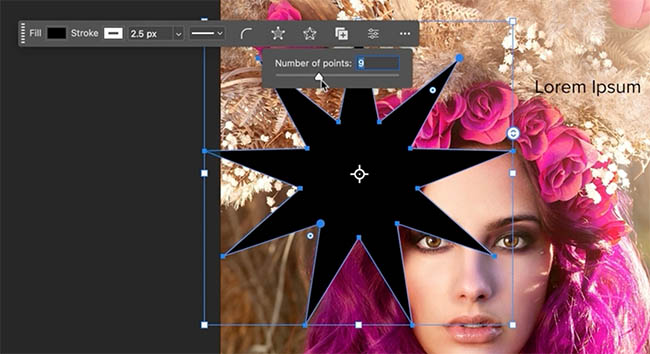
You can change and modify Gradients and a lot more.
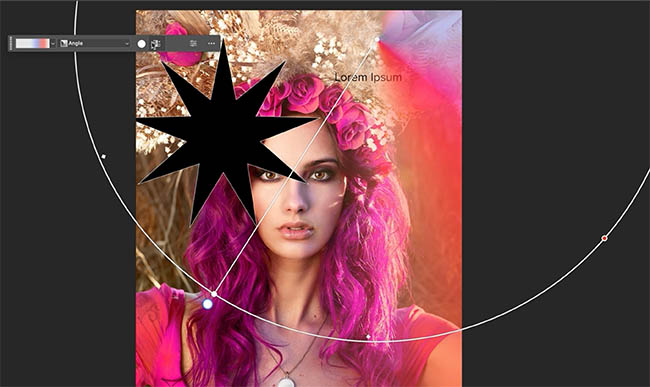
To show/Hide the Contextual Task Bar: Right-Click on the workspace outside the canvas.
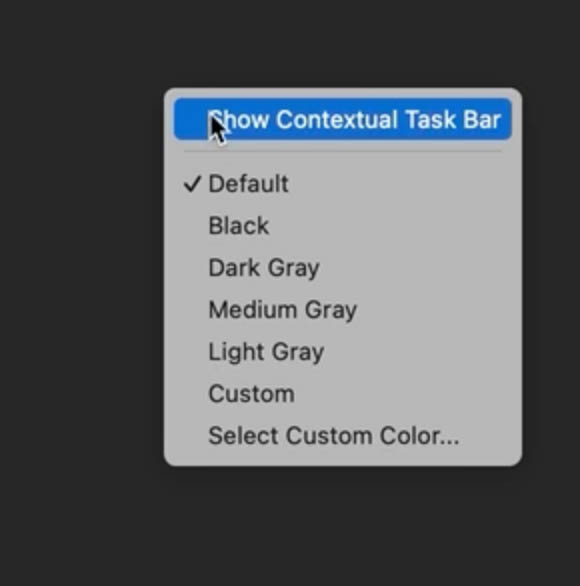
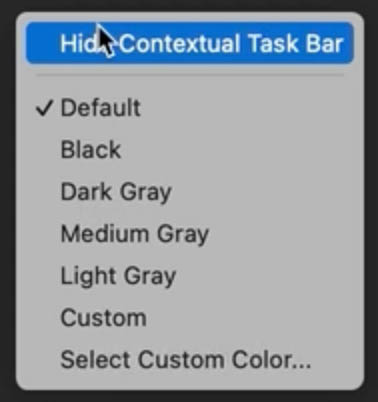
I hope you found these tips useful. If you did, please drop a comment and let me know your favorites. I read every comment and respond. I (Colin) also wrote these written steps, its not ai. Just in case you were curious.
Great to see you here at the CAFE
Colin
PS Don’t forget to follow us on Social Media for more tips..
(I've been posting some fun Instagram and Facebook Stories lately)
You can get my free Layer Blending modes ebook along with dozens of exclusive Photoshop Goodies here


3 thoughts on “7 new Photoshop tips for Photoshop 2026”
Leave a Reply

How to paint hair and fur in Photoshop. This free Photoshop tutorial shows how to make custom hair and fur...

In this Photoshop Tutorial, Colin shows you how to combine type and photos in Photoshop. Learn how to place a...

Watch free Photoshop CS6 videos here by Colin Smith from photoshopCAFE. Photoshop CS6 superguide, all you need to learn photoshop...








All but 1 were new to me. Thx so much.
All, but the remove tool Find Distractions. It doesn’t work for Intel Macs. Ugh!!!
That’s too bad.