
Cut out hair and difficult Images in Photoshop Tutorial
In this tutorial we are going to learn the best way to cut out difficult images from their background in Photoshop. I’m not talking about solid shapes and people against green screens. I’m talking about hair and irregular edges against less-than perfect backgrounds. You know, the kind of thing that you have to deal with in the real world, not just for tutorials. As you know, here at photoshopCAFE we are all about keeping it real and tackling real-world stuff rather than eye-candy that you can’t actually use.
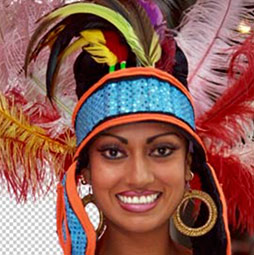
So let’s have a stab at extracting a woman wearing a feather head dress. To make it more fun, we will use a colored background that is similar in color to the feathers… one one side, and completely different on the other side. Sound challenging enough? Let’s do it!
I have made an updated tutorial below for Photoshop CC
Although there are newer Selection tools, this trusty method is still a great fallback that lets you make selections when all other fail.
Making selections and cutting out hair in photoshop CC
The advanced method of making selections
Step 1
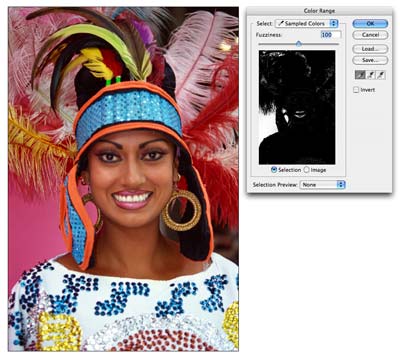
Make a duplicate layer of the image. This way the original is preserved on the background and we are working on a duplicated layer. Hide the background by clicking off its visibility icon. Choose Select>Color Range from the Menu. When the Color Range Dialog box open, choose the Left Eye Dropper tool and click on the background color in the image window (pink). You will see the selected color turn white in the dialog box. Move the Fuzziness slider until the image is mostly black and the background is a clean as you can get it. Tip: To add a color to the selection click on the eyedropper tool with the plus sign and click in the image. Click ok
Step 2
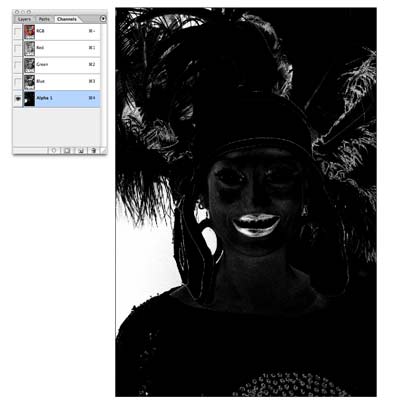
With the selection active, switch to the Channels palette. Click the save selection as channel button, it’s the second one to the left on the bottom of the channels palette. A new alpha channel will now be visible. Press “Ctrl/Cmd+D” to Deselect and click on Alpha 1 in the channels palette. The main window will now turn black and white. The advantage of using a channel is the ability to fine tune the selection without effecting the original image. Black represents the areas that we want to keep and white, the areas to be discarded.
Step 3
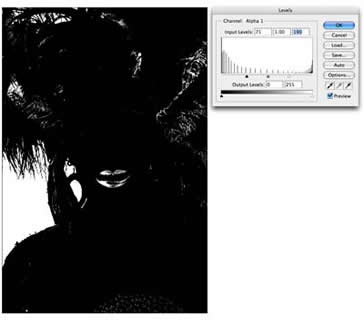
Notice that there are areas of gray, these would be semi-transparent and need to become solid black and white (except for areas that should be semi transparent such as soft edges). There are tiny dots also visible, there will make for a very messy selection. Here is a quick solution that I have come up with: Click Image>Adjustments>Levels..
In the levels Dialog box, click the black point slider on the left and drag it to the right until the gray areas have become a solid black, Slide the White point slider to the left until the whites are nice and clean and the grainy effect has gone. Click ok to apply.
Step 4
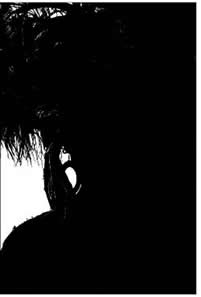 Time to fine tune the mask. Choose a black brush and make the edge hard. Paint over all the areas that belong in the object to mask out. Use a larger brush for large areas and a smaller brush for finer detail such as around the feathers. Use a white paint color to paint out the areas that should be removed.
Step 5
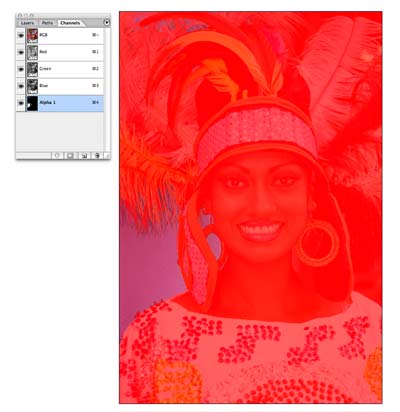 Sometimes it can be hard to guess which part of the image belongs in the foreground and a peek at the original image is needed. Click on eye icon to the left of RGB at the top of the Channels palette (Fig 5). The original photo is now visible and the mask appears as a reddish color. Click the eye icon to go back to the mask view. The mask can also be hidden by toggling the eye (visibility icon). Keep going until you have a clean mask.
Step 6
Hold Cmd(Ctrl PC) and click on the Alpha 1 thumbnail. You will now see an active selection. Click on RGB to see the color image. Open the layers palette.
Select the working layer and add a layer mask. The masked area of the backround will now be removed to reveal a nice clean masking effect.
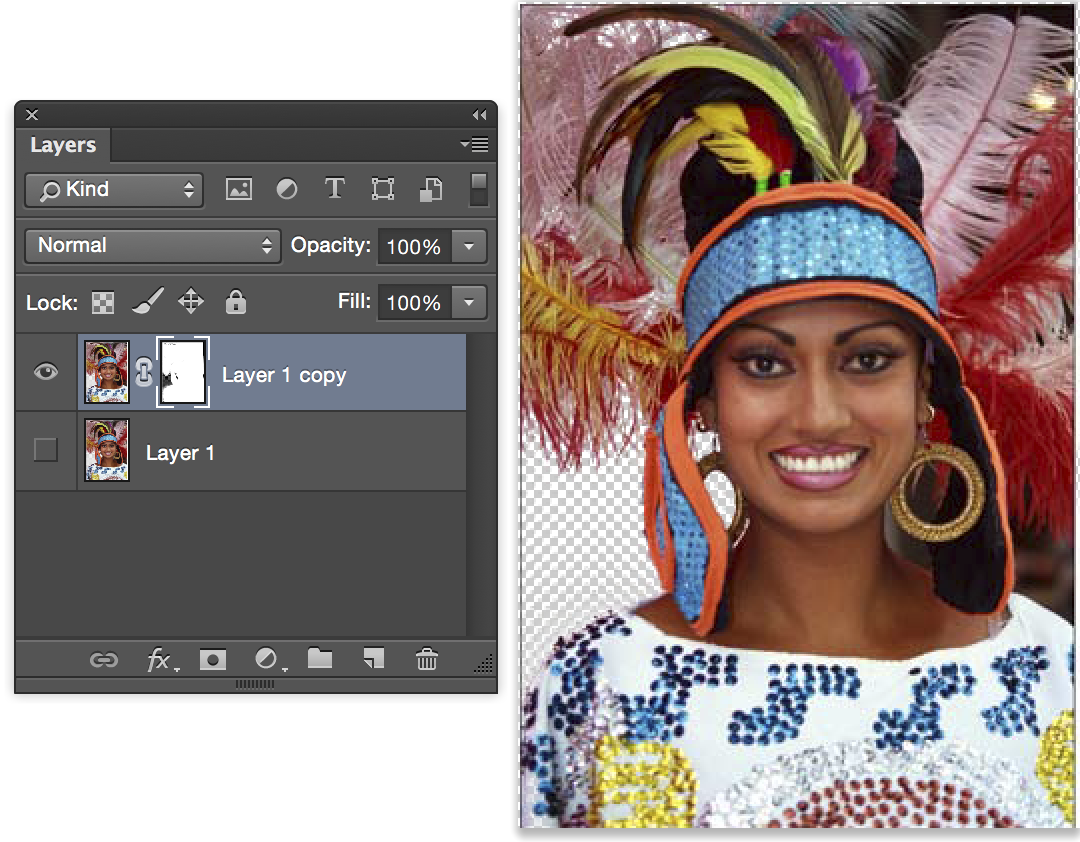
If it looks the opposite, click on the layer mask and press Ctrl/Cmd+I to invert the mask. You can touch up the mask by painting with black or white to add or remove portions of the image.
At this point In am only worried about removing the pink background on the left.
Step 7
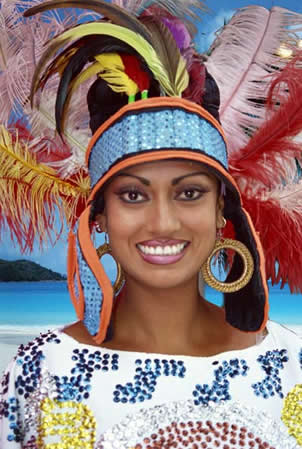
If there are areas that still need to be removes such as on the right side of this image, repeat the proceeding steps. Because each image is unique, some will need several passes and some can be done in a single pass. As you can see, this technique is very effective and the image can be dropped onto any background. Look at the top left of the image to see how precise the cut out is on the detailed feathers. Try that with the pen tool!
USEFUL RESOURCES
► Download Layer Blending Modes e-book:
PS Don’t forget to follow us on Social Media for more tips.. (I've been posting some fun Instagram and Facebook Stories lately)
You can get my free Layer Blending modes ebook along with dozens of exclusive Photoshop Goodies here

78 thoughts on “Cut out hair and difficult Images in Photoshop Tutorial”
Leave a Reply

How to make Collages in Photoshop by blending photos with Layer Masks, Tons of layer mask and selection tips
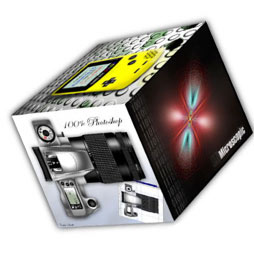
I have been asked a few times, how to make a 3d cube in Photoshop. here is the manual method....
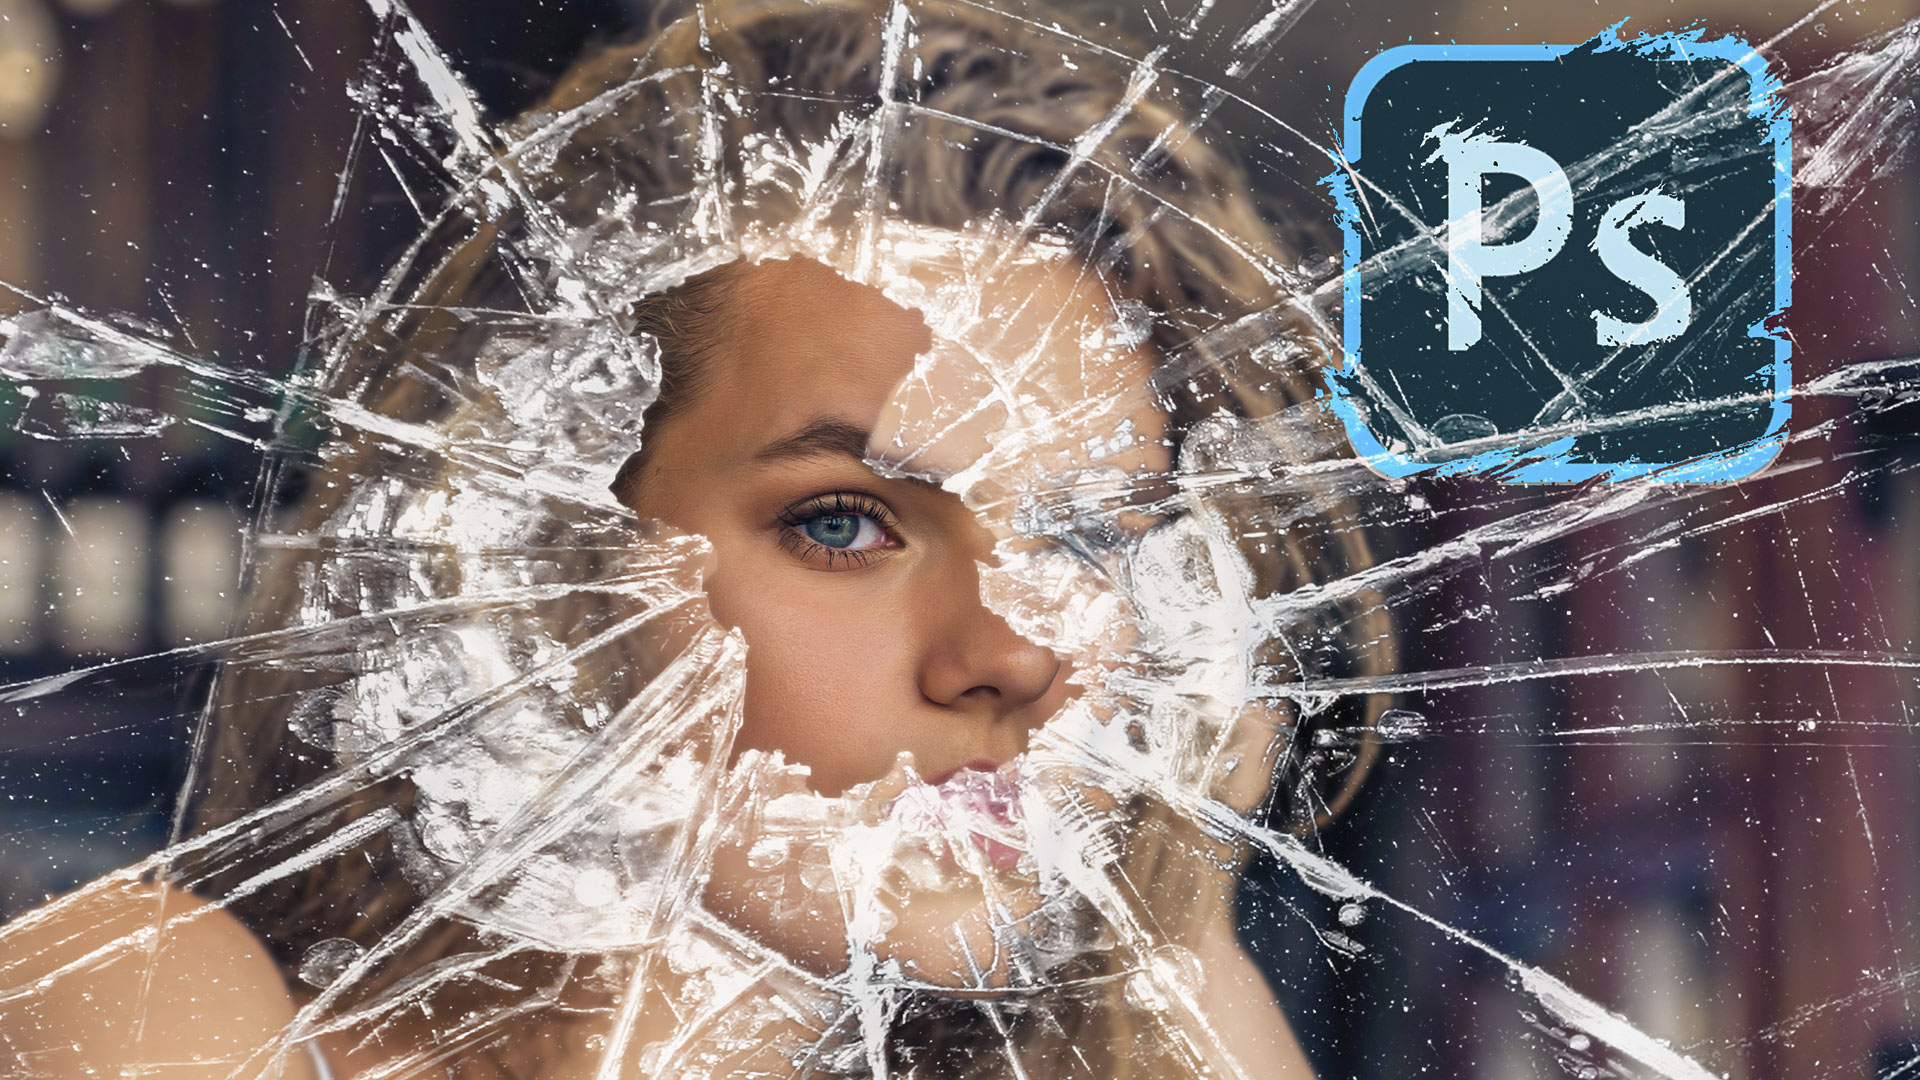
How to make a shattered glass effect in Photoshop with displacement maps and Layer Blending modes.


Waw! how easy to masking a difficult photo,I didn’t know that but I have seen your tutorial, now this is very simple work for me.thank you for your wonderful post.keep it up!!!
Thanks
hi Colin Smith,
awesome your masking tutorial. very details and useful tips for learn masking better.all steps are easy and helpful for any photoshop designer.thanks
Thanks, it’s an important task in Photoshop
This is my favorite path to create an image masking..Absolutely I honor you, Because you read my mind without notice. Thanks so much Colin….
Thanks so much for the kind words
very effective tutorial.. steps are very simple.
i was enjoying it..
thank u so much for your fantastic tutorial
Very helpful and informative tutorial. I love it.
This is excellent–a very clear explanation of the various steps. But the background doesn’t seem that difficult to extract–it’s all a single color after all. I’d love to see steps to extract a difficult subject from a difficult background, where many of the colors are shared by both. Is that possible to do, ahem, cough, “easily”?
Did you read the tutorial? Its a multi colored background that is different on the left side than the right side
Hi Colin, thanks you so much for this tutorial. I’m trying to clean up a graphite drawing (i.e. as a grayscale image) and lift the image from a slightly toned background to be able to print it onto t-shirts, and it’s definitely proving to be quite a challenge. I will try the tips you’ve shown here, but do you think you might possibly create a tutorial on how to mask complex drawings with shading to drop the background? Haven’t found anything like that on the web so far.
Hi llana,
Could you possibly share one of your images so I can see what you need and find the best workflow for you.
Hi Colin, thanks for getting back to me! Here is the image I need to transform, a drawing I just recently completed. Sending you a low res, hope that’s ok. I’m considering I might be happy with just creating a contour to the image to drop it onto white t-shirts, but am also considering dropping some parts of it so they’ll become transparent, such as the palest parts of the face and hair so I can transfer onto coloured t-shirts as well. I don’t know if that is at all possible since there is so much tonal range.
I also want to separate the hand-drawn type and drop it onto the drawing in reverse so it’ll appear as white, possibly as a semi-transparency, though I need to try versions to decide on this.
p.s. Anybody considering reposting this, I’m fine with that, but please do indicate the original artist’s name along with it (i.e. me)! Thanks!
So your looking for something like this? Or different? If different, can you show me an example?
I don’t want to turn the work into just black and white, so if that’s just the mask you’re showing me, I guess that would be what I want to do. I’ll try to find something to show you if that’s not the case. What’s for certain is I want to keep my tonal range and not posterize the image, though I suspect you already know that.
eta: that was super fast by the way! Thanks for responding so quickly! 🙂
Or a more detailed version?
Please bear with me, I hadn’t started this drawing with the intention of creating t-shirt art until some people expressed interest in it, so as I look around I see maybe my expectations are a bit off in terms of transferring the image onto a colour background, in which case there isn’t much choice BUT to transfer it into b/w art.
So let’s sort of start over taking it from the top:
1. For WHITE t-shirts only I want to create a complex clipping path around the image and keep all the tonal range. A mask that will allow me to keep in all the subtle details of the fur and strokes (looking a lot like what you’re showing me above, in fact, so maybe you’ve already done what I was looking for?). We’ll forget about transparency in this case.
2. For colour t’s, see example below for a colour t-shirt with an illustration that preserves the image, though my clipping path would need to much more subtle, but I’ll forget about dropping parts of the image, other than the strokes at bottom, which you’ve done beautifully and exactly as I want to achieve!
I’ve added a few edits to the above for a bit more clarity, I hope.
You probably want to trace it in Illustrator if you need color separations, otherwise you could color it in Photoshop and do a process print. The next step is a whole different topic. If you give me permission to use your lion, I can make a tutorial on making it into line art.
Interesting. I like the idea of you creating a tutorial on creating line art, though not sure that’s what I want to do for this specific t-shirt project as I really do want to use the original art with the least mechanical transformations as possible. It is intended to contribute to an awareness campaign to contribute to non-profit organizations and I have a traditional drawing series in mind. Could we take the discussion offline so I can raise a couple of issues?
If it’s an issue, don’t worry about it, I have plenty of other people who I can get sketches from. I really don’t want to turn this into a big task.
Maybe that would be better since I intend to make semi-commercial use of my original artwork. Back to my original question then, would you mind looking at the 2-part question I posted 2 hours ago which includes a colour t-shirt example? I’m not handy with photoshop and don’t know how to proceed to create a fine-detailed mask. Would like to know how to create a mask close to what you showed me in your 2nd example.
I’ll post the steps when I have time to write the tutorial.
Colin, I’m posting another sketch I’m ok with you working from, as well as a different drawing altogether, since I’m curious to see what you might do with it. If you end up using either one, would you consider giving me a credit for the original image on the site?
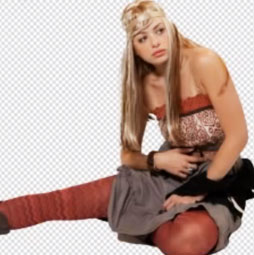
There’s still instances that crop up every now and again where even the very best techniques don’t work, take this image for instance, looks easy right as its on a white background but you try extracting the hair without a halo and placing it on a purple background for instance. I’ve been trying this for a while now and just can’t get a satisfactory result. Any tips would be very welcome. Thanks.
Did you decontaminate in the refine edges section?
Trying to look for a tutorial when using a complex background.
Obviously nice creativity. Your website and your articles has been a tremendous help for me.
Hi Colin, I do night photography ( Star Trails ) and I’ve had to resort to using GIMP to extract the foreground ( Joshua Trees ). And it does a poor job i might say. I’ve been trying to figure out how to mask the foreground on a Alpha layer so I can process the background ( Stars ) but the foreground is so close in color to the sky I’m finding it difficult to accomplish my task. Hence I’ve had to use GIMP, which sucks. Is this tutorial the one that will help me with my processing ?
Hi Colin, this is a great tutorial, thank you!
I publish a free, monthly photography magazine here in New Mexico. I would love to be able to share this information with my nearly 5,000 readers, giving you full credit, of course. Would this be possible? Thank you!
Hi Dave, please contact me offline to discuss
Messaged you on FB.
Oh, ok.. support ticket is the best way to reach me, I don’t always check messages on Social media, but I’ll look.
Hello ,
Cut out hair and difficult images step by step tutorial in Photoshop it’s a very useful and important tutorial . This tutorial is more useful for beginner graphic designer .
Amazing masking tutorial colin.Definitely I will try to learn this masking tutorial. Thanks for this informative guide.
Just want to know what Photoshop (I am using CS5) version I have to use to get all these things done perfectly. Thanks for this grate tutorial. Keep it up 🙂
Masking on Photoshop really hard job and it’s essential too for a graphic designer. Thanks for sharing this excellent tutorial. You explained the steps perfectly but I think need lots of practice to make perfect output.
It is excellent Photoshop image masking tutorial. It will be helpful for newbies who want to learn photo editing. Photoshop masking is not as easy as we think. It really need to practice a lot to make photo masking perfectly and only expert photo editor is needed for perfect image masking. This detailed tutorial will help to create good masking.
may i say this is a channel masking tutorial Right ?
Great tutorial with detailed instructions. It is really a nice tutorial for any photo editor. I can bate anyone will learn a lot from this tutorial.
Really this tutorial is more details step by step, so that it is easier to learn for any one who want to create something
new in any picture by photoshop. Thanks for sharing.
Photo Masking is one of the most important and heard service on Photoshop.Every designer are confused when she create a mask.I hope your tutorial must be helps for all Photoshop designer…….
actually making is hard work of photoshop. but every day i am handling 70+ masking image for my client. i am expert of this work and giving service from my website
Truly helpful! I am an Adobe trainer and thanks for reminding me to “choke” the selections!
please tell the smart technique or features for color correction for more than one photos for digital album making.
This tutorial was fantastic! I could never figure out how to cleanly make difficult images have a transparent background. My background eraser skills weren’t cutting it here LOL. Thank you so much for this!
Very helpful post, easy to learn from your video tutorial.
Thanks for sharing. very helpful for beginner like me.
I’ve loads of images of my granddaughters with very fine hair that require cutting out & this video is what I’ve been looking for after trying unsuccessfully other techniques. Will be putting this method to the test & report back once tried, hopefully this time with success. Thanks again for a great tutorial.
Tried to use this method, but I only have Photoshop Elements 13 & the first problem is that there is no Color Range item under the Select menu. From this, can I assume this method cannot be used in PE13?
Colin thanks for the tutorial man i was facing some problems but now its solved thanks to your tutorial.
Thanks my friend this is amazing and beautiful information i like it so much brother good luck for the next
Awesome! Thanks a lot.
now it is more easier for me to make a nice photo masking , thank you .
Advanced level cut out image or background remove. I appreciate your sharing.
Obviously nice creativity. Your website and your articles has been a tremendous help for me.
Photograph Masking is a standout among st the most vital and heard administration on Photoshop.Every fashioner are confounded when she make a mask.I seek your instructional exercise must be helps after all
For me – a challenging tutorial. Am generally familiar with masking, the Refine-Edge tool (which I find in CS6 sometimes works great and sometimes doesn’t) and editing in Edit-Mask-Mode (a favorite) – but I’m pretty much a dummy with working with channels. I’ll need to mirror your tutorial probably a number of times to really get it, and would love to have the image you are using for this tutorial so that I can repeat your process step-by-step. If I pick an unrelated image, it will be more difficult to follow along with your process.
Just a thought! Your tutorials are extremely helpful and appreciated!
One of my biggest problems is cutting out backgrounds from photos… You have made this such an easy task… Thank you so much for the tutorial 🙂
Hi this may sound silly but I cant understand you when you say your clicking a q key or something? In your notes it says to press Cmd(Ctrl PC) what is that? I have tried the Ctrl key, I have tried the windows button key and I cant get this to work for me, what am I meant to press please
The Q key toggles the quick mask on and off
Its very helpful article for beginner and advanced level editor who want to learn photo editing. I hope you always publish this types of Article @Colin Smith
Nice tutorial Colin Smith, Really helpful.
Nice tutorial, Lot’s of I have learned for masking. Very useful and nice tips you have shared. Thanks and keep it up.
Truly helpful! I am an Adobe trainer and thanks for reminding me to “choke” the selections!
Excellent and informative tutorial. I just want to say ”Awesome”. Excellent work. Keep it up. Thanks for sharing.
Thanks
nice tutorial.. i learned a lot of things from this guide.. glad to read this guide.
wow specially hair cut from background always is a big challenge for me , thanks for share this fantastic tips it really help me
new in any picture by photoshop. Thanks for sharing.
eally this tutorial is more details step by step, so that it is easier to learn for any one who want to create something
This tutorial is really helpful. Not only the beginner but also an advanced level photoshop expert get help.
This tutorial was fantastic! I could never figure out how to cleanly make difficult images have a transparent background. My background eraser skills weren’t cutting it here LOL. Thank you so much for this!
Wow, pretty cool tips. I really appreciate your post. I definitely visit this blog again
These are some great tips. I think that it is important to get some great photographs whilst on holiday. You are making memories after all, so getting the right shot is important. Not just the usual legs on a generic beach shot that tells you nothing about the place you were visiting!
I just want to say ”Awesome”. Excellent work. Keep it up. Thanks for sharing.
Photoshop is a powerful image-editing tool that can be used to create stunning images. With its wide range of features, it can be daunting for the uninitiated. However, one of its most useful features is the ability to cut out hair and difficult images from photos. In this tutorial, we have learn essential tips. Thank you for your tutorial.
This tutorial is really helpful. Not only the beginner but also an advanced level photoshop expert get help.
Nice Post