Wire frame Text effect in Photoshop Tutorial

In this tutorial, I’m going to show you how to create text that looks like it’s made out of metal wire. The cool thing about this, is that the text remains fully editable throughout so you can try different fonts and different words. Oh yeah, I’ll also give you the layer style for free at the end, but don’t cheat, read the tutorial first so that you know how to use it correctly, or you’ll run into problems with the shadow. This tutorial follows the popularity of my outline text tutorial

Step 1
Create some type and apply a Layer style by clicking the little “f” in the Layers Panel. Add a stroke as shown here. The color of the stroke is unimportant at this stage. 
Step 2
Change the fill type to gradient for the stroke 
Step 3
Add a bevel and emboss. Choose Stroke emboss Remember to adjust the size to look good for your text. You will see when it looks right, it’s ugly when too big. Change the Gloss contour to what’s shown 
Step 4
Refine the shape a bit more by adding a contour to the bevel 
Step 5
If you go to blending options at the top of the styles panel you will see opacity and fill opacity. Turn fill Opacity all the way down to 0. Give it a drop shadow. Do you see the problem with the shadow here? It adds a shadow for the whole word, not just the outline. We have to be sneaky and figure out a work-around. 
Step 6
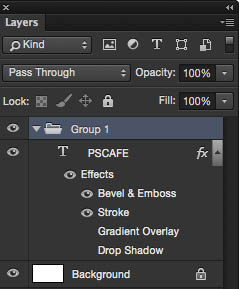
Hide the Drop Shadow for now and this is what your text and layers panel should look like so far. (Ignore the Gradient Overlay in the screenshot) 
Step 7
Here is something a lot of people don’t know, You can add layer styles to layer groups and they respect the transparency of all the nested layers combined. Whaa? That means you can get it to do what you want. Select the type layer and press Ctrl/Cmd+G to put in a layer group
Step 8
Now, apply the drop shadow to the Group (Group 1) and notice you now have full control over it as a wireframe. Very cool. 
Xtra Credit
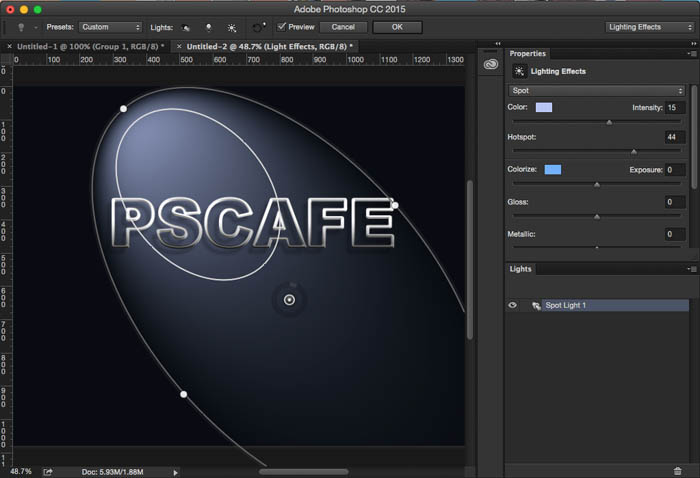
In case you want to jazz it up a bit, you can add a light beam using Lighting effects. Filter>Render>Lighting Effects (Note: Lighting effects ONLY works in RGB mode and earlier version of Photoshop).
Here is the result.
Make sure you adjust the shadow so that it falls in the right direction, away from the light source.
Also check out a similar tutorial on creating a metal outline effect here.

Thanks for checking it out
Colin
PS Don’t forget to follow us on Social Media for more tips.. (I've been posting some fun Instagram and Facebook Stories lately)
You can get my free Layer Blending modes ebook along with dozens of exclusive Photoshop Goodies here

2 thoughts on “Wire frame Text effect in Photoshop Tutorial”
Leave a Reply
How to fix blocky artifacts from photos in photoshop
Here is a photoshop tutorial that will show you how to roll your own dynamic photo edges in Photoshop
New Features in Lightroom 8 / Lightroom Classic CC 2019 This video goes through the new features in the latest...




text design is so useful for logo design.
So cool and well done! Thank you for the explanation!