Making a mermaid in photoshop using photographs and 3D
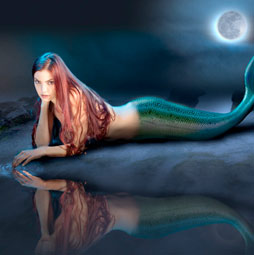
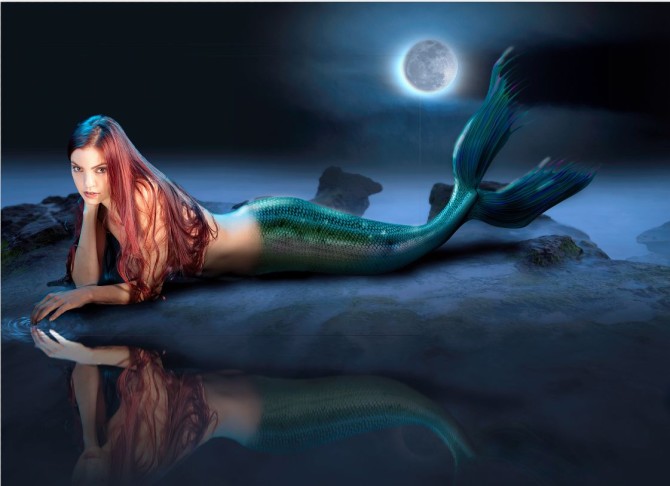
In this peice inspired by the little mermaid, I wanted to combine photography, 3D and Photoshop together to try something out.It was worth the effort because this image was used by Adobe in their keynote presentation when they announced Photoshop CS6. It also spent about a year as a showpiece on the homepage of Photoshop.com.
final
I already had the final image in my head and was planning the shoot for some time. Often when I have an image like this in mind, I’ll carry the idea in my head for as long as it takes, until I crystallize the concept and find the right props and model. When I met Whitney (the model) I knew that her long red hair and slender figure would make her perfect for the part of Ariel.
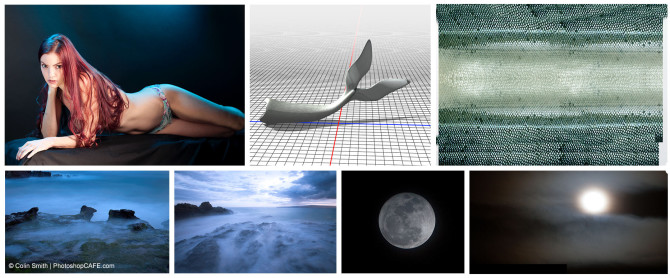
In the image below, you can see all the different parts that will be composited into one image. It doesn’t matter if you are doing exactly the same image or not, there are many techniques used in this tutorial that can be applied to different kinds of artwork.

The Photography
The first step was to photograph the model to use as Ariel. I posed her on a plastic trunk with a black cloth draped over it. My goal was to elevate the model so that I could get the right angle for the shot, but more importantly, so that I could get some light under her. I set up a black 9 foot seamless sweep for behind to cut down on unwanted bounce light. I also did the shoot at night so that I didn’t have to cover up the windows in the studio.
For lighting I often use Kinoflo Diva 400 video lights. I love using these lights for photography because they are a very large and soft light source and they produce really nice color on skin tones. I gelled the 2 back lights with midnight blue colored gels. This simulates the moonlight and creates a nice blue rim light around the model. For backlights, I used One Kinoflo and one generic fluorescent dish.
I then placed one Kinoflow in front to illuminate the model’s face, body and hair. I used a silver reflector to fill in the hair and body (I chose silver over white because I needed the extra punch because of the lower power of constant light. The original goal was to have the mermaid looking into the water and projecting caustics (reflected water ripples) onto her. When I started making the caustics, they looked weird without the movement, so I decided not use them. I also felt that the lower angle of the lighting just looked too monster light for the mood I was looking for. So I broke the rules of realism and went for a more beauty lighting to make the model look attractive rather than sinister.
In this first test image, you can see some of the light’s position.
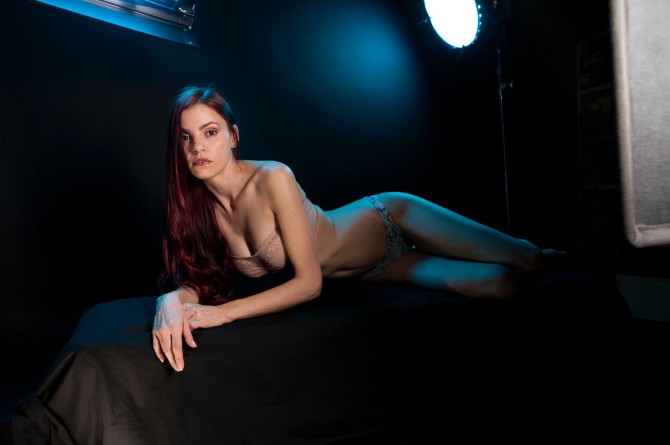
After sorting through the images, I decided to use this particular image even though the front arm is over lit and blown out. It’s easy enough fix this later on, although I normally would try to get it right in camera or selected another image, but I liked the pose and expression best and that often trumps using a perfectly technical photo in my view.
(worth noting, I always shoot tethered into Lightroom these days, so that I can spot and eliminate these kinds of issues on set)

The 3D
Once the photograph is selected, it’s time to go CG. We will need to create the tail. The first thing I did was to extend the canvas in Photoshop to make room for the tail.
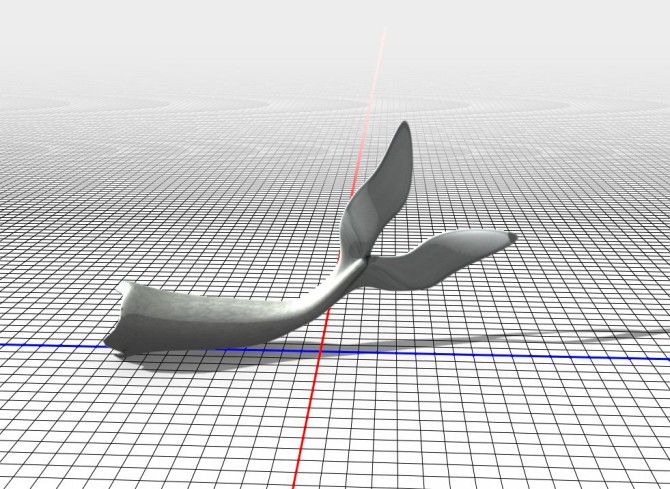
I used a 3D program called Maya (Popularly Used for visual effects on films). I started with a cylinder and roughly modeled the tail shape by pushing and pulling polygons. I then imported the tail in Photoshop, using the 3D features in Photoshop. I was able to experiment with sizing and positioning.
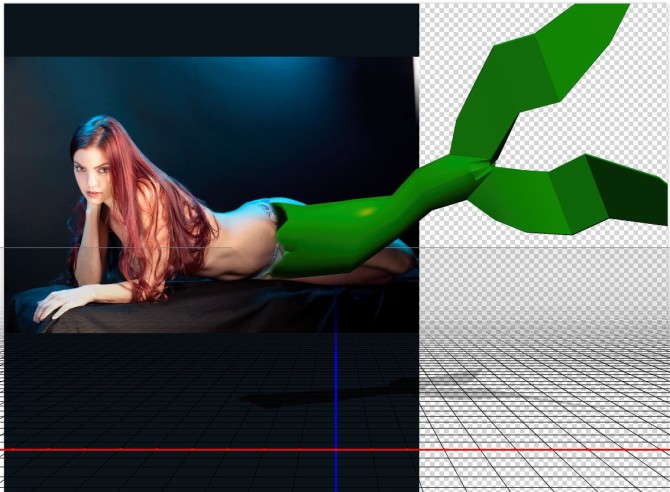
When I was happy with the positioning, I returned to Maya to make adjustments to the shape. When I got a pretty good fit in Photoshop, I refined the model in Maya, including subdividing and using a deformer lattice to bend the shape.
The same thing can be done on simpler 3D apps such as Cinema 4D, Rhino etc. You can also find plenty of pre-made 3D objects online if you can’t make them yourself. In this case, I needed something very custom, so making it myself was the best option.
Photoshop Compositing
Now it’s time to create the background plate. I imported the two images that I shot at Laguna beach to create a surface to place the mermaid. I merged the 2 photos together using layer masks. I also added a photo that I shot of the moon.
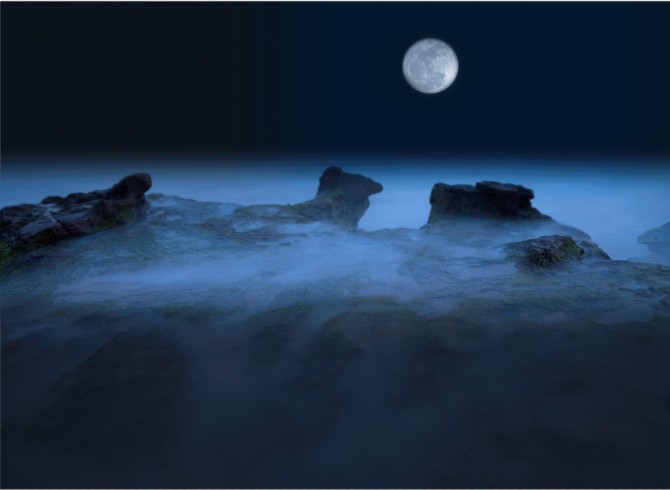
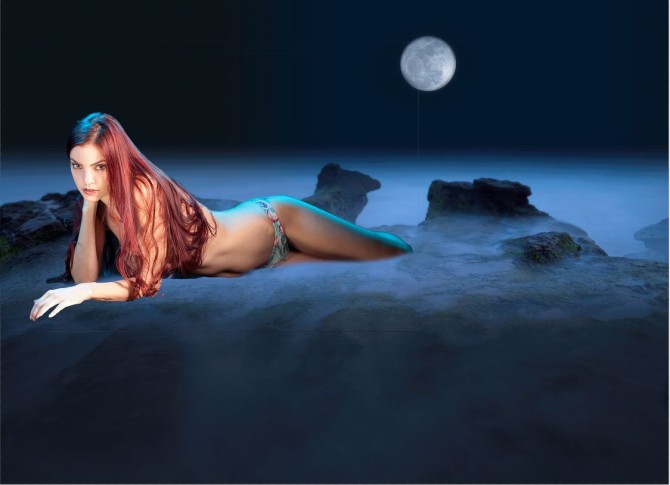
Now I bring in the model and begin to blend her into the scene. Standard retouching is also performed here on the face and body. Because we wern’t using a wig and the model has clear skin,not much retouching was required.
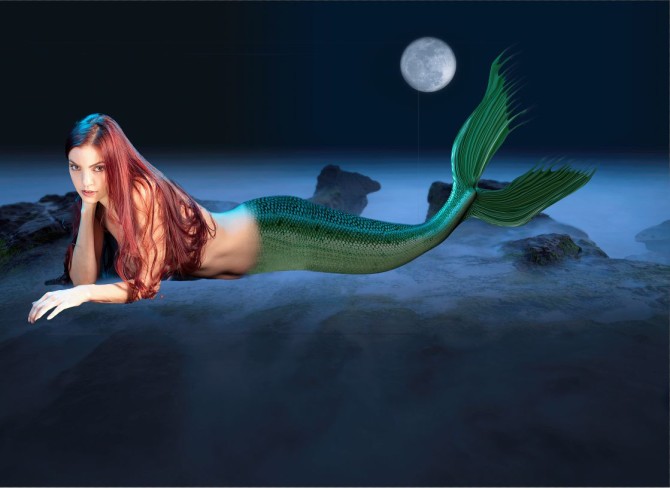
At this point, I dropped in the tail. It was exported from Maya as an .obj. I then imported it to Photoshop and wrapped the scaly texture around it and positioned it using Photoshop’s 3D texture tools. For the scale texture, I found an image of a fish, streatched it out, warped it and cloned it to make a flat texture. I also used Photoshop’s 3D lighting tools to match the position and intensity of the lighting.

I decided to use the liquify tool for the fins rather than modeling them and texturing, which would have been a lot more time intensive. (Note: next time, I would use z-brush for the tail fins or illustrate them, as I’m not really that thrilled with it).
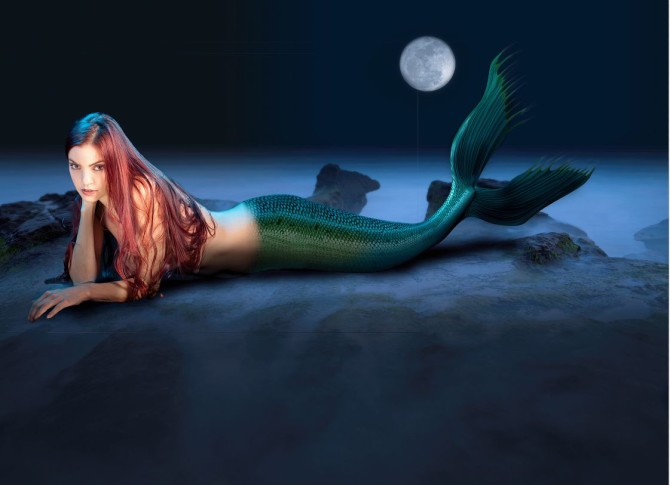
At this point it still looks very fake and composited. This is where painting in carefully placed shadows brings a base to the model and adds the realism need to make the composite believable. I also darkened the blown out hand in the front with an adjustment layer and a Layer mask.
I added the reflection and blended it using a layer mask.
You can see a basic reflection tutorial here
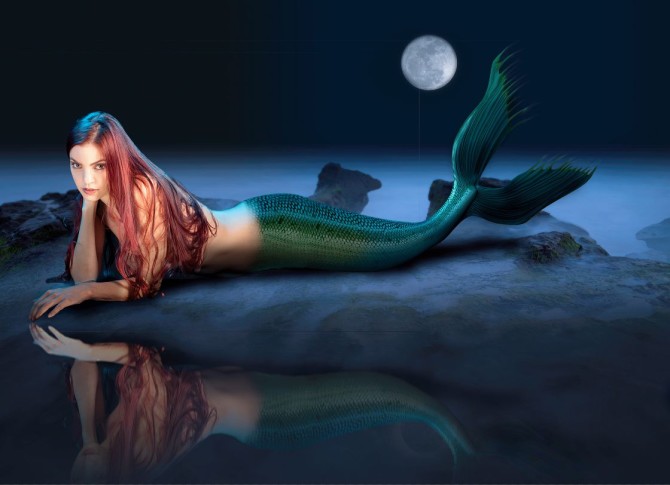
At this time, I added the second image that I shot of the cloudy night sky around the moon. Both moon shots were captured at the same time. I bracketed the exposure to capture the moon and another for the cloudy sky. There were about 10 stops difference between the two shots. I choose to composite rather than use HDR for my purposes here.
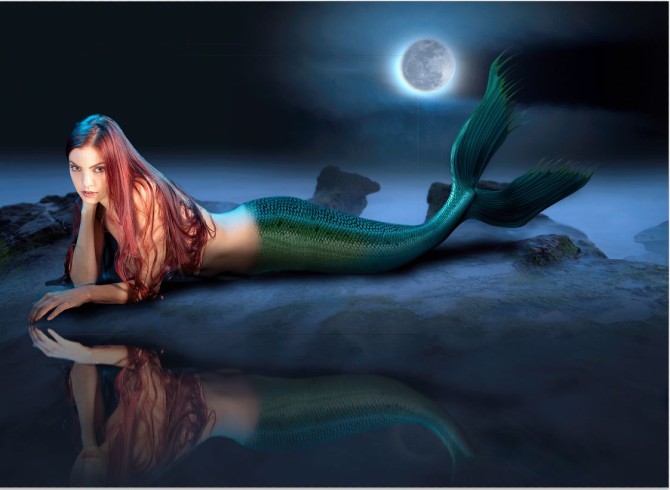
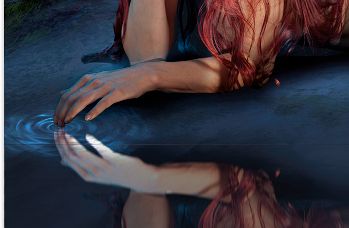
This is where I added the water ripple, to add a nice fine detail. I did this using filters and masks in Photoshop.
In this step, I added some color to the tail fins. It might detract from realism, but I wanted a bit more of a fantasy feel.
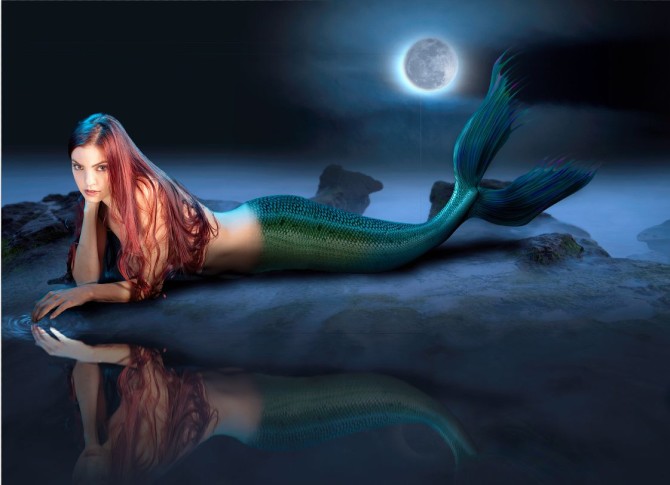
I created some reflective highlights on the tail. These were toned down a bit later on by blurring them and reducing the opacity.
Here you can see the Layers panel and see how the image was constructed, as well as some experiments along the way.


Finally, I darkened the reflected hand in the water to match the one on the mermaid. I also tamed the tail a little and did finishing touches here.

Thanks for reading. Leave a comment and let me know what you think
PS Don’t forget to follow us on Social Media for more tips.. (I've been posting some fun Instagram and Facebook Stories lately)
You can get my free Layer Blending modes ebook along with dozens of exclusive Photoshop Goodies here

3 thoughts on “Making a mermaid in photoshop using photographs and 3D”
Leave a Reply
How to use the new Neural Filters in Photoshop 2021. Change the age or expression on a face and more.
Complete guide to using Reference Image in Photoshop to generate images. Colin Smith shows how to use a reference image...
How to edit your photos like a pro in Photoshop in 4 easy steps. A free mini masterclass in photo...




+++
Beautiful 💖, I would love to be able to produce work this clean. Gorgeous, down to the last pixel!! Kudos!!
Thanks for such kind words