Generating Actions of your own Photoshop Tutorial

Generating Actions of your Own: A Quick and Nearly Painless Process!
(Note, this tutorial has been updated by Colin to cover Photoshop CC, Actions work basically the same in every version of Photoshop)
This week I’m going to walk through the process I use when developing my actions, step by step, with all the appropriate interjections, sub categories and bylines required to flawlessly create your own. In theory, anyway!
1 open the panel
With Photoshop open, hit F9 to bring the Actions Palette to the front. After you hit F9, you should see this palette:
The default actions set is visible in the palette… if you like, you can clear that set out of there. Or press the new folder button. This way our new actions can be organized in a new folder.
2 ready to go
Ok. Now from the menu we can start recording, or we can also press the New Set Icon from the bottom of the palette.
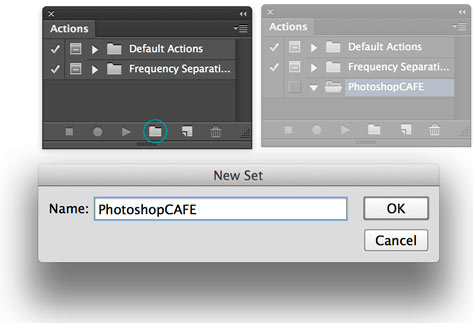
All actions must be in a set before you can record. You may then select ‘New Action’ from the menu, or just hit the New Action Icon from the bottom of the palette. Once you hit record you’re in business… every step you make in Photoshop will now become part of the Action provided it is a command that can be recorded. Stick with the commands you can control from the drop down menus and you are in good shape, as not all tools can be recorded. This will save you a few of those pesky error messages when you try rerunning the action later.
3. adding a stop
Either start with an open photograph as we are doing here. or…
If you are creating an effect from scratch; the first thing I do is set up a new image for my text actions. Generally I start with something 9 inches wide, 5 inches high, 72 dpi, RGB, white background
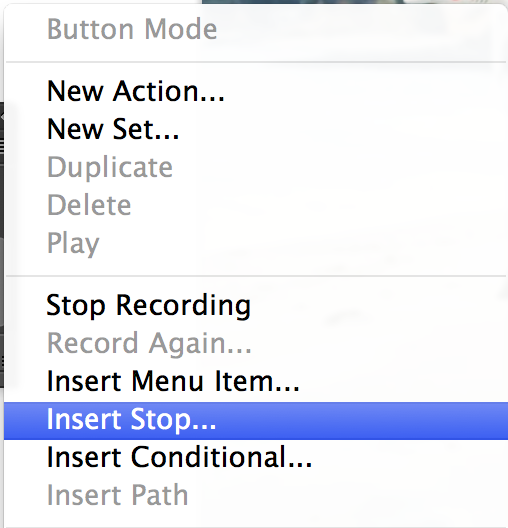
I insert a ‘Stop’ command at this point giving instructions to the user on how to proceed. Before you insert your Stop, you will want to cease recording. You insert a Stop from the Actions Menu:
4. messages
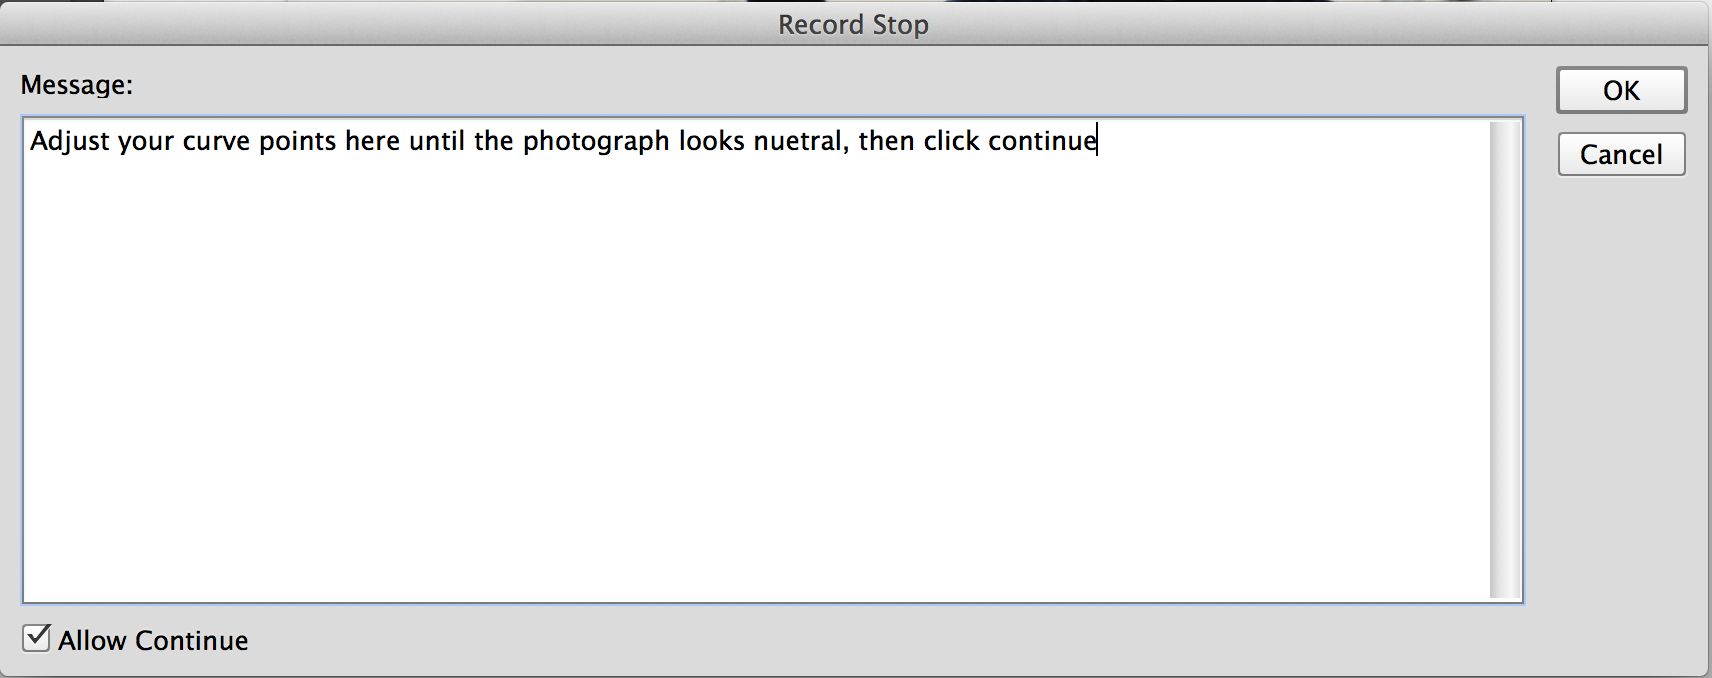
Here is an example of a standard message I use in my actions. Note that I give the user instructions on how to set up their image for the best possible result, including which tool to use, what to adjust, how large a font to enter and so on. I rarely select the ‘Allow Continue’ checkbox to avoid mistakes, as the user will be able to press play to start the action once they have completed the required steps.
5. the results
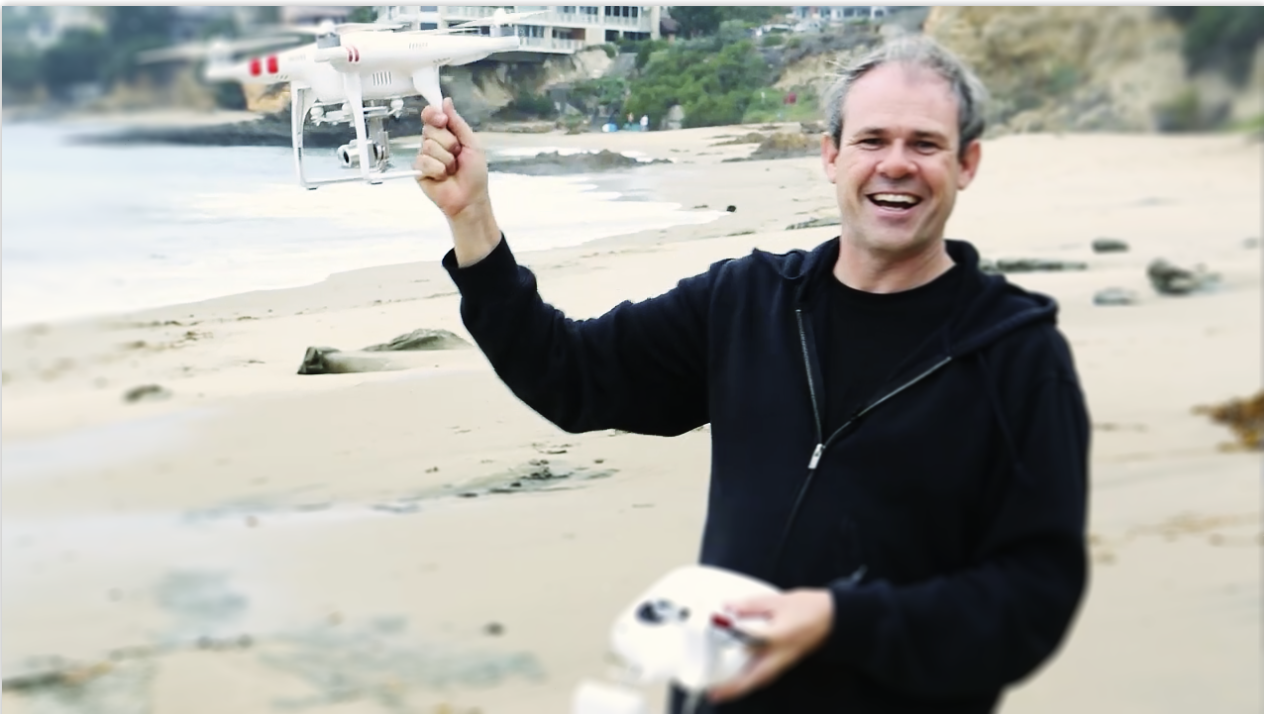
To save a whole lot of time and space, I’m not going to go through the entire process for this effect, as it is simply recording the steps I took to go from this:
to this:
Once you have completed your action, stop recording, select the Set that your action is in, name it and save it from the Actions Menu. You can now distribute your action for all the world to play with.
Until next time, be safe, take care, and do something cool for someone. Ciao!
Al Ward, Action Fx Photoshop Actions Resource
This tutorial was written by my friend, Al Ward from Actionfx. Unfortunately, Al passed away a few years ago, RIP Al!
PS Don’t forget to follow us on Social Media for more tips.. (I've been posting some fun Instagram and Facebook Stories lately)
You can get my free Layer Blending modes ebook along with dozens of exclusive Photoshop Goodies here

3 thoughts on “Generating Actions of your own Photoshop Tutorial”
Leave a Reply
How to make the apple liquid glass effect in Photoshop
Here is a photoshop tutorial that will show you how to roll your own dynamic photo edges in Photoshop
You are going to love how easy it is to change the color of anything in Photoshop. Check out how...







yes i knew good about photo shop action after learning your tutorial.
I cannot contact Customer Support. It will not accept my password, will not send a new password. I cannot find a phone number for Customer Support or for Photoshop Cafe
Please click the support link at the top and bottom of the page