
Sky Replacement in Photoshop- fixing edges with Sky Brush
Sky replacement, better edges
I have created a few tutorials on Sky replacement in Photoshop already. I’ll add a list at the bottom of this tutorial.
One thing you may have noticed, the edges sometimes have a hazy glow around them. These is a tool, that very few people know exist, let alone use and that’s the sky brush. This short video tutorial and written step by step Photoshop tutorial shows you how to replace a shy and fix the edges.
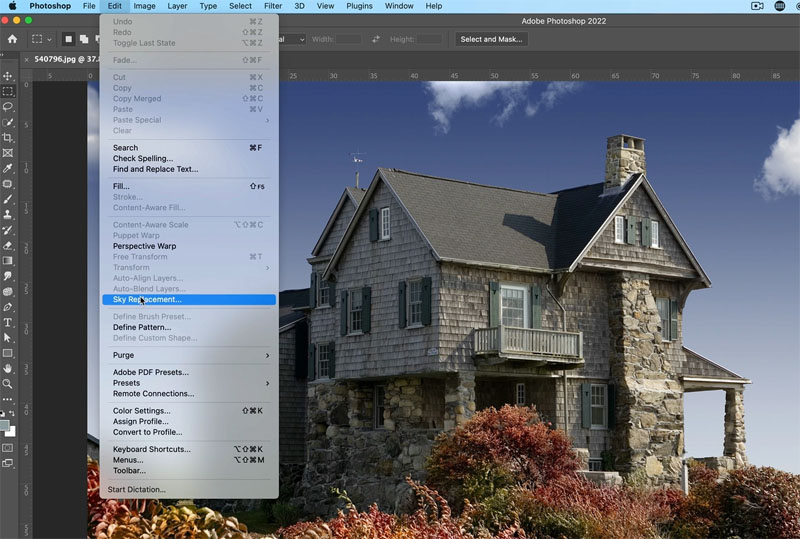
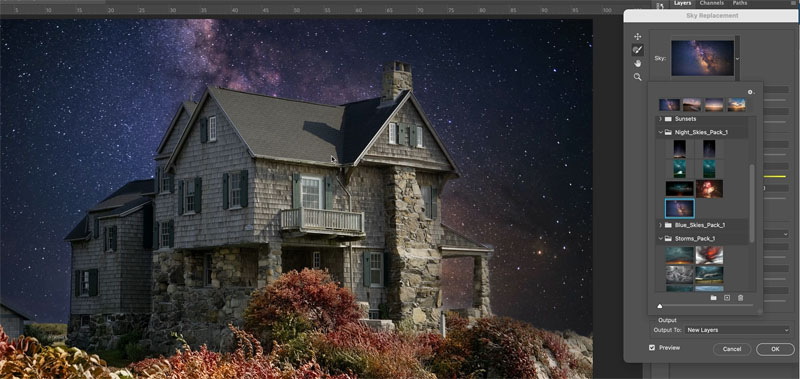
To change the sky choose Edit>Sky Replacement
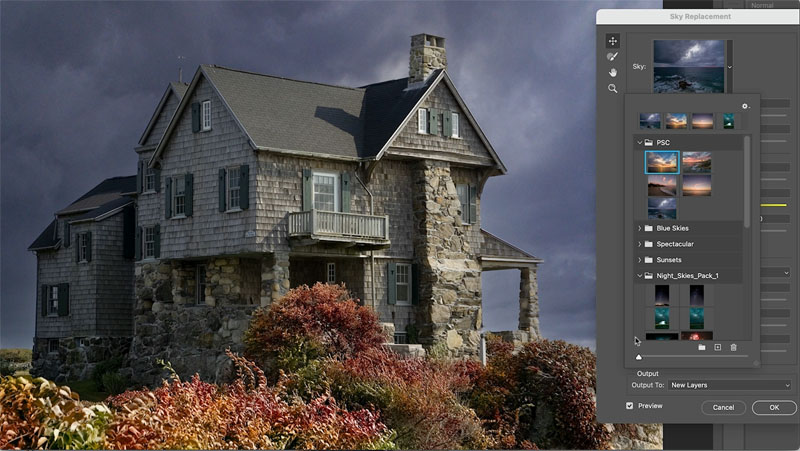
Choose a different sky to change the sky (full tutorial on sky replacement here)
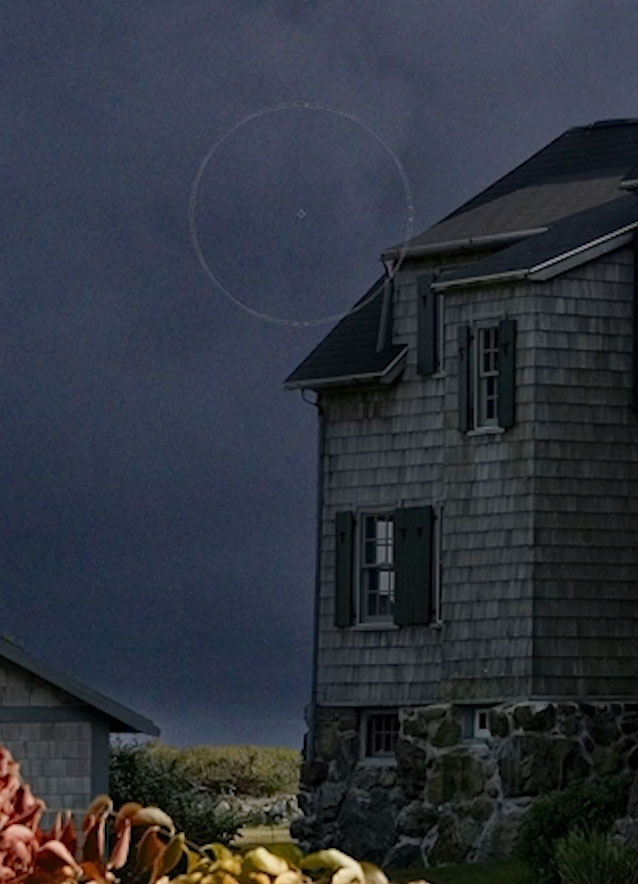
The haze looks good on the horizon, but it doesn’t look good up against the sides of the house.
If you look at the Sky Replacement panel, you will see the sky Brush on the top left
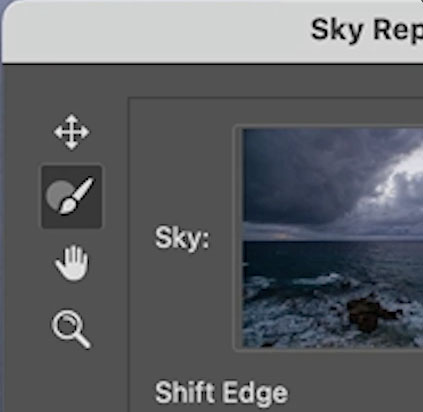
Run it around the edges where you want to remove the haze.
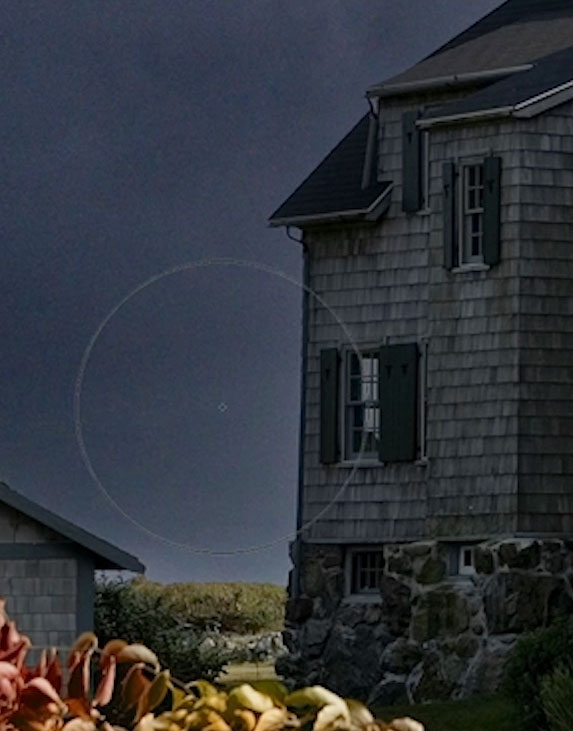
You can see how it affects the edge here. Press the [ or ] keys to resize the brush.
What about areas such as the post? We need to do the opposite.
Rather than paint in sky, we want to remove the sky overlay from these areas.
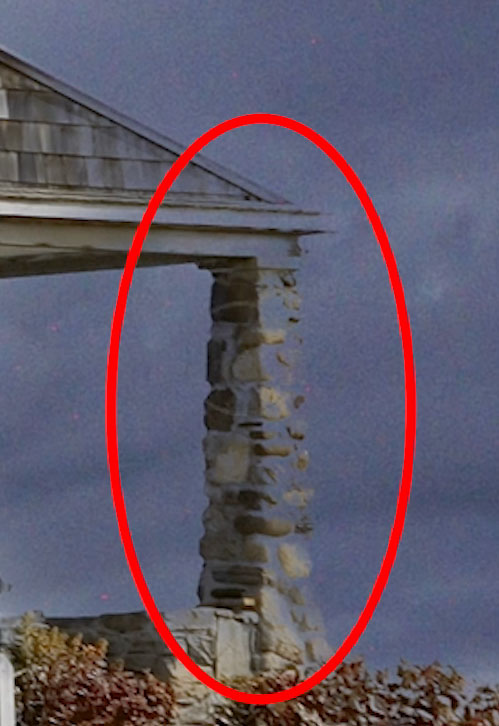
To remove sky, hold down the alt/option key and paint in the image.
The brush has color detection, so keep the central cross hairs in the areas you want to effect.
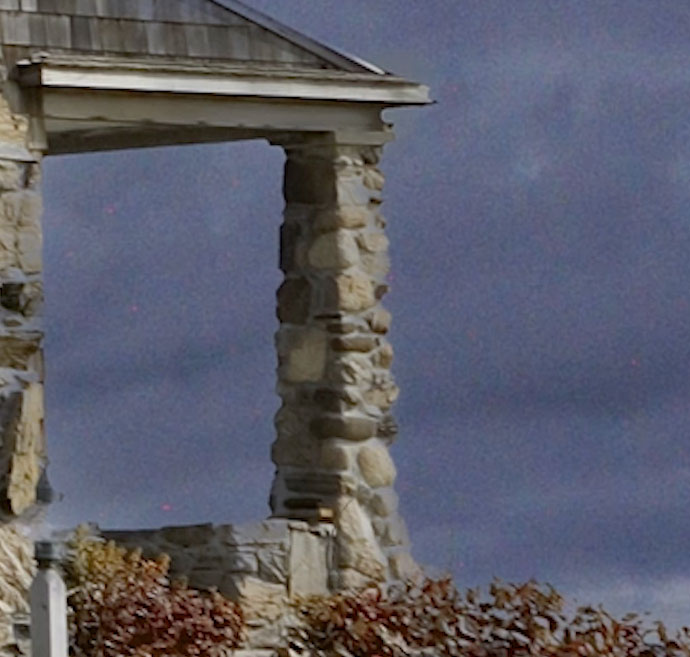
Here we have painted around the image and cleaned it up.
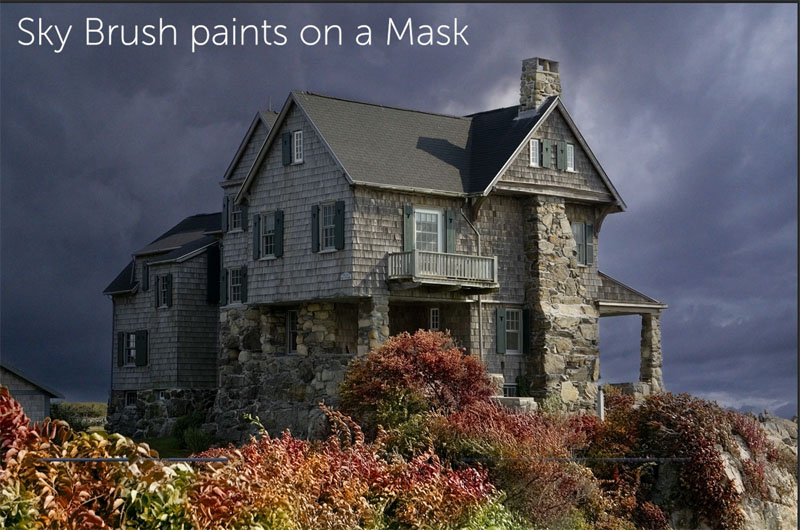
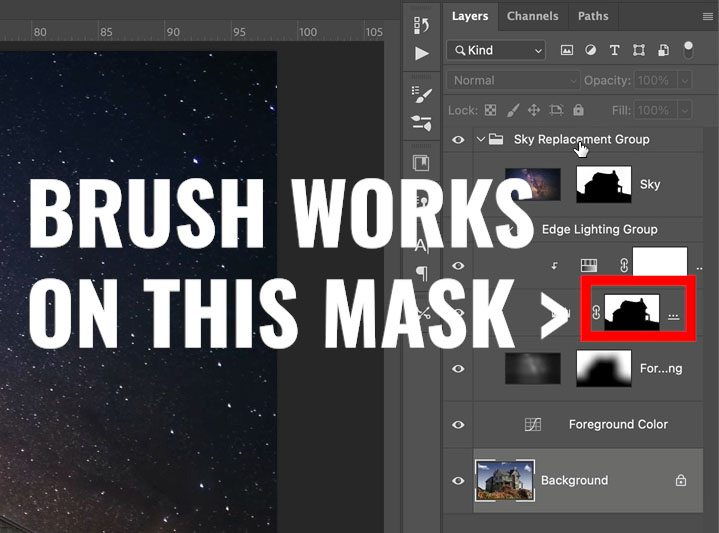
Photoshop uses a mask and remembers the mask you edited.
Choose other skies and notice you mask is remembered and you don’t have to use the brush each time you change the sky
When you apply the sky, you will see a layer stack. This is the mask we have been brushing on.
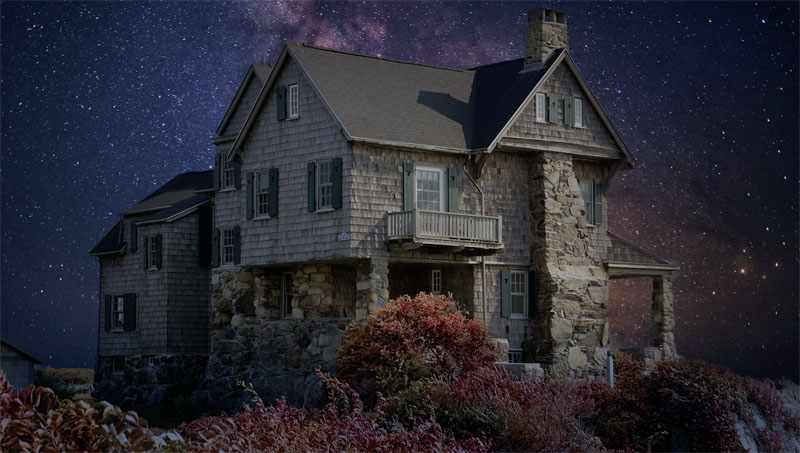
After a little color adjustment, here is our final sky swap.
Here are links to more of my sky replacement tutorials that go more in depth in the settings and also how to load and find more skies etc.
Sky replacement in Photoshop, getting free skies
Ultimate sky replacement tutorial
I also have some free skies to give you as part of the Photoshop Vault. (If you are on our mailing list, you already have access and don’t need to sign up again look near the bottom of each newsletter for a direct link to download all the goodies)
Thanks for checking out this tutorial
Colin
PS Don’t forget to follow us on Social Media for more tips.. (I've been posting some fun Instagram and Facebook Stories lately)
You can get my free Layer Blending modes ebook along with dozens of exclusive Photoshop Goodies here

32 thoughts on “Sky Replacement in Photoshop- fixing edges with Sky Brush”
Leave a Reply
How to add a rim light to a photo in Photoshop. This Photoshop tutorial shows how to make a backlight...
how to convert a photo into a painting using Generative ai in Photoshop. Colin Smith also shows how to convert...

How to remove crowds for a photo in Photoshop. Use Stack modes to easily remove tourists, cars + people from...


Very cool! I did NOT know about this, so thanks for sharing, Colin! Seems a bit like the refine edge brush in the select and mask workspace.
Well you are not alone! I am so excited to find this brush – thank you.
Fantastic! I didn’t know this, and it really works.
Gawd but I didn’t! Thanks, Colin!
Cool! Didn’t know and will start using it, Thanks for sharing.
I did not know this and have not used a sky I wanted because of the bleed like the rock post in your tutorial. Now I know an easy way to fix it. Thank you, Colin, for your very helpful and informative tutorials!
I can’t access the “Freebies” in the Photoshop vault. I do not receive the “confirm email address” email.
If you are already signed up, you will see th link in the bottom of the newsletter. If not, please contact me at the support link
This is one of the reasons I watch every video you release. No I also did not see or use the brush feature in PS sky replacement. I have been using PS for over 20 years and I still need help in finding and using many of the features.
Thank you.
Jack
I didn’t know about the sky brush. No surprise since I’ve never replaced a sky! Thanks for the tip.
In earlier days, I used the dye transfer process to create color prints (via photography). It would have taken an entire day to do what Photoshop can do in a few minutes. Sky replacement was a major challenge and I seldom saw it done well. Now, it’s almost trivial.
Wish I’d seen this a few days ago. Terrific tip, thanks!
I don’t know how I overlooked the sky brush. Now you have prompted me I will be experimenting with it at every opportunity
No, I did not know about the brush. Thanks for the tutorial
Used it, it works, thanks for the tip Colin.
Wow. No sh*t!! Colin, you are a genius. Thanks for sharing
Love it = thanks for sharing. Did not know about the brush.
Did not know about the brush, so thank you for revealing such a useful and time saving tool.
Very informative
Had no cooking clue. Thank you for the heads up. By the way I love it when you provide the notes. Thank you so much.
For the last 3 months I have followed all tutorials and now I am becoming a pro Photoshop Editor.
Again Thanks Colin Smith
WOW! no I did not and I use the sky replacement a lot, I will now start playing around with it. Thank you.
good info I didn’t know. Thanks for sharing
Thanks Colin!!! I had no idea about this brush, but, now that I do….I will certainly use it.
Like you I never checked it out. Now I have to go back and review all of my sky replacements:)
Thanks again
Sky Replacement brush and Split Warp were very helpful. Thank you!
Double WoW, Colin. Thanks for continuing your short, content filled tutorials. The brush has been hiding in plain sight for me.
Awesome, Colin. Thanks much.
Very informative, but the font is barely readable because it’s so light.
Hi, thanks for letting me know. You can change the font in your browser and system, it will look a little different on everyones system.
Hopefully you were still able to follow the video version ok?
I have used this brush but was unaware of all its features. Thanks. Also I like the short tutorials of one skill.
The brush literally does not work for me! What am I missing?? I open Sky replacement and replace the sky, but I don’t totally like the edge (sky is showing through a hat and one side of a face that has bright highlight levels, but despite pressing alt while using the brush over this area, there is NO change whatsoever. Super annoying, because other than that, I got the sky just the way I wanted it.