
Newly updated ai selections and masks in Photoshop are amazing
One of the most important updates in Photoshop
Adobe has just updated the training and algorithm for Select subject and its huge. This ai selection tool is working much better than it had. Select subject has been with us for a while now, but the performance improvements are notable.
This feature was in beta, but is now in the current shipping build of Photoshop.
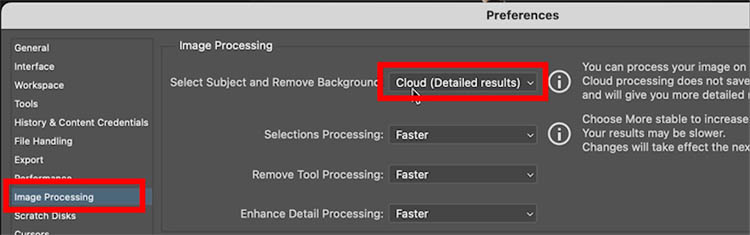
There is a setting that will make Both Select Subject and Remove background better.You will see a drop down menu that says Cloud or local. Cloud does a better job because it utilizes a server farm to compute, rather than your local CPU. If there is no internet connection, it will automatically default to local.

I suggest setting and forgetting. Go to Preferences and choose Image Processing. Set this to cloud.
To make the selection, you can choose the Object selection tool and click on Select Subject.
Alternatively, click Select Subject from the task bar.

You can see this work live on the video at the top as well as a few extra tips.
To test, we will simply make the initial selection. (Just making the selection isn’t the entire workflow.) We usually refine the selection as well, but for the sake of this test, we won’t refine yet. Makes it easy to see how good the initial selection is.
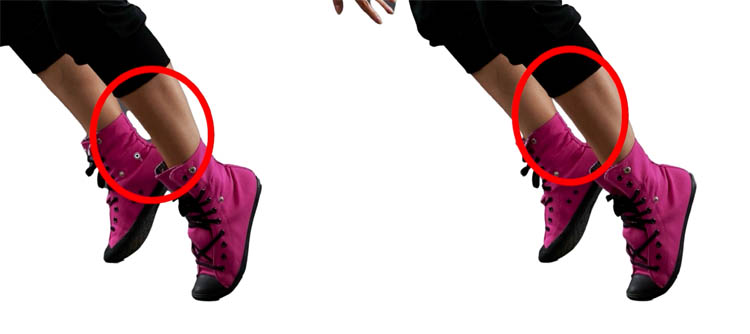
Test 1 selecting Person, with hair.

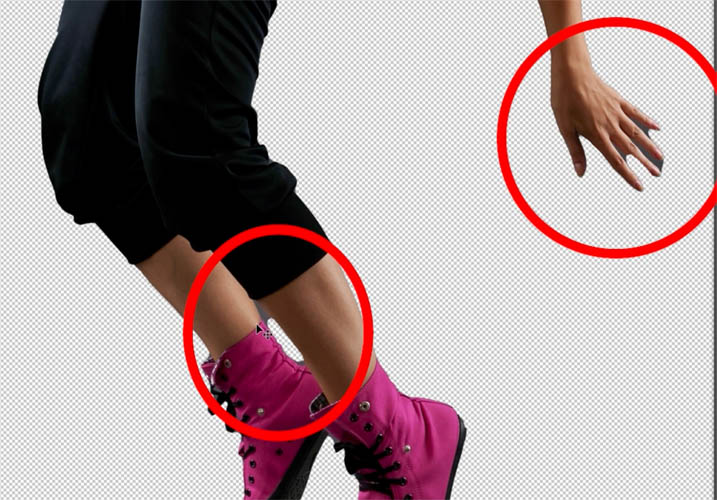
We start with the previous version of Photoshop.
make the selection and then pop it on a mask to view.
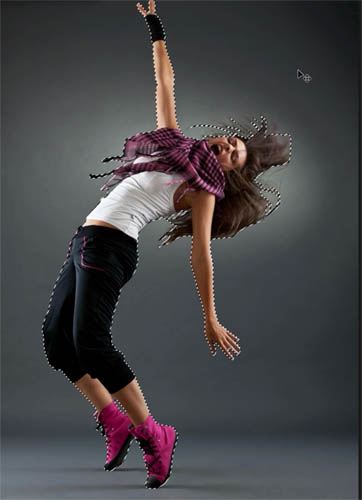
Notice the issues, like webbing on fingers and tight spaces.
When we test this on the current version of Photoshop., see how the webbing is gone and it gets into the gaps more tightly.
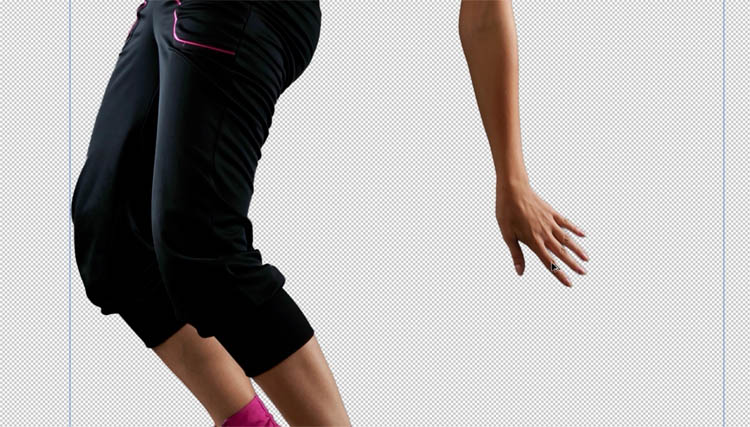

Also notice the hair is better.
Left (old version) Right (New version)

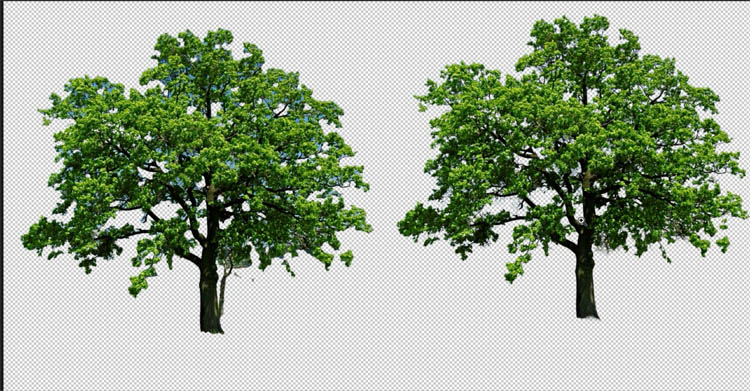
2nd example, lets cut out a tree
Challenge is getting into all those small spaces between the branches and leaves.

Left (old version) Right (New update)
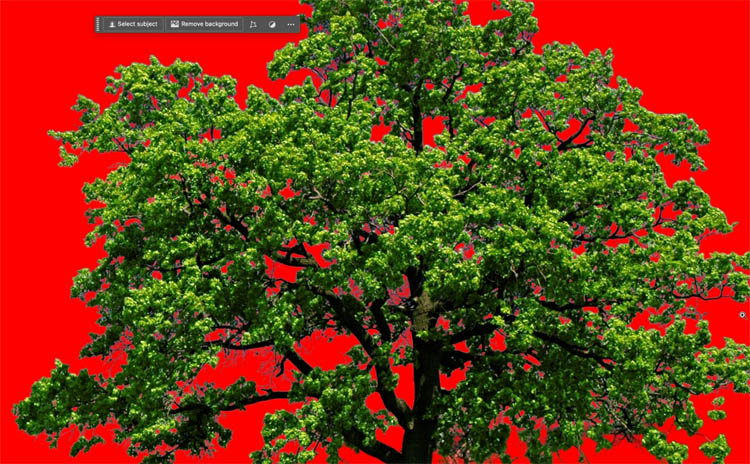
Close up of previous version on red.

Close up of new.
#3 Cutting out flat art and flattened vectors
This is where it really shines. (At the point, I haven’t seen anyone else test this type of subject).
Have you ever tried to extract flattened art, logos, kine art etc?

Left (prev version) Right (New update)

If I change the background to black, you can see thaere are almost no areas of white showing on the selection on the new one. It even gets the thin lines in the dragon wings.

Heres a close up.

Current version on red. You can see lots of pieces got missed.

On the new version, its almost prefect. Very impressive.

This tutorial is focusing on the quality of the edges and making a clear comparison with the new update. This is why I wasn’t using complex backgrounds.
Here is one with very difficult backgrounds.
Here are more resources on the latest Photoshop and Lightroom UPDATE.
7 Favorite new features in Photoshop 2025 April update
Auto Selections | Auto selections on difficult images
Ok there you have it.
Great to see you at the CAFE
Colin
PS Don’t forget to follow us on Social Media for more tips..
(I've been posting some fun Instagram and Facebook Stories lately)
You can get my free Layer Blending modes ebook along with dozens of exclusive Photoshop Goodies here


10 thoughts on “Newly updated ai selections and masks in Photoshop are amazing”
Leave a Reply

One of the most popular features here at photoshopcafe is the “Super Tutorials”.In Super Tutorial #3 This will be a...
How to use the new Features in Photoshop 2023 June v 24.6 release.

How to make selections in Photoshop tutorial, Power user tips for the selection tools in Photoshop. Selecting shapes in Photoshop


Wow! Just wow!
Wow, Colin this is truly a game changer! What a difference! Many thanks for showing us that. Aloha.
Hi
lately when I watch your Videos on you tube it gets synchronized to German, wich I dont really like, I am German speaking but my English is 100% and I dont like your A1 german where can I change the setting that your tutorials come in your native tongue, best Thomas
I was unaware of that, It’s something Youtube is doing. If you click the YouTube link it will take you to the YouTube play page. You should be able to change the language back to English.
Hi Colin, Yes the new Beta update of PS looks great for Selections. It might be worth breaking my rule of never installing a Beta version for production work. Incidentally your presentation on Virtual Summit – Creative – 2025 was terrific. Every time I listen to you I learn or re-learn PS. Thanks
Thanks so much! Happy to help
Incredible! Will always use the beta version, but how do you get direct access as seen in your video. I have both versions on my p.c?
I enjoy your tutorials
This is a welcomed improvement, when will it be in the regular version of photoshop? BTW, thanks for the video .
They are there now!