There are many ways to remove objects from pictures in Photoshop. We all know the Content Aware Fill, healing and spot brushes and the trusty clone stamp tool. All of these work by sampling the surrounding pixels. The new Remove brush, uses ai to generate pixels to fill the area, even if those areas don’t exist in the original image. This make it ideal to use for retouching. The Remove Tool doesn’t always get a perfect result, but it can get you most of the way where you can finish off the work with the traditional tools.
Remove tool is now out of beta and available in the current version of Photoshop
In the toolbar, choose the Remove tool.
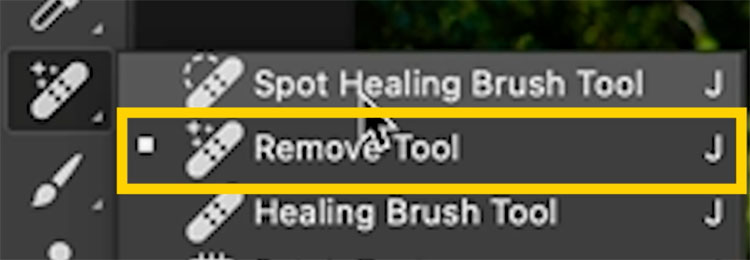
There are 2 options
Sample All layers: No matter what layer you are on, everything visible will be used. If this is off, only the contents of the active layer can be affected. (Ill explain more as we go on).
Remove after each stroke. If this is on, the tool will activate each time you lift your mouse. With it off, you can apply different strokes to different parts of the image and then press Enter of the check mark to apply the adjustment all at once.
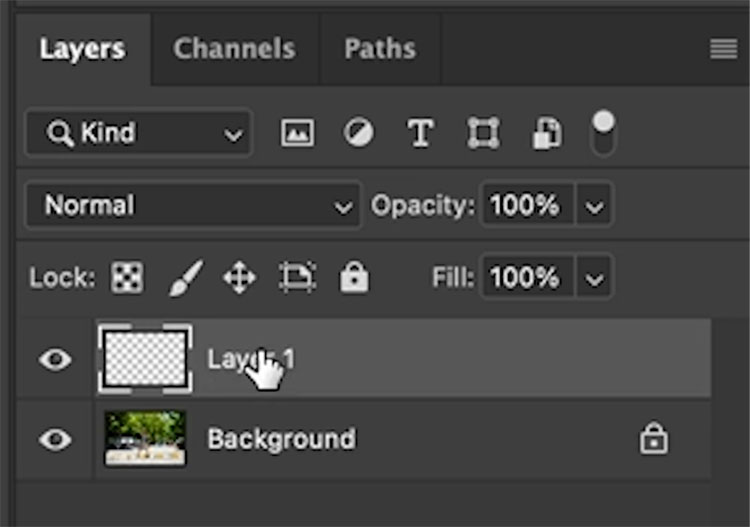
Turn on Sample all layers

Create a new layer

We will work on a new blank layer and it will work because Sample All Layers is on. This will enable us to work non destructively.
Turn off Remove after each stroke

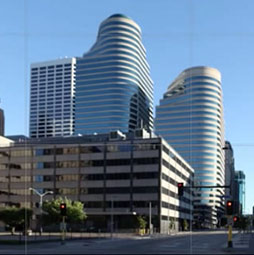
Paint over the object we want to remove. You would probably remove distractions and not the woman in this photo, but it will demonstrate how this tool works.
Change the brush size with the [ and ] keys. Paint over the area to remove, going just a little larger than the object.

Click the checkmark at the top, or press the Enter key on the keyboard.

The object will be removed.
There are still some artifacts and a shadow remaining.

The remove tool can also do the touch ups. Turn on Remove after each stroke.

Paint over the areas to remove.

This example is more of a real-world scenario, we will be removing objects and distractions.

Paint over each of the letters on the STOP.

Notice it does an almost perfect job of this one.

Paint over the pole in the stop sign.

Worked nicely, it even automatically recreated the manhole cover!
Paint over the stop sign

And here is is with everything removed easily. You can see the actual process of this on the video at the top.

Here is a picture of a classic car. 1963 Lincoln Continental.

You can see on the video as I remove the wheels and arches in a few simple brush strokes.

I think the Remove tool is going to really help retouchers save a lot of time. In some cases, it will be the only tool you need for certain tasks, and you can use it in combo with the other tools to get a perfect result every time.
I hope you enjoyed this week free Photoshop tutorial. Browse the website here for 100’s of free Photoshop tutorials. What makes PhotoshopCAFE unique is that most of the free tutorials contain BOTH written and video.
Great to see you here at the CAFE
Colin

This site uses Akismet to reduce spam. Learn how your comment data is processed.

Learn how to make the X-Men logo in Photoshop. You will learn both the 3D and 2D way. Convert any...

How to use Gradient Maps in Photoshop to instantly add a high-end color-grade to your photos. Free Photoshop tutorial. ...
The best way to blur the background of a photo in Photoshop, with no dark edges. ...


Hi Colin,
Many thanks for the detailed text and supporting images for this amazing Photoshop tool. Your workflow summary is excellent, as usual, and easy to follow.
All the best,
Jeff
I installed the beta version after seeing your video but I’d be most grateful if you show how to access it through LR classic. Thx.
Thank you. You teach even the oldies but goodies people how to work in Photoshop in a way that we can understand.
Wow! I tried this on a sign in front of a fluted column. The lines came out wonky, so I tried the tool again on the bent parts and it perfectly recreated the fluting of the column. A few more small corrections to shadows and artifacts worked perfectly. I will use this a lot!
After I installed Photoshop Beta , every time I use Lightroom classic and I want to jump into Photoshop 23 … I simply can’t because open the Beta version. How can I choose regular or beta? Because in Lightroom preferences I see only the regular Photoshop but never open when I have installed Photoshop Beta . Thank you in advance
You can change it in the latest version of Lightroom, look at my newest tutorial, I show you there
Thanks for a great video etc.
There is a fantastic development in AI for the moment – Hard to get along with
That’s why videos like yours are amazing