
How to Seamlessly Blend faces into background in Photoshop using new radial gradients
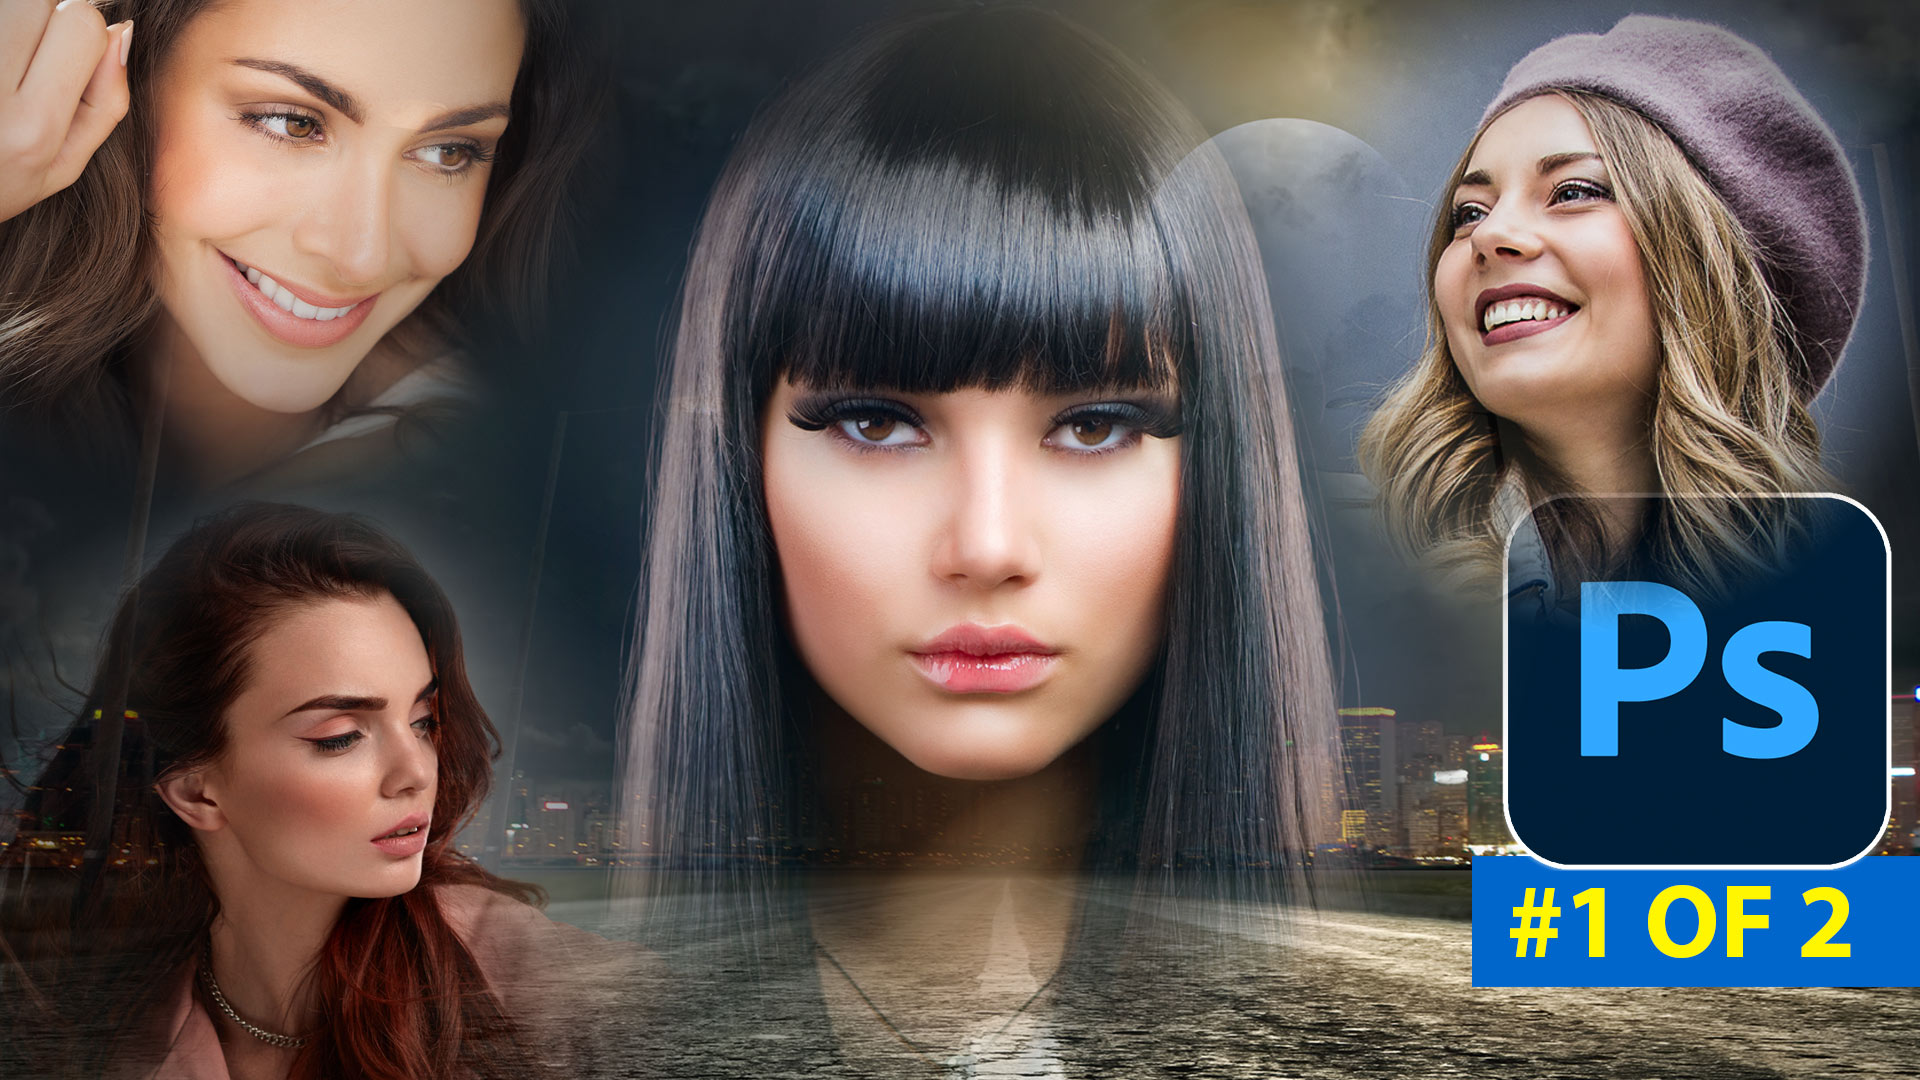
How to easily create the floating heads effect used on movie posters
We have all seen the floating heads effect on posters, magazine and album covers, you name it. We combine different pictures and seamlessly blend them into the background.
While experimenting with the updated gradients tool in Photoshop, it occurred to me, this might work well on faces and heads. So I tried it and immediately, I knew I had stumbled on the perfect use for this tool. I’m excited to share this discovery with you now.

The first thing we need to do, is get all the images into Photoshop, but in layers in a single document.
Choose File>Scripts>Load Files Into Stack
Click Browse and choose your images. Tip: If you have already opened the images in Photoshop, choose Add Open Files, and they will be stacked together.
Click ok


All the images will be added to layers in a single document.
Turn off the layers except the background by clicking the eyeballs in the Layers panel
One at a time, resize and position the images of the faces. Press Ctrl/Cmd+T for free transform. Drag to position. Drag the corners to resize.

We will do the following steps for each image.
Choose the layer and make it visible. (eye icon)
Click the new Layer mask to add a mask


Choose the Gradients tool (G Key)
Choose Radial and Foreground to transparent
Make sure the forgeround color is black,
Make sure REVERSE is checked it the top bar. Alternatively use a black to white gradient. (The Transparency option allows to use multiple gradients on 1 mask).

Making sure the mask is selected in the layer, not the image..
Drag out from the center. Notice it creates a beautiful vignette effect and blends the image into the background.

In the Properties panel, drag the center point under opacity control. This will change how the edges feather. (You should be able to do this with the diamond on the overlay, but that appears to be broken at this time).

If you want to do manual touchup on the mask it’s easy.
Grab a brush. Paint with black to hide areas and white to show them. Be strategic with the manual painting as you can easily ruin the smooth blend if you aren’t careful.

I hope you found this tutorial useful. I actually mad this a 2 part tutorial on the new Gradient tool. Check out the addition tutorial on making a rainbow to master some of the other features, as well as a killer tip I came up with.
Drop a comment and let me know if this was helpful.
Browse the other free photoshop tutorials here at the cafe
Download 100s of dollars worth of Photoshop adds on for free here at the Vault.

Also follow me on Instagram, Tik Tik, Threads and Twitter. for shorts and reels.
See you next time!
Colin
PS Don’t forget to follow us on Social Media for more tips.. (I've been posting some fun Instagram and Facebook Stories lately)
You can get my free Layer Blending modes ebook along with dozens of exclusive Photoshop Goodies here
25 thoughts on “How to Seamlessly Blend faces into background in Photoshop using new radial gradients”
Leave a Reply

Finally, real retouching is possible from within Lightroom. Join Colin Smith, as he shows you how to use the new...

How to generate 3D models using Firefly ai in free Adobe Substance 3D viewer. Generate images from the 3D models

Basic layer structure in Photohop and how they work. All the different features in the Layers panel explained. Layers are...


Colin,
This was great!! Thanks you.
Dennis
Thank you Colin, for all that you share with us. Your tutorials are very much appreciated.
That is amazing…. so happy I checked out this video! Thank you!
Wonderful tutorial! If you turned each of the layers into a smart object, would you be able to edit the gradients when you reopened the image after saving it?
You can re edit the gradients on anything except a mask
This is an excellent way of blending. Thank you for sharing.
Thank you Colin. Very cool effect and good use for the radial gradient.
I always enjoy your tutorials, Colin. This is a fun one and simple to do. Thanks so much!
great stuff as usual. really liked the bg image
You are a rock star Colin! thank you so much!
Very interesting and much appreciated!
I just had to take a moment to express my admiration for your incredible Photoshop Café tutorials. Your expertise and teaching style are simply outstanding! Thanks to your guidance, I’ve been able to elevate my digital art skills to a whole new level.
Thanks so much!
Colin, I think there is one step missing. In my PS desktop, I need to check “Reverse” in the gradient tool settings to make the radial gradient go from transparent in the center to black (foreground) as I pull out the circle so the edges are feathered.
That’s correct, I need to add it to the tutorial
Hi Colin, I enjoy your tutorials very much. Another Aussie making it in the USA
Wow! This is totally wicked! I so love your tutorials, Colin
Awesome stuff Colin, as is your usual teaching. I didn’t realize blending could be so easy. I’m just getting into compositing and this will make my life so much easier.
Easy to follow lesson, concise instructions and uses an example that shows the technique to very good effect. Thanks for sharing.
that really is a good one! thanks.
Thanks very much for this info Colin, I have only been discussing the difficulties I’ve found blending composites earlier this morning.
Blew me away with how easy it is to create a collage with family photos. Thank you.
Enjoyed this tutorial. Will start to practise immediately.
I am using photoshop 2025 and cannot make this work ! I have followed the video and followed step by step on the written instructions, I am obviously doing something wrong but god knows what, please try and help. It’s the gradient I cant get to work..
thanks
Make sure you gradient setting at the top is set to Gradient and not Classic Gradient