
Easily wrap art on clothing, new feature in Photoshop split warp
How to wrap anything in Photoshop with new features in split warp. Written steps and video tutorial.
Have you ever tried to wrap something on an image such as a T-shirt? And it’s very difficult to make it look like the artwork is really on the clothing. We have all seen ads, where the art was clearly photoshopped onto a t-shirt and look completely fake. This tutorial will show you how to make artwork fit clothing perfectly, or anything really.
Adobe dropped some new features last week inside Split Warp, to make it easier to wrap images around objects in photos in a very realistic way. Let’s look at that right now. Check out th quick video above and use these written steps as a quick reference.
Download image used here (Part of the Adobe Stock free collection).

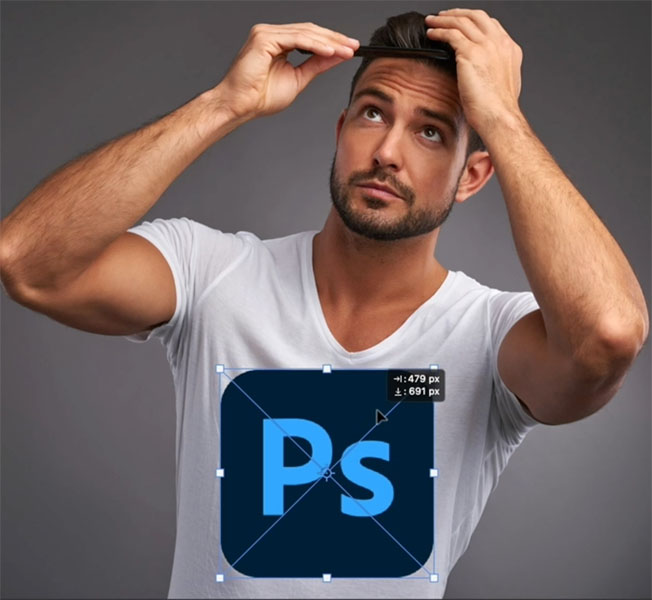
We will drop a Photoshop logo onto his shirt.
So let’s go into the Library. I’ve just got a Photoshop logo that I found online (you can easily google one, or use your own logo or design – thats the idea really.) Just drag in the logo from the library, or from a separate file using edit>place embedded.
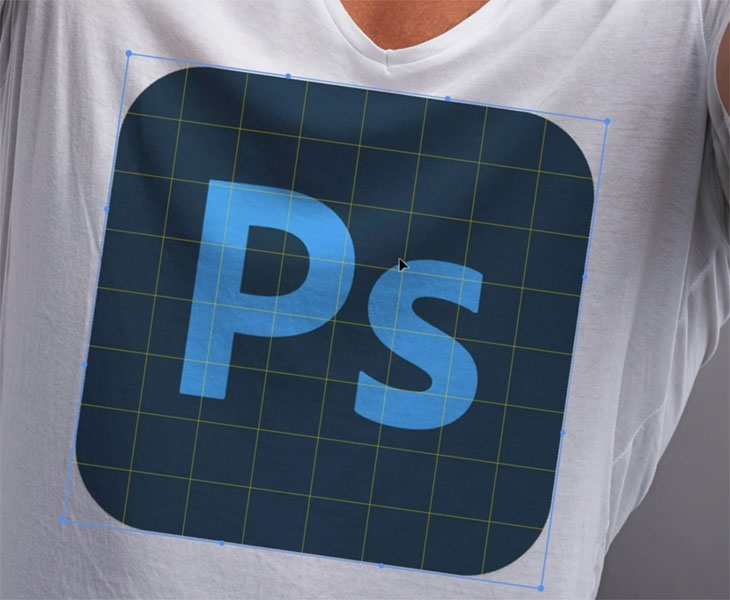
Scale and rotate the logo into a rough position and size.
Change the blending mode to Multiply.
Notice how it’s starting to blend in a little bit better and let’s take opacity down a little bit (85%). There we go.
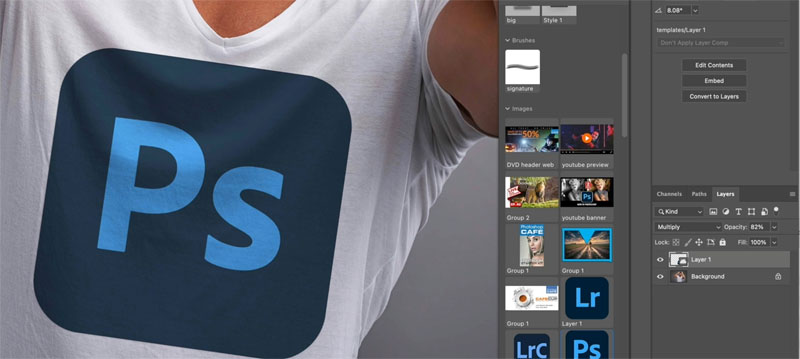
So here you can see some of the texture, but the Photoshop logo needs to warp to fit it.
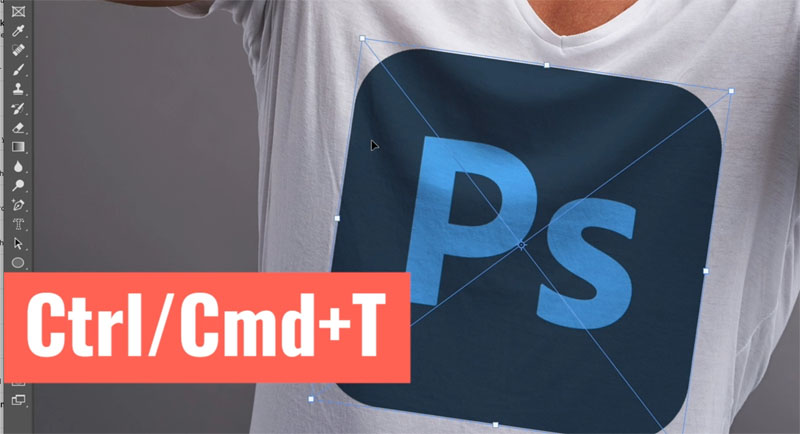
Now I’ve got other tutorials, on other tools such as displacement maps, Puppet warp and liquify. Each tool has its place. In this tutorial we are using warp.
Ctrl/Cmd+T brings up free transform.
Right click and choose Warp.
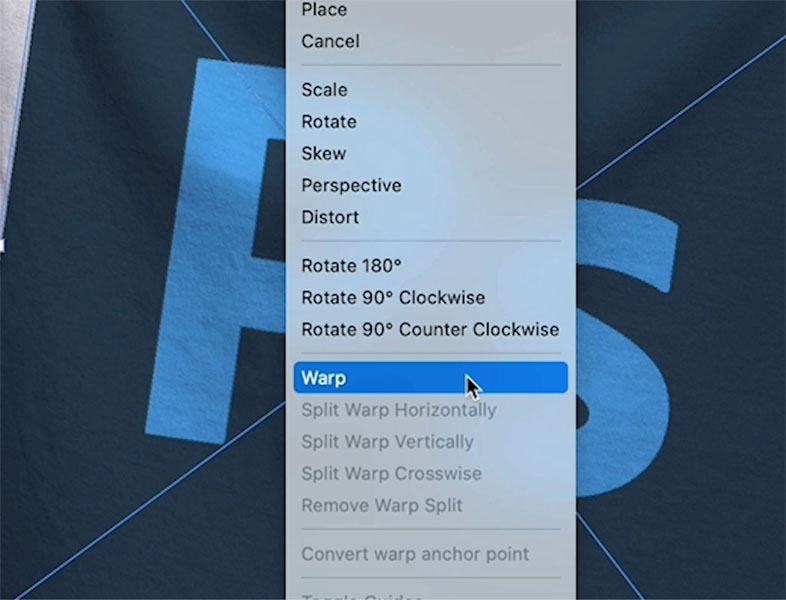
You should see a grid (maybe not till you start to warp, depending on your settings) . If you choose the gear icon at the top, you can also change the settings of the grid.
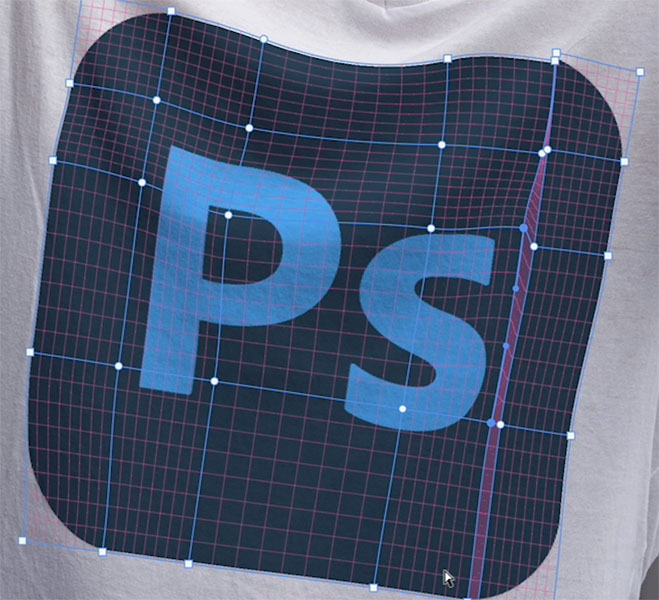
Drag the grid to shape it a little bit.
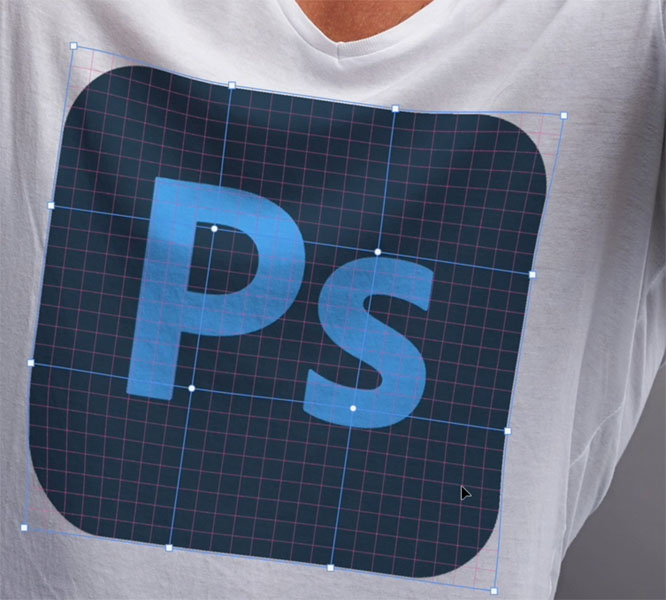
One of the things we can do is we can drag these points and we can move the individual points. You can grab these little handles to warp the shape.
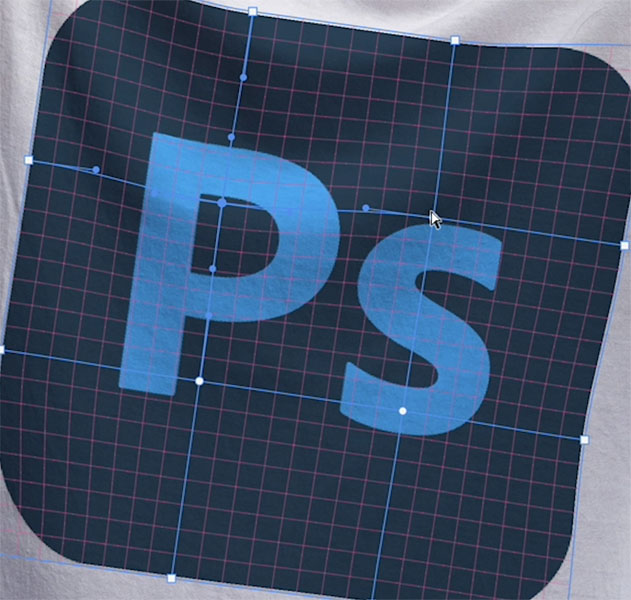
Drag a point, notice how the other side moves with it. It’s always been a problem.
One of the new features is if you hold down the Alt or the Option key and you click on the point, it separates the handles. And notice now we can just move that one side.
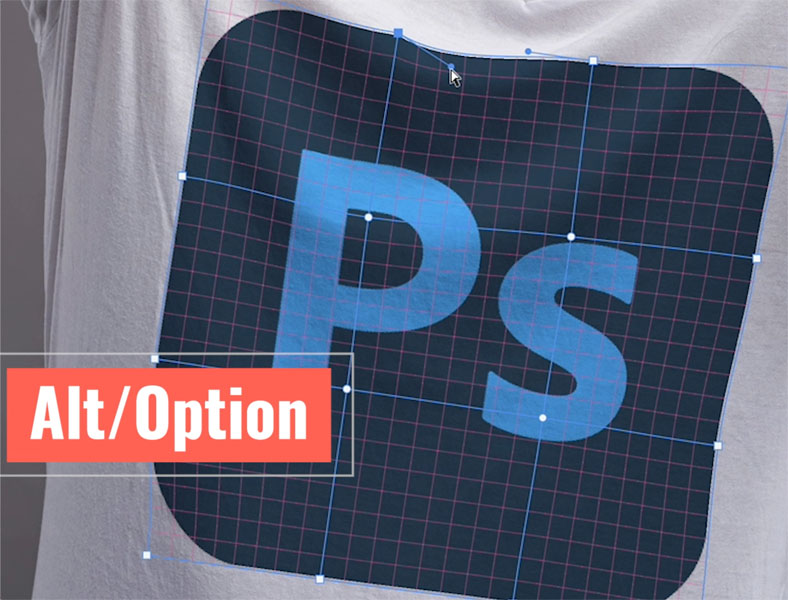
Alt/Option click on the point again, to toggle the way it works.
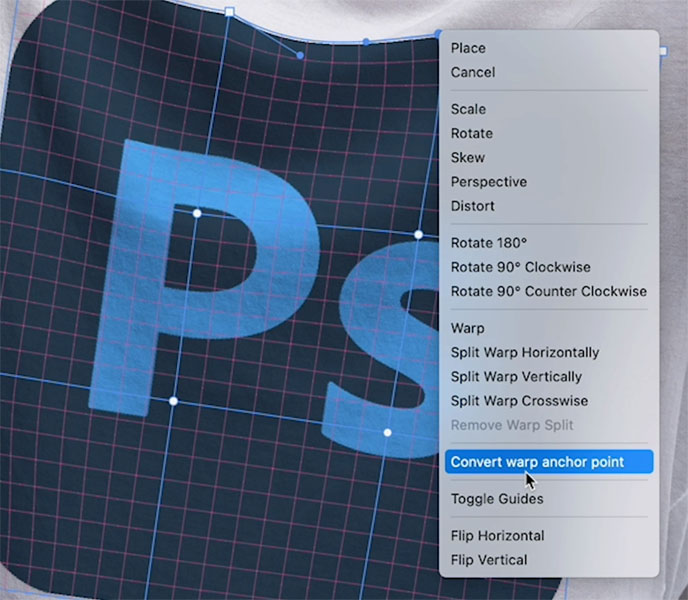
Alternatively, right click and choose Convert warp anchor point to do the same thing.
Now, if we want to split the grid, hold down the Control or Command key and just move over it. And notice that we can just create a new division when we click.
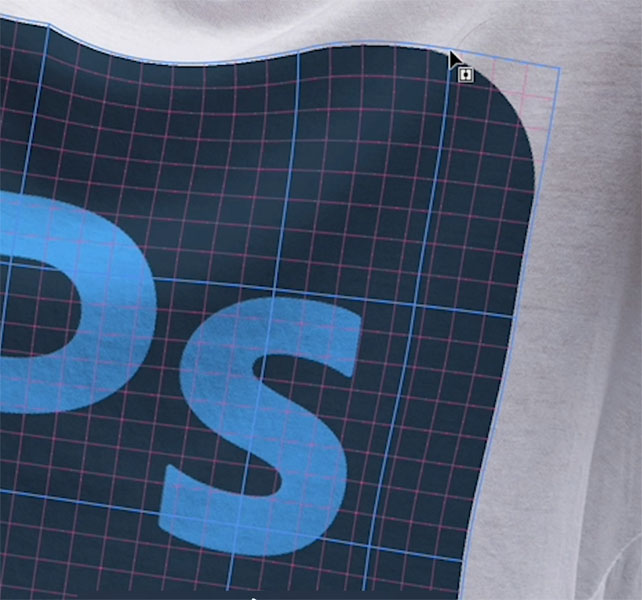
And why don’t we create another one close to it? And then tuck the other point underneath, and that’s going to give us a little bit of overlap.

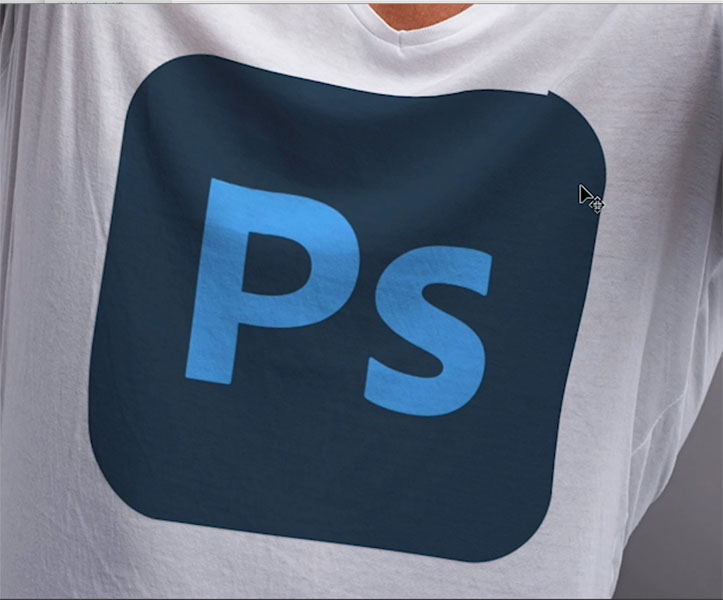
Let’s see how that’s looking. Just click on the background layer and we can see, okay, this is looking quite good.
I’ve got more things I want to do with this tool in future tutorials. Let me know if you’re interested in that, and let me know underneath in the comments if you find these new changes useful.
Colin Smith
PS Don’t forget to follow us on Social Media for more tips.. (I've been posting some fun Instagram and Facebook Stories lately)
You can get my free Layer Blending modes ebook along with dozens of exclusive Photoshop Goodies here


13 thoughts on “Easily wrap art on clothing, new feature in Photoshop split warp”
Leave a Reply

This tutorial is almost quick two in one. I'll show you how to create one of my favoriate effects on...

Differences between Flux Kontext Pro and Nana Banana in Photoshop, which is better?

This is how you get the 3D look using channels. By creating a bump map and transfering it to an...


I am using the latest version of Photoshop but am told this feature is not yet available. Any ideas?
Colin, Thx. This was very cool. I was able to split & Warp using various Grids with the ALT key (then clicking on points) on my Win (10) PC. It would be interesting for you to dive into warping some more for an LFL tutorial! Maybe as a compare & contrast with Depth Mapping. In the image I tested your techniques with the warping I added seemed to adapt to the lighting of my scene. Is that possible? Or, am I just moving the light/shadows around as part of the warp?
You are moving them around, it’s not that smart.. yet 🙂
Oops…I meant with Displacement Maps (not Depth Mapping…), but I couldn’t edit my previous post.
Thank you for this tutorial.
I would like more instruction with the Warp tool.
Hey Colin,
Good Tutorial! I’ll have to try it out. Question, how would you go about taking a wrapped photo and straighten it out. I have a coffee cup with a bunch of Disney Characters on it and I wanted to straighten it out. I took several photos going around the cup and then tried to merge them. Didn’t work as I thought … any ideas? Or is it impossible to do?
Dennis
Use the same method and also liquify, but it’s VERY hard to do.
Thanks Colin – yes, absolutely interested in that tool. It’s always great to be able to place a logo or item onto another item and have it look realistic. Love to hear your other tips and tricks, thanks again.
Very good tutorial. I’ll try it today
Hi Colin
I have an arm and a fist, I would love to learn how to snap tree bark to the arm and hand to mark it look as if it is popping out of the earth in a desert.
Happy to let you have my image if you need it. And the image I am working on, thats not working lol
Arlene
Super useful. Many thanks. Would love to see it used in a composite scene.
@ Dennis Zito
Have you tried to use the panorama technique with a lot of photos of the mug. Each frame should be taken very carefully after a slight rotation of the mug ( no more than 10 or 15°) and cropped to keep only the narrow vertical center of the frame. And then from within Lr calling the PhotoMerge/Panorama tool with the cylindrical parameter. Please keep us informed if it works (I’ve just imagined the workflow…and I’ll try)
Just getting back into using PhotoShop and your tutorials are making thetrasition so much easier, thanks Colin.