
How to Animate in Photoshop, Video animation
How to animate in Photoshop
In this tutorial, you are going to learn how to make a video animation in Photoshop.
We are going to make a jet fly across the screen.
There are 2 types of animation, frame based and video based. In this tutorial we will be doing video based. You don’t need a video to make the animation, but we will save it as a video.
This is the beginning file. It contains 3 layers. A background, a jet and the flame for the afterburner, called exhaust.
We are going to animate the jet from the top of the screen to the bottom. We want to turn off the afterburner, then 1/2 way through, we will turn on the afterburner and the jet will speed up. This challenge should be enough for you to learn a lot of the animation tools in Photoshop.
If you need more preceise details on any of the steps, please watch the video. You should watch it anyway to see the animation.

Step 1.
Open the timeline Window>Timeline
Drag the layers to make them longer, we are dragging them out to the 5 second mark.

Step 2.
With both the Jet and exhaust layers selected, drag to the top of the screen and just off the screen as the starting point for the animation.

Step 3.
Select the jet layer. We will animate this first.

Keyframes are how Photoshop does animations. a/ You set the first keyframe. b/ Move the playhead to a different point in time. c/ Change the object on screen. Photoshop will animate the changes over time, lets see…
Step 4. Using keyframes
Click the arrow to reveal the keyframes
Click on the stopwatch by Position to set the start point for the jet

Step 5.
Move the playhead to the end of the timeline. This is where you want the animation to end.

Step 6.
Drag the jet to the ending position.

A keyframe will be generated at the playhead at the end of the timeline.

Step 7.
Press the spacebar of the play button in the timeline to preview the animation. The jet should be moving at a constant speed.

Step 8.
We want to also animate the flame behind the jet.
Move the playhead to the start position.
Choose the exhaust layer and click on the stopwatch for position.

Step 9.
Move the playhead to the end of the timeline.

Step 10.
Drag the exhaust into position.

Play it back and now the jet and the flame should be moving together,


Step 11. Changing the speed of animations in Photoshop
Now we are going to change the speed. We want the jet to start off slowly and then speed up at the end.
Move the playhead to the middle of the timeline (around 2.5 seconds).
Click on the diamond between the 2 arrows to the left of the position stopwatch, this adds a keyframe

Step 12
Click on the exhaust layer
Click the diamond to add a keyframe on the exhaust layer

Step 13
Click one of the keyframes to select it.
Hold down shift and click the second keyframe to also select it.

Step 14
Drag the keyframe to the right. They will both move together because they are both selected.

If you playback now, the jet will move slowly, when it hits the second keyframe it will speed up. (It’s explained on the video why it does this)

Step 15.
Now, we want the flame to only appear when the jet speeds up, as the afterburner kicks in.
Move the playhead back a single frame.

Step 16
In the exhaust layer, turn on the stopwatch for opacity

Step 17.
Turn the opacity to 0 on the exhaust layer

Step 18
Move the keyframe forward 1 frame.

Step 19
Set the opacity to 100

Now the flame will be hidden at the beginning of the animation

When it reaches the keyframes and the jet accelerates, the flame will turn on.

Step 20. Adding a moving shadow
Now we need to add a shadow for realism and depth.
Choose the jet layer
Click the add a layer style button and choose drop shadow

Step 21
Add the setting as shown here

The shadow will move with the jet
Step 22. Changing the shadow over time
Let’s change the shadow so that it looks like the jet is climbing when the afterburner is on.
Move the playhead forward to when the afterburner comes on. (where the speed changes)
On the jet layer, click the stopwatch to add a keyframe for style.

Step 23
Move the playhead forward a little bit.

Step 24
Double click the drop shadow effects to open the effects.
Change the settings as shown here. Make the shadow softer and more transparent. Drag the shadow further away from the jet. (This makes it look like its getting further away.)
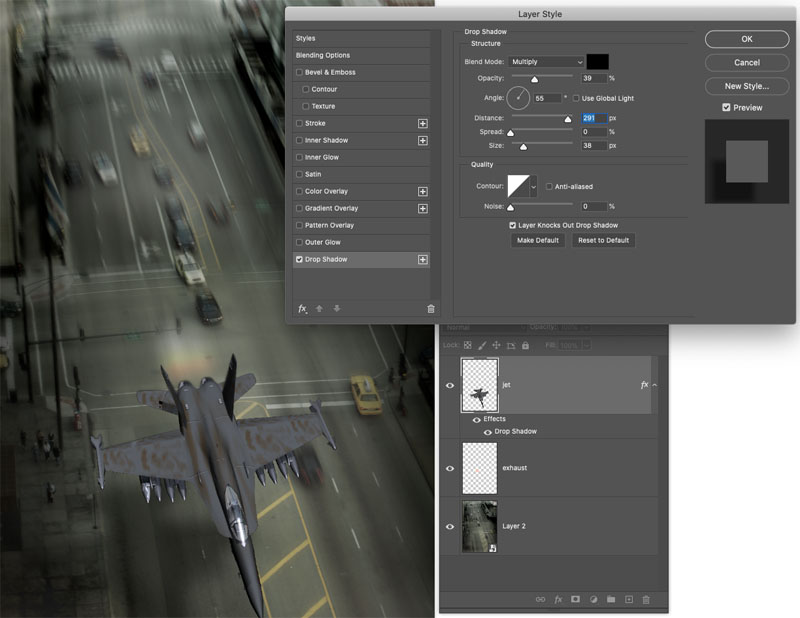
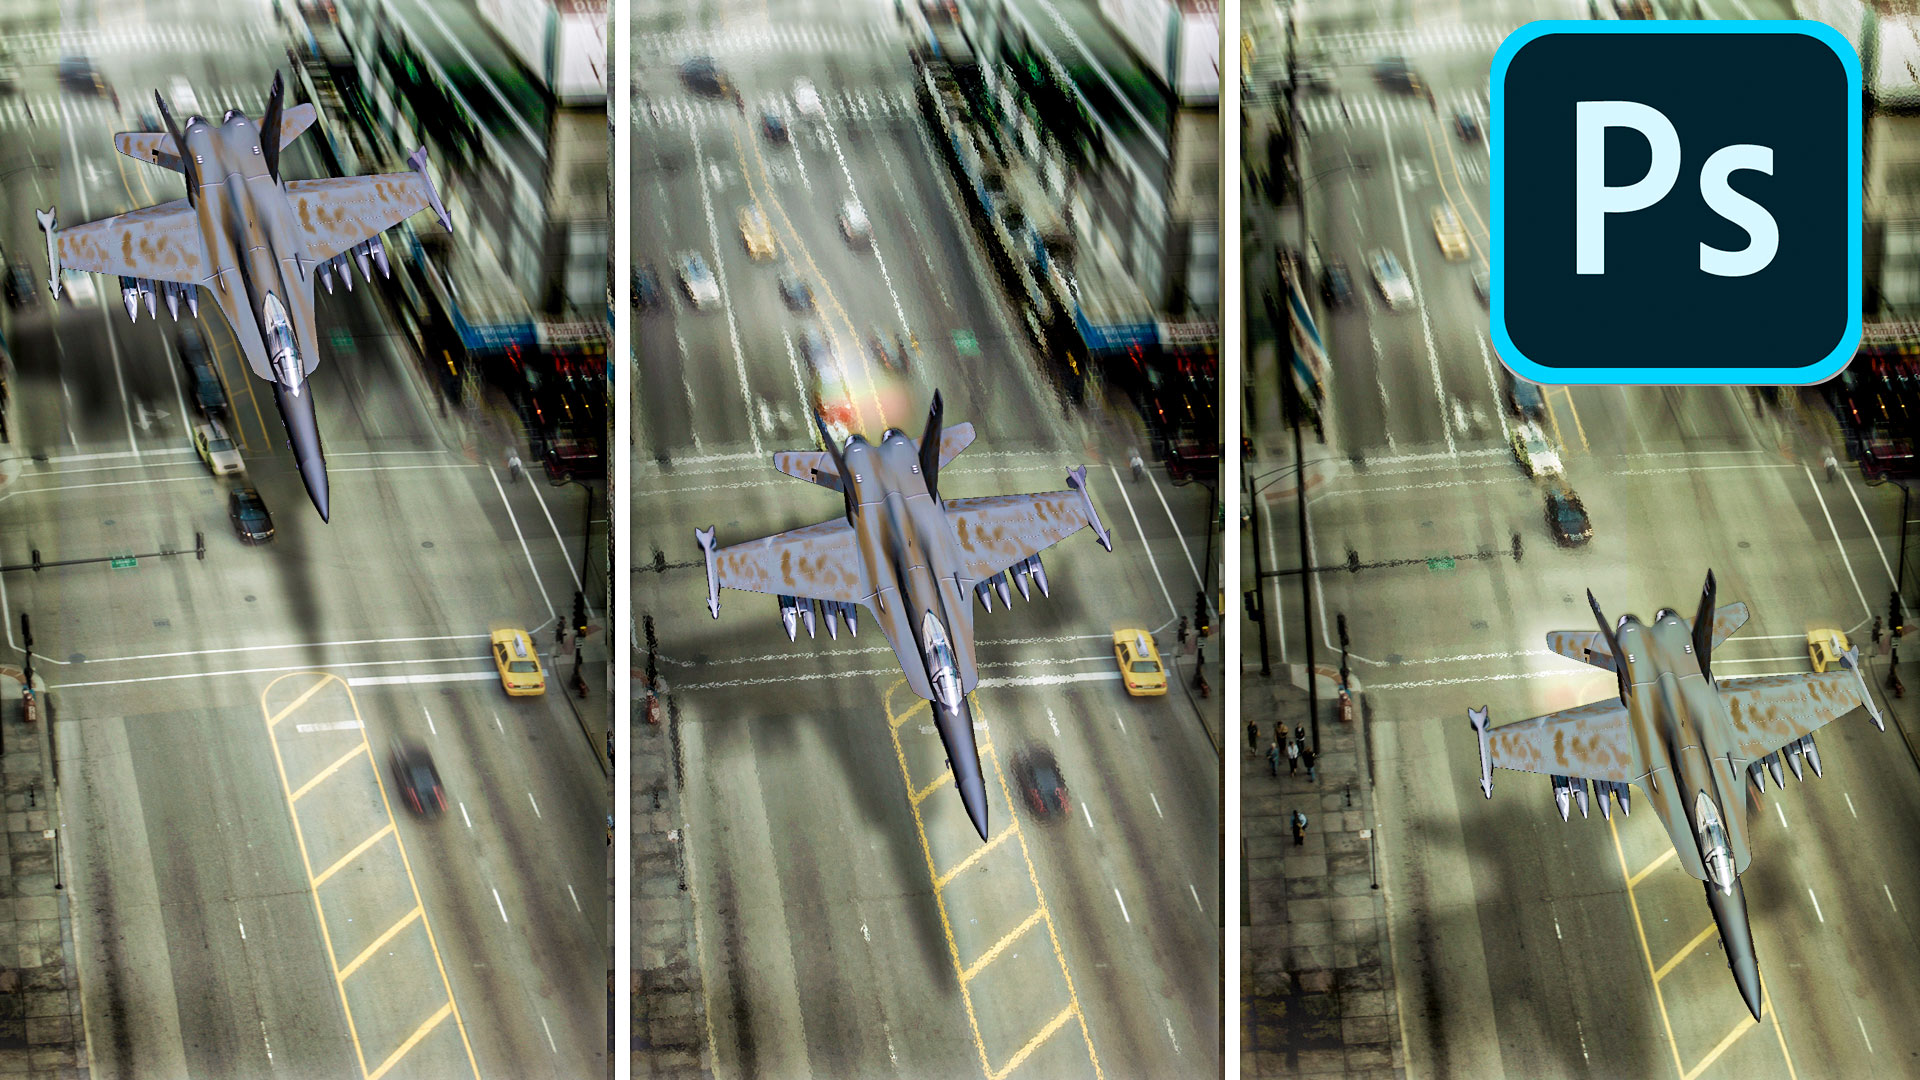
Now when you play it back, the yet will move and the shadow will change over time
This makes it look like the jet is climbing. A little bit can go a long way with animation.

RENDERING THE VIDEO
Now we have made the animation, we need to export it, so we can use it.
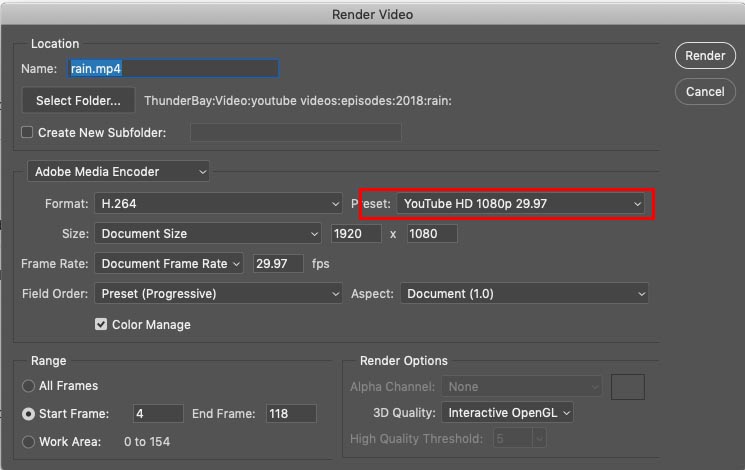
Choose Export>Render Video.
Give it a name
Choose the location to save the video
choose the presets and select the best one for your video. Here i used youtube 1080 for a letter boxed version that will fit a HD video
I have more Photoshop animation tutorials here
- Make Animated Rain
- Edit video in Photoshop
- Make Animated snow in Photoshop
- Make an animated cartoon Cinemagraph
- Make a Cinemagraph gif
- Make Animated Star Wars Intro
If you want to learn more about animation and working with video in Photoshop, check out the 2 premium courses I have. (They both work on CS6/CC 2025+)
PS Don’t forget to follow us on Social Media for more tips.. (I've been posting some fun Instagram and Facebook Stories lately)
You can get my free Layer Blending modes ebook along with dozens of exclusive Photoshop Goodies here

8 thoughts on “How to Animate in Photoshop, Video animation”
Leave a Reply

Here is another tutorial that has come about by a request from the forum. This is how you wrap something...
redesigned Generative Fill in Photoshop adds 5 new features. Visualize filling a room with real furniture without breaking a sweat.

Photoshop CC 2017 has a search tool, templates, updated face aware liquify, refined select and mask, a new, new workspace...







It’s awesome, I am trying to follow your video tutorials. Thanks for your nice post.
This is superb, thanks. Perfect timing too, it’s on my to do list (soon to be was on my to do list). Stay well, stay safe.
How does Photoshop animation compare with After Effects ? & does it work well with when files are imported from other Adobe products ? Looking forward to more tutorials on this. Thanks
Colin, thanks for the tutorial. I have created some short animated videos indeed, thanks to your training videos in how to animate in photoshop. But new tricks really help enormously. I appreciate what you do. Keep up the great work and stay safe out here.
Great video, and very well explained. I didn’t know Photo Shop could do this. More learning
Hi Colin,
You are such a SMART ALICK, I really enjoy your tut’s, learnt so much, 10 Q!
When I drag the object to where I want it to finish, the second keyframe does NOT appear. Why would this happen? I have followed very step, anything I may be missing? Thanks
is the stopwatch on?