
Welcome to the PhotoshopCAFE Photoshop CS4 Learning site
Photoshop CS4
Exclusive Interview with John Nack – Principle Product Manager: Photoshop.
I was recently at Adobe Headquarters and managed to catch John Nack for an interview. John is the principle Product manager for Photoshop. John was kind enough to take a few minutes out of his busy day (Actually he gave me about an hour). Thanks John!
Photoshop CS4 new feature overview
When you launch Photoshop CS4 for the very first time, something is totally in your face. Yes, it sports a brand new interface. Over at Adobe, they have decided it’s time for Photoshop to be easier to use and make the tools you need within reach.
The windows version is now running in 64 bit mode (allows access to more then 3Gig RAM). The Mac version is still in 32 bit. The reason it’s not 64 on Mac? At the last moment Apple pulled Carbon 64 support. It would require a complete rebuild in Cocoa for Mac to be in 64 bit which according to my sources Adobe is working on for the future. Don’t be alarmed by this, there are not that many users that are working on images so large they need more than 3 gigs of ram anyway. Both Mac and Windows versions are making use of the video cards’ GPU , this takes some of the strain of the CPU and makes for really speedy graphics and more, while freeing up the CPU to work on other tasks..
Performance improvements
The new view features are really great. Be warned that if you don’t have a video card with GPU (Graphics Processing Unit) you won’t have access to them. An easy way to tell is to look at the lower right corner of your document. If you see a drop shadow, you are good to go otherwise you are almost out of luck. Yes, there is hope, you can get a video card and add it to  your machine.The best brand I can recommend are NVIDIA, they make cards that start out very cheap, all the way up to the high end cards that cost a few thousand dollars, for those who have a lot of heavy lifting to do. If you skimped and got integrated video, you won’t have GPU. You can add a card event to a machine with integrated graphics; this is the cheapest way to get speed improvements from your machine. See the article on GPU later in this guide.

Go to Preferences and choose Performance. You will see an option to use Open GL. Turn it on to enable the new features, if it’s grayed out, then you don’t have a supported GPU.
If you have more than 256 MB of Vram (Video Ram) you can take advantage of an accelerator called blitpipe.
The first thing you’ll notice is the way documents are viewed. You no longer have to zoom into 25%, 50% etc to get an accurate view. Everything looks great at any magnification; this is a long awaited improvement. As you zoom in or out, you will see this nice animation as the document zooms, this prevents you getting lost in you document.
When you zoom in, give the document a little nudge and release your button, notice it glides a little bit, just like “throwing” the document. This is called “flick pan”. If you don’t like this behavior, you can turn it off in prefs. (See the website for a video on the GPU features as you can’t experience these with still images: www.photoshopcafe.com/cs4).
Once you are zoomed in past 500% you will see a little grid that separates the pixels. This helps achieve pixel accurate editing. You can also zoom into 3200%.
Birds eye view
When you are zoomed into the image and want to move around, press and hold the H key. Click with your mouse and you will zoom out. Reposition the viewing rectangle and it will zoom back in to the new location. This is a super fast way to get around your document. It’s called Birds Eye view and is amazing fast.
The document views are very fast and responsive. This is so much better than waiting as your document is redrawn line by line! This is especially good for large images and panoramas, since only the viewing information needed is loaded into the video ram.
Another GPU improvement is the rotating canvas. Hold the R key and drag. You will see a compass and the whole canvas rotates for your convenience. This is useful for freehand painters using graphics tablets. The rotated canvas enables you to draw with the natural arc of your hand, just like you would spin a piece of paper around as you’re drawing on it. The rotation doesn’t affect the filters or anything, its not changing pixels; it’s only for convenience. For example if your page was rotated 30 degrees and you add a 90 degree motion blur, it would be 90 degrees in reference to the page.
Brush Improvements
I think by now you’re starting to see the improvements that GPU processing in CS4 gives you. On top of that we get a new brush engine, which is faster and smoother, especially when working with a graphics tablet. You will also notice a new brush preview, and wait for it, a new way to resize brushes by dragging in the doc. On the Mac hold down Control+Alt (Windows Alt+Right click) click and drag and you will see the brush tip change size. Drag to the left or right to change the size. Choose Control+Alt+Cmd (Ctrl + Shift on Windows) to change the softness.
32bit tone-mapping in HDR
Tonemapping in HDR also gets a boost from the GPU and makes for smooth and speedy adjustments in the exposure adjustment. Sadly, there are no other improvements with HDR tone mapping.
You also get speed improvements with video playback and 3D features using GPU.
Interface
On the Mac there is an optional new application window. This enables users to float the entire application. This now allows users to drag the entire Photoshop application to a second monitor or to use the program without the desktop showing through.
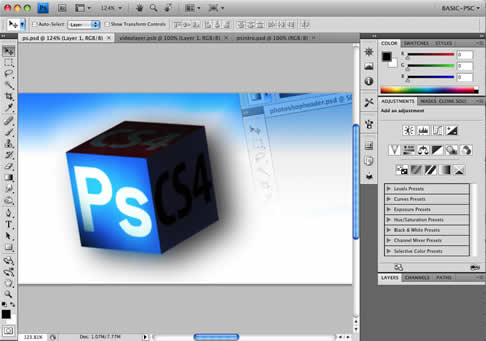
Tabbed Documents
Borrowed from apps such as Flash, Photoshop now has tabbed document windows. This allows you to manage your working space without document windows spread everywhere. There are options in the new Application Bar which allow you to tile the windows in different ways, or to float them just like in previous versions of Photoshop.
New Panels
Palettes are now called panels across the suite, not just in Photoshop. You’ll see some inspiration from Lightroom in this release. All the panels have been redesigned and there is the addition of a couple of new ones; Adjustments and Masks panels. Don’t worry though; most of the panel behavior is the same as CS3.
Adjustments panel
One of the biggest changes in CS4 is the addition of the Adjustments Panel.Adobe is using the modular concept from Lightroom. Instead of opening a bunch of dialog boxes, you can now work with adjustments from a centralized panel. This means all of Photoshop’s functionality is available while making image adjustments.

This is way easier and faster than before. A few users are yet to discover adjustment layers, now’s your chance to switch. The beauty of this is that all the image editing is non-destructive. Shadow/Highlights and Variations still need to be applied as smart filters, but there is an addition of the new Vibrance adjustment. Vibrance made its debut in Lightroom. Sadly, the clarity slider didn’t make its way across. (These are accessible from Camera raw which also works on jpg and tiff images – launched from Bridge). To make an adjustment, simply choose the desired tool from the adjustments panel or use the option at the bottom of the layers panel like before. The difference is that a dialog box doesn’t open. You can make all the changes with sliders right in the panel. There are also options in the panel such as clipping to a single layer.
The Adjustments panel allows you to select an adjustment. Once selected, its options take over the Adjustments panel so you can adjust without opening any dialog boxes. When done, click the left facing arrow, to return to all adjustments. Adjustment layers are added to the laters palette just like in the past.
A really useful addition to the Adjustments panel is the ability to easily save and use presets. Sure you could save your settings in the past, but it was so obscure it wasn’t really useful. All that has changes, it’s now really easy to create and apply presets.
TIP:Typically an adjustment layer will affect the entire layer stack. At the bottom right of the panel is an option, which affects only a single layer. It does this by adding the adjustment as a clipping group to the layer directly beneath it. This even works on masks, so get your creative thinking caps on!
Masks Panel

One of the most useful tools when working in layers is masks. This allows you to hide or show a layers’ content with a brush. Masks are essential for any retouching, compositing or collaging. Much of the functionality of masks has been moved to a single location in an easy to use masks panel.
Pixel Masks and Vector Masks are both living in this new home. Two major features have been added. Mask Density and Feather. Density is a fancy name for an opacity slider for masks. In the past, more advanced Photoshop users used levels or brightness adjustments on masks to change they way the work on a layer. By deducing the density of the mask, you allow some of the masked out portions to come back in a controlled way. This is great for making those creative little tweaks. For example you want to reduce the effect of a masked layer rather than remove it, just dial back the density and away you go.
The feather option is a great way to blur a mask non-destructively. In the past we applied a blur to the mask to soften the edges of a selection for example. If we changed our minds later, we had to recreate the mask. With the feather options, masks can be blurred and we can change our minds or experiment with them later. As an added bonus, the feather now allows us to apply a soft edged selection to vector masks.
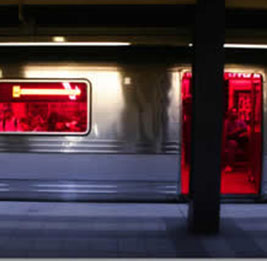
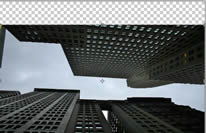
The Masks panel: A basic mask created to show the red layer through the windows and door.
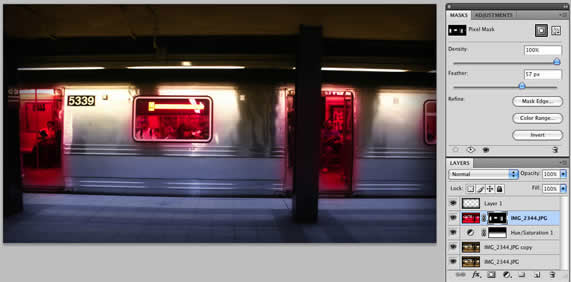
The feather turned up, adds a soft edge to the mask.
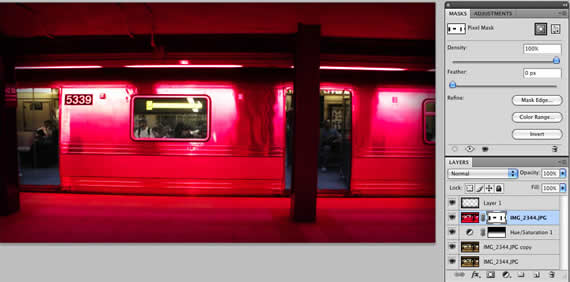
The invert buttom has been pressed. This inverts the mask and now everything else is red.

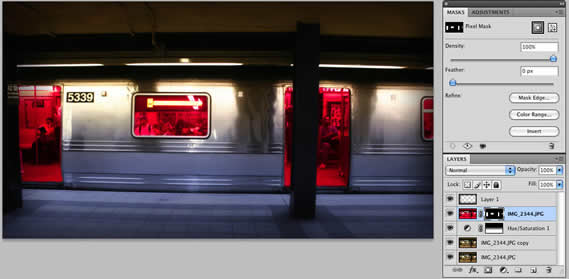
Masks density turned down. This lowers the opacity of the mask.
Click and Drag
In Photoshop CS3, a new behavior was added to the black and white adjustment (If you didn’t know, now you do). You can click and drag on an image to adjust the underlying tones. This Lightroom inspired feature is now in the Hue Saturation and curves adjustments. Click the little icon and drag on the image to make color and tone adjustments, that’s slick!
Clone Stamp preview
The Clone Stamp tool has enjoyed a little bit of a tweak. If you have ever seen the brush previews in Vanishing point, you will have noticed that the brush tip shows what it’s going to paint. This is called a clipped preview. We now have the clipped preview on the Clone Stamp; this allows us once and for all, to perfectly align things while cloning. All the usual comforts such as size and opacity controls are included.
Spring loaded keys
Here is a tiny, but useful change. Something called Spring Loaded keys. How many times have you been using a tool and need to temporarily switch to a different tool? Rather than tapping a keyboard shortcut for the tool, hold the key, use the tool, then release the key and you go back to the previous tool. For example, you’re working with the brush tool and need to make a quick selection. Hold the M key, make the selection, release the key and continue painting around the new selection. Now is a good time to learn all the tool shortcuts!
Auto align
When using the Auto-align tool you’ll find some minor tweaks. The first is an automatic fisheye correction. Photoshop will read the metadata and if it finds a supported lens, it will compensate for it while building seamless panoramas.
Here are the currently supported lenses.
- Canon 15mm Fisheye
- Sigma 15mm Fisheye for Nikon and Canon
- Sigma 4.5 mm Fisheye for Nikon and Canon
- Sigma 8 mm Fisheye for Nikon and Canon
- Nikon 10.5 mm Fisheye
- Nikon 16 mm Fisheye
These lenses should be supported with all Canon and Nikon DSLRs.
Vignette correction
When making panoramas you can also compensate for lens vignette (less light makes it to the edge of the lens, therefore the edges of the image are darker). This makes the panoramas more seamless without dark edges on each photograph.
Color Range
One of my favorite tools for making selection is Color Range. I always had problems with it being too greedy and grabbing colors from all over the image. It now has a new spatial tolerance with Multiple color clusters. What? Ok, in English: Color range has always selected by the how close the colors are from each other. Now it can be constrained to physical distance too, so you don’t have to select a color all over the image, just within a certain distance that you choose with the new Range slider which appears when you turn on the Localized Color Clusters option.
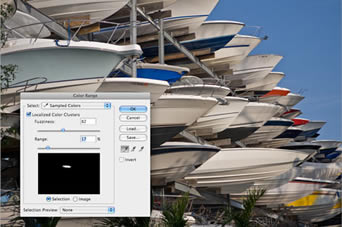

Color Range used to select the blue boat in the photo.

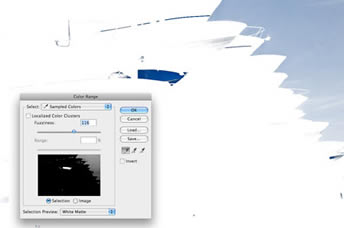
The traditional way
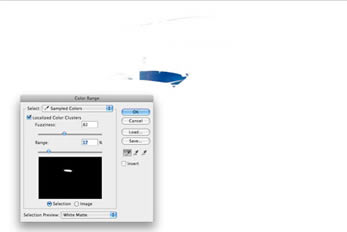

With the Localized Color Clusters turned on
Retouch tools
The Sponge tool has the addition of the vibrance control as an alternative option from saturation. Vibrance first found its way into the Adobe world through Lightroom. It’s now in Camera Raw and as an Adjustment layer. Vibrance works like saturation except if avoids clipping colors. When a color is dull it gets adjusted more than an already bright color, quite nifty really. The Dodge and Burn tools have also been tamed a little and are a lot more usable than they were in the past. They now affect just the tone without messing with the colors.
Content aware scale
Probably the sexiest looking feature in Photoshop CS4 is the Content aware scale. When you transform an image vertically or horizontally, usually it ends up with a squashed looking distorted image. When you turn on Content Aware Scale, it looks for the most important parts of the image and maintains their shape while squishing everything else. It looks just like a magic trick! If Photoshop can’t figure out the important parts of the image, you can paint on a channel to tell it. There is also a protect skin tones button, which prevents skin toned people from getting distorted.


Gestures on Mac!
I had to try it for myself to believe it! Yes! For those of you who have a newer MacBook pro, be happy. Those little pinch to scale gestures (ala iPhone) now work in Photoshop. That’s just so cool! So cool in fact, it works in Bridge too! You can also scroll and rotate with the use of 2 fingers.
Flash panels
 Adobe had now allowed us to create our own panels in Flash and bring them into Photoshop. If you have Flash skills and can build a swf, you can make a panel. There is even a Configuration widget that will be added in Adobe Labs, this will allow you to make your own panels. You can add buttons, commands, movies and more. Check out the free custom panels that we have on PhotoshopCAFE for your convenience! Just drop them into your Panels folder and open them from Window>Extensions.
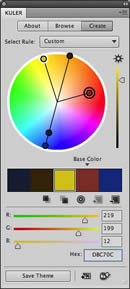
Photoshop CS4 comes with 2 panels. Kuler (pr- cooler) and services (Or connections). Kuler is a color widget. It helps you choose and match color combinations. Its part of the Adobe Kuler community, where you can create and share color palettes.
Kuler: Kuler was in Illustrator CS3 and now also in Flash.
Adobes definition of Kuler: With Kuler, you can easily generate color themes that can inspire any project. Whether you’re creating web sites, in¬terior designs, scrapbooks, fabric patterns, graphic identities, or any other piece of visual communication, you can ex¬periment quickly with color variations. You can also fast search by tag word, title, creator, or hex color value through thousands of themes created by the Kuler community.
Connections: The Connections panel helps you manage all your Adobe accounts. It can log you into Adobe.com services (Kuler and ConnectNow) as well as check for updates and new panels.
Extra panels
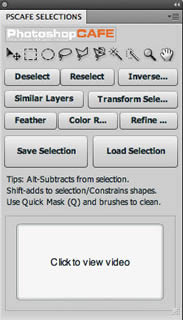 I have created a selections panel, which includes all the common selection tools, commands, tips and even a little video to help you work more efficiently with selections. Keep coming back for more, as I will be adding more free panels for your use. Also look for the PhotoshopCAFE TV Widget coming soon.
(Note, this is a thing of the past and no longer exists)
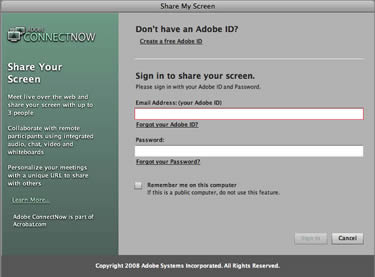
Connect- now
Connect Now: File>Share My Screen, allows you to share your screen with up to 3 people. This free service allows for amazing collaboration, just like being in the same room.
Annotations
The little notes have been improved. You now have a panel for displaying their contents. Much easier to work with, plus you can now export the contents as a text document. Audio annotations are gone. Yes, they had audio annotation, see; no one used them, that’s why they are gone.
5 thoughts on “Welcome to the PhotoshopCAFE Photoshop CS4 Learning site”
Leave a Reply
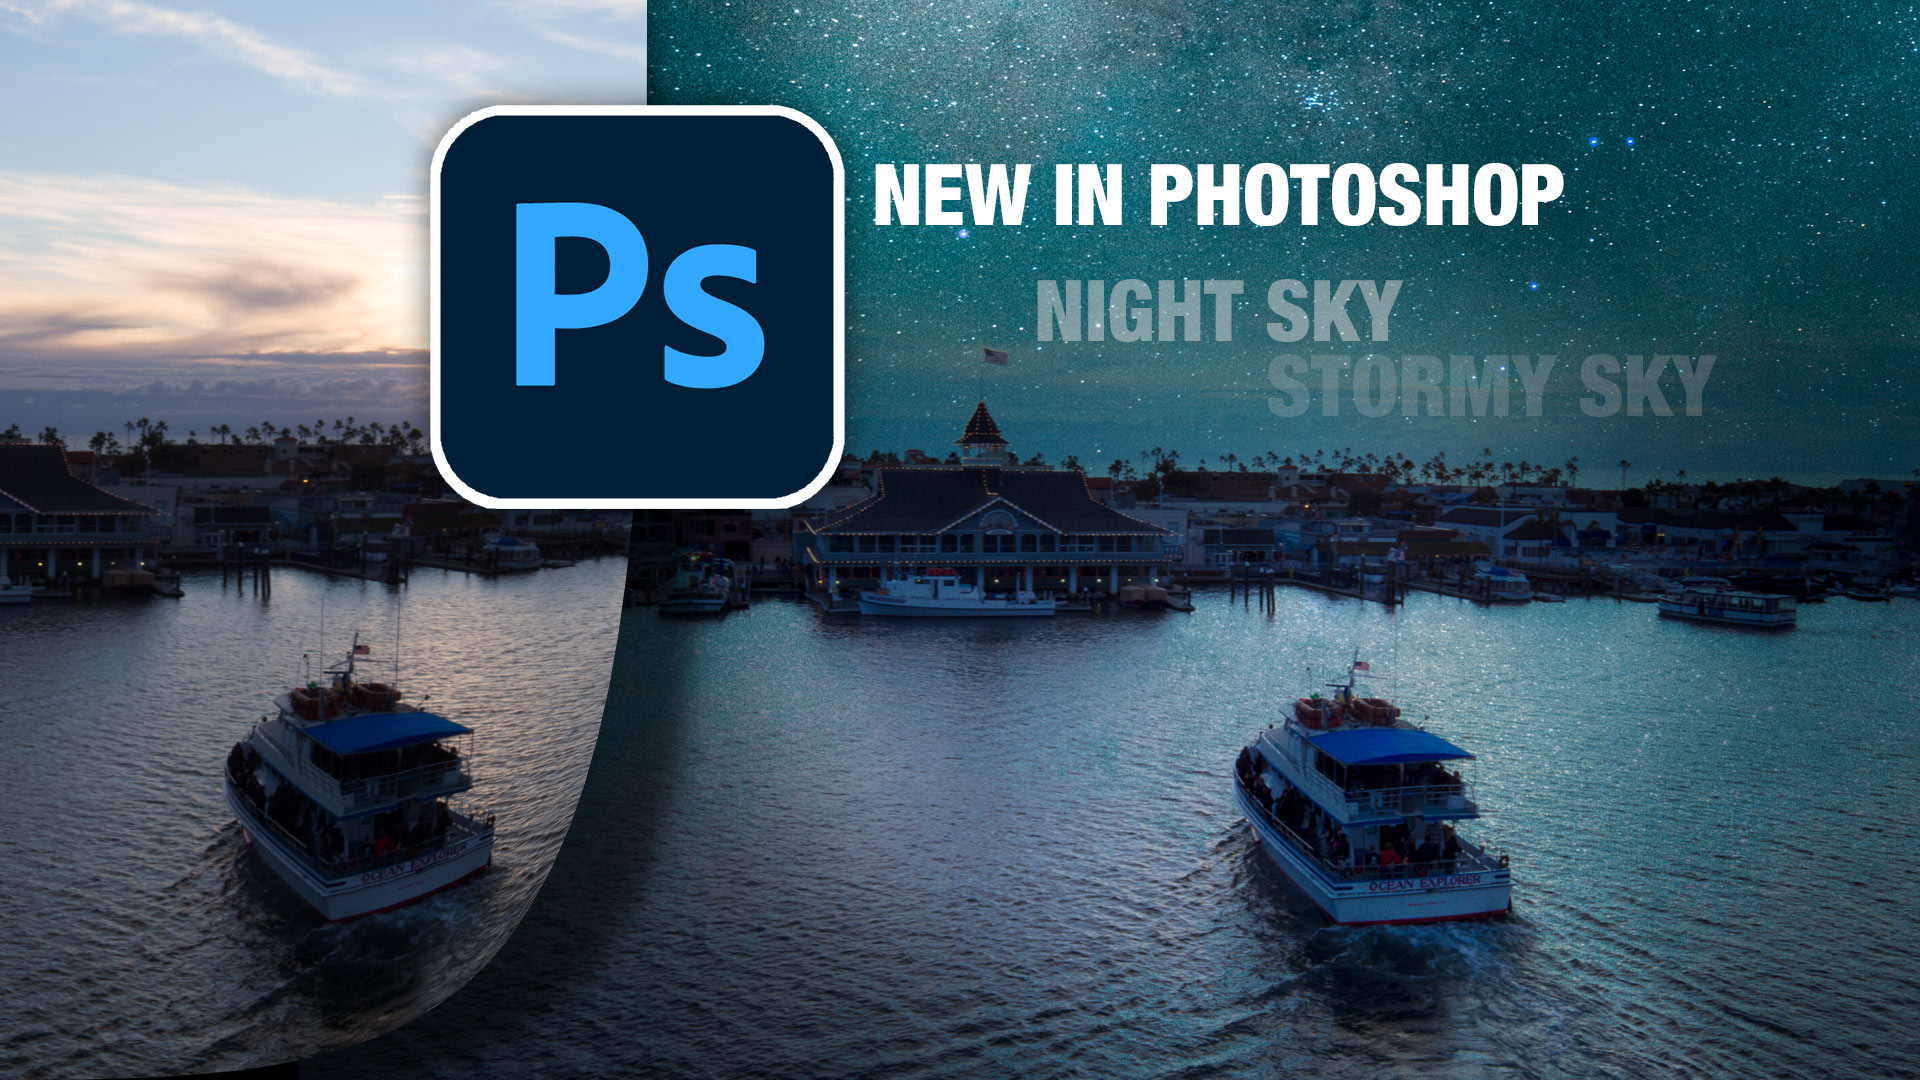
How to replace sky in Photoshop, sky replacement new features and free sky images from Adobe.

New features in Photoshop 2021 Split Warp,easily to wrap images around objects in photos in a very realistic way.
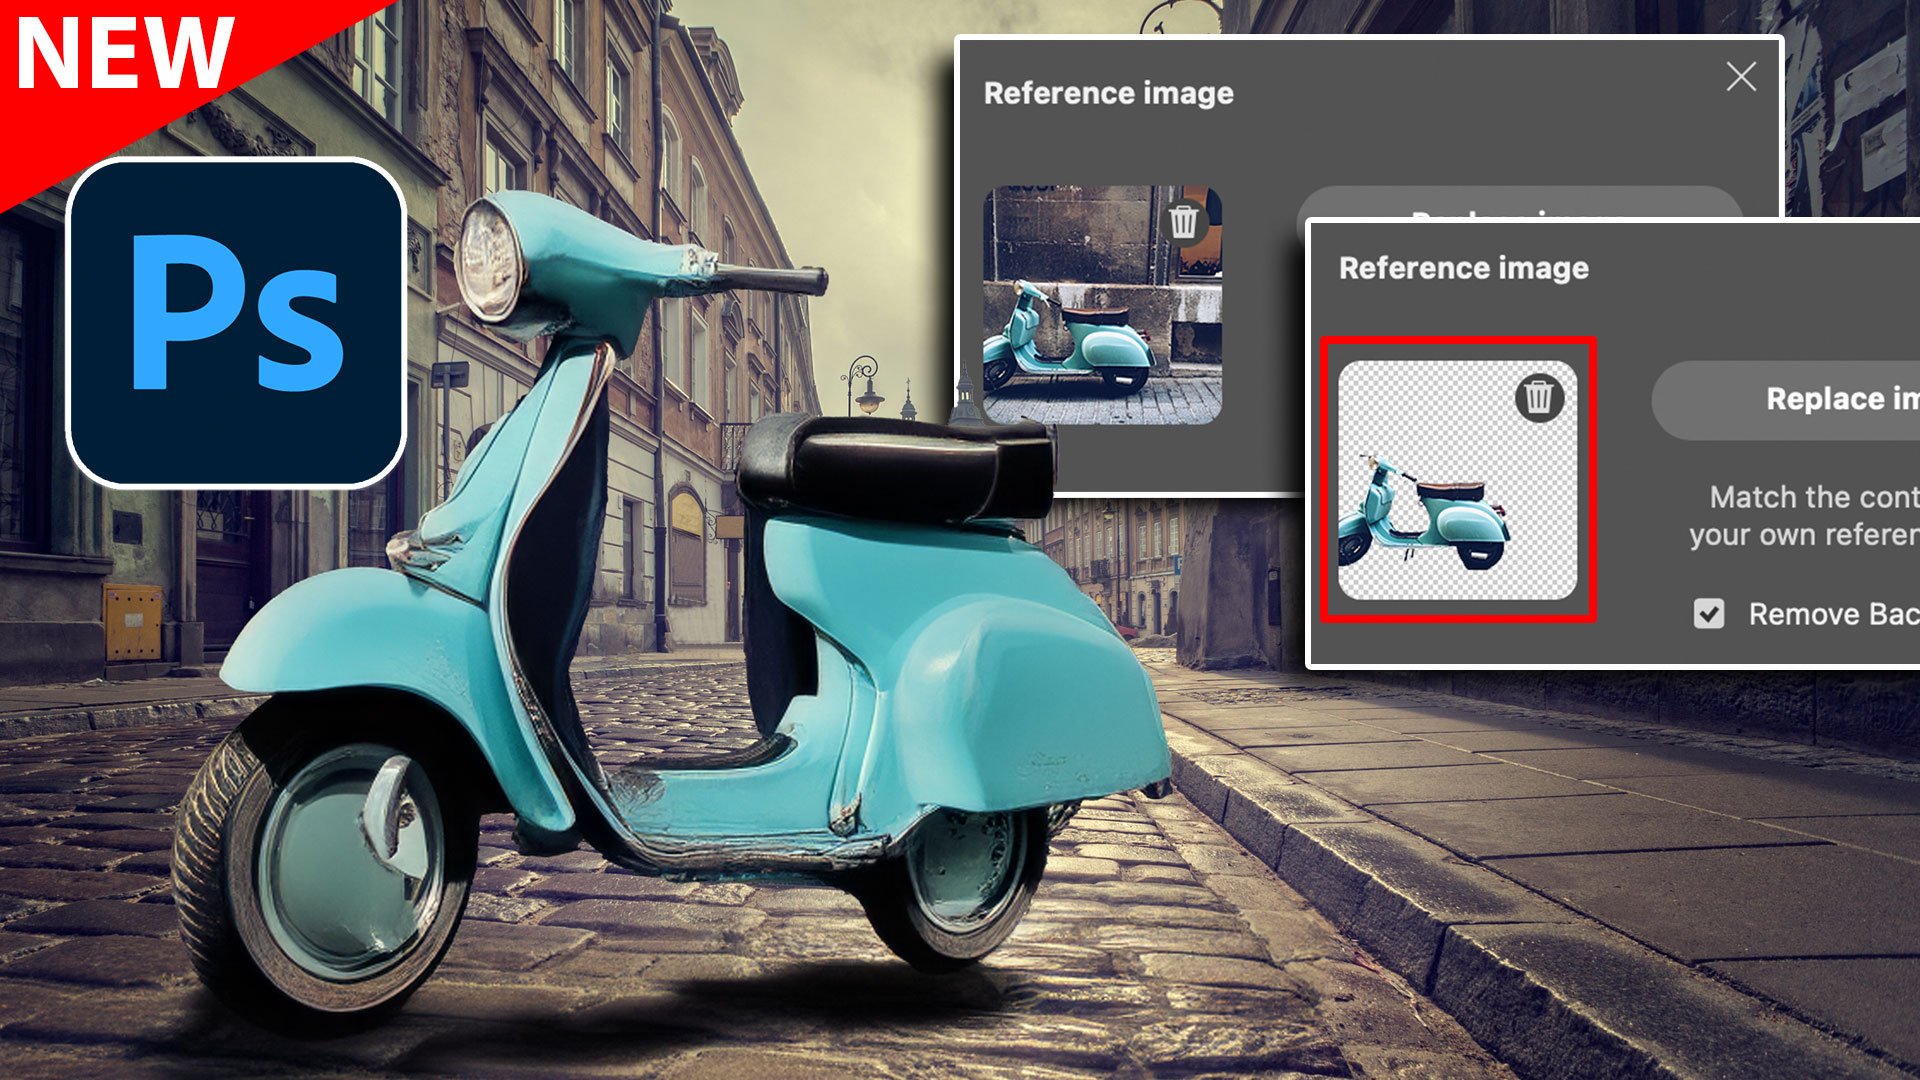
New feature, Remove Background for Reference image in Photoshop Generative Fill


Where is the best place for me to go to learn what I need I need to teach high school students about PhotoShop (PS). I don’t know how to use PS myself yet. 🙁
The best place to learn Photoshop is right here at photoshopCAFE! A good place to start are the free tutorials http://photoshopcafe.com/tutorials.htm
The best place to learn Photoshop is right here at photoshopCAFE! A good place to start is with the free tutorials here http://photoshopcafe.com/tutorials.htm