
Align type to a path and inside a shape in Photoshop tutorial
In this Photoshop tutorial, you will learn how to fill a shape with type and how to align type to a path in Photoshop. Photoshop actually has some very powerful type features that a lot of people aren’t aware of, or leveraging very well.
(I’ve even thought about doing an extended premium tutorial on type and typography (2-3 hour range) if you’re interested, let me know in the comment, otherwise I won’t bother if there isn’t enough interest )
There is a type warp tool in Photoshop that you can use to do some cool stuff quickly. However, this method gives you way more control AND its a lot of fun 🙂
I hope you enjoyed this tutorial
Colin
How to Make Shapes with Text – Type on a Path in Photoshop
Hey Cafe Crew, it’s Colin Smith here from PhotoshopCAFE and you can find me on Twitter, Facebook and Instagram @ PhotoshopCAFE. You can also visit me on photoshopcafe.com.
All right, today I’m going to show you some things with Type that you may not even be aware of you can do in Photoshop. There’s actually a lot of things we can do with Orientation, so I’m going to show you how to do Type on a path and then I got another cool trick I’ll show at the end. This is going to be quick, so let’s get started.
So the first thing I’m going to do, here’s a photograph. I’m just going to grab the Pen Tool here and then I’m just going to click up, then go down, and let’s just create a nice little kind of a curve here that will be kind of fun.
All right, so the next thing we’re going to do is we’re going to grab the Type Tool and this is how you do it. If you’ll look in here, you’ll see there’s no align to type here or Type on a Path option.
What you do is you move it over and then notice how you see that little wiggly thing there at the bottom of the Type Tool? Click on here and now we type in “Type on a Path at Sunset,” and at this point here, all we need to do is just select our Type. We can change the size of it, you know, we can change the color. You know, we can do all those kind of things.
We can change the font style. Now, let me just do Bold and okay, so we’ve got “Type on a Path at Sunset.” Notice that and if you want to move them around, just grab the Type Tool here like if we want to change the spacing, hit the Alt key and then hit the arrow key. Notice that you can kind of nudge that and play around with it.
And maybe I want to make that one a little closer, so the left arrow key will make it closer, holding down Alt or Option and the right, we’ll take that away. So, that’s how you kind of fix that. It’s looking good. And of course, we can put Drop Shadows and all those kind of things on here, so let’s just put a Drop Shadow on there really quick.
Let’s change the Spread all the way down. Get the size and give it a little bit of distance. Just for fun, the other thing, by the way, you can drag this around. I don’t know if you knew that. And let’s take the size down and just make it hard. There we go. That will just kind of make it pop a little bit.
All right, so we’ve got that. What else can we do? Okay, this is where we’re going to really step it up. So, we can go to these shapes, so let’s grab the shape like let’s go to the Custom Shape Tool and just for fun, we’ll grab something like a love heart. Okay, ’cause you know, we all love the sun.
Now, under the Options on the left, we want to make sure we choose Path and then just click and drag. Notice it gets so weird. Hold down the Shift key and we can constrain the shape, and if you want to move it around, just hit the Spacebar and we can move it around and we’re going to pop it right over here, and I’m just going to make it a little smaller. There we go. Now we got a path.
Now let’s grab our Type Tool again and this time, notice that little thing, there’s a wiggly thing. You go inside and you see the circle. I’m going to click and now I’m going to insert some type. Let’s make it smaller so we can actually see what we’re doing, make it about a 10. And now, you know, we could type that in or we can go up here, and we can go to the Type Tool.
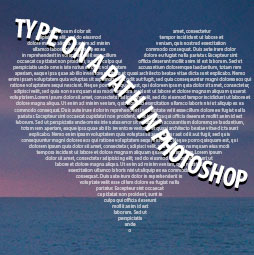
Go down to paste ‘Lorem Ipsum’ and boom! It will put the text in there. Click away and there we are. We were able to create that love heart. Now, of course, if you want to make it stand out a little bit more, just go like that. Change the font to maybe something like just a regular font and maybe drop the size down a little bit.
And if we need to paste some more, we can always do that. Just go under the Type, of course, and paste ‘Lorem Ipsum’ again. And if this is not enough, Ctrl Copy, select it there and we can just paste it a couple of times. That was Ctrl C to copy, Ctrl V to paste. And it’s almost looking good.
One last thing I want to do is I’m just going to select and then hit Ctrl A to select it all. Let’s change the alignment to Center Align and boom; we’ve now got a love heart made out of Type.
So anyway, guys, as I promised, short and sweet; some cool things you can do with the Type Tool and I bet you maybe you didn’t know or maybe you did, but I hope you enjoyed it. If you did, hit the Subscribe button right now and subscribe to our YouTube channel and you’ll get at least one new tutorial every single week. If you liked this, smash that Like button into dust, add a comment, and until next time, I’ll see you at the Cafe.
PS Don’t forget to follow us on Social Media for more tips.. (I've been posting some fun Instagram and Facebook Stories lately)
You can get my free Layer Blending modes ebook along with dozens of exclusive Photoshop Goodies here

5 thoughts on “Align type to a path and inside a shape in Photoshop tutorial”
Leave a Reply
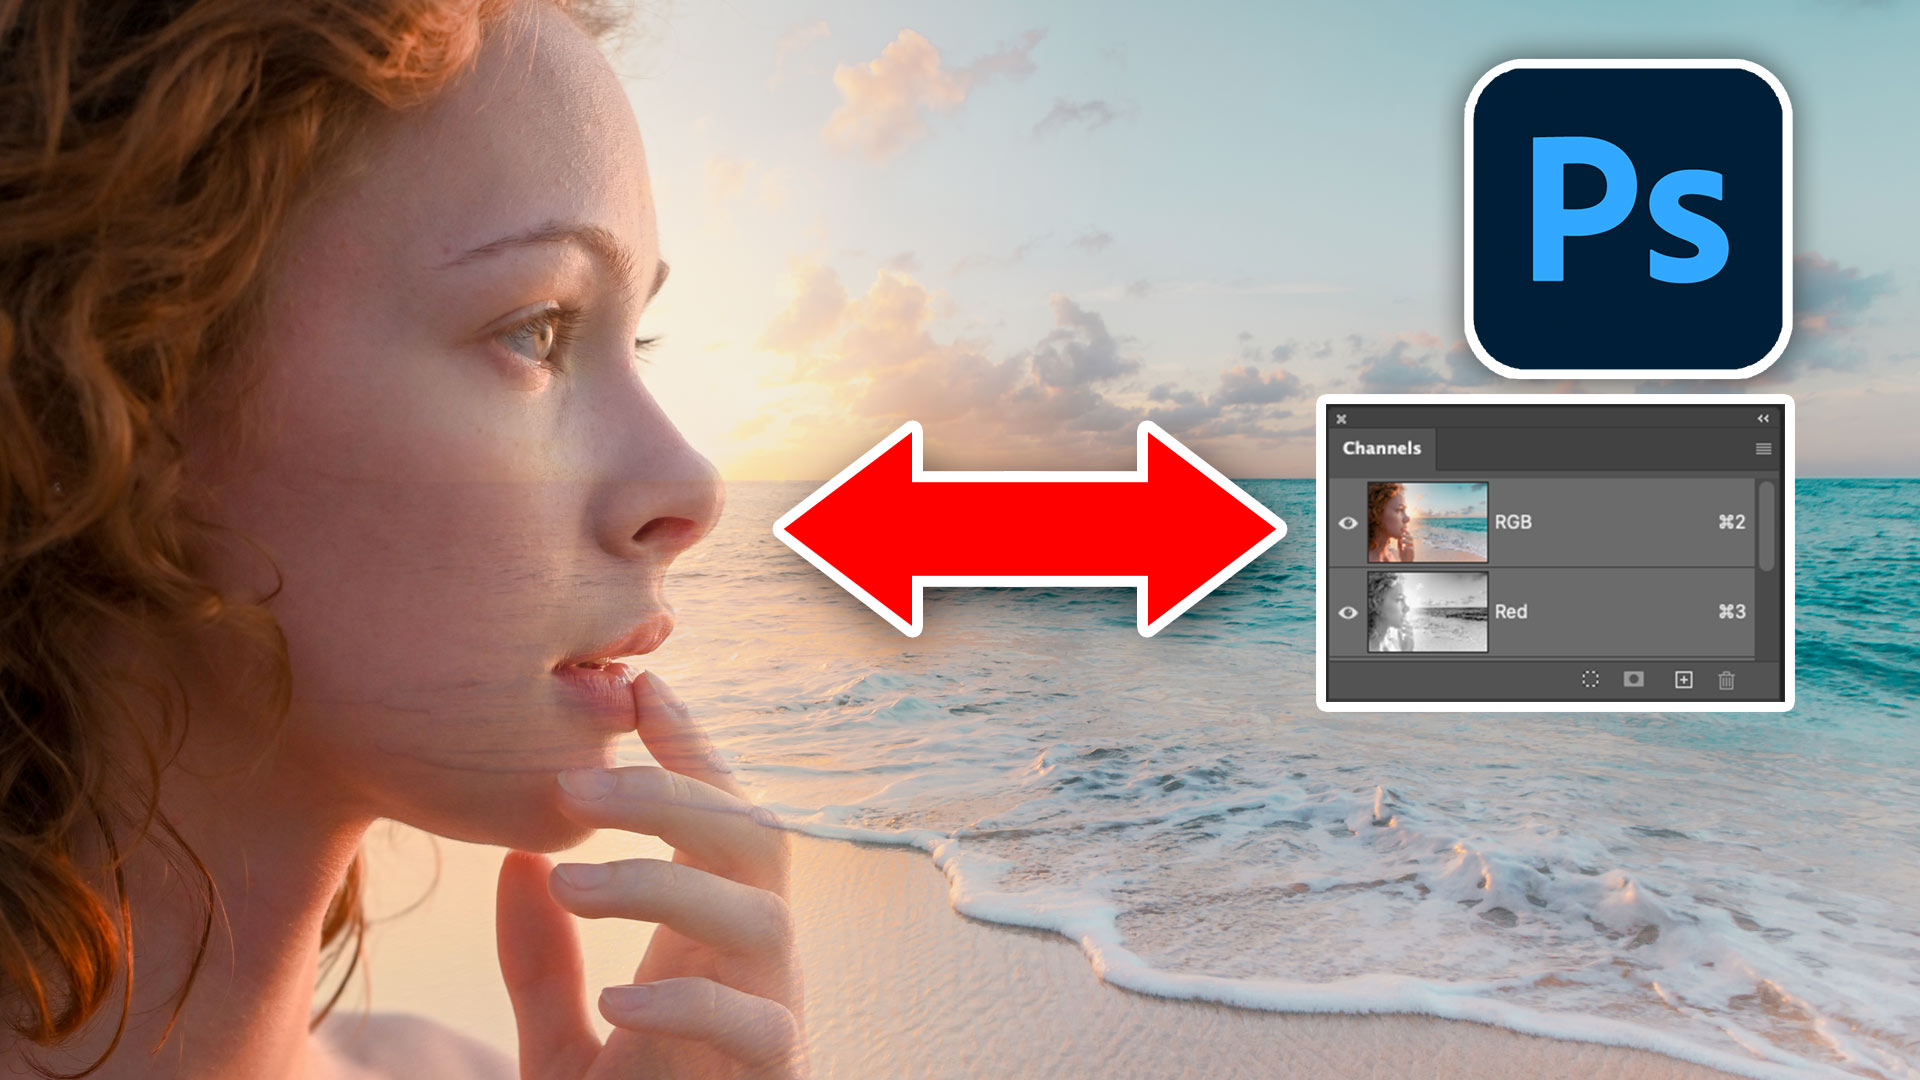
How to blend images in Photoshop to make a poster, using channels to select faces

This tutorial is a 2 in one. Learn how to make a custom brush from a photo. Also learn how...

How to create a texture that simulates brushed metal in only a few steps. This is the same metal used...


Thank you. Would love to see/read/videos on the subject ‘type’.
Thanks again.
Thanks for todays vitamin – I didn’t know about the custom shape tool – been accustomed to doing all my type in Illustrator.
I am relatively new to PS and find your tutorials easy to follow. I was wondering if we can make word art in PS.
Thank you for the Video and the written tutorial.