
5 HIDDEN features in Photoshop CC 2019 you may have overlooked

Photoshop CC New features in Depth, the BIG little things
In our ongoing coverage of the new Features in Photoshop CC 2019 in depth, I have a new tutorial for you. We are taking a closer look at the unsung heroes. These are some of the features that are hiding in plain sight. I say that because they are easily overlooked if you aren’t aware of them. For example, click on the canvas to apply a transformation instead of the tool bar, or click on type with the move tool and it switches to the type tool. If you are unaware and working with muscle memory, you would never even be aware that easier ways of working exist. The goal of this tutorial is to make you aware of these and other new features, designed to improve your workflow. I suggest watching the video first and then reading the text below.
Photoshop CC is packed with lots of new features. This is part of a series where we look at the new features and dive in a little deeper. The other installments are here..
Photoshop CC 2019 New Feature tutorials
- Top 5 Features, overview video
- New Photoshop Frames in depth
- Content aware fill in depth
- New Features in Lightroom Classic
- Adjustable Depth Of Field
New Workflow improvements and tricks in Photoshop CC 2019
All of this is covered in depth in the video, but I’ll add some useful footnotes here.
#1 Proportional scaling
For eons, someone thought it was a good idea for us to hold down the Shift key when scaling things proportionally. This is so drummed into our muscle memory that we don’t even thing about it. Now, we don’t need to hold down Shift anymore, everything stays in proportion as we drag the sizing handles, the same as any other software on the planet. It’s going to take a little to get used to having a free-hand now, maybe sip coffee with it. To scale anything, choose Cmd/Ctrl+T for Free Transform. Or when placing an object these handles come up by default. If you want to scale it freestyle (unconstrained) Hold down Shift. (Its flipped)

But, where is the anchor point? You know, that little cross hair thing that you always drag by accident while scaling small things. This anchor point is useful because we can use it to scale or rotate from a non center position. Think, rotating from a corner, for example. It’s still there, but hidden by default. You can toggle it on from the Options bar. You can even click on a point to set it to the center or an edge or corner. You can as always drag the anchor point freely too.


#2 On Screen application of transform
Another big one to miss is to apply a transformation. Usually when we transform something, work on text or crop, we click the checkmark up in the options bar, press enter (but not for text) or just click another tool to accept the changes. Now all we need to do is click on the canvas to apply the changes. I’m still trying to get used to this because it’s so easy, it’s easy to miss.

#3 Text tool
You are using the move tool and you decide to change some text. You know the story, you grab the type tool and double click the text to edit it. You no longer have to do that, double clicking the text with the move tool will allow you to edit the text, it changes to the type tool automatically. When you click away, your cursor changes back to the move tool. (I have a couple of other text tricks in included in the video above, it’s easier to see it in the video rather than trying to explain it here.
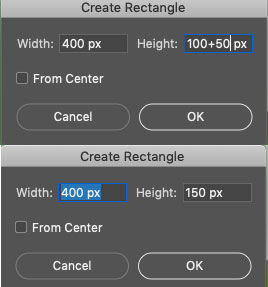
#4 Math in Boxes
You can perform math inside dialog boxes so you don’t have to think so hard
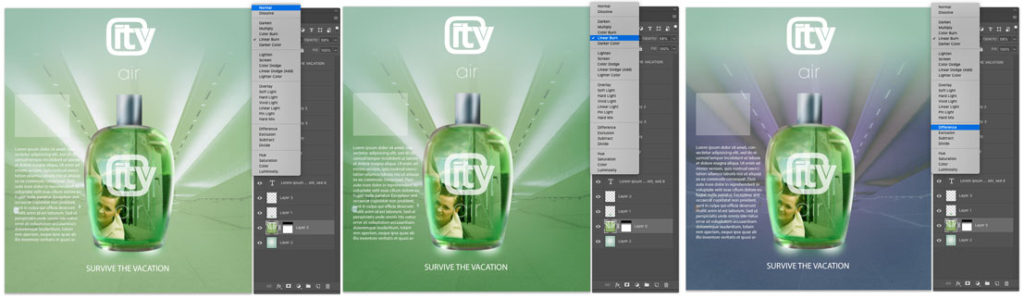
#5 Preview of Blending Modes
This one is a really useful one. As you hover over the different Layer Blending Modes, you will see an onscreen preview of that blending mode.
(If you want to learn more about Blending Modes, check out the PhotoshopCAFE Ultimate Guide to Blending Modes)
However, a (very) few people have complained about the Blending Modes not displaying correctly on Screen. Here is the fix for that and also any other display bugs you may be experiencing in Photoshop CC 2019.
How to fix bugs in Photoshop CC 2019
Choose preferences>Performance and Turn on Legacy Compositing if you are experiencing problems.

Every software release has a few bugs and PS CC2019 is no exception. (Some people have blown this out of proportion, CC 2019 is very stable). The other reported bug (I asked people to list them) is that the bracket keys [ and ] don’t change the brush size inside the Select and Mask workspace. You can fix this by resetting Photoshop Preferences
Resetting Photoshop Preferences: Hold Down Shift+Alt/Option+Cmd/Ctrl while launching Photoshop.
Thanks for checking this out and welcome to the CAFE!
Don’t forget to join our mailing list for weekly tutorials and drop a comment, let me know your favorite new feature.
Colin
PS Don’t forget to follow us on Social Media for more tips.. (I've been posting some fun Instagram and Facebook Stories lately)
You can get my free Layer Blending modes ebook along with dozens of exclusive Photoshop Goodies here

57 thoughts on “5 HIDDEN features in Photoshop CC 2019 you may have overlooked”
Leave a Reply

Nearly anyone can create a bevel on type, but not many realize that from this foundation we can create glass,...

Preparing your files for printing. Prepress and steps to prepare file for a commercial printing job, tutorial

NEW Lightroom features in Lightroom Classic 8.3 and Lightroom 2.2. Colin Smith explained the new texture slider in depth and...


Just knowing these are now available was worth watching even is I very rarely put them to use. Thank you
While I haven’t had issue with compositing, it’s good to know that there is a way to revert to legacy SW, if needed.
I keep hearing that cc 2019 has improved noise reduction. But I can’t find a video from any source on how to best make use of this improvement.
Thanks for this video. The clicking away alone will same all kinds of time.
I do a lot of compositing which requires resizing images. The fact that I don’t have to hold the shift key to keep the proportions is awesome . It is definitely my favorite of the 5 big little changes. But of all the changes, the new content-aware fill, hands down, is my favorite!
My comment is that whenever there is a new Adobe release, there is very little Adobe explanation of the changes in the new release. Mostly, it is a few, terse words, and no links to an in depth explanation and demonstration of the new changes. How are relative amateurs like me supposed to learn these things?
From PhotoshopCAFE 🙂
Live in NYC Manhattan
Very helpful and informative as per usual.
Many thanks
Kind Regards
Roger
Interesting tool.
Super tutorial… the most beneficial is the anchor point, and about the text. Really neat! Thanks!
My favorite: double clicking move tool to edit the text
HI Do you experience the target window in the new content aware dialog suddenly having checkerboard transparency?
Great video. Thanks
Thank you for these tips. I’ll keep a better anchor watch from now on. BTW, I don’t think I will hold a cup of coffee in my now spare hand. That’s too close to the computer and spills do happen…
Hi Colin, The anchor point was a new one for me. I hadn’t missed it to be honest but interesting now I see how it can be manipulated. BTW I live in a semi-rural area of the Central Coast in NSW Australia.
I moved from a rural ‘city’ to the big city. There’s plenty of rural areas I can access with a 15 minute drive so I’m good!
Thank you for ALL the lessons.
Hey Colin. I recently discovered your site and I must say, you have a great way of showing us PS. Thanks for this post. I knew there were changes but this brings them together and shows me how they work.
Thanks again.
Regards
Shane
Colin, the anchor point was new to me. The other day I needed it and was wondering what happened to it! By the way: I live in the middle of nowhere on Bali, Indonesia. And I am of Dutch nationality
Hi Colin, My favorite tip was the missing anchor point more importantly the ability to center it again when I accidently drag it off somewhere. Thanks for the tips
I was trying to put a custom shape on it’s own layer and when I clicked on the other layers the custom shape disappeared. What am I doing wrong?
Didi you choose Shape, or Paths from the options?
Wow! It’s amazing how much I don’t know. Maybe it’s because I’m a city boy?
I love the videos Colin, many thanks for making it easy.
Hi Colin, thank you for the Cafe, I love your way of explaining sometimes complicated details. I certainly had no idea about clicking on the canvas to apply changes and I can see where it’s going to take a little getting used to but I believe I’m going to love it!
Love the fact that just hitting clicking applies various actions. Cuts extra steps.
Thanks Colin. This is another informative tut. Loveit
Thanks for selecting to give talk on these small features .My most fav would be cropping in proportion without holding shift key .In fact all such features are time saving ,and seem to have emerged out of interaction with the photographers /designers than with the engineer-minds.In fact ,Adobe should go a step forward and see that one does not have to go back to the tool .By the way ,am a city-bred though my roots are from a rural area .Thank you so much for bring it to our knowledge .
I’m new to Photoshop and didn’t know about anchor points so far.
Hi for me the anchor point. Love the quick way of re centering it back in the bounding box, and clicking anywhere outside to apply. 🙂
super cool about the resizing technique, couldnt work out why it had changed, thank you
Love the real time blend mode views!
And I live in a rural area…..
Great info Colin!
The changes to the text tool are a significant time saver. Thanks for the informative videos Colin!
Loved the type text box. Never knew about it but I could find many reasons to use it. Thanks Colin.
Like the blending mode, especially as you don’t have to select an option to see the difference.
the anchor point and proportional scaling
Thanks for the info – I didn’t have a clue! It’s nice to apply changes by clicking the canvas and I like having proportional scale as the default for transformations.
The blending modes.
Love the Blend Modes’ new roll-over. Great! And thanks, as always, for your great explanations and friendly manner. I’m a total city-kid in the SF Bay Area. Grandparents and father total country until the 1930s Depression when they had to come into the city to work and support their families.
always great info, but for some reason I still have to click on overlay or hard light ect I cant seem to get it to roll through them , just my luck
Hi Colin, first off thanks for the wonderful tips and techniques. I appreciated your enthusiastic passion about imparting information to others. A gift you have for sure! In regards to this recent update… Wow! I’ve been working with Photoshop for 25+ years and find this latest update to be one of the most practical ever! The ability to not have to hold the Shift key whilest resizing alone is worth it. …and getting rid of the anchor point….and deselecting type and elements by just clicking away… all so practically relevant. Thanks again my Colin!
Never seen this guy before! Having watched one video I was hooked as I never know what all the tools can do and he made it easy. I even put him on my bookmarks and clicked the subscribe button-not something I normally do as I don’t like scams. I might even enjoy the weekly free contact!
THANKS
Hey Colin,
I think the Content Aware Fill tool is the best. I used to spend lots of time with the Healing Tool to fix those crazy “pieces” left over after using the Content Aware Fill (Shift F5 on my PC).
I really like your tutorial. You’re like a friend who says. “Hey, let me show you how I did this, or how I did that.” I know some of the things you talk about, but you always have a little trick that I never knew. I have learned a lot by trial and error and you help me avoid some of the errors and give me something useful to try that I know will work, or sometimes, do what I have been trying to figure out by searching youtube. That is how I found you. I like your style of teaching and will visit your café often for tips and ideas.
Pete C
Thanks for the kind words and welcome to the CAFE!
Thanks, very good and very useful… I live in the country surrounded by 12,000 acres of marsh.. very peaceful.
Thank you for showing us these easier hidden tools in 2019. I love clicking over the blend modes to see what they look like. Its easy and exciting.
I have a simple question and don’t know who to ask. Since you taught my latest Creative Live class, I will try you. I have always used “command 1” shortcut to get to 100% in lower left corner. However, I can’t remember the key to get there and type in a different percent. I was in the habit of using it often (it’s hard to teach an old dog new tricks after 20+ years). It is driving me crazy.
Even though I’m not a photographer, I LOVE all your classes and never miss one of your freebies .I could listen to you talk about ANYTHING.
Your easy going manner and that fact that you present both a video and the text is a great bonus and much needed for people who require either to watch videos or those who prefer the notes. I Did not know about the Legacy compositing nor the layer blend mode options so these were certainly worthwhile learning to use
Fantastic job of explaining, thank you
I live rural remote, this means our internet can suck, limited slow and party line sharing. This means lightening has travelled down the phone line and caused havoc, so I dont just shut down your computers, pull out ALL plugs ! I learnt the hard way. Lightening Storms are the norm and unpredictable, rain can go for 3 months straight! I love your the sharing community work that you do and share the information and website when I can.
Hi very nice,very well explained.