Have you ever wondered what is the correct workflow for Lightroom Classic? Discover how to build a catalog, tag and sort images. Filter through and find the best photos quickly. Make them look amazing and then duplicate those settings to a whole bunch of photos in a couple of clicks. All this in 15 minutes, from a real photo shoot in RAW, not staged stock images. This guide works for Lightroom 4, 5, 6 and Lightroom Classic.
If you are confused about Adobe’s new naming of Lightroom Classic v Lightroom CC read here.
The video will get you up and running in Lightroom in 15 minutes. Here is a quick guide to get you started really fast and easy, it will only take a couple of minutes to read this information. This is a no BS Lightroom turbo start!
Lightroom is broken up into Modules. There are currently 7 Modules in Lightroom, here is a secret, you only have to know 2 of them! It’s a good idea to learn the rest later, but to get started, all you need is the Library and the Develop module.

This is exactly what it sounds like. This is where all your photos live. This is where you import the photos and do all the boring stuff like keywords and collections etc. It might be boring, but a little effort here will pay off in spades later on down the road, You’ll see. You can sleep at night knowing that all your photos are safely tucked away and labeled so you can find them in a rabbits blink. When you get a bit more experienced, you’ll also find that most of this can be automated.
This is where the party’s at after everyone has left the library. The develop module is where you take those dull images and turn them into works of art. This is your digital darkroom (Lightroom) where you can be creative. A lot of this can also be automated if you are in a rush. But you may want to hang out here for a while, because this is fun!

Ok, here we go. In as few words as possible, here is how to work in Lightroom. I’ll give you details about the stuff that really matters and skip the boring details.
You’ll start in theLibrary module: Click the import button in the lower left
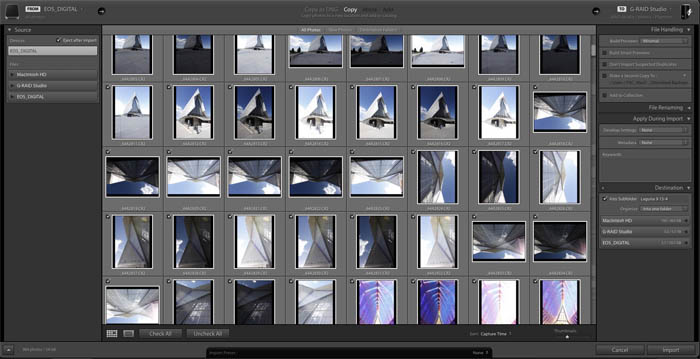
The importer will open. Click the Arrow in the lower left corner to expand it. It’s useless to you collapsed

This is what the expanded Importer window looks like. Don’t worry about all the options for now, we will walk through the steps you need. Look on the top and you will see 3 options for the import workflow.: 1. Grab Photos From | 2. What to do with them | 3. Copy photos To somewhere
Look at the top and you will see “FROM” This is where we grab the photo to bring into Lightroom

Under Source, you will see all your drives. You can bring them in from your computer if you like, but for the sake of this tutorial, I’m going to assume that you want to bring them in from your camera card reader. Click that option (EOS_DIGITAL is mine.)

Note: If you can’t see the photos from your subfolders, click on the panel that says “to” and choose the Include Subfolders option at the bottom

In the middle top, choose an option from importing. Copy and Copy as DNG are the only options from a camera or card. To keep it simple, we are going to use Copy.

At the top right, you will see an option that says “TO” This is where we are copying the photos (and videos) to.
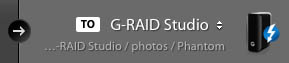
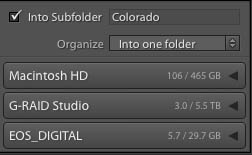
Under the “to” options, I recommend choosing the subfolder and Into One Folder option and giving it a name. (this will prevent those horrible nested folders by date, that are a pest later on)
Next, locate the folder that you want to put your photos. If you are just starting, it’s a good idea to have a strategy and stick with it, because you will be using this structure for a very long time.
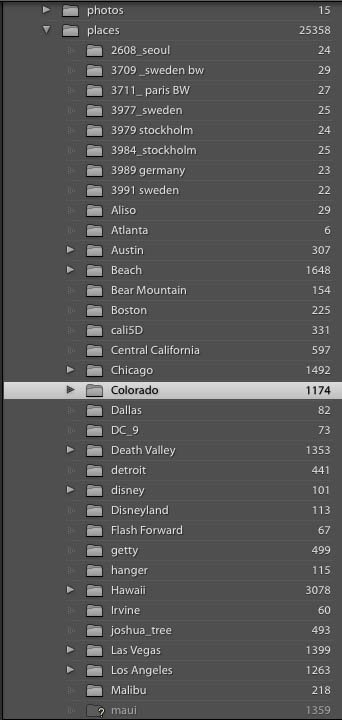
What we are doing right now, is creating a folder structure on your disk drive. Lightroom doesn’t care where the photos are to nicely catalog them. But this structure is for you, to help you keep your photos organized, trust me, it’s worth the extra effort. I normally create a top level folder called photos. Under this a create categories that I’ll use such as:
I’ll then create folders as I import photos under these categories, as subcategories: Places
Use whatever categories you think you’ll need. You can always add more later or change them
WARNING! If you do change folder names or image locations, do it through Lightroom or you will break the file association. In other words, if you change a location through Lightroom, the image will move on your computer = good! If you move it directly on your computer, Lightroom won’t know where it is = bad!
Ok, back on track, I think you needed that bit of extra info if you are new to DAM ( Digital Asset Management AKA Managing your photos) Choose a folder where you want your photos to go to

You have now set up: Where from > What to Do with photos > Where to go In the main window, choose the photos to add to Lightroom. Usually you will go with the default, which is all the photos on the card.

If you turn on the option “Don’t import suspected Duplicates and photos are already in Lightroom, they will be greyed out.
Click the import button
![]()
![]()
Your photos will now be copied into Lightroom and you will return to the Library module where you can watch your photos getting sucked into Lightroom.
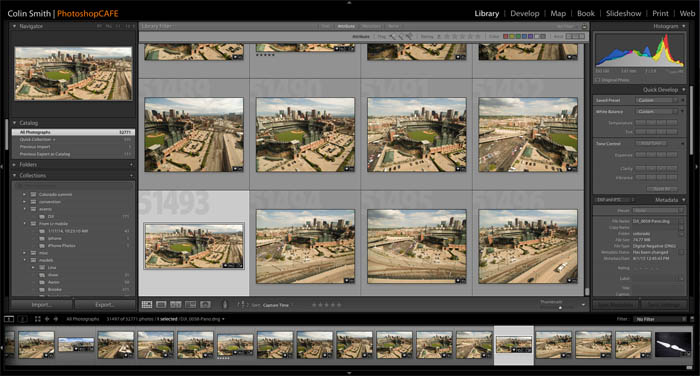
All your photos are now safely tucked into Lightroom. Next step is finding them.
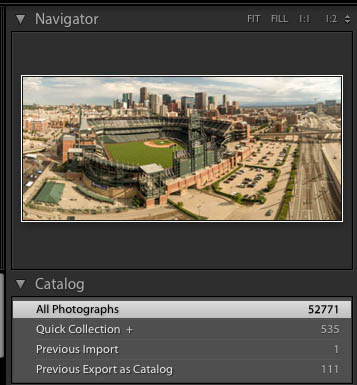
At the top left you’ll see the Navigator which is a thumbnail of the selected photo. Under that is the Catalog. The options that you’ll use are either Previous import, which will limit the view to just the last batch of photos you bought into Lightroom. Or you can choose All Photographs, to show every photo currently in Lightroom. If photos seem to be missing, click All Photographs.
The next block down shows the Folders View. You will see a list of drives that have photos in them that Lightroom is managing (in the Library). Currently attached drives are lit up. The Folder structure is the same as on your computer, because this is what you are actually browsing right now.
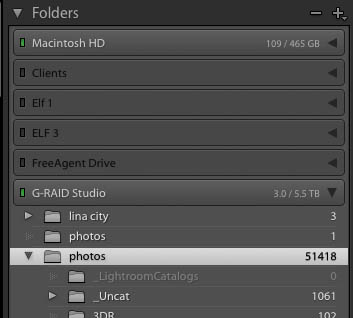
Here you can see our Folder called Colorado that we just made when we imported from the card.
We want to make our own folder structure just for Lightroom, this will make things easier to use for us. For this, we use Collections. Collections have tons of advantages because they don’t actually contain photos, just a reference to the photos, this way we can have the same photo in different Collections without making multiple copies of the same photo. Trust me, multiple copies of the same photo is a bad thing and can get very confusing as well as quickly filling up you drive with duplicate photos. Select all the Photos that you want to put in the collection. Click in the Grid and press Cmd/Ctrl+A to select all. Click the + button and choose Create Collection as shown. 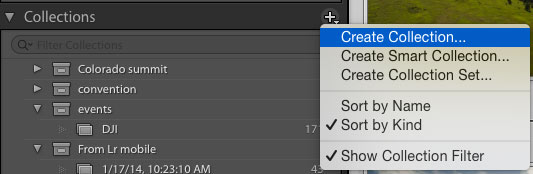
Name this Collection something that is descriptive. Optional: Nest it in a Collection set if you want. Check the box, Include Selected photos. Click create

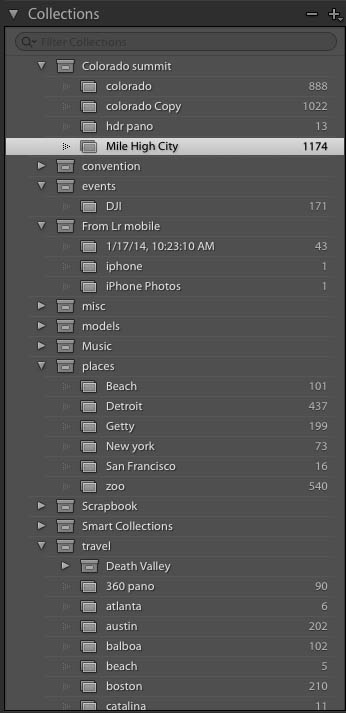
Bang! You now have a Collection with your selected photos in it. For way more reasons than I’ll list here, I like to organize my photos into Collections and work on them from there. I almost never go into Folder view unless I have lost something.
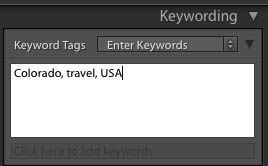
Now its time to do all the metadata work. At a bare minimum, I add some keywords to help find the photos later. You can select an entire Collection and add simple keywords to them all in just a few seconds.
You’ll see little badges on photos that have metadata. ![]()
![]() There is a lot of other metadata stuff you can do to your photos now if you like. If you want to sort through them and find the good ones, you can use things like ratings, flags and labels. I have touched on this on the 15 minute video, so you can watch that when you’re ready to do more organization. When you want to go more advanced you can add meta data on import etc. You can even create metadata templates that add a ton of info to a photo in a single click. (All of this is explained in my 13 hour comprehensive Lightroom training video)
There is a lot of other metadata stuff you can do to your photos now if you like. If you want to sort through them and find the good ones, you can use things like ratings, flags and labels. I have touched on this on the 15 minute video, so you can watch that when you’re ready to do more organization. When you want to go more advanced you can add meta data on import etc. You can even create metadata templates that add a ton of info to a photo in a single click. (All of this is explained in my 13 hour comprehensive Lightroom training video)
Let’s select a photograph and have some fun with it, enough of this organizational stuff. Click a photo in the Filmstrip. It will appear nice and big if you double click it.
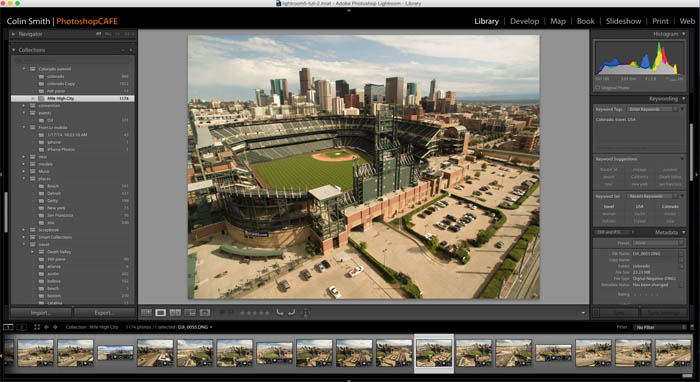
Click the word Develop at the top of Lightroom and the currently selected photograph will now appear in the digital dark room. This is where you make all the image adjustments that could be as simple as cropping, lightening or darkening photos or as advanced as localized dodging and burning, black and white, special effects and even retouching. Once again, covered in depth in my Lightroom for Digital Photographers video training and also some free tutorials here on PhotoshopCAFE.
The develop Module
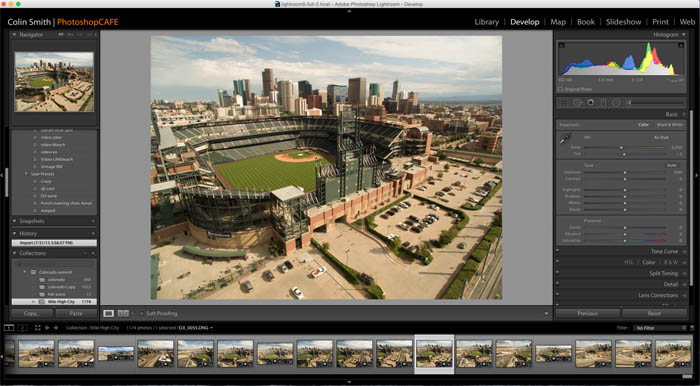
Let’s make some adjustments to the photograph.
Here I grabbed the white balance tool and clicked on an area that should be neutral gray or white in the photo. This removes the color cast. White balance is usually the first thing I do to a photo. 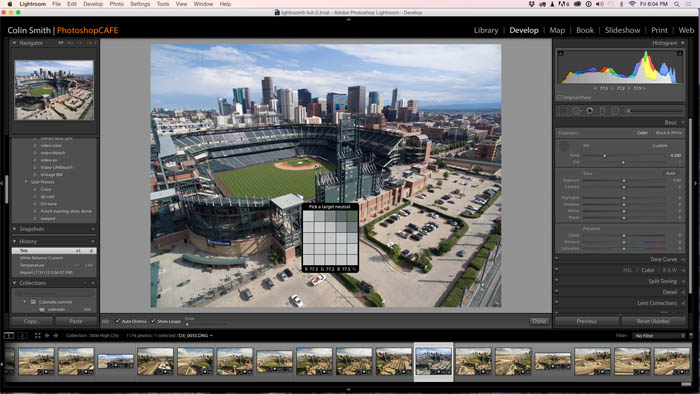
At this point, make some adjustments using the basic adjustments panel. Most of your adjustments can be made in this panel and it’s certainly a good place to get started. There are a ton of other option that you will learn later as you go deeper into the rabbit hole. For now, just get familiar with the basic adjustments. If you have used Camera Raw before in Photoshop, these settings are identical. Why Lightroom? At it’s most basic, the Library module. Or see a more detailed video on why Lightroom.
The sliders are broken into 3 groups
I usually start with white balance, then move on to Exposure to set overall brightness. Then grab Highlights and shadows to recover details in the highlights and shadows (Expand the dynamic range). Set whites and Blacks to give contrast to the photo. Nice crisp clean whites and deep rich shadows.
Here is the result of moving a few sliders, a much more realistic and cleaner photograph.

Now, Lightroom is capable of much more than just basic adjustments, you can use it to create a lot of mood and drama, You can add color looks and be very creative with Lightroom, and I’ll teach you that on other tutorials.
What you can also do is save all of these adjustments as presets. Presets are like little recipes that can be applied to any photograph in a single click. You can make your own, or add in ones that you get from other people.
Click on the + on the Presets panel
![]()
![]()
You will see the New Develop Preset panel. Give it a name and a folder, default id User Presets. Notice you can choose which adjustments to include in the preset. Most of the time, I add them all even if some settings aren’t in the preset, it won’t cause any harm.
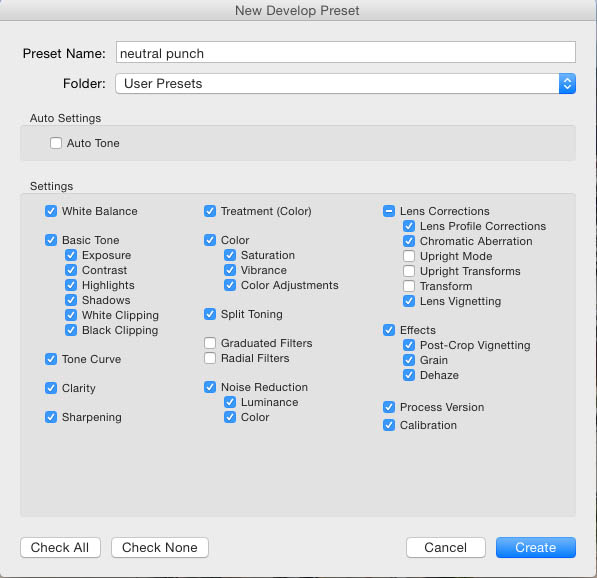
Click create and your preset will be saved. You can access it from the presets panel and use it anytime without having to re-apply all the adjustments.
Here is the same photo where I am applying some presets that I created at an earlier time. See how they dramatically change the appearance of a photo in a single click. A lot of people get Lightroom just to use presets. We will email you some free presets and a free ebook to get you started right now.

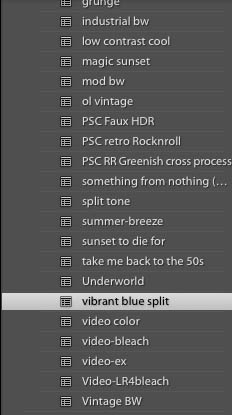
Or here is a completely different preset for a different feel to this photograph.

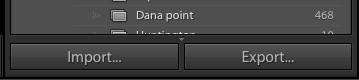
When you have finished making your adjustments, you will want to share your photos with the world. While you can create web galleries, slideshows, print and even make books in the different modules in Lightroom, let’s do a simple task. Export a Photo that we can share online on Social Media. (Lightroom can also integrate with your favorite social media site directly from within Lightroom)
Let’s look at a simple photo export.
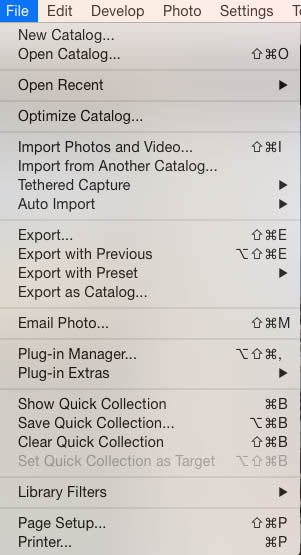
Choose File>Export
You will see the Export Dialog box. There are a ton of options in here including the option to create export presets and multiple images. I actually created a Facebook preset, Ill break it down.
File image format choose jpg and a medium quality.
I limited the size to 1600 on the longest edge, thats big enough for people to enjoy without becoming so huge it bogs down the entire internet.
I also include a watermark. I think it’s always a good idea to protect your public images with watermarks. They also make it possible for people to find the copyright holder (you) when they are hot linked on different pages.
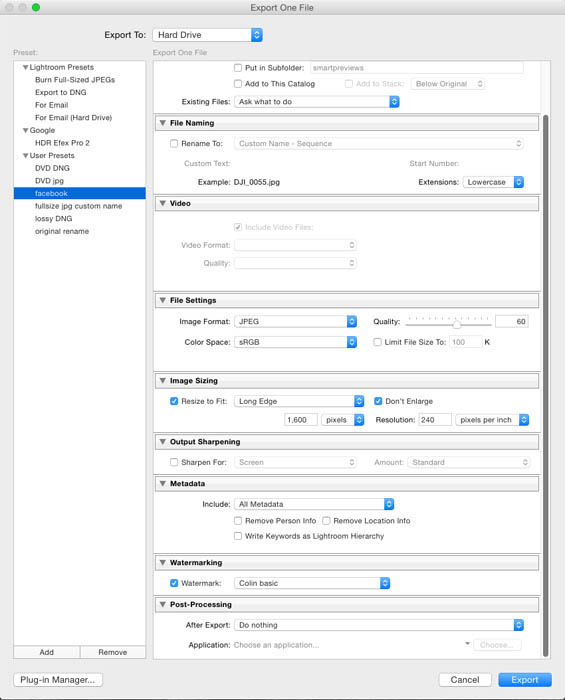
Click export and the photo will be exported for your use.
If you enjoyed this quick start guide and you’re ready to take your skills to the next level, this is for you! This is THE award-winning A-Z guide to using Lightroom that will help you to master Lightroom (Or just get really good at it). One of the most-loved training resources is new for Lightroom Classic CC2019 (Lightroom 8)! Learn all the new features and workflows. No matter your level, you can quickly master Lightroom Classic with effortless ease.

This is the most comprehensive video on the market for Lightroom. This 7th edition is recorded in beautiful Full HD from the ground-up for Lightroom Classic CC. Learn how to import, organize, develop and output all your captures with effortless ease. Enjoy in-depth coverage, pro techniques, secret tips and Colin’s way of breaking down even the most complex tasks into quick and easy to understand techniques. You’ll spend less time in front of the computer and more time behind the camera!
Available as an instant download


This site uses Akismet to reduce spam. Learn how your comment data is processed.

How to seamlessly combine pictures in Photoshop to make the floating heads effect on posters, magazine and album covers....

Help for Photoshop 2024 update, is generative fill a paid option? troubleshooting your Photoshop update Colin Smith answers your...

Hidden new features in Photoshop 2023, how to use them and how to get access...


Quite informative and helps with importing which was non intuitive for me. Thanks.
its so informative and very useful tutorial.
Your site is a great motivation to me. Thanks.
Sorry to hear that
very nice article it is very helpful. great collection and a lot of good inspiration for getting better final results 🙂 Helped me getting even more beautiful shots. Thanks for sharing!
nice, thanks. Was looking for stuff around lightroom.
Don’t forget to share your images with the community on our facebook group https://www.facebook.com/groups/53878338135/
Hey Colin Smith,
Your article is so good. The way you presented the flow is very simple and easily digestible. More importantly, this is a non-technical guide because of which I loved this (I don’t remember technical stuff easily).
Thanks for the guide. See you soon in the FB group with my latest images,
Abhinay
Need assistance on how to get rid of many duplicates in organisation of hard drives and photos within Lightroom catalog
Hi there
I created an in depth course that explains all of that and more here https://photoshopcafe.com/video/products/LightroomClassic.htm
nice, thanks. Was looking for stuff around lightroom.