
Photoshop Generative ai, reference Image remove background
New Gen ai Photoshop tool, makes reference image work better
There is a new feature in Photoshop beta currently that makes it easier to get a good result Generating with a reference image. Let’s look at it now. How to get Photoshop beta.
Make selection with the lasso tool. We are going to generate a Vespa scooter.

Click on Generative Fill in the Task bar. (Window>Contextual Task Bar)

Click the Reference image button (Currently only in Photoshop beta, but might be in Photoshop main if you are reading this later)

Click Choose image

Find the reference Image that you want to use.

This is the reference image

Click Generate

See, it generates the Vespa, but it also has a weird background.


This is because the reference image has a background and Gen Fill is trying to generate that too. For best results, you need to isolate the background from the subject in a reference image. I’ve covered reference images in Photoshop Generative Fill in depth
The new feature, is a remove background check box when you load the reference image.

Click and the background is removed from the reference image, very cool!

Now, it generates more what you would hope for.

Revealing the Original background in Generative Fill
Let’s do a bonus tip here.
When you use Generative Fill, it will generate pixels for the entire selection. If we want to show the original background we can mask it out. Here’s how..
Grab the Quick Selection Tool

Click Select Subject from the Top menu bar

It selects our Vespa

Inverse the selection. Cmd/Ctrl+Shift+I

Choose the mask.

Grab the brush tool, (B)

Make the foreground color black

Make sure Hardness is turned down on the brush for a soft edge.

Paint around the background on the vespa. Black brush stokes on the Layer Mask will hide the current layer and allow the background top show through.

keep painting, but don’t paint over the shadow that was generated

We now see the original background from the bottom layer.

I hope you found this tutorial useful. Keep checking back for new Photoshop features as they become available and other photoshop tutorials here at the CAFE.
Great to see you!
Colin
Recommended for this tutorial
Complete Guide to ai in Photoshop 2026
Generative Fill, Firefly, Harmonize and every AI tool in Photoshop, step by step.
$79.00 · one-time purchase · instant download

Free for you
The Photoshop Vault
Get my free Layer Blending Modes ebook along with dozens of exclusive Photoshop goodies: actions, brushes, presets and cheat sheets.
You're on the list, so your free goodies are waiting for you in the Vault.
Get Free Photoshop Goodies Open the Vault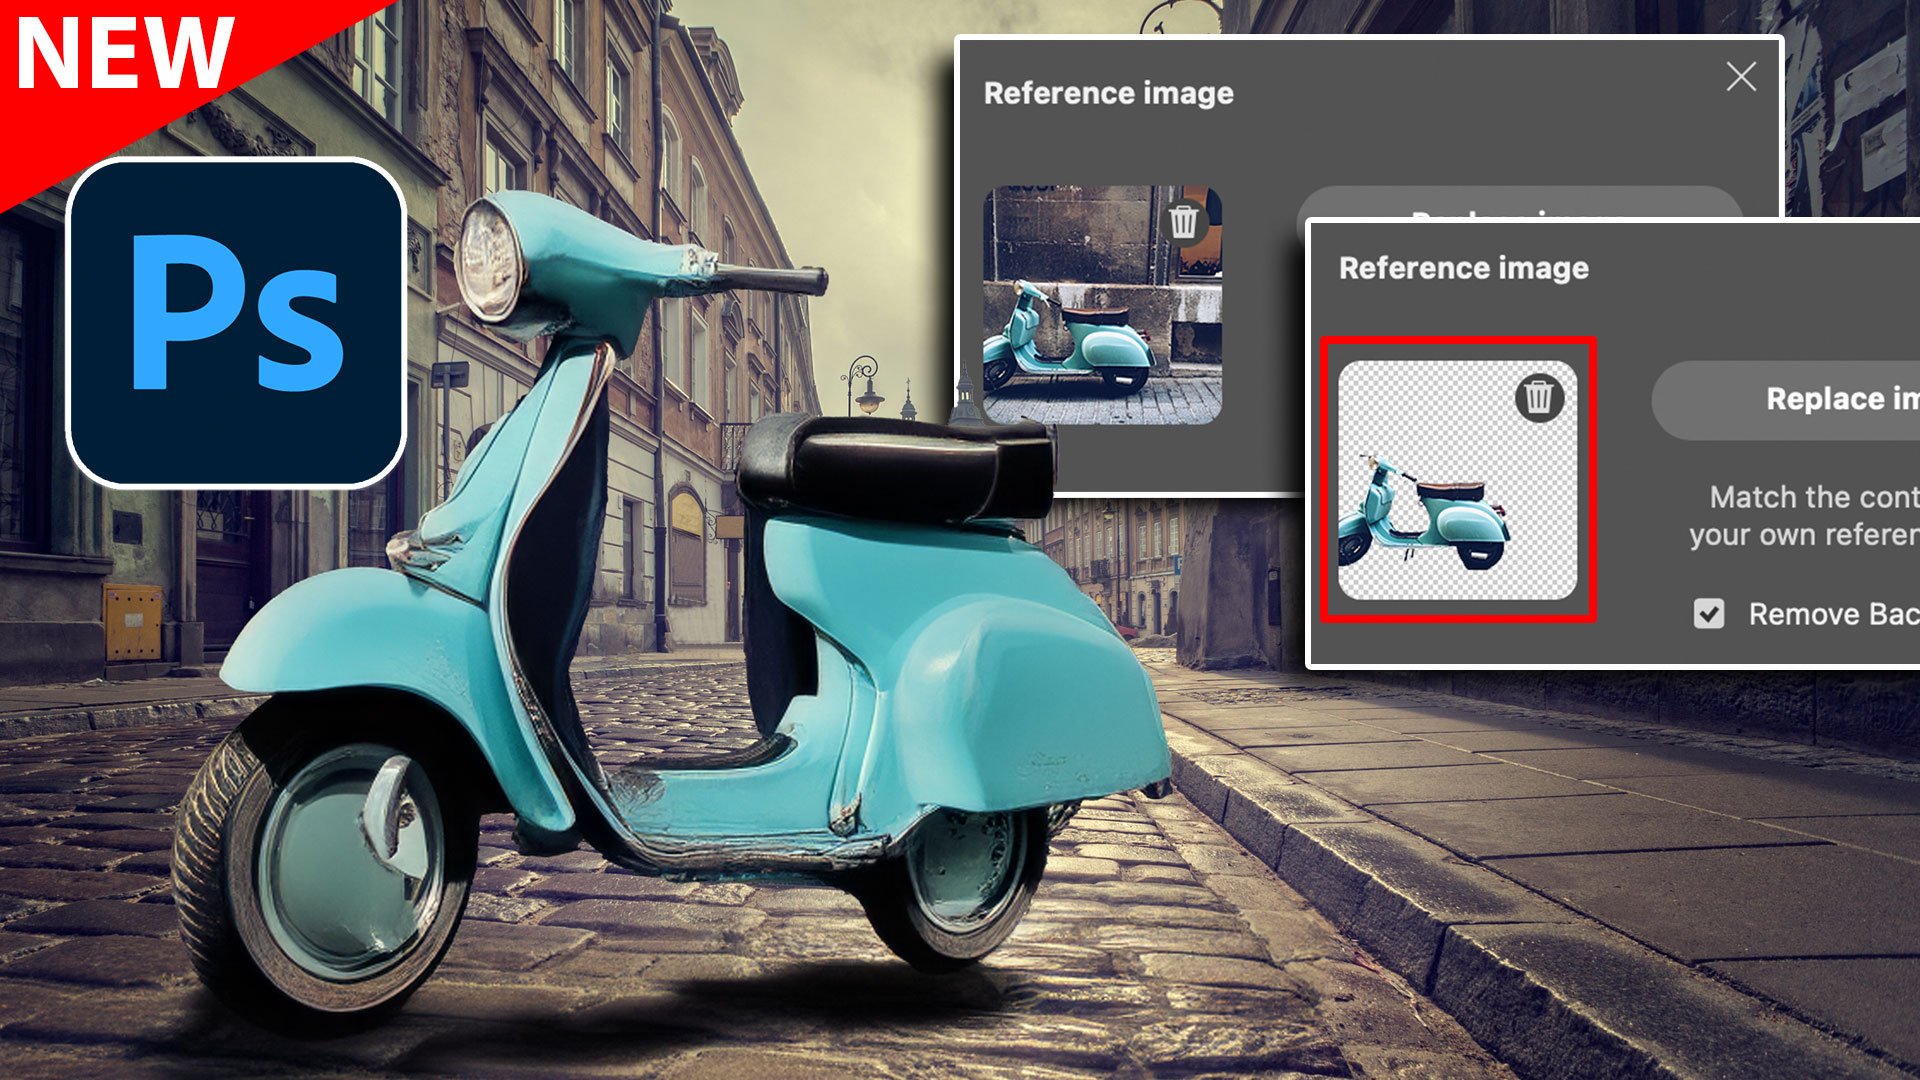
Big ambitious NEW features in Photoshop 2025 July 29 update
How to use the NEW features in Photoshop 2025 July 29 update, free written tutorial and short video tutorial by Colin Read tutorial
How to choose the best Generative ai Model in Photoshop
How to choose the best Generative ai model in Photoshop. Firefly, Flux and Nano banana, which is best? The answer is simple,... Read tutorial
Revealing hidden features in Photoshop Generative Fill to convert photos to art and more
Hidden way to convert your photos into different art styles using Generative ai inside Photoshop. Access Firefly settings inside Photoshop Read tutorial
Generative ai now Matches your photo or sketch, Structure Reference in Adobe Firefly
How to use Structure Reference in Adobe Firefly to upload a photo or a sketch to guide ai image generation. Read tutorial
How to use Generative Workspace in Photoshop
Photoshop Beta Generative Workspace Explained: Prompts, References & Variables Read tutorial












Excellent….
Another thing I didn’t know ’till noq