
How to make the out of bounds, pop out effect in Photoshop Tutorial
How to make OUT of BOUNDS: pop out effect in Photoshop
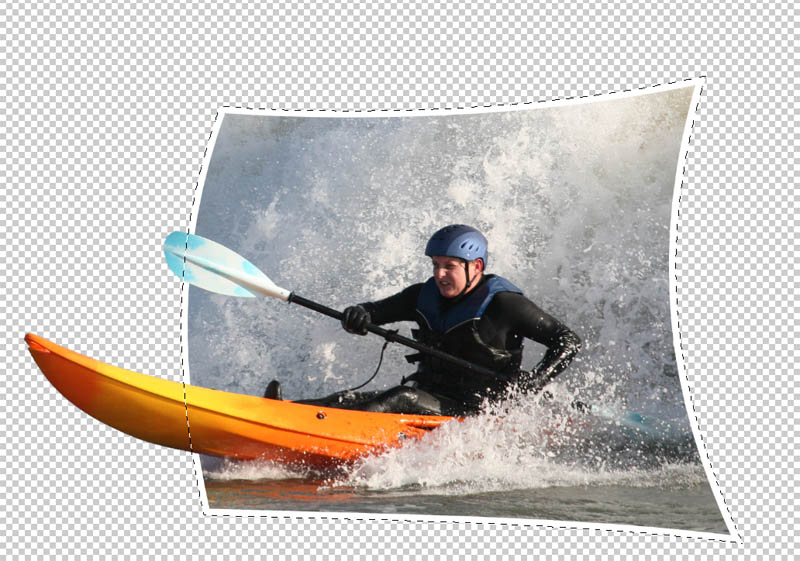
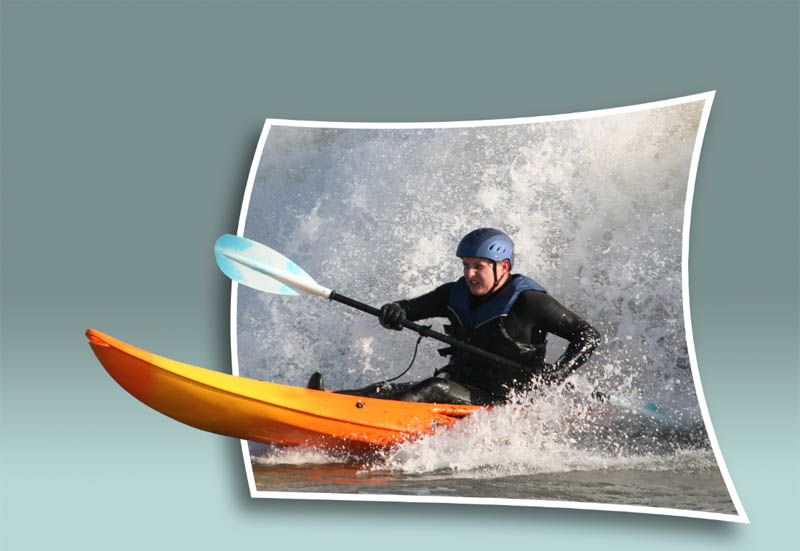
A really fun effect is the pop out effect. When you see a frame that can’t contain the photo, where its bursting out or oozing out of the frame it captures the imagination. I guess its a kind of augmented reality that adds so much visual punch, it’s impossible to ignore. My buddy Avi Muchnik who used to run Worth 1000, used to have a contest category, “Out of Bounds” and this is where this effect got its name. I’m going to show you exactly how to create an out of bounds effect in Photoshop right now. I’m using Photoshop CC, but you can adapt this tutorial to work in any version.
The kinds of photos that lend themselves to that are things like sports images and action images. The shadows are a key element is making something look like it off the surface. In fact I have created a Photoshop tutorial on making cast shadows here.
Finding the photo I used
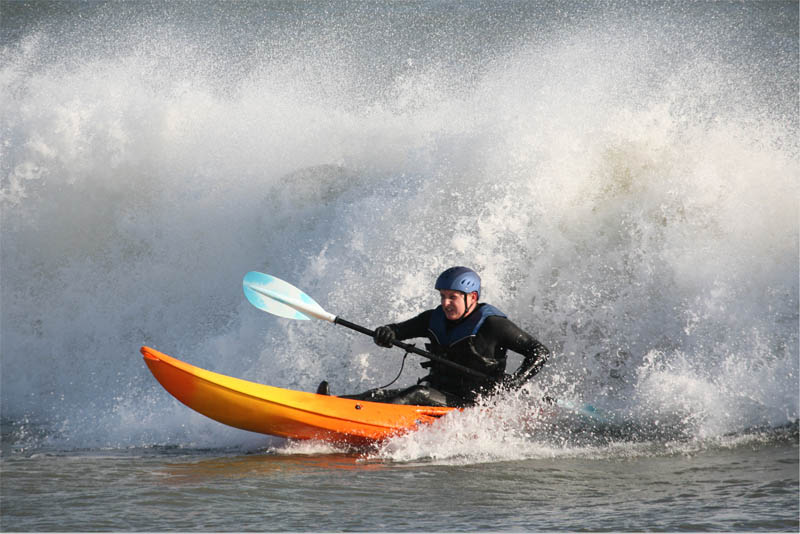
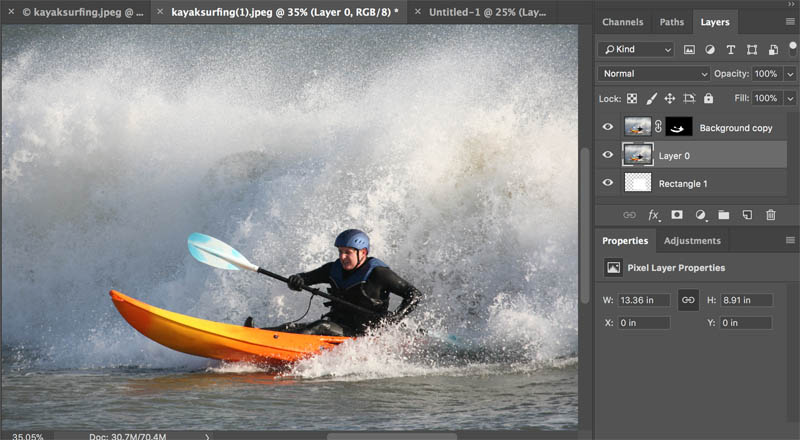
The photo I used is this Kayaking photo from Adobe Stock. you can find it here
Step 1. Extract the Kayak
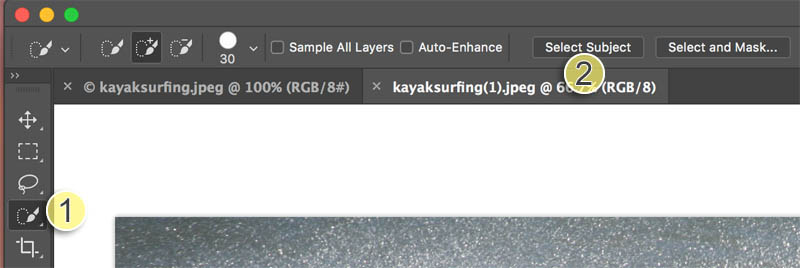
The very first thing we need to do is cut out the subject of the photo.
I’m using some new features in Photoshop CC here. If you are on an earlier version of Photoshop, use this technique to cut it out instead.
Choose the Quick Selection tool: Click on Select Subject
Step 2
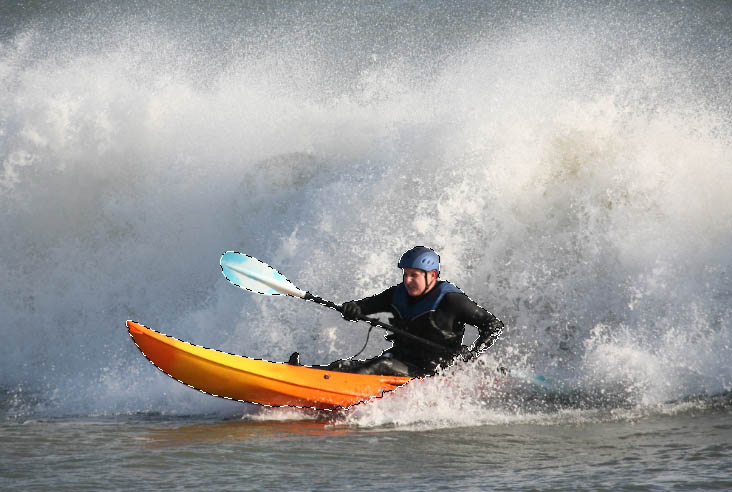
You will now see your subject selected. Use the quick selection brush to fine tune the selection. (If the auto option doesn’t work, then use the quick selection tool like normal, by painting the selection)
Step 3
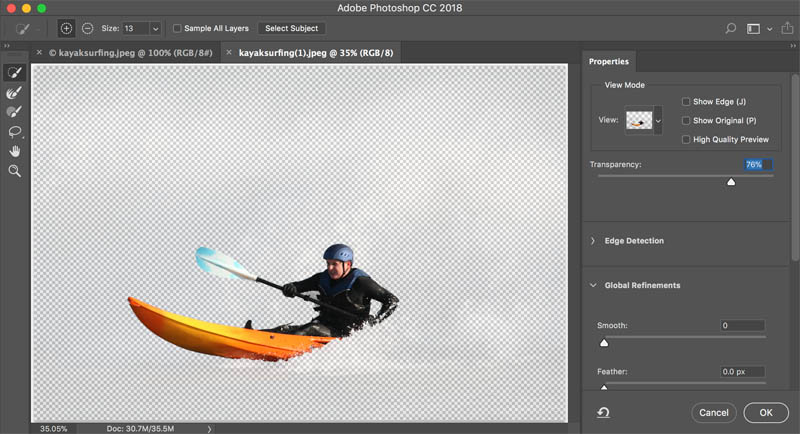
Do some touch ups on the selection by clicking select and Mask from the top tool bar
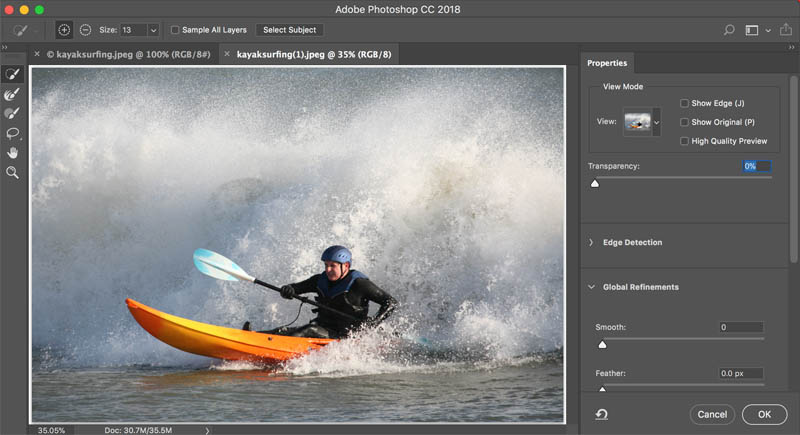
Increase the Transparency slider, so you can preview the cutout
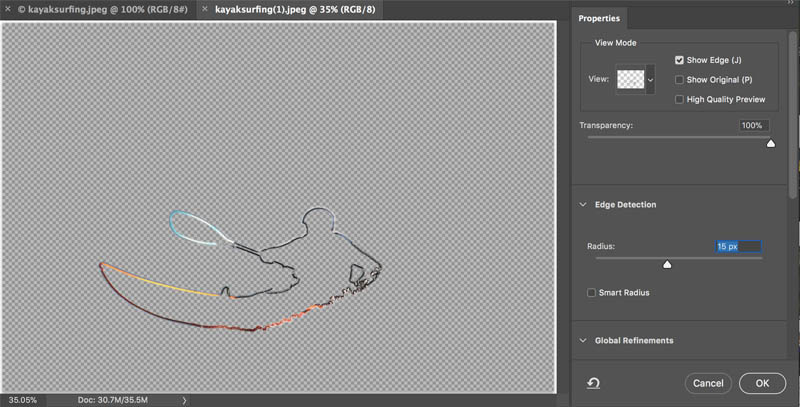
Here is a trick I do, to get a cleaner edge selection.
Click on “Show Edge”
Move the Radius slider until you just start to see an outline
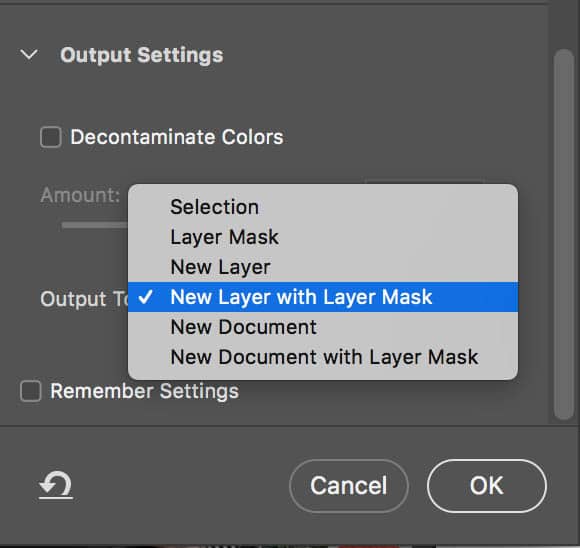
Change the output settings to “New Layer with Layer Mask”
Click ok
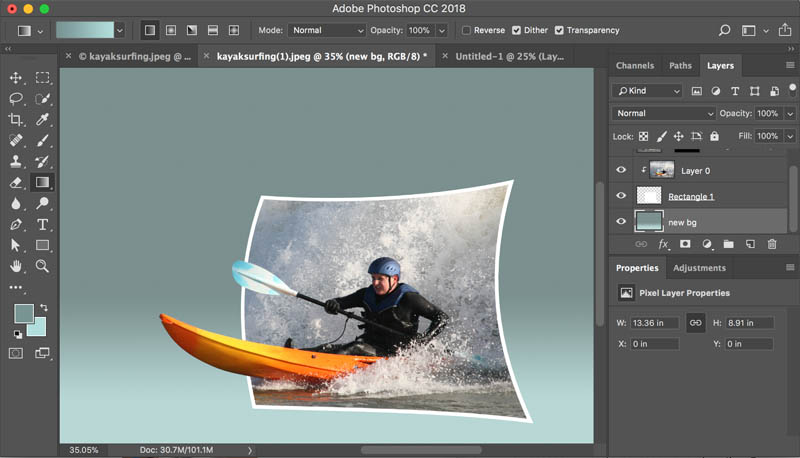
Making the Frame in Photoshop
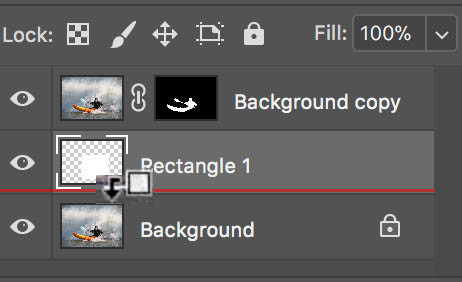
Step 4
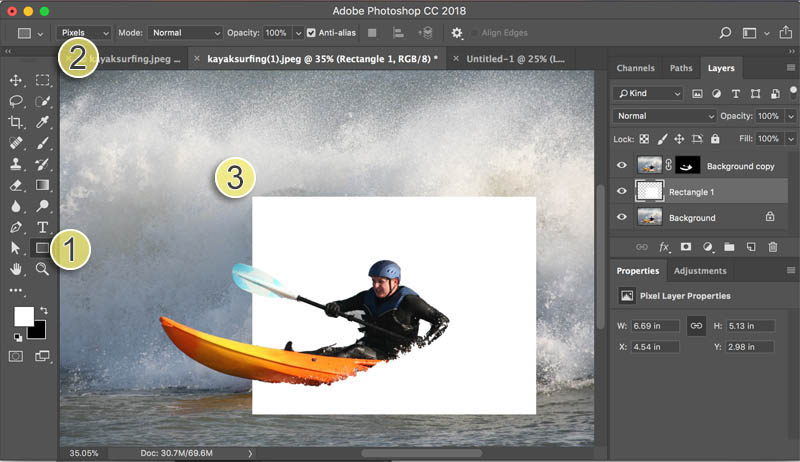
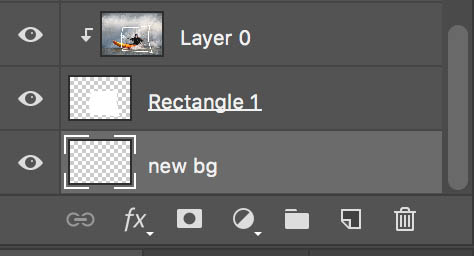
Create a new layer and make sure its between the cut out and the background. This is where our frame will go
Step 5
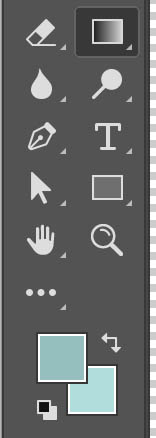
Grab the rectangle shape tool

Step 6
Make sure you choose Pixels as the option in the top right
Drag the rectangle to make a nice frame shape around the kayaker (This is white because that’s the current foreground color, color really doesn’t matter)
Reshaping a rectangle in Photoshop
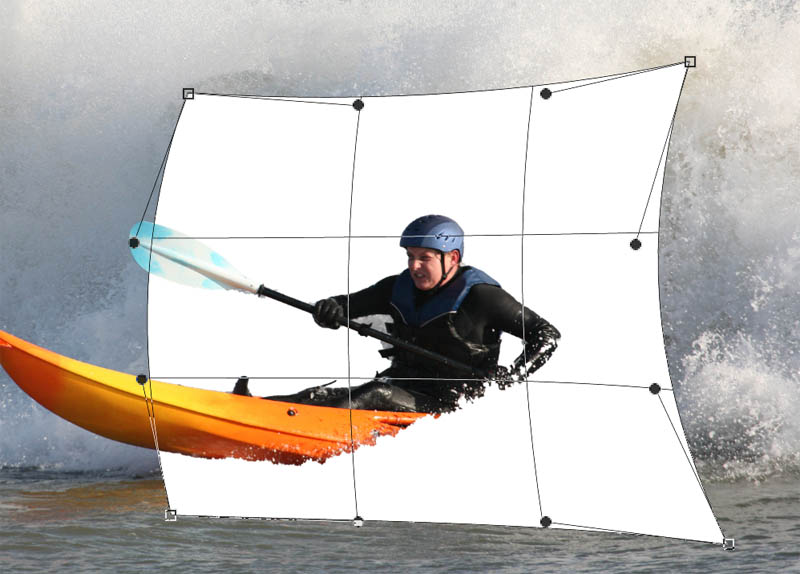
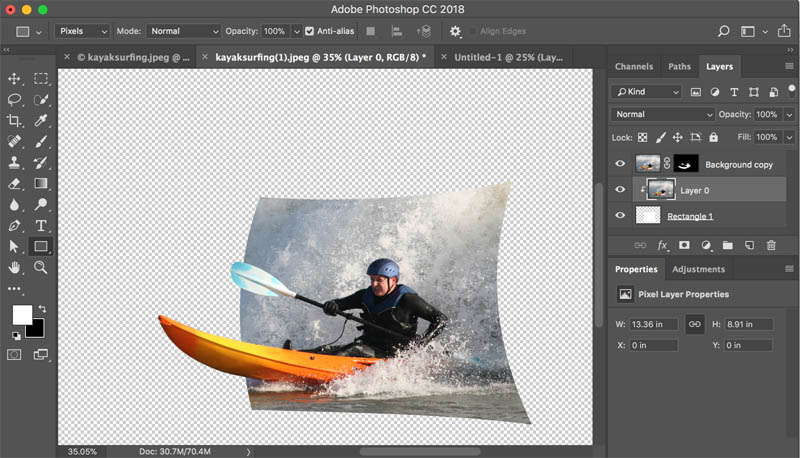
Step 7
Now its time to give some shape to the rectangle, lets make it look like its bursting to hold back the image as it bursts through (Dramatic enough sounding?)
Press Ctrl/Cmd+T for free transform
Right click and choose warp

Step 8
You will now see lines and points on the shape. You can drag on the points, or lines to reshape the box
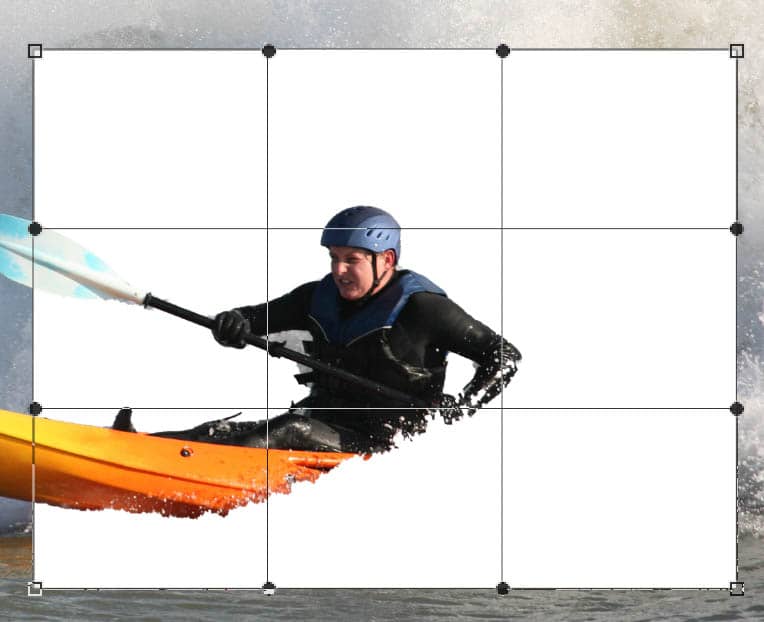
We are going for a “sail” like shape
I mostly got this shape by dragging the corners and the handles that appear when reshaping the corners
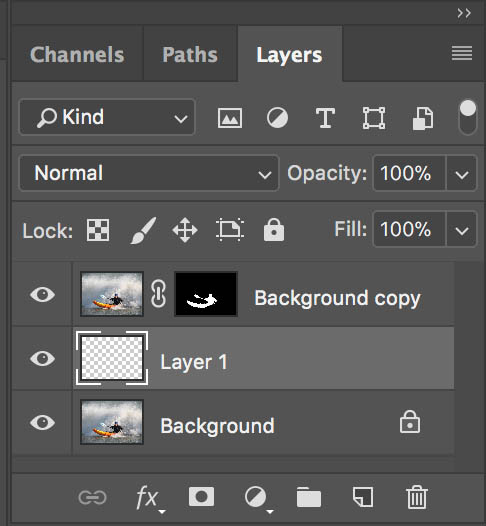
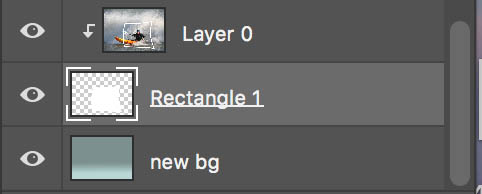
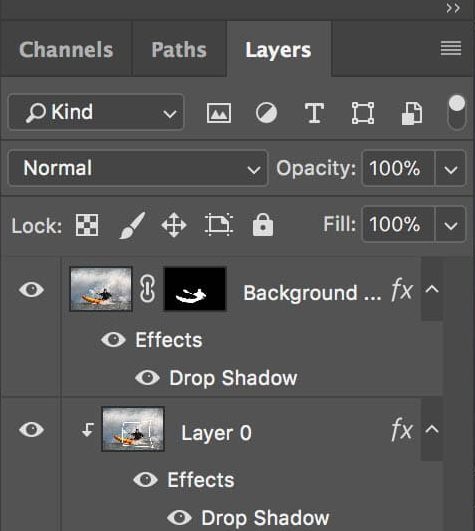
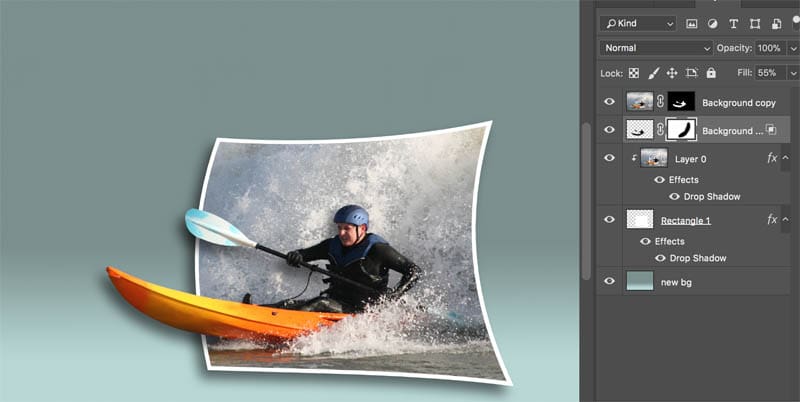
This is what you will see in the layers panel
Step 9
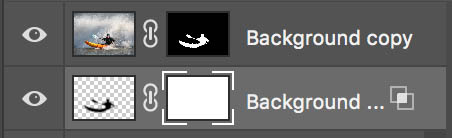
Unlock the background first, by clicking the padlock
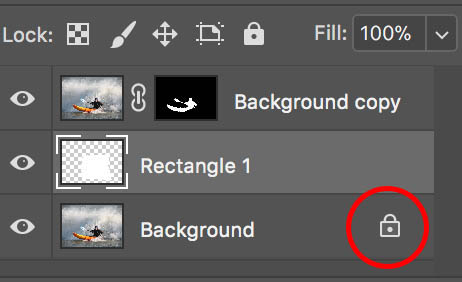
Move the Rectangle layer to the bottom of the layer stack
Step 10
Click on the layer thumbnail and drag to the bottom of the layer stack.
Make a Clipping Group in Photoshop
The key here, is to fit the contents of the layer, inside the frame shape we have made. Then the cut out subject will overlap (ahh, so that’s how it works!)
Step 11
To do this, hover your pointer over the line between 2 layers and hold down the Alt/Option key
When you see an arrow appear, click to apply
Now the photo above will be clipped to the shape of the rectangle. That’s how clipping group works.
Looking good for the initial cut out. Now we need to give the frame a little character and then really make it pop with the shadow.
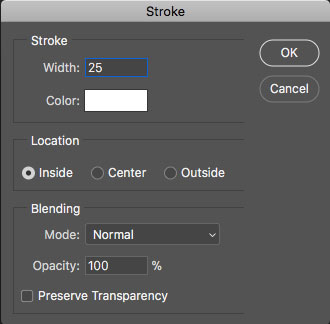
Let’s add an outline to the frame.
Step 12
Keep the clipped image layer selected.
Choose Edit>Stroke I chose 25px for mine. A good idea is to choose Inside for the location since anything outside the clipping bounds wont show.
And the outline around the frame
Let’s fill in the background to give us something to look at
Step 13
Create a new layer at the bottom
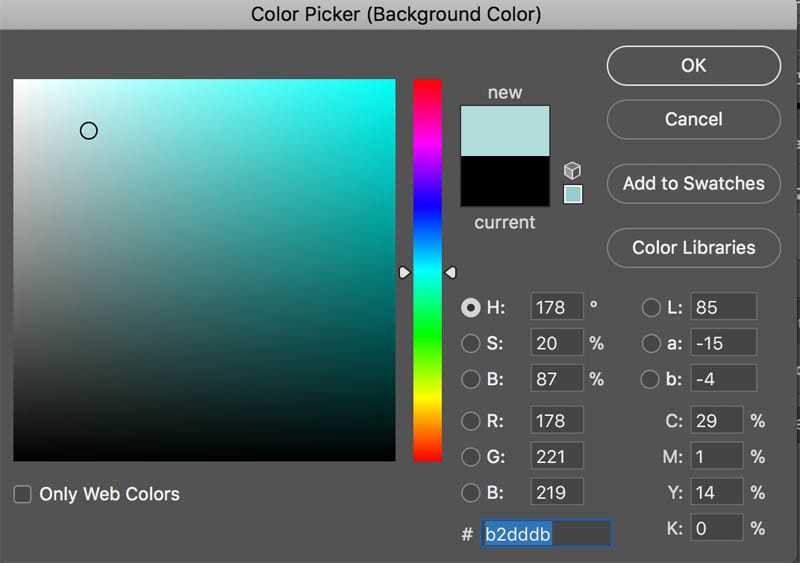
Choose a color for the foreground
An a similar, but slightly different color for the background
Step 14
Grab the gradient tool
Choose foreground to background | Linear | Normal | Opacity at 100%
![]()
Step 15
Drag with the gradient tool to create your background gradient.
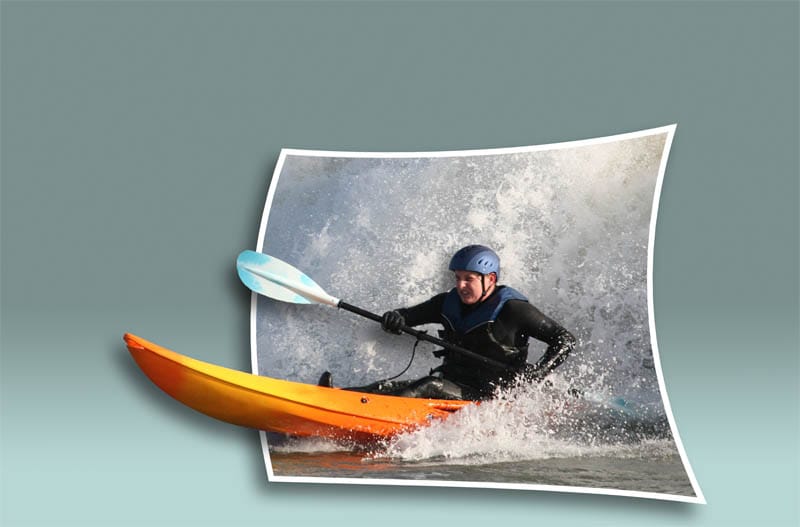
Adding the Drop Shadow in Photoshop for realism
Let’s add a shadow to really lift it off the page. I made an in-depth tutorial on cast shadows in Photoshop
Step 16
We are going to create a shadow around the box first. Choose the Rectangle layer
Click on fx and choose Drop Shadow from the menu

Here are the settings I used for the drop shadow
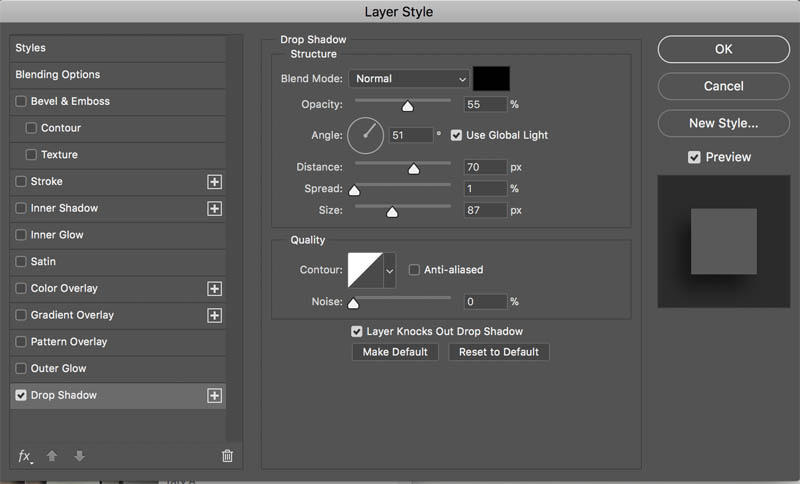
And here is the result. The frame is now floating above the page. We need to add the shadow to the subject to complete our effect.
If we apply a layer style shadow to our subject, it will make a shadow all the way around the shape,so we will need an extra step.
Step 17
Add the drop shadow to the Subject layer
The problem is that the shadow shows all the way around and looks weird at the bottom of the boat and where the water spray is.

Here is a cool trick to fix the shadow
Step 18
Convert the shadow to a layer. Right click on the word effects
Click Create Layer
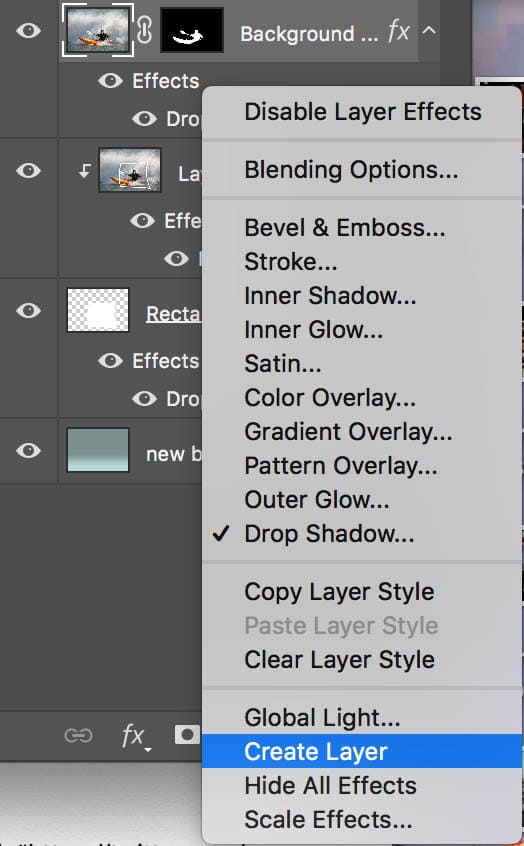
You will see that the drop shadow is now its own layer
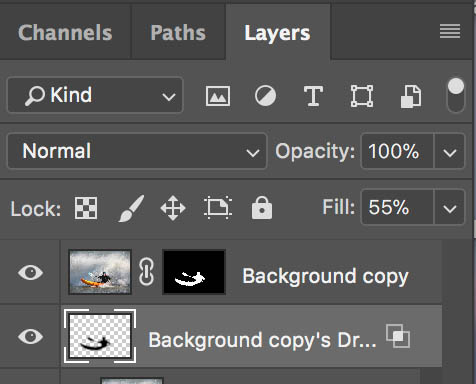
Step 19
Add a Layer mask to the shadow layer
Step 20
Choose a soft, black brush (B) and paint away the shadow from the areas that you don’t want it to show
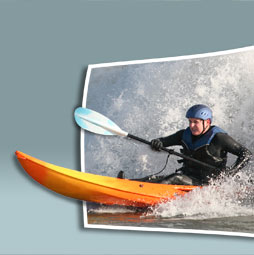
And here is the final result!
Wasn’t that fun? Let me know in the comments.
Thanks for checking out this tutorial.
Don’t forget to browse my hundreds of free Photoshop tutorials, you might be surprised by the quality and amount of our free content
Colin
PS Don’t forget to follow us on Social Media for more tips.. (I've been posting some fun Instagram and Facebook Stories lately)
You can get my free Layer Blending modes ebook along with dozens of exclusive Photoshop Goodies here

22 thoughts on “How to make the out of bounds, pop out effect in Photoshop Tutorial”
Leave a Reply

The DJI Mavic 2 Pro and Mavic 2 Zoom have been announced this morning. A big feature is hyper lapse,...

How to use Repeat Transformation in Photoshop. Save time when making copies of objects and positioning them in Photoshop, this...

How to combine images and auto composite in Photoshop with Generative Fill ai. Colin Smith shares his Photoshop Gen Fill...


Very much enjoy your effective style of teaching. I have learned so much and continue to do so with all the new updates you furnish for us.
Thank you
Thanks 🙂
Hey Colin,
Great Tutorial! I’ve been wanting to so something like that, but never knew how! So now I’m off to try it out!
Thanks,
Dennis
Thank you so much for this tutorial, you are so easy to follow, clear speaking and concise…..many thanks
I enjoyed your tut and learned a lot.
is there a way to make the shadow of the front of the boat more realistic. Coming out of the layer of the photo this shadow should move away from the boat. The greater distance to the gray-blue background the more the shadow will move away from the boat. Perhaps you can transform the outline of the front of the boat and fill it with a gray gradient.
Wahwww, I’ll try this today with one of my pictures. I have ever seen this tutorial but I could not remember it.
Thanks…!
We are always told to ‘smash’ the light button at the bottom. Where exactly is this light button. How does it look?
Thanks
The like button on youtube 🙂
I learn so much by listening to you! Thank you for the tutorials. Loved this one.
Colin, Thanks, thats the easiest I have seen this done. I am going to try this with some of my race cars.
Pete
I learned a lot from your wonderful tutorial. I would appreciate it if you could let me know the actual picture identification number of the kayak picture on Adobe stock. I looked at a lot of kayak whitewater pictures horizontal and could not locate it.
https://stock.adobe.com/images/kayak-surfing/2235882?prev_url=detail
When I try the out of frame tutorial.
I find that the Select Modify is greyed out and therefore I cannot put a frame around the warped selection.
Any suggestions ?
Colin, thank you once again for sharing with us. Your generosity and enthusiasm is infectious and has challenged me to become a more competent photographer. Just know that on the other side of the world there is someone who is inspired and delighted by your tutorials and who recognises the value and generosity of your experience and teaching. I extend my sincere admiration and gratitude…..all the way from Australia.
I have a question from a different email: The free Adobe Video pages at Adobe are only for Premier Pro?? The will not work with Elements Premier?? Are there any free ones for Ele. Premier???? Appreciate your help with this!!!
Thank you, Colin,
I have wanted to know how to do a pop out. I need to practice this. i have watched other tutorials that you have done.
These are awesome tutorials.
Good training
thank you
lemons.ir
Great tutorial – often wondered how it was done. Now I know.
This is my first time using your tutorials thay are Great tutorials
Enjoyed the tutorial but I wasn’t able to get the frame step to work, and I’m not sure why.
Don’t forget to share your images with the community on our facebook group https://www.facebook.com/groups/53878338135/
Can I do use the out of bound effect free on Photoshop.