How to get rid of the black or white edge around a cutout in Photoshop
After you cut out or mask an image in Photoshop, it’s common to have black or white fringes or just jaggy around the edges. Here I’ll show you 3 ways to get rid of them. Make sure to watch the video if you can because it has a lot more tips and detail than these written instruction.


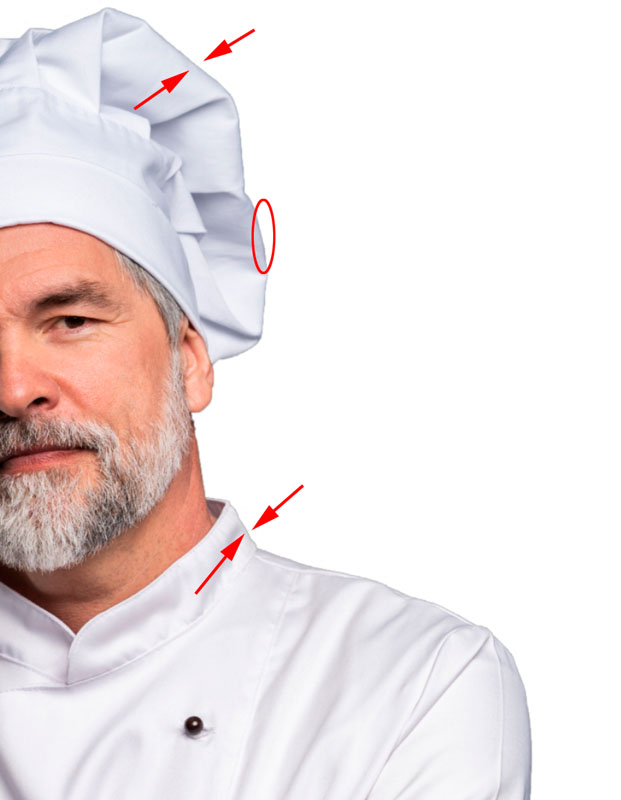
When you make the cutout, you should do it with a layer mask, don’t erase the background. (How to cut out an image in Photoshop)
Click on the layer mask.
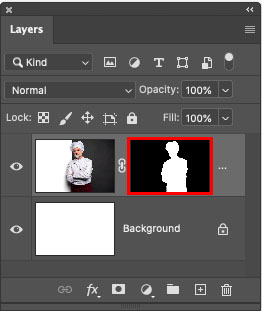
Click on the layer mask.

Press Ctrl/Cmd+ for Levels
Take the black slider on the left and move it towards the right until the edge is nice and clean.
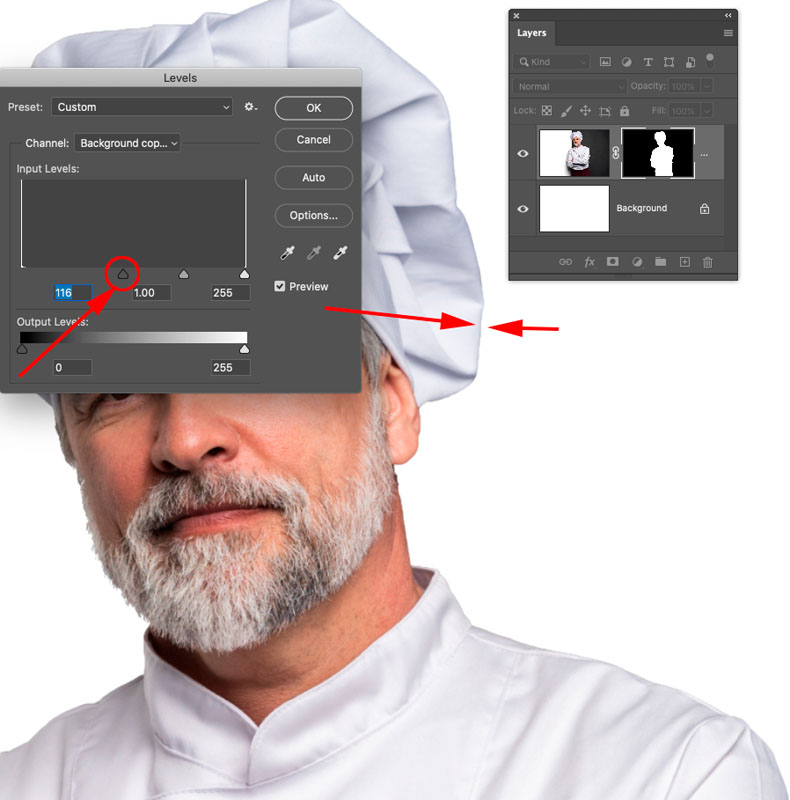
Click on the layer mask.

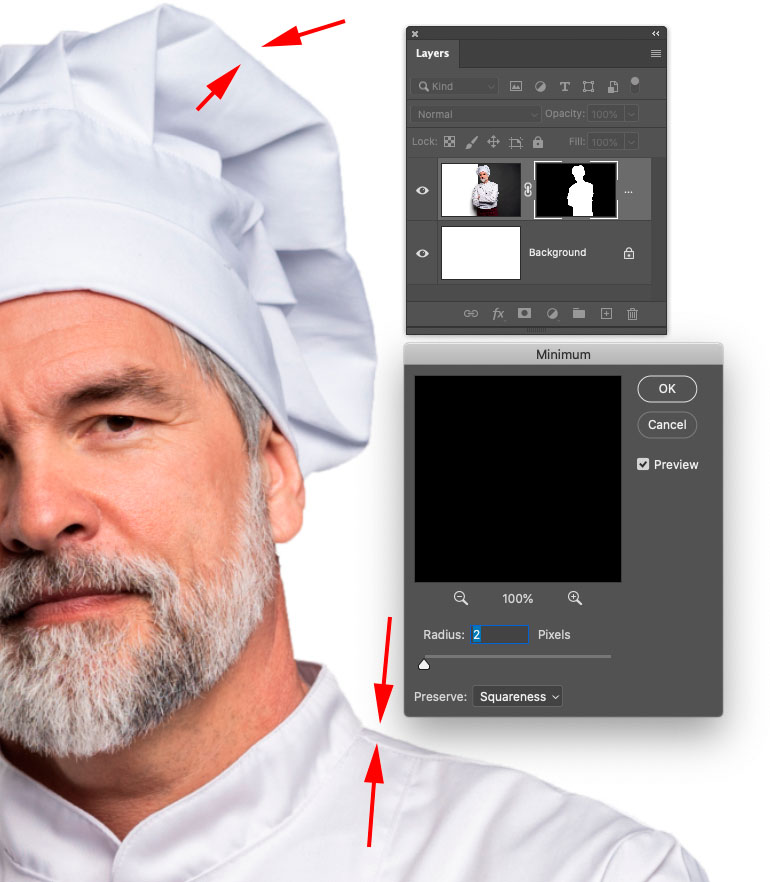
Filter>Other>Minimum
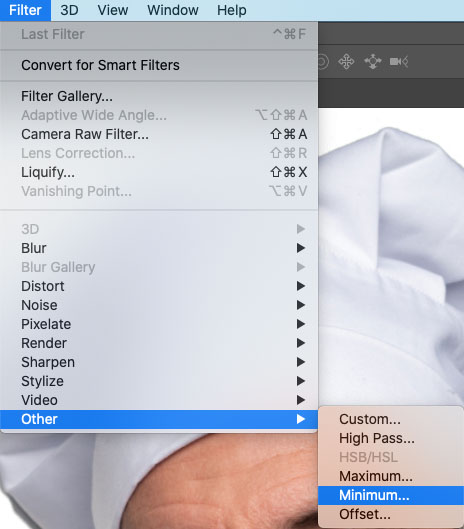
Increase the radius until the edge is clean.
See the video for more details on this including when to use Maximum and what square vs rounded does.
The other methods are global, meaning all the edge is adjusted at once.
This 3rd method is a local method, so you can paint away your edges where you want. This is a good option when hair is part of the selection. The other 2 methods will make loose hair disappear, this will let you save it.
Ctrl/Cmd + Click on the layer mask to load the selection.

Choose Select>Modify>Contract
Contract Selection by 1 pixel
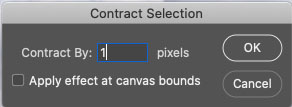
This will shrink the selection
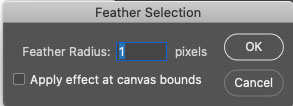
Choose Select>Modify>Feather enter a setting of 1.
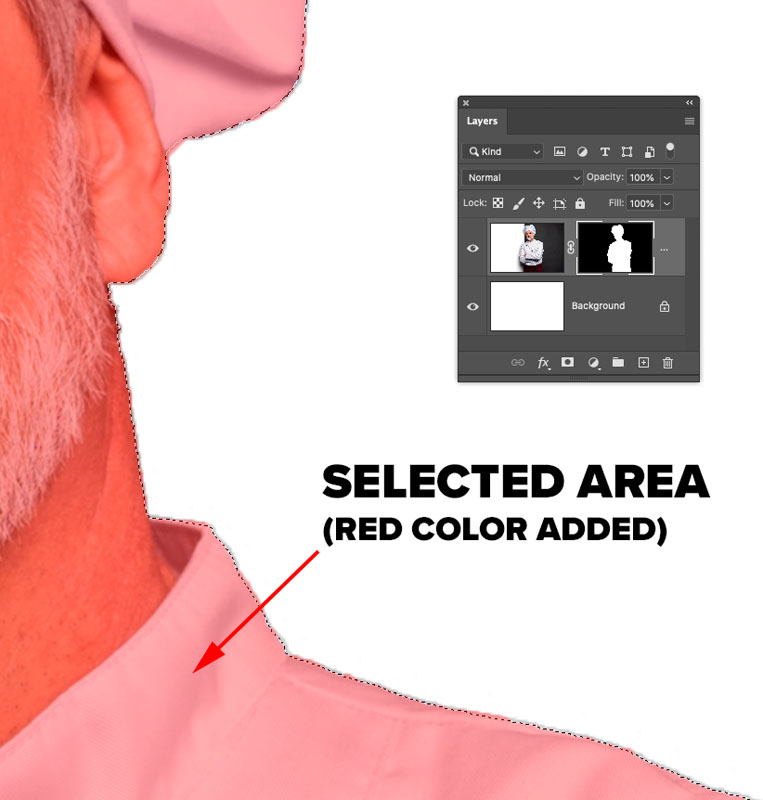
Press Cmd/Ctrl+Shift+I to inverse the selection
Now everything outside the image is selected with a single pixel on the inside of the image edge.

Choose Black as the foreground color (Press D key)
Select the brush tool for the toolbox.
Choose a soft edge, 100% opacity and normal mode
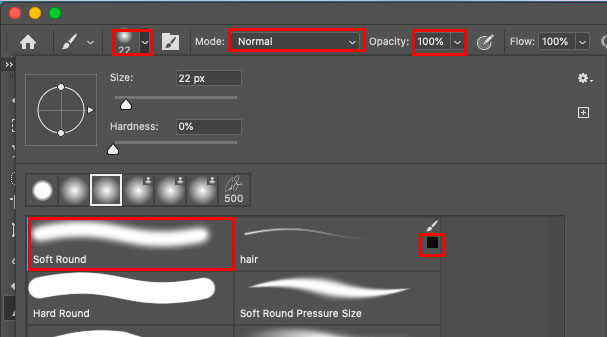
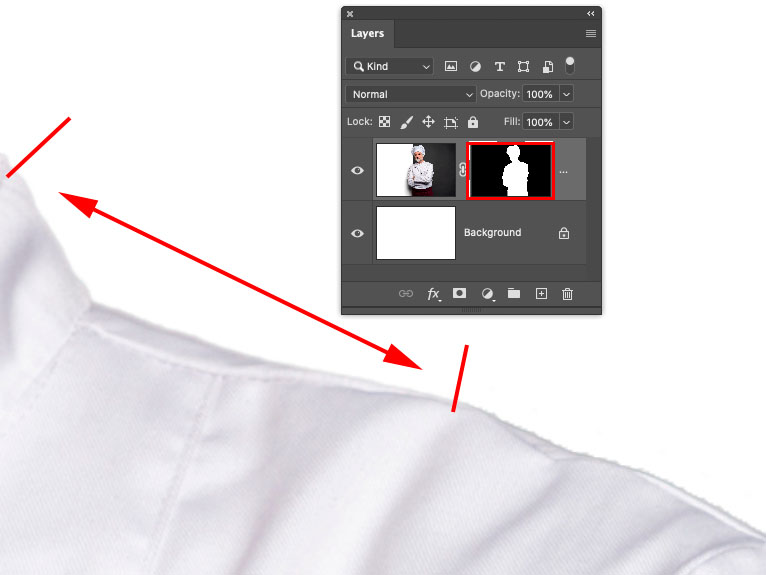
Click on the layer mask
Press Cmd/Ctrl+H to hide the selection (On mac it might ask if you want to hide Photoshop or extras. Choose extras)
Pain on the edges and watch the edge halos disappear!
I hope you enjoyed this week’s tutorial and you are now able to make those edges look nice. Look around, there are a lot of useful tutorials here at the CAFE and I make a new one every week.
Great to see you here at the CAFE
Colin
PS Don’t forget to join our mailing list and follow me on Social Media>
(Ive been posting some fun Instagram and Facebook Stories lately)
You can get my free Layer Blending modes ebook here
Stop struggling with selections. Learn how to select and cut out anything from people, hair, trees, complex shapes and even transparency.
Discover how to get perfect edges, without halos and jaggies. Colin shows you exactly how in 18 lessons.
All the images are included for you to follow along.
You will be able to select and cut out anything: faster and cleaner.

This site uses Akismet to reduce spam. Learn how your comment data is processed.
a deep look at the new features released in Photoshop 2022, learn the new features in a creative, practical way...
In this weeks Live from Lockdown Colin Smith shows how to match the color between photos, Make any photo look...
how to create a hightech techno style composite / collage design in Photoshop...

I did NOT know these methods! I’m a long-time Photoshop user. This has been driving me crazy. I am SO GLAD you showed us these 3 tricks! Now I can stop using the painstakingly slow method of selecting objects that I’ve been using!
I did not know about this feature. Thanks! (Of course I’ll have to watch it again and again to remember it!)
Stay safe!
I love that you have offered us the ‘printed’ version as well as a video. I know they must take time to make, but for the recipient, they are so much faster to access and take in–as well as faster to go back to for a refresher! You just go to the part you need reminding about. Thanks so much Colin!
-Mary
I try to have them for every tutorial. occasionaly I may miss one because of time. But I plan to go back over thouse and do written steps as time allows
I wasn’t aware of these methods
I knew methods 1 & 2, but the third is a game-changer. What a superb resource there is in the PhotoShop Cafe! Great tips, well taught. Thanks again Colin.
Thanks for the kind words, I try to make PSC as useful as possible
The Guru does it once again. Didn’t know about this feature. Thank you very much Colin.
Hi Colin. Love your tutorials. I loved your methods to create the smooth edges and cutouts. Thanks so much.
Thank you, Colin! Great tutorial. I think I don’t remember seeing these tutorials. Only the ones with the common masking thing. But these are fast, efficient and extremely practical. Glad you’re here for us. Keep up the great work. Hoping you are doing great and and great health.
Hi Colin, I did know about method #3. Thanks for showing all 3 … Great info my Man!!
Dennis
Knew about minimize (from a prior lesson of yours), but not the other two techniques. These are extremely helpful, thanks, Colin!
As always, extremely useful. Many thanks yet again.
Thanks a lot!!! New informative and easy to understand!!!!
Great tutorial! Thank you!
Another great video, and another important lesson lesson. Thank you.
At the beginning of this tutorial you mentioned your video on using layer masks. I’ve gone through all 14 pages of your listed tutorials and I cannot find one with that particular title. Which one of your tutorials would it be?
Many thanks for all your excellent tutorials.
Did you try the search function?
https://photoshopcafe.com/use-layer-masks-photoshop-7-layer-masking-tips/
Really pleased I’ve found this website/tutorials new to using a Mac too so great for me Thanks
Hey Colin,
I never knew what the Minimize setting did, even though I had clicked on it out of curiosity, probably when it would not do anything I could notice. Thanks also for the Level method. I think that works a little more subtle and softer. The third technique is a lot like the way I figured out after trying many things that I knew might work.
Pete
Hey Colin, WOW! thanks the tut was great. I knew about one of them. My go to with the selection tool and using the modify, feather and inverse worked best for me. thanks again brother. I do want to ask in some of the process the steps I am not as familiar with and when you explain I am lost with the explanation. there is much work that goes into your tutorial and adding more steps-well I do not want to increase that load. but is it something you can consider? thanks. – Jesse
Hey Colin, WOW! thanks the tut was great. I knew about one of them. My go to with the selection tool and using the modify, feather and inverse worked best for me. thanks again brother. I do want to ask, in some of the process the steps I am not as familiar with and when you explain I am lost with the explanation. there is much work that goes into your tutorial and adding more steps-well I do not want to increase that load. but is it something you can consider? thanks. – Jesse
Great info exactly what I was looking for. These edge fringes gave me an headache all the time. Now I know how to fix them. Thanks a lot!
Extremely useful tutorial! Congratulations for the work done!
Thank you for all the useful information!