
How to make a sunset or sunrise in Photoshop with lighting effects
How to make golden hour lighting in Photoshop to make your photos come to life
In this tutorial we are going to make a beautiful golden hour, like you would see at sunrise or sunset.
You can apply this technique to any photo. You can use an overcast day, to add a sunrise or sunset, or you can use a photos where the sunrise didn’t quite hit and really make it shine. We will use 2 examples here.
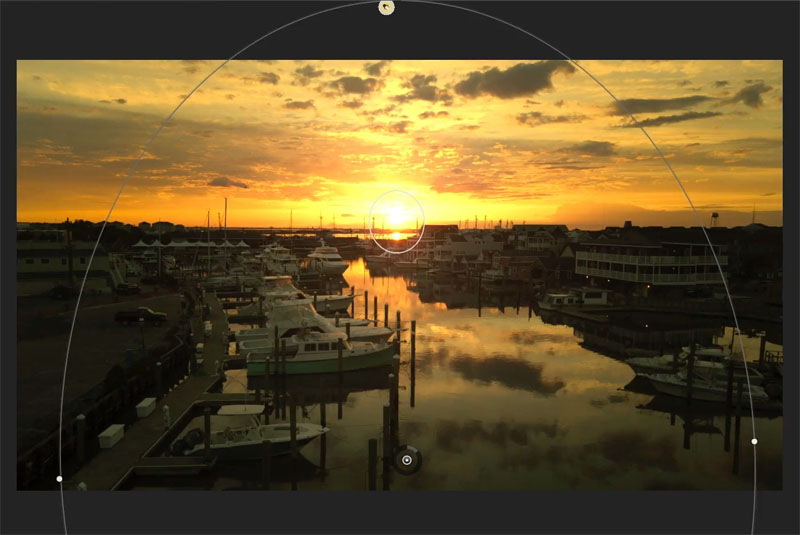
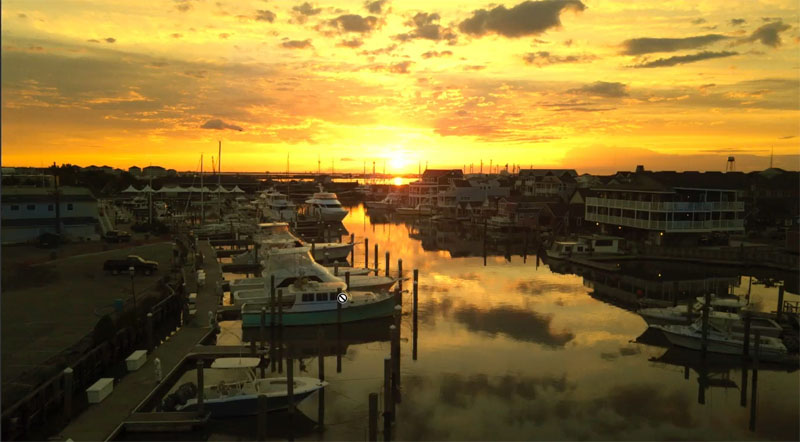
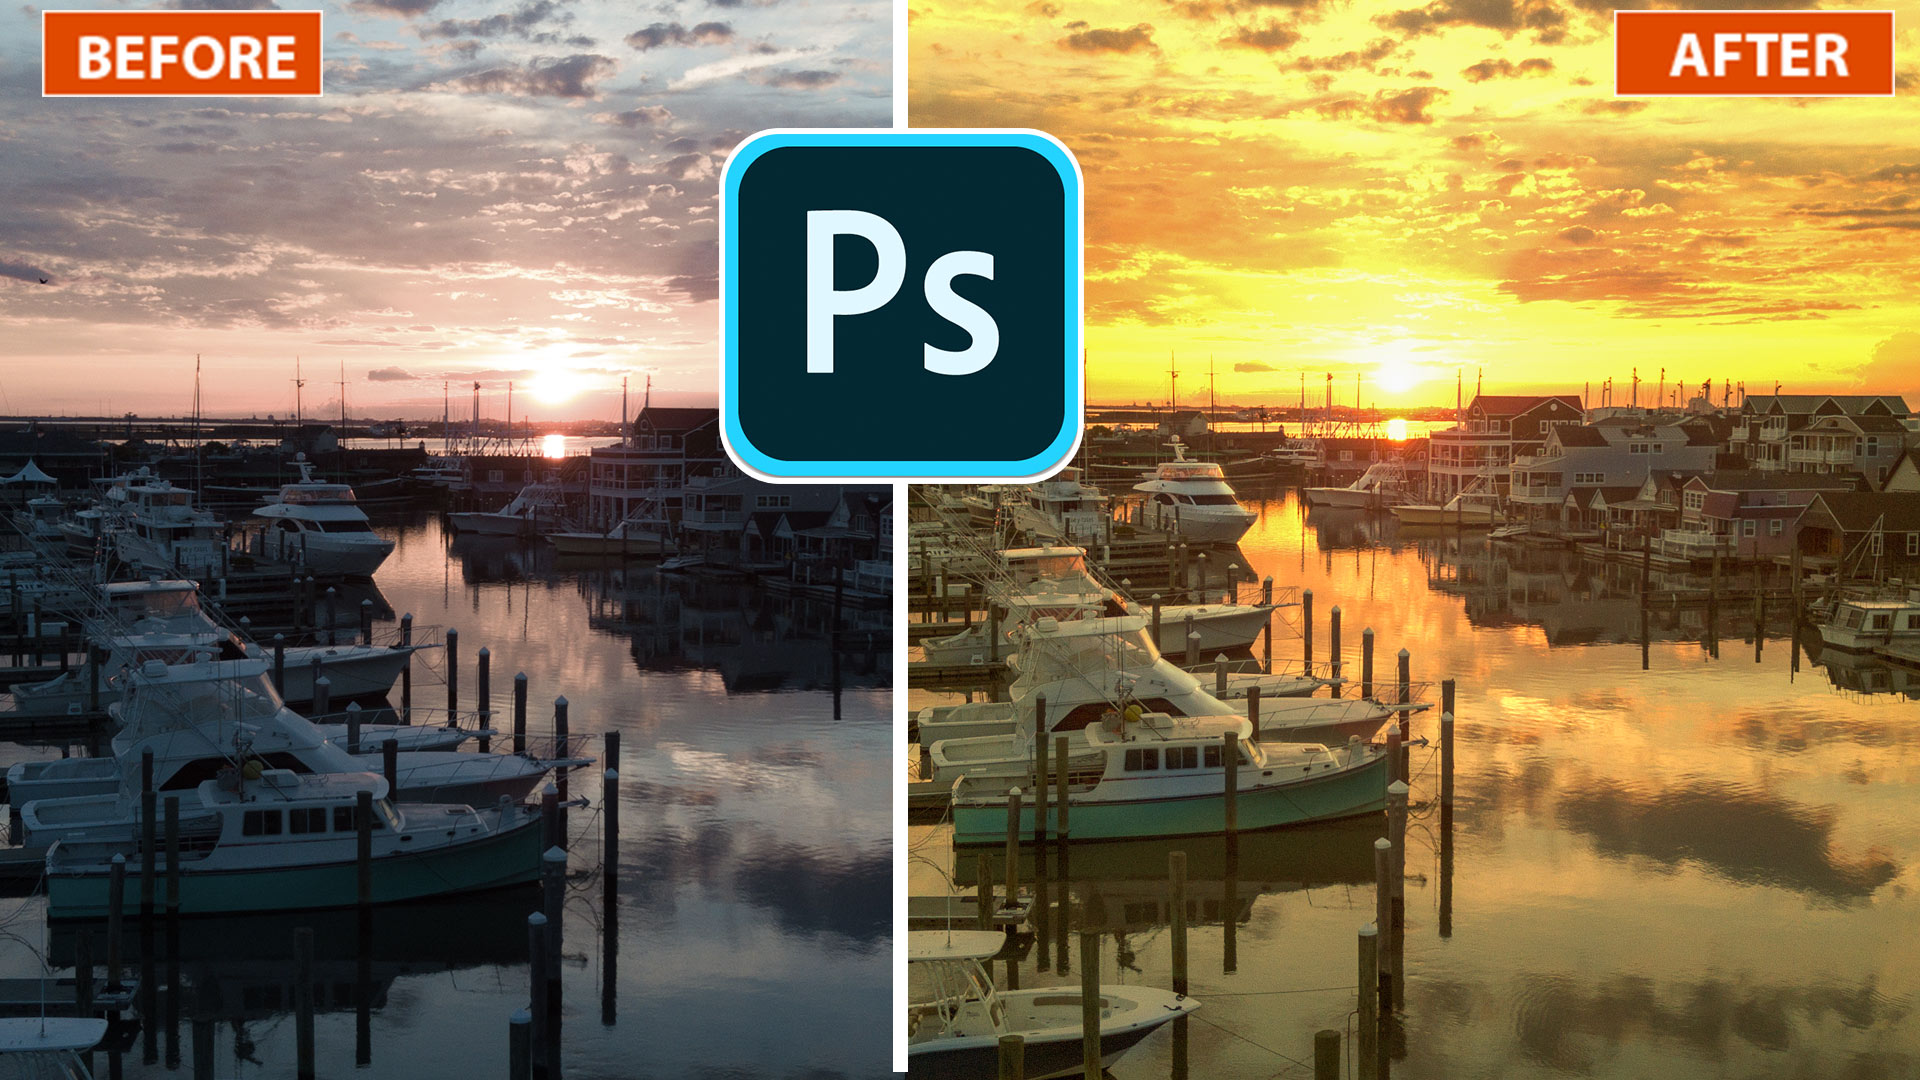
Let’s start with this aerial I shot in Cape May NJ.
Make sure you image is an 8-Bit RGB image under Image>Mode

1.
Right click on the name in the Layers panel and choose, Convert to Smart Object. This gives Flexibility by making the filter a Smart Filter.
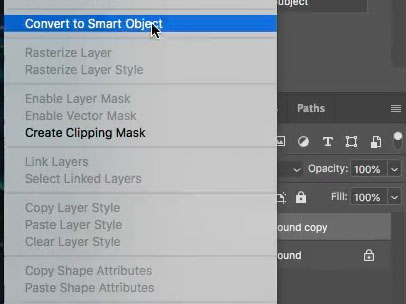
I made the smart object on a copy of the background, this is entirely optional.

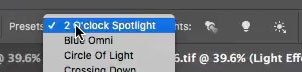
2.
Unfortunately, the Lighting effects filter has recently been retired. This tutorial shows how to get lighting effects with new Gradient features.
Choose Filter>Render>Lighting Effects
Under presets, choose 2 O’Clock Spotlight
3.
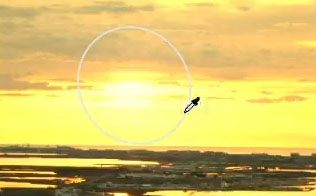
Position the hotspot over the sun. If the sun isn’t visible in the image, place the hotsport where the sun would be. Drag on the 4 points to change the size and shape of the lighting oval. Drag inside the oval to move and outside the oval to rotate.
(I cover this in more depth in the video and the previous few tutorials if you need more basic instruction).
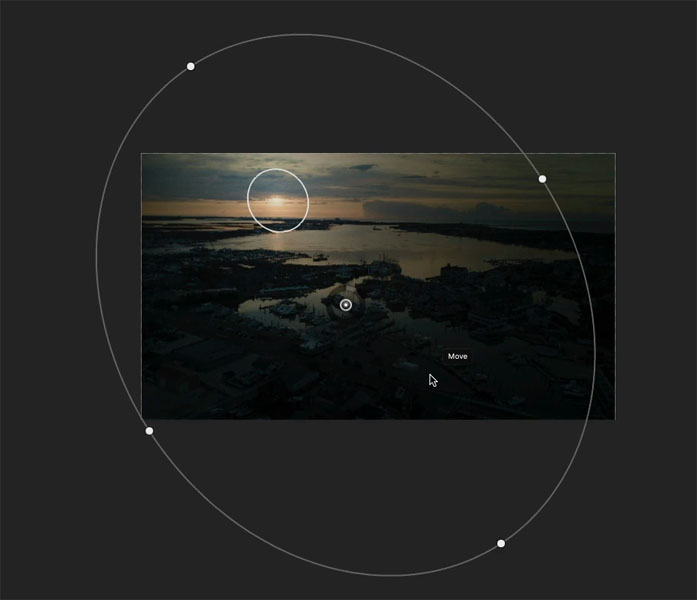
These are my preliminary settings. Pay special attention to the Hotspot slider.
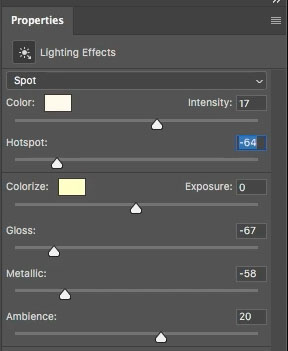
4.
In the Lighting effects, there are 2 areas. The top set of adjustments are for the hotspot, or the light itself.
The bottom set of adjustments is for the ambient, or overall lighting outside the oval.

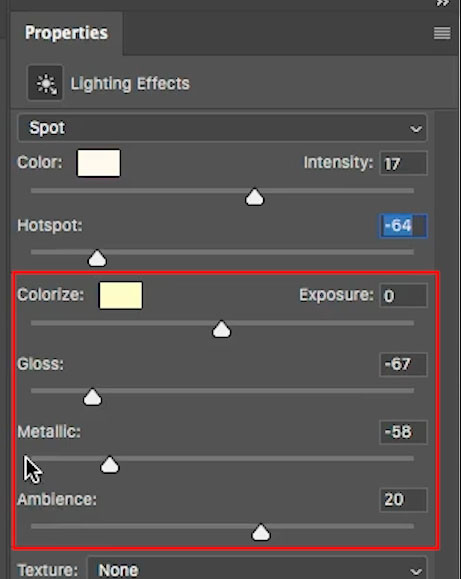
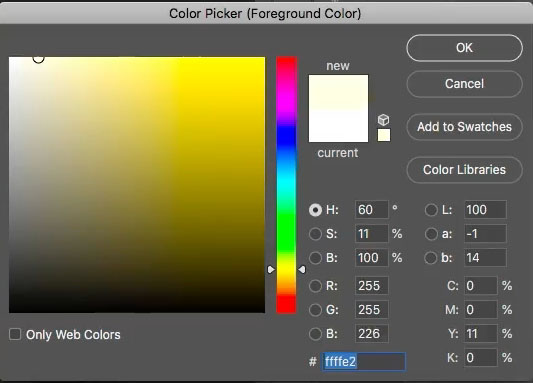
There are 2 color swatches, the top one changes the color of the lit area (Light color), the bottom one changes the rest of the color on the image .
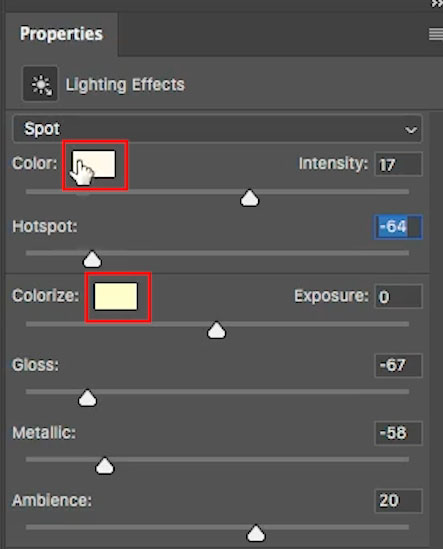
5.
Click on the bottom color picker (colorize) to change the ambient light.
Choose a warm orange color and increase the Intensity to 1.27
Click ok
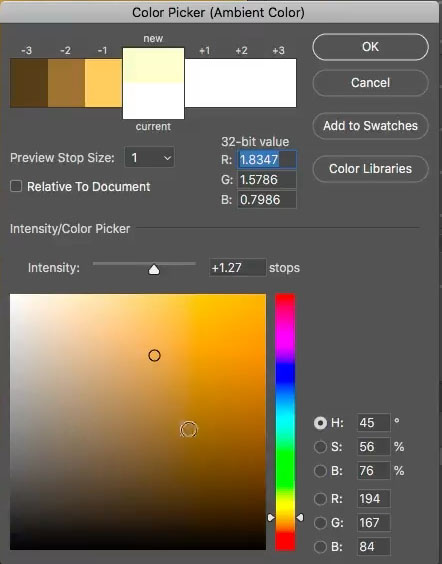
You will see how we are starting to see a nice golden color of the image.
6.
Click on the top color picker, the color one.
We want a nice golden color of the light source,
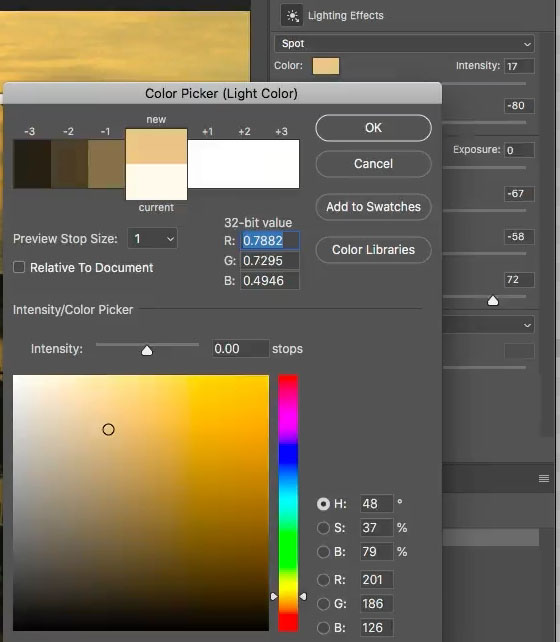
If you move your curser over the photo, it will change to an eyedropper. Click to sample a nice golden yellow color.
7.
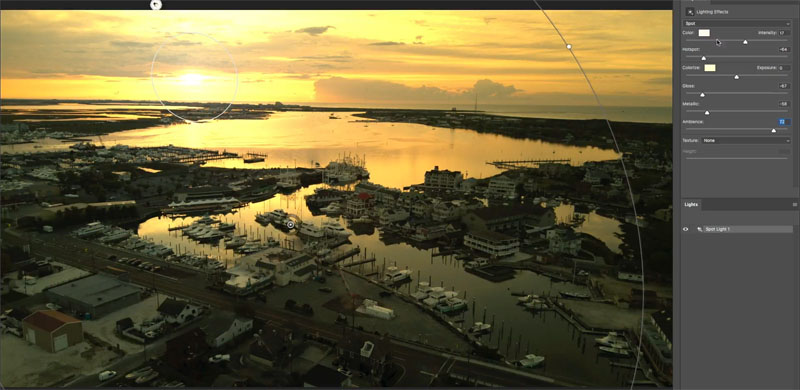
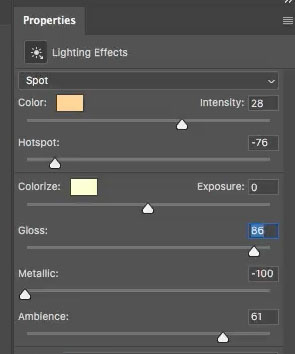
Adjust the settings so there is a nice balance between the light and a nice ambient glow.
Here are the settings I used.
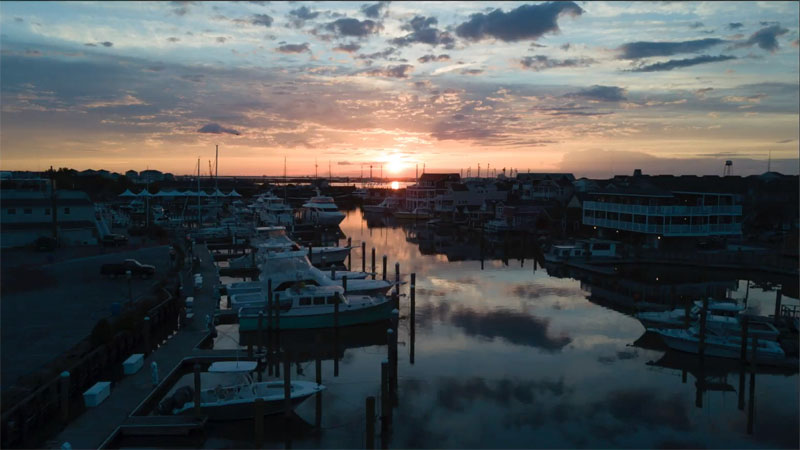
and the result, a realistic looking golden early morning glow.

8.
Let’s look at another example, I have something different to show you on this one. Right click on the name and choose Convert To Smart Object. (You will see why soon).
9.
Choose Filter>Render>Lighting Effects
The previous settings will appear (its a sticky setting)
Position the hotspot over the sun.
If you like, you can change the settings, like we did in the previous example. I turned up the ambience slider just a little bit, everything else is identical to the last settings.

10.
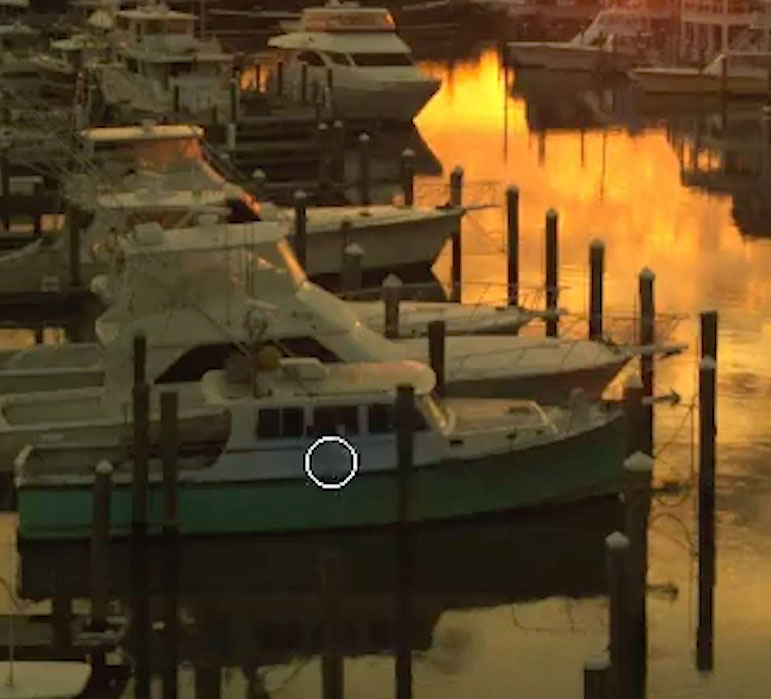
Now we are going to occlude some of the color in the areas that aren’t facing the sun.
What that means, is we will turn down the golden color in some areas, but not completely remove it.
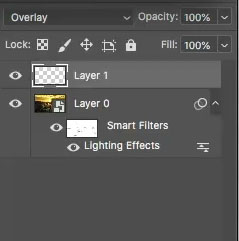
When you look at the Smart Filter, you will see a white box. This is a mask, click on it. (This is why we made a smart object at the beginning).
If we paint with black, we can paint away the filter.

11.
Choose a soft edged brush (B key)
Select 50% Gray as the foreground color.
With the Filter Mask selected (the white rectangle) paint over the areas of the photo that should get less orange color. It’s subtle, but it will give you an extra layer of realism.
12.
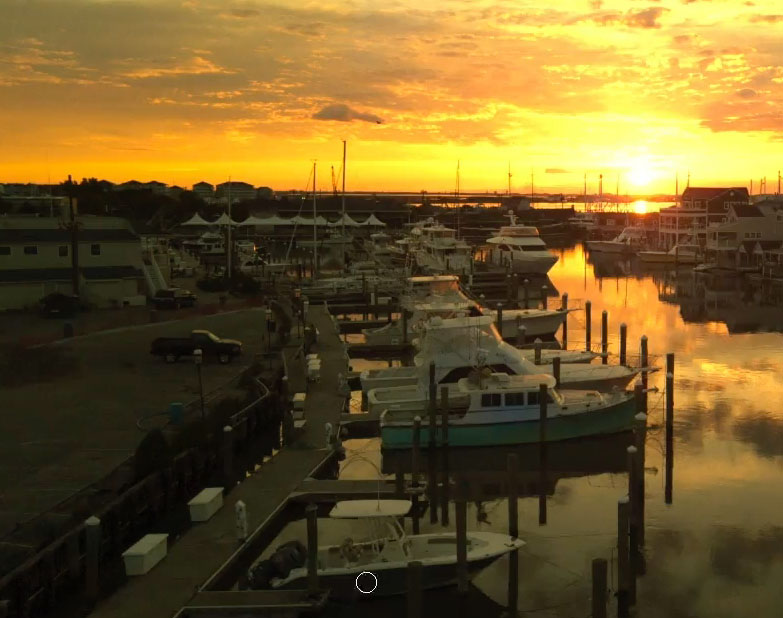
Now we are going to make the highlights pop. This will add some nice definition to the photo.
We are going to Dodge the rim lighting… you will see what I mean.
Create a new Layer and make sure it’s on top.
Change the blending mode to Overlay by clicking and changing “Normal”
13.
With a soft brush selected, change the foreground to a slight yellowish off white.
Lower brush opacity to 30%.
14.
Paint on the edges that are catching the light, This will enhance the highlights and really make it pop. Because we have turned up the sun, we also need to turn up those highlight areas.
For me, this is an enjoyable step. It can take a little time, but you are now creating a unique piece of art.
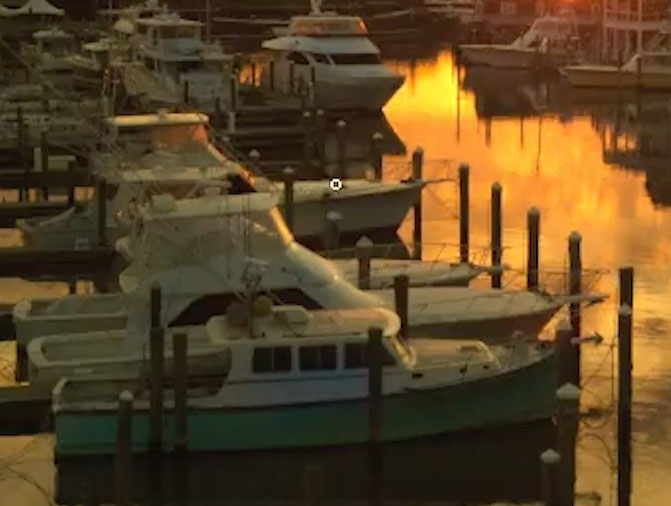
And the result, See the nice sunrise and notice the forward facing edges of the boats on the left. See how the dodging made it pop. See more on Dodge and Burn here.
I hope you found this tutorial helpful.
This is part 5 of a series I’m making on Lighting effects, where we do something different with the lighting on a photo in each one. This series will really make your photos come to life.
If you enjoyed this please share it on social media
Great to see you here at the CAFE
Colin
Check out part 1 here for the basics and using a color channel for texture.
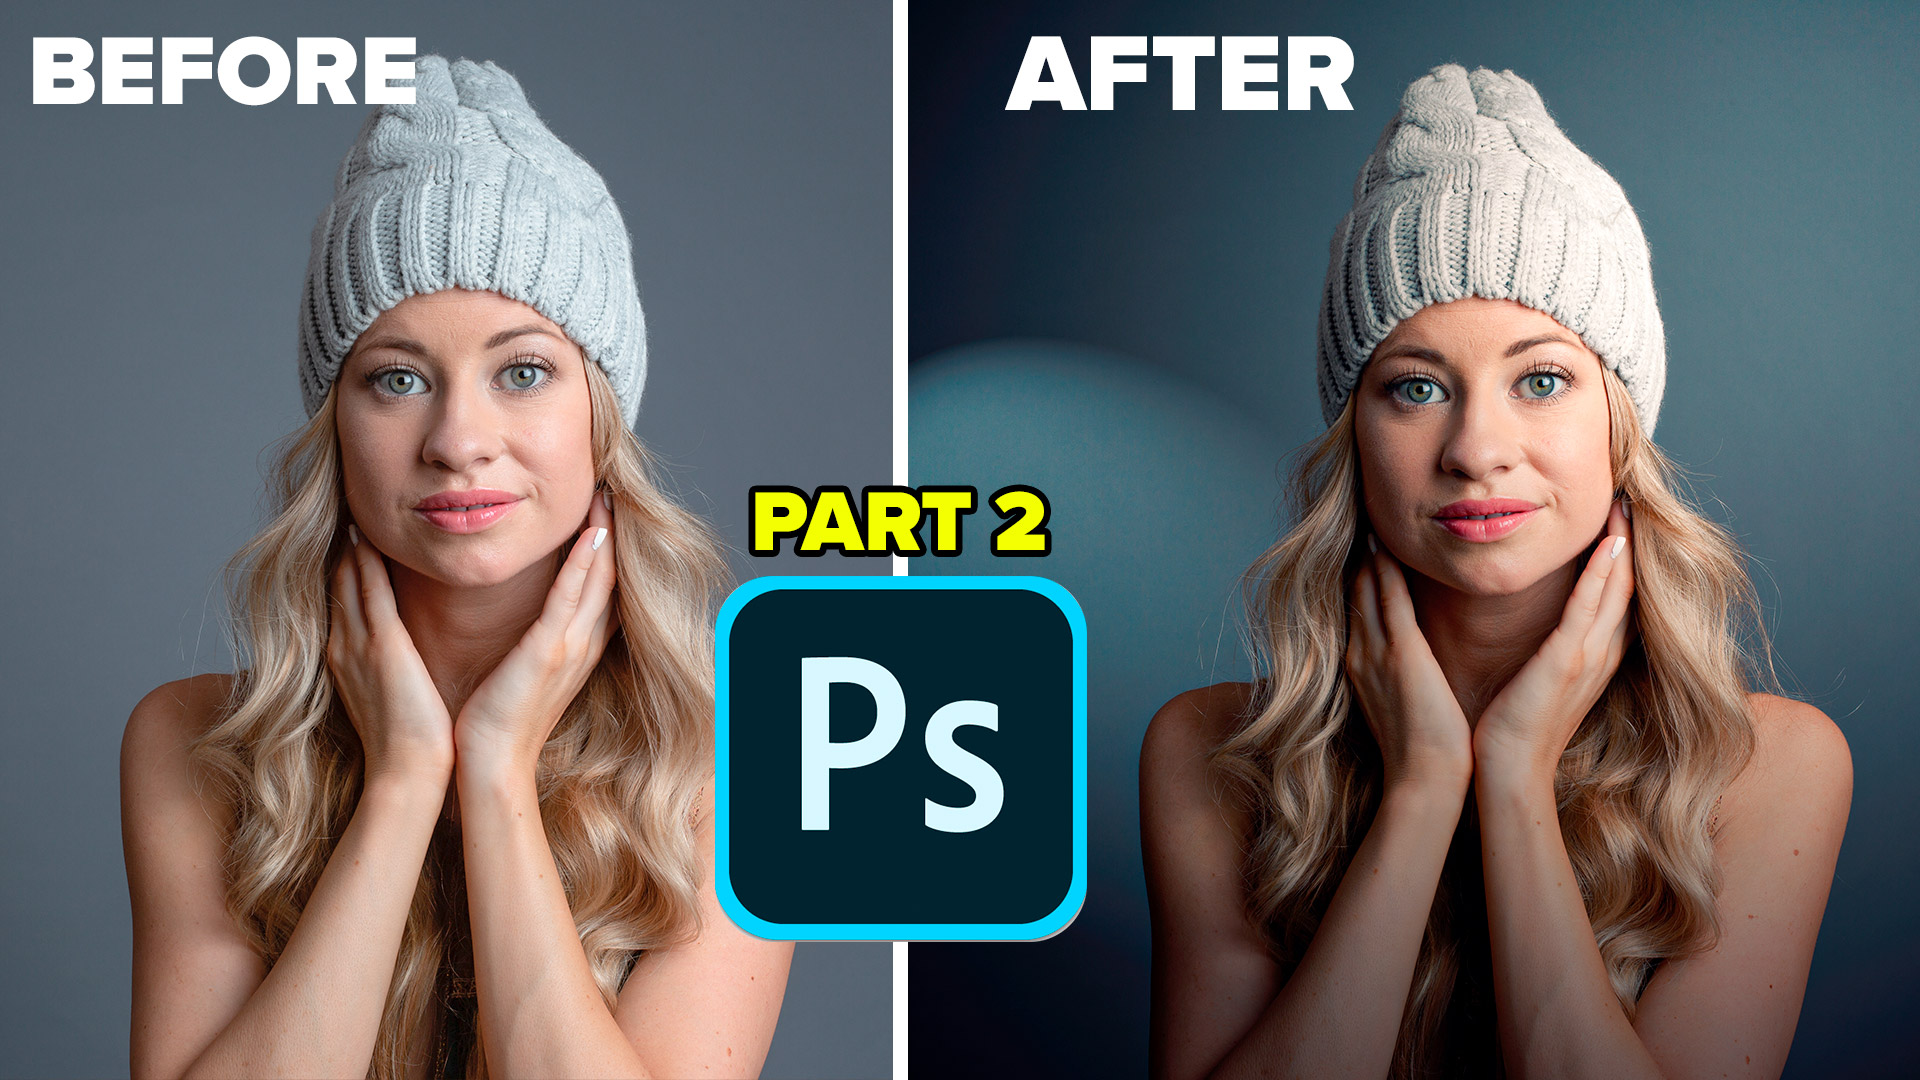
Part 2 is lighting a portrait
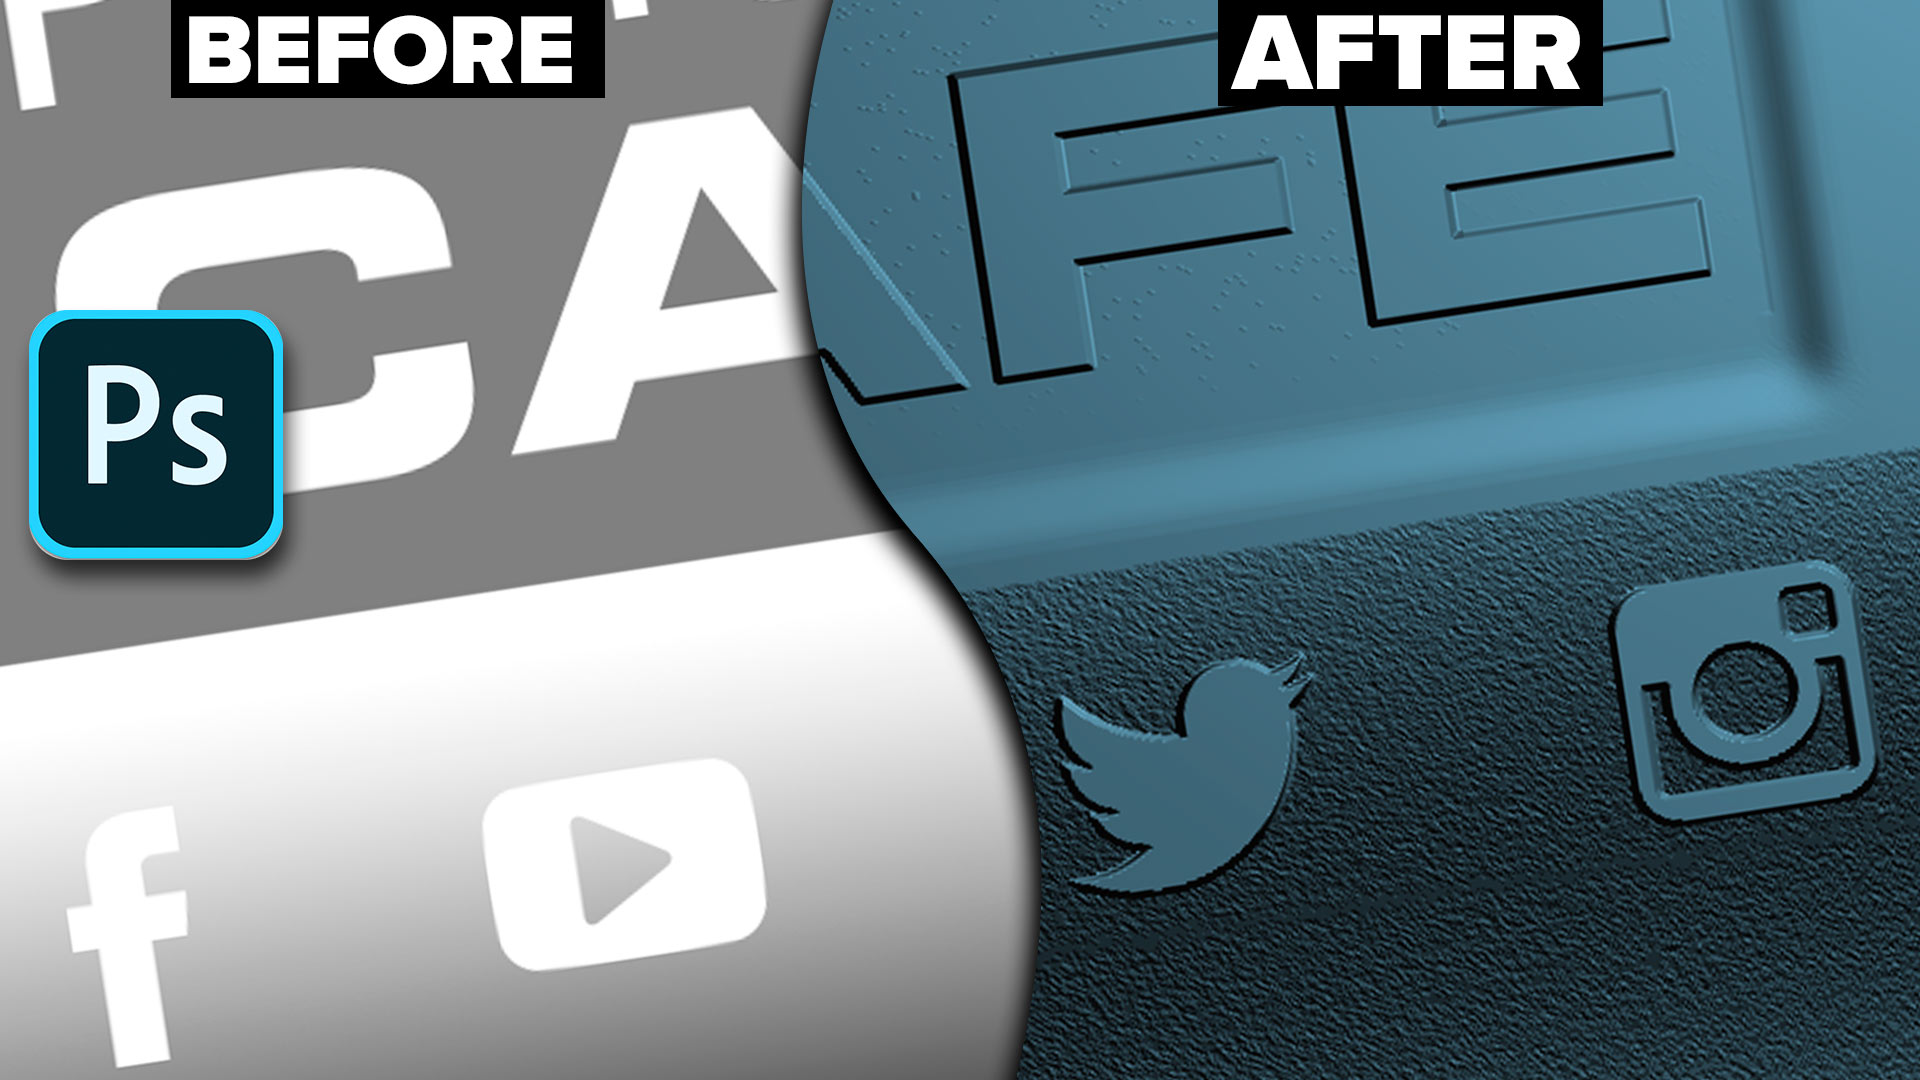
Part 3 is embossing a logo
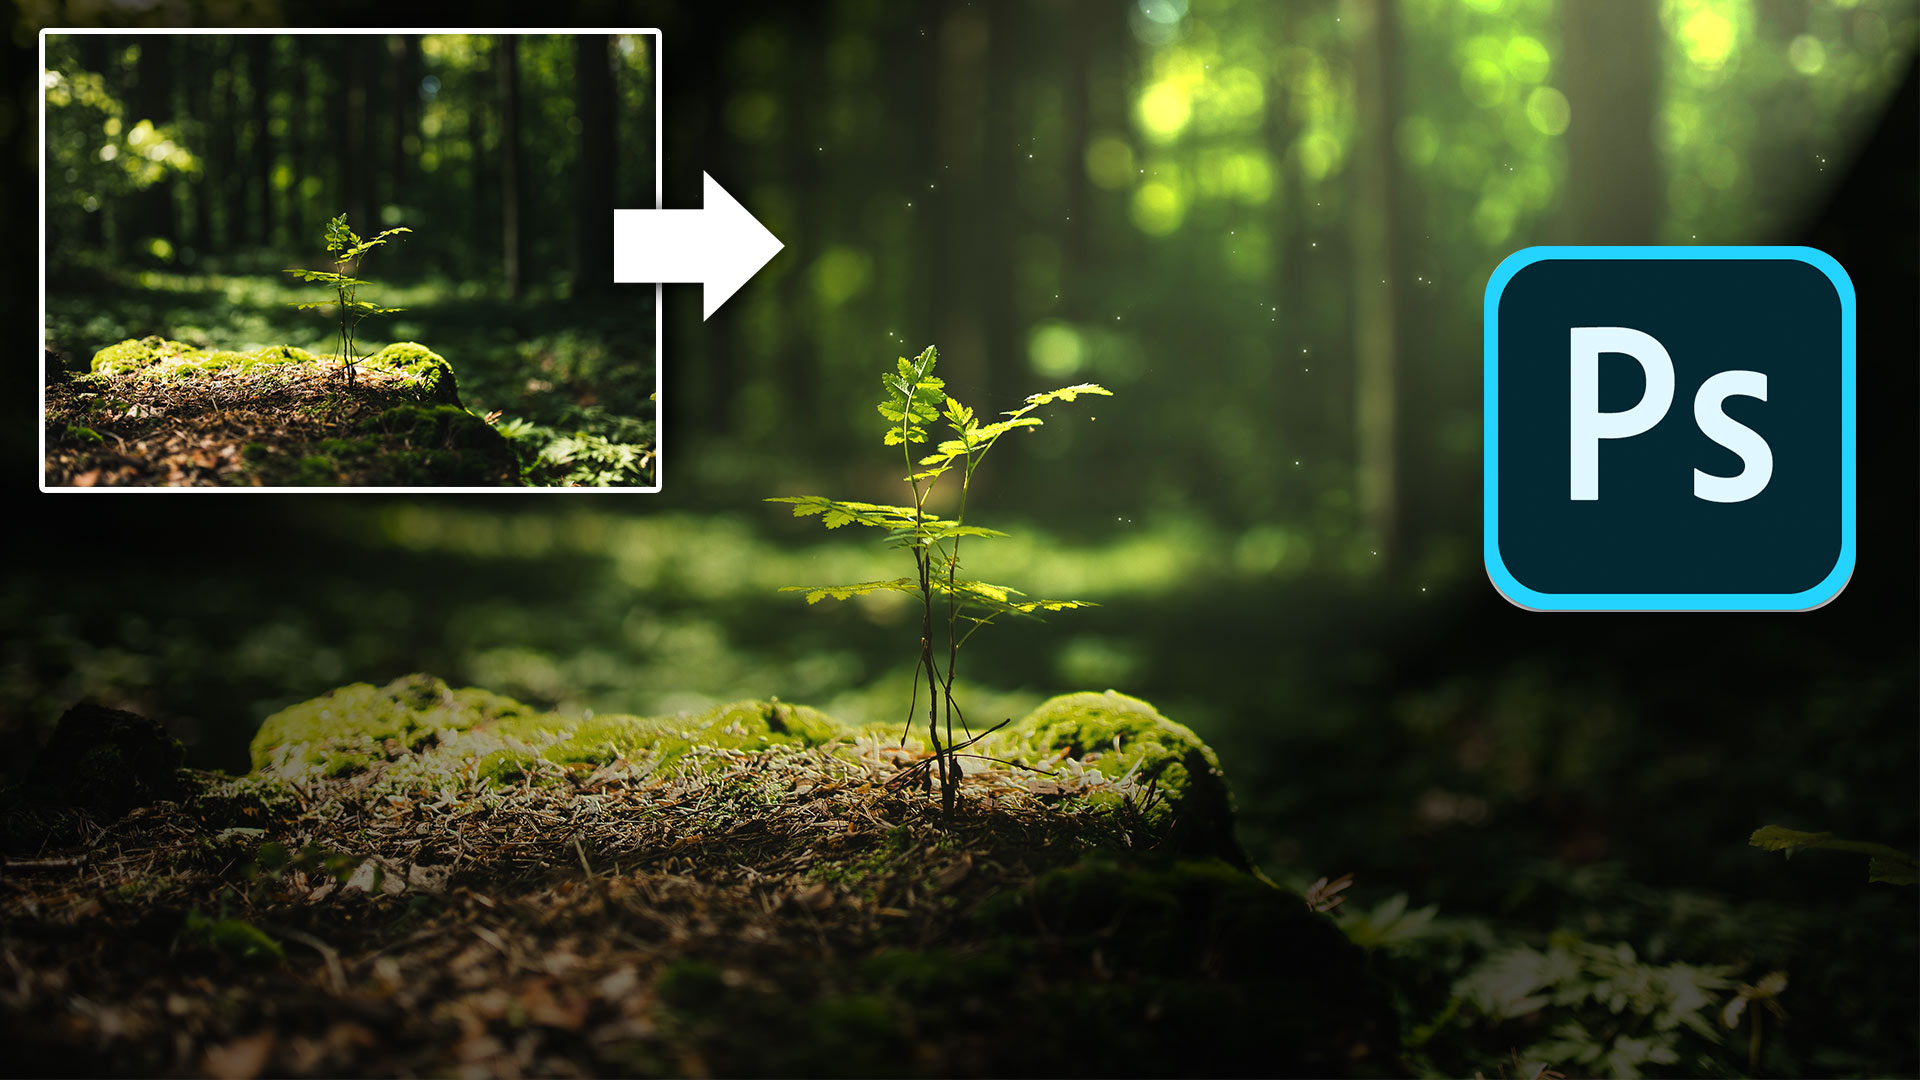
Part 4 is adding a beam of sunlight to a Landscape photo.
Browse our hundreds of other free tutorials here, or search for what you are looking for in the search at the top of the page.
Great to see you here at the CAFE,
Colin
PS Don’t forget to follow us on Social Media for more tips.. (I've been posting some fun Instagram and Facebook Stories lately)
You can get my free Layer Blending modes ebook along with dozens of exclusive Photoshop Goodies here

13 thoughts on “How to make a sunset or sunrise in Photoshop with lighting effects”
Leave a Reply
Here is a very realistic way of chaging the color of anyones eyes in Photoshop using curves. Colin Smith shows...

How to make a photo collage in Photoshop by blending layers together. Photoshop collaging and compositing tutorial
New Features in Adobe Camera Raw 16.3 2024 release. ACR 16.3 features.


This was a very cool tutorial. I’m already thinking of some images in my library where this technique can really help the colors come out better. Thank you for this.
Great stuff! Keep them coming, I am learning more and more from your tutorials! Thank you!
I have enjoyed your tutorials on Lighting. Appreciated
Very interesting, thanks. I’m sure I can make use it.
Thanks Colin. I have had trouble with the light filter but feel I understand it much better now.
This was awesome, Colin. It is something I always wanted to learn how to do. I’m still waiting for a tutorial from you about how to make hair look wet in Photoshop. If I’ve missed it please link me, thanks.
I have a question, Colin. If you want to adjust the sky like this but you have 2 figures on a balcony looking out at it, they are affected also. i tried to select them to keep them out of it but that doesn’t work it just leaves odd spots around the figures themself because you can’t get the exact outline of them always. How can you do the effect without affecting the figures. Do you use the black and brush them out or what? Thank you.
Excellant tutorial, I learned a lot! Thank you!!!
I enjoy the focussed tutorial concept. I have been using PS since ver 2 and everyday I learn something new.
WOW, awesome presentation
WOW, awesome presentation sir
Enjoy and learn from all your tutorials.
In the current one, converting to Smart Object, could you explain why you have to work in 8 bit rather than 16 bit?
Because the filter doesn’t work in 16 bit.