
Instantly Blur the background of a picture in Photoshop with Depth Blur Neural Filter
Easily and automatically blur the background of a photo in Photoshop
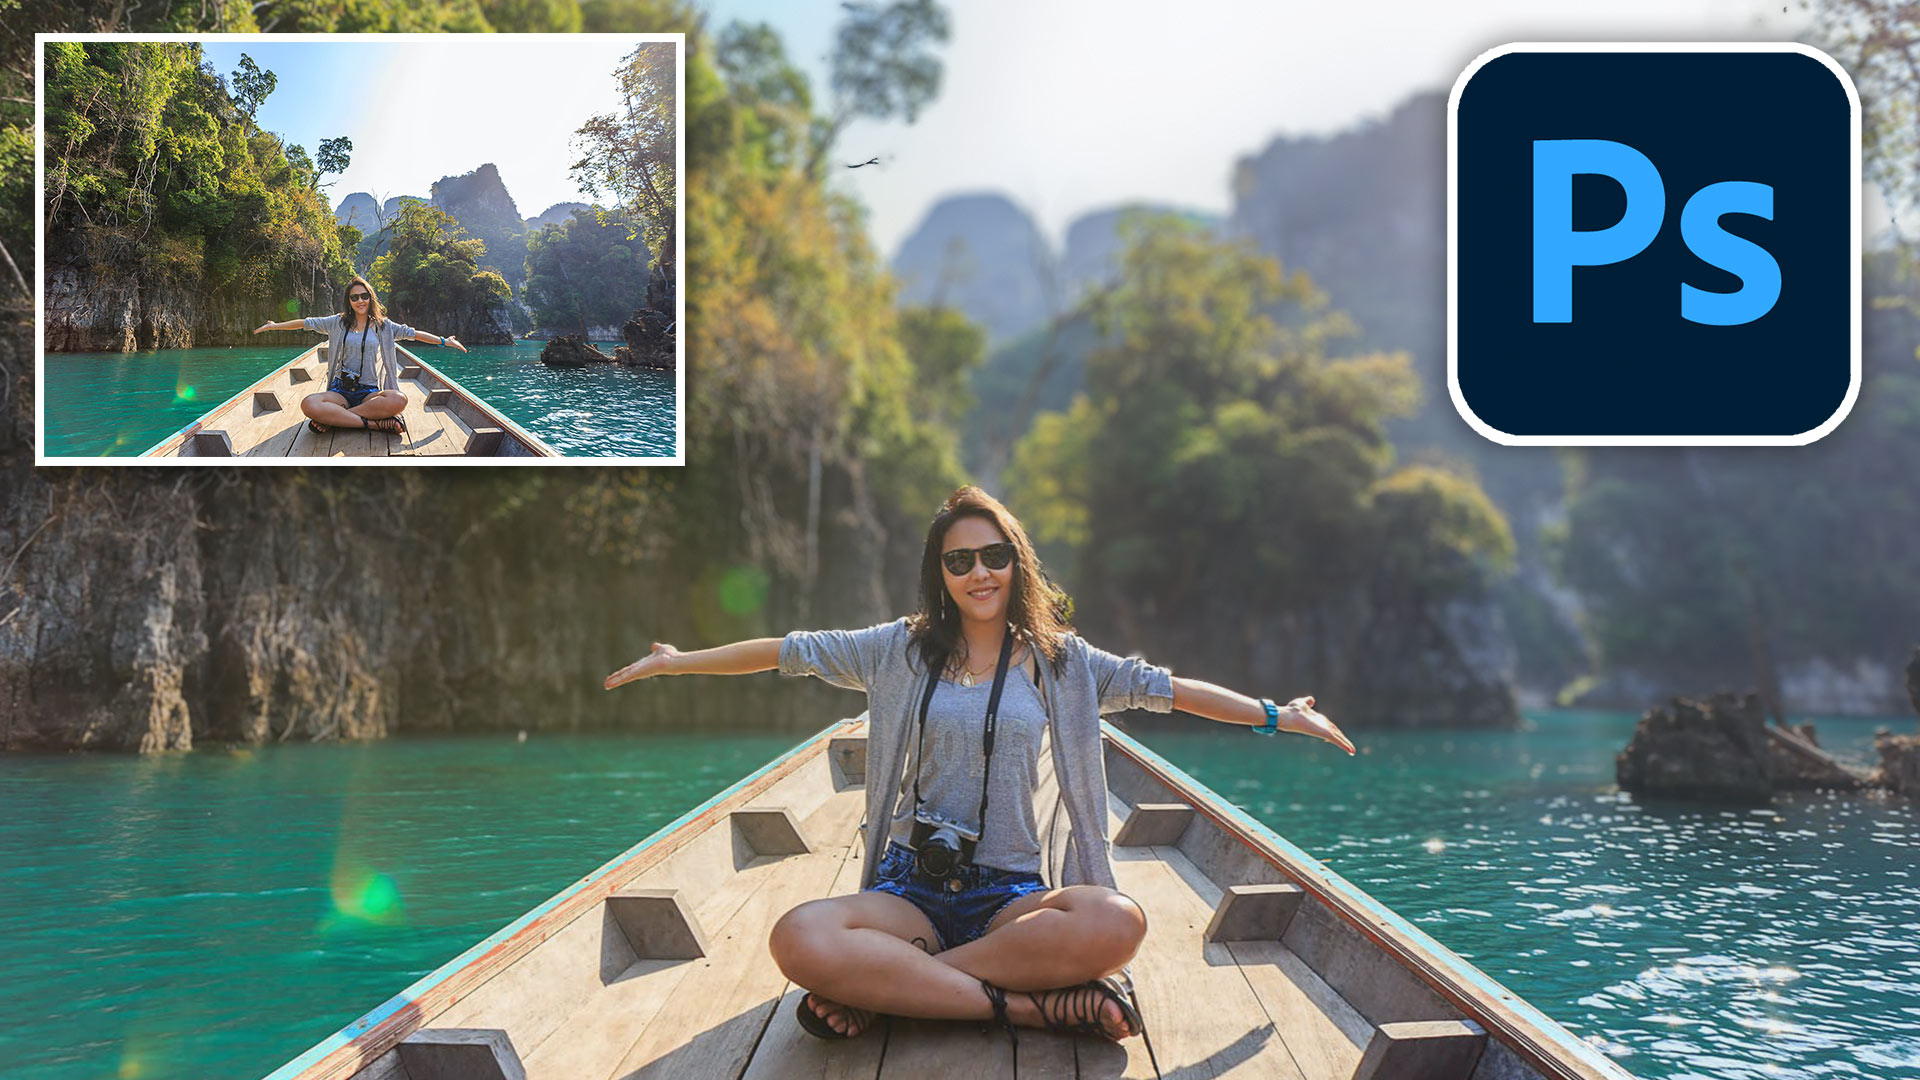
In this Photoshop tutorial, I show you how to use the AI in Photoshop to blur the background to create a realistic bokeh effect.
Lets begin with this image where everything is in focus. We will pop the subject by adding the background blur.

Choose Filter>Neural Filters
Look for Depth Blur. If you see the cloud icon, click it to download the filter.

Click the switch to turn on the filter

You will see that the background becomes blurry. There are a few settings to make this look better.
There are 3 sliders that make a big difference, let’s look at them now.

Adjust the focal range to make the depth of filed deeper, or shallower. This would be like switching from an f1.2 to f4 for example on a camera.
Pull back on the focal range a bit, makes it look more realistic, let’s continue.

Adjust the blur strength. I have reduced it here.

Finally add a little haze. This adds some atmospheric perspective and helps with the separation of foreground and background.
In my opinion, these little tweaks add a lot to the realism from the default result.

Exploring the options in Depth Blur
You can also choose where you want the focus point of the photo, so it doesn’t have to be the person.
Turn off Focus Subject.

Click on the thumbnail on the area you want to focus on. See the blue dot?
We choose the background, on the hill. Now the foreground is blurry.

Or click on the midground

Lastly, click on the person. See the difference, just like focusing a real camera.

I hope you found this tutorial useful, check out the other hundreds of tutorials here at PhotoshopCAFE.
ciao
Colin
PS Don’t forget to follow us on Social Media for more tips.. (I've been posting some fun Instagram and Facebook Stories lately)
You can get my free Layer Blending modes ebook along with dozens of exclusive Photoshop Goodies here

9 thoughts on “Instantly Blur the background of a picture in Photoshop with Depth Blur Neural Filter”
Leave a Reply

how to remove a tattoo in Photoshop and how to add a tattoo in Photoshop. This tutorial show how to...

Use Path blur in Photoshop CC to add a custom motion blur to an object in a photo without any...

How to use Quick Masks in Photoshop, the secret weapon for easy selections


I find it interesting that many espouse the mantra of ‘tack sharp throughout, whilst this proposes the exact opposite – it seems that fashion is never more alive than in photography.
It really depends on the story you are trying to tell
Perhaps you should compare the Neural approach vs Blur Gallery where you can use field blur or tilt shift to control blurs with much more precision. The image you chose works fine with the neural filters but one with more objects at varying distances would be more complex. Love your stuff btw…
I have tutorials on all the other methods too
Last trip was to Costa Rica in February 2020, Return visit to New Zealand planned for late 2020 postponed twice but hopeful for later this year.
Great tutorial, Colin! Thanks!
Thanks Colin for the recent tutorial on background blurs. I’m a recent new member of the “cafe” and already enjoying what it has to offer. I consider myself a seasoned pro in PS but as you well know, PS is sooooo deep you can forget all the things it has to offer. “Cafe” is helping me remember… things I might have forgotten or never knew. Thanks again. Don
Another gem. Thank you
I went to the Douro Valley in Portugal. With all of the grapevines trimmed, the amazingly steep terraces stand out in a bold fashion. They burn all of the trimmings, so there is a blue haze hanging over everything, emphasizing the visual perspective.