
How to match colors between images in Photoshop the easy way
How to copy colors from one image to another in Photoshop.
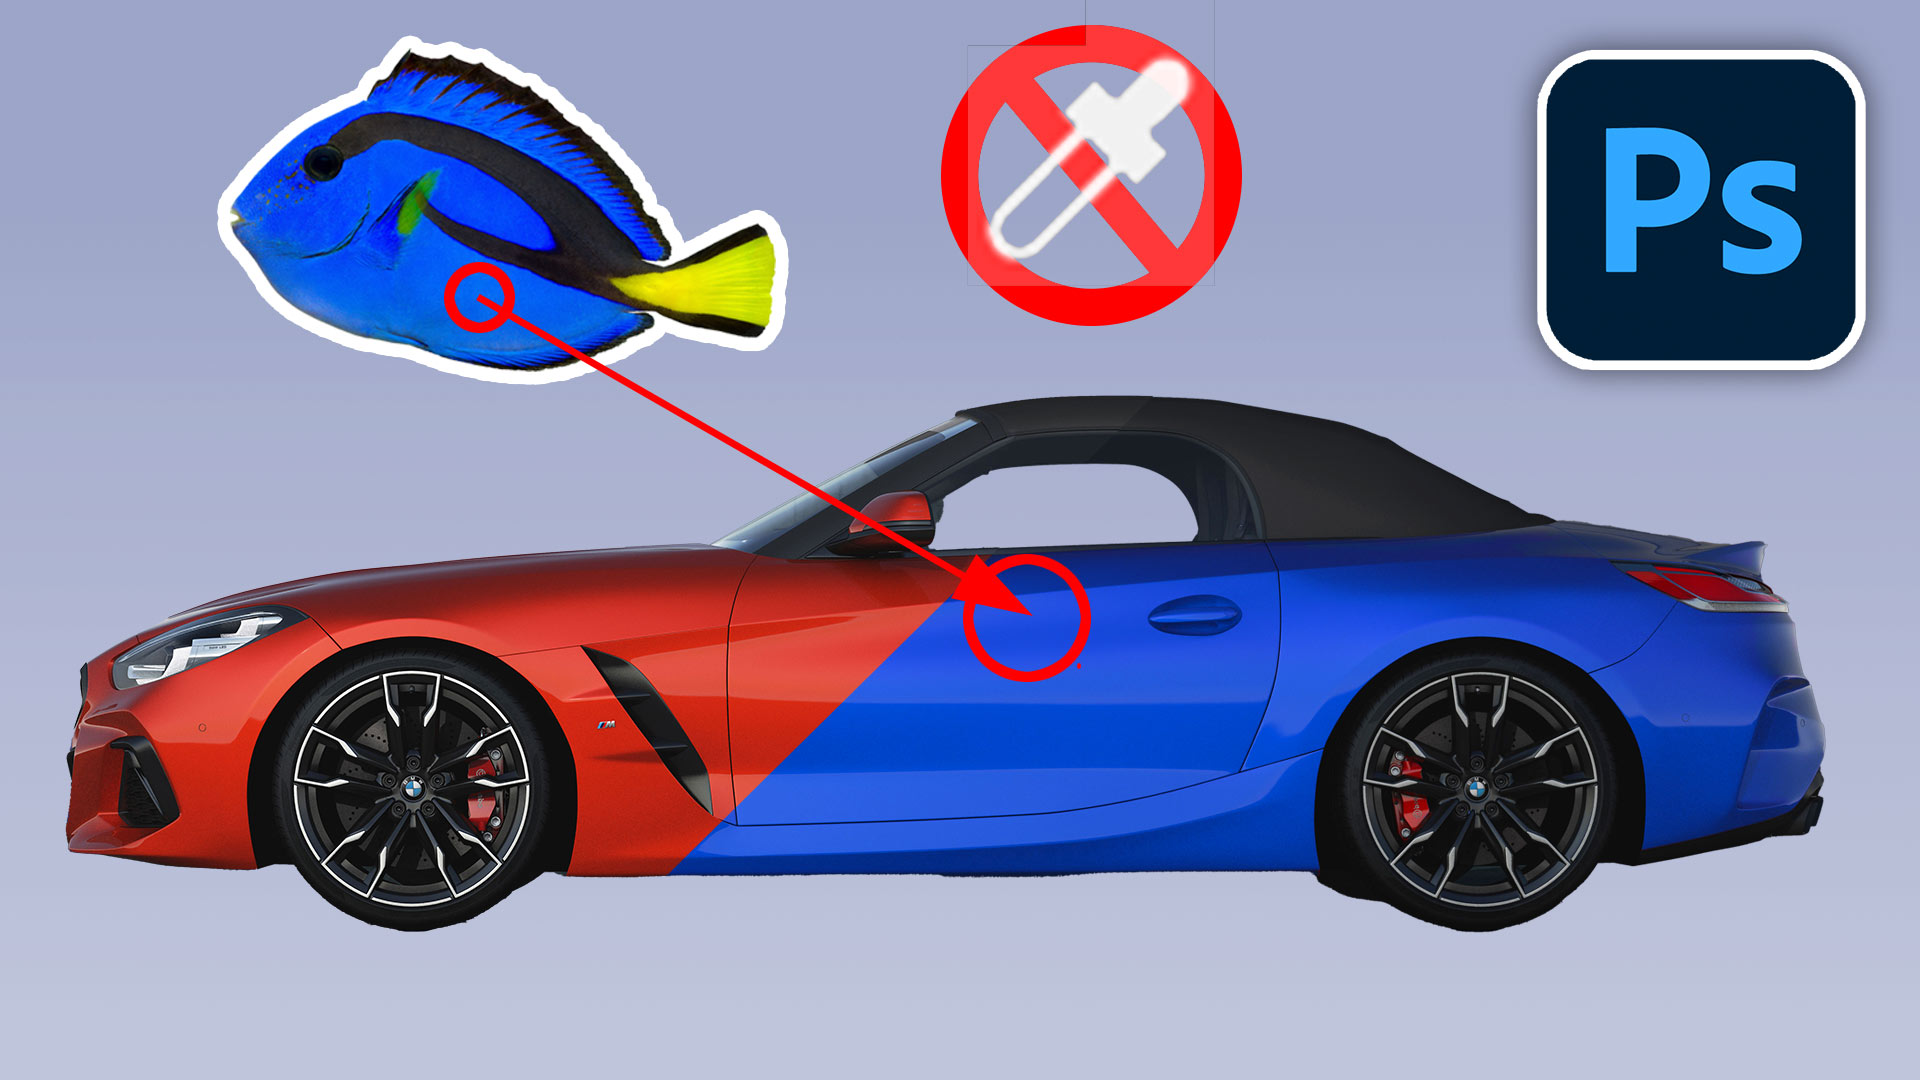
Colin Smith shows you how to change the color of an object to perfectly match the color of another object in a picture in Photoshop. This works in photoshop 6 through Photoshop 2023.
In this tutorial we will change this red car into a blue car.

We want to match the blue from this fish

This is the quick and easy method. If it doesn’t work, there is a more accurate method that uses Color curves in Photoshop to match colors
Step 1, sampling the color
With the colored image open in its own tab, make a selection around the area of color that you want to use.
Use the rectangular marquee tool to make a selection.

Step 2. Selecting the color you want to change
Let’s select the red on the car.
Choose Select>Color Range
With the eyedropper, click on the color you want to select

Choose the eyedropper with the + next to it
Click on other colored part to add them to the selection. Tip: You can drag with the + eyedropper if you like.

Adjust the fuzziness to include or exclude more of the color. The goal is to get the selected area white, while the non selected area will be black.

Click ok
Press Ctrl/Cmd+J to copy the selected area to a new layer.
Here, I have hidden the background so you can see the contents of the new layer. (You don’t need to hide the background.)

Step 3 colorizing the object
Choose Image>Adjustments>Match Color.
Note, this isn’t available as an adjustment layer and it won’t work on a Smart Object. This is why I copied the selection to a new layer, it is a destructive process.

In Match color, change source to the name of the tab that contains our color (the fish).

At first the color may look very strange, because currently it’s sampling the entire image, not the selection.

Click on the “Use Selection in Source to Calculate Colors” checkbox.

Now it will use the color inside the selection only. The correct blue is now showing.

Step 4. Making the color look natural on the layer
Change the blending mode from Normal to Hue.

Now the color looks natural

If there are some extra areas selected, such as the brake calipers, we can easily fix it.
Click on add a layer mask button on the layers panel

Choose Black as the Foreground color and paint away the eras that you want to reveal the original color.

And that’s it. I hope you found this useful. If you did, tell all your friends about PhotoshopCAFE and click the share buttons to share on Social Media.
Check out this tutorial if you want to go deeper into colorizing. Color curves in Photoshop to match colors
Great to see you here at the CAFE
Colin
PS Don’t forget to follow us on Social Media for more tips.. (I've been posting some fun Instagram and Facebook Stories lately)
You can get my free Layer Blending modes ebook along with dozens of exclusive Photoshop Goodies here

One thought on “How to match colors between images in Photoshop the easy way”
Leave a Reply
How to remove anything from a photo in Photoshop to get rid of distractions and make a clean background. This...
When Photoshop changes your colors, Color Spaces explained

How to use 3D in Photoshop. The ultimate guide, to all the 3D features in PS CC. learn Photoshop 3D...


I have tried this on a photo of my car. The car is in a country scene, with grass, sky, cloud etc. There are reflections in the car. The car is white, but the reflections are numerous colours. When I select with the eye dropper tool on the white of the car, everything that is the same colour is also selected, clouds, white sections of ground and road etc. So it is impossible to select just the car. Also the reflections on the cars paintwork are not selected where they are blue from the sky. When I go to match colour whole sections of the photo are changed. Can this colour change only be done when the photo is distinct as your car is?