
Fine art photo in Photoshop, free masterclass
How to turn a photo into fine art in Photoshop
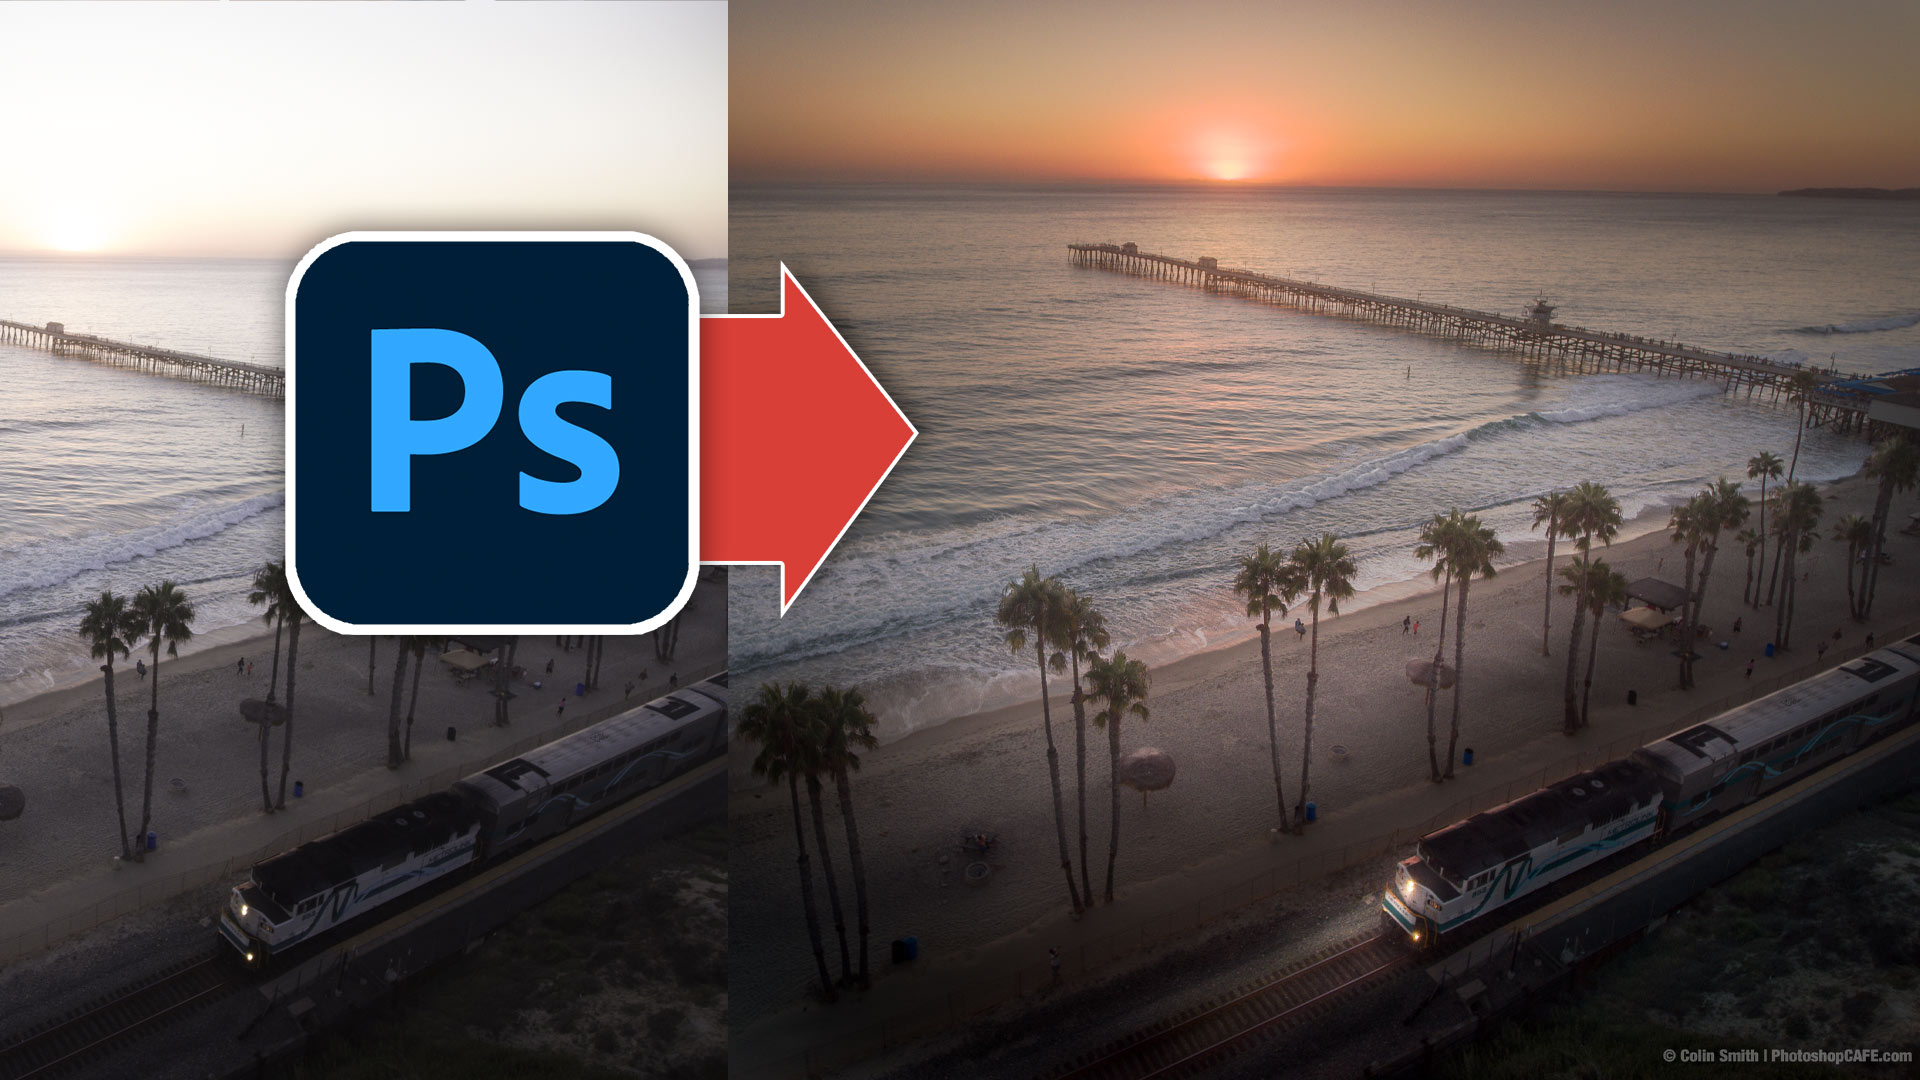
How to edit a photo and give it a fine art, painterly feel in Photoshop.
This “masterclass” walks you through the process of crafting a photo into a fine art piece that can be printed and displayed.This tutorial is about workflow, all the pieces put together. This isn’t the only workflow that i use. There are many ways to do things in Photoshop and these techniques work on this image. The techniques are interchangeable and will work for any photo. What I’m saying it, watch the techniques and workflows, but don’t take them as poured in cement. Be flexible and quick to adapt and change, (I might do some things differently in other tutorials) this way you will produce better art. Watch the video to see each step and the explanations as to why I’m doing certain things. These written steps are to help you see the basic overview, or or more advanced users to see whats happening. If you get stuck, watch the video ;).
I’m starting with a series of aerial photos I shot with a drone. (See my drone photo gallery here). The same workflow applies to any photo, I just happen to enjoy a drone as my camera.
To capture a setting sun, you need multiple exposures to capture the detail in the sun as well as foreground details (AEB Exposure bracketing). You could use HDR, but I’m not in this example.
In Lightroom, Select a light image for the foreground and a dark image for the sunset.
Right click and choose Edit in> Open as Layers in Photoshop

Exposure Blending in Photoshop
This opens the Images as 2 different layers in Photoshop.

With the top layer selected,
Hold down Alt/Option
Click the new Layer Mask button
This creates a new mask which is inverted and hides the current layer.

Choose a white brush and make sure the layer mask is selected (White frame around it).
Paint on the areas that you want to reveal the current layer and allow the darker photo to show through in the brighter areas such as the sky

If I hide the background, you can see the areas that are showing on the top layer.
We are blending the exposures together.

When you are happy with the blending, select both layers in the layers panel
Right click on the layer name and choose Convert to Smart Object
You will see that both layers are merged into a single Smart Object. This step is optional, but I chose to do it so I could process then together in CameraRAW (All that is on the video above).
Shaping the Photo with Dodge and Burn
We will do 2 passes of dodge and burn. This first pass is to shape the overall toning of the image. The second pass will to pop the details.
With the Cmd/Ctrl Key held down, click the create new layer button

Because of the alt key, you will see an options box.
Change the blend mode to overlay,
Choose Fill with 50% gray (To me, gray works better than transparent when we are blending the tones )

Because of the blending mode, the gray is hidden and the layer doesn’t change the appearance.
Choose a black brush with 10% flow and paint around the edges and areas that you want to darken. Don’t worry if it gets too dark.

You can see the “big” dodge and burn layer here in the layers panel

When you have mapped out the darker tones, adjust the layer opacity so that our burning isn’t so dark.

Crete new layer for the dodging (lighter tones)
Choose a white brush and paint in some lighter areas, such as the surf and beach.

Also paint in front of the train with the white, to make a beam from the headlight. (Once again, watch the video to see all this in action).

Looking at the layers panel, you can see that you can make multiple dodge and burn layers. This makes it easy to adjust the opacity of different parts of the image.

Here I am dodging the edges of the tress to add a rim light.
If I go over the edges (like I did here, it can easily be fixed by painting with 50% gray).

Here are the waves breaking into surf.

Paint the tops of the surf to make it pop.

Here is the train

Get those edges of the roof to make the rim light pop

As you work on the little pieces at a time, you may not realize the overall impact those adjustments are making until you put it all together.

If you find this interesting and want to take dodging and burning further, I created an in depth course here
I hope you enjoyed this tutorial! Add a comment and let me know if you learned anything new.
Enjoy browsing the hundreds of free tutorials here at PhotoshopCAFE
Until next time,
I’ll see you at the CAFE
Colin
PS Don’t forget to follow us on Social Media for more tips.. (I've been posting some fun Instagram and Facebook Stories lately)
You can get my free Layer Blending modes ebook along with dozens of exclusive Photoshop Goodies here

22 thoughts on “Fine art photo in Photoshop, free masterclass”
Leave a Reply

How to remove crowds for a photo in Photoshop. Use Stack modes to easily remove tourists, cars + people from...
Few people Use or understand HSL. This Photoshop tutorial will help you understand and use these amazing color controls for...


Start to finish—great tips along the way. I am NEW to my Wacom, and this tutorial is a powerful start for me for its effectiveness.
Thanks for the tutorial. However, the low resolution of the video made it hard to follow. It was difficult to find your cursor at times to see where you were working. Enjoyed the content, but can you improve the resolution? Thanks
If its blurry, hit refresh, the video is in High Resolution
Always enjoy and learn from watching your tutorials, both the “tips” and “workflow” on an image.
As for the request to hit the “like” button, I always want to do so but cannot find it.
I do like this in-depth approach vs the tip and tricks
LOVED THE TUTORIAL FROM START TO FINISH!!!!!!!!! GRACIAS COLIN!!!!!
Loved the extra detailing!! I learned a lot. Thanks!!
Great tutorial! Thanks, Colin.
Really enjoyed this one. Learned so much and absolutely would like to see more.
Wow, what a tutorial. Just excellent and eye opening.
Where is that like button?
Its on youtube
Fantastic tutorial! Loved how you painted in the light. Would appreciate more classes like this. You have a great teaching style.
Learnt loads on this one! Thanks.
All of your tutorials are great Colin, but I especially enjoyed this one. It demonstrates that creating an artful photograph requires that the artist first “see” the “look” that he/she is after in the final product. You carried that message beautifully, and then showed us how to make it happen using basic Photoshop tools and editing techniques. Yes, I’d like to see more!
Thanks for making this a video and a written tutorial. Great reference and work flow guide. I have enjoyed your tutorials for many years now.
Because of you I do this. I would most definitely like to see more of this. Great job as always and thank you for all you do.
Loved the tutorial, helped me get a better perspective of integrating tools into a workflow.
Very informative, thank you
Loving the start to finish approach.
Great video. Really appreciate your teaching approach and skills. Learned a lot from this video.
Would have liked the image to follow along the process.
All our premium corses come with practice images.