
How To Edit Video in Photoshop: Free mini Course
How to Edit Video in Photoshop: A short Mini Course to master video in Photoshop
Yes, Photoshop can edit video. It can also do much more. Such as, applying adjustment layers and filters to video (Even Camera RAW). You can stack layers, including graphics, text, photos and video. It supports animation and motion graphics and even 3D animation. Photoshop is like a mini Premiere Pro and After Effects all in one. To see what’s possible, watch this tutorial and see the written steps below. This is for all versions of Photoshop CC and works on Photoshop CS6 Extended.
I’ve been experimenting so much with this that I have written a book with Peachpit Press – Video in Photoshop, as well as 2 video courses at PhotoshopCAFE, Video in Photoshop (companion for the book) and Making Movies in Photoshop. I have also taught this at Adobe MAX and Photoshop World. For full-length editing, you should use Premiere Pro. For short clips, promos, ads, motion graphics, social media etc, Photoshop shines.
Steps
- Arrange and trim video
- Color and effects
- Sound
- Motion Graphics
- Encoding
Editing Video in Photoshop
This tutorial works exactly the same in Photoshop 2025. Adobe literally hasn’t changed a single thing in the video features since CS6 extended, this tutorial was made in Photoshop CC.
Step 1. Importing Video into Photoshop
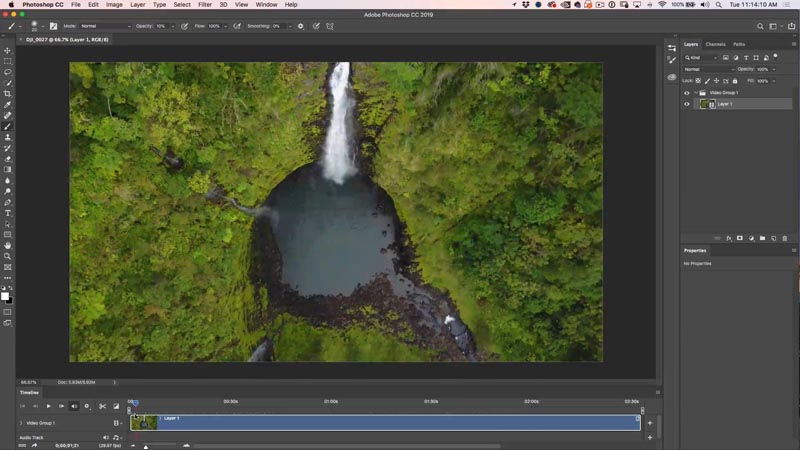
To import a video into Photoshop, choose File>Open and select a video.
Photoshop will open the timeline (Window>Timeline) and create a new video document using the settings from the video clip.
Drag the playhead to move (scrub) to different parts of the video.
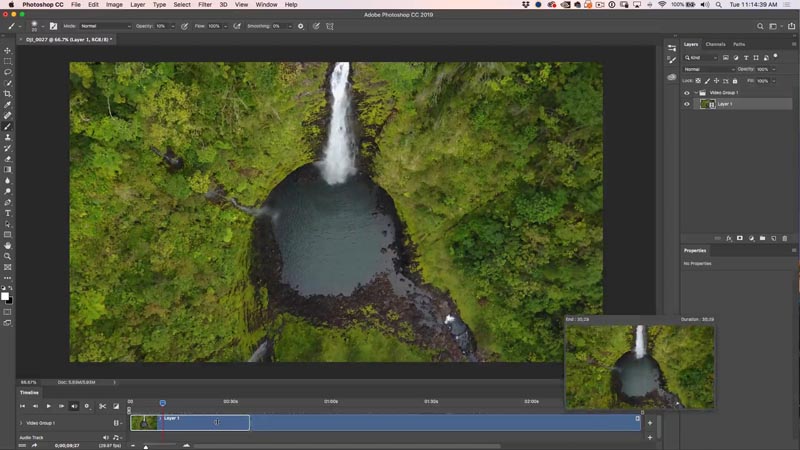
To shorten a video clip, drag on the end or the beginning. You want to shorten each clip to a few seconds, so you don’t bore your viewers.
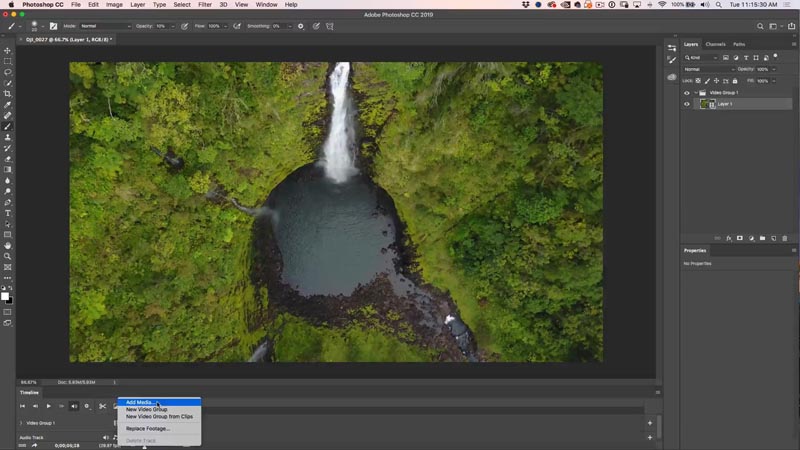
To add more clips, click on the + to the left of the timeline.

Choose Add Media
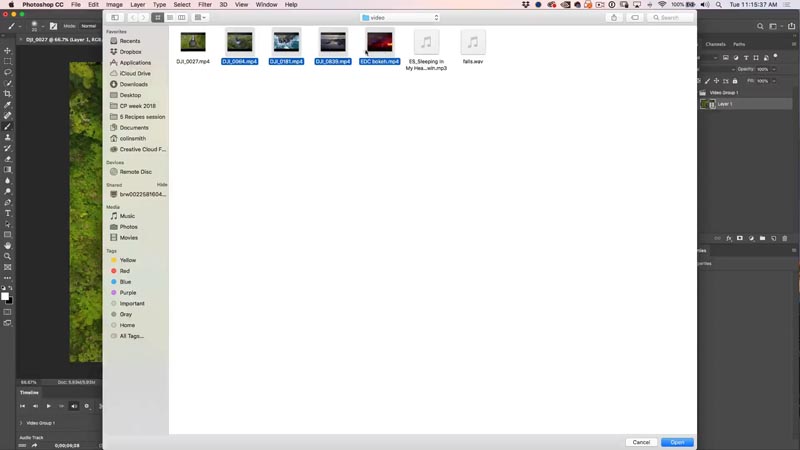
Navigate to more video files. You can select a single one, or multiple at once.
Click open.
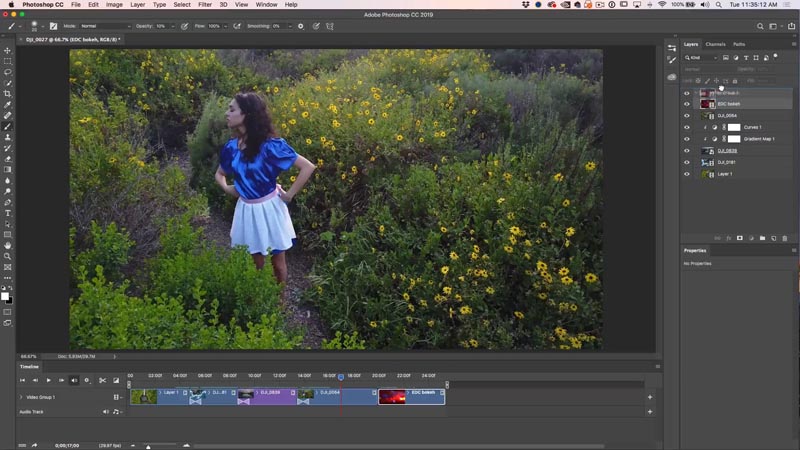
Here we have multiple clips on your timeline.

To change the order, either drag in the timeline, or in the layers panel. The bottom of the layer stack is the first clip, the top is the last clip.

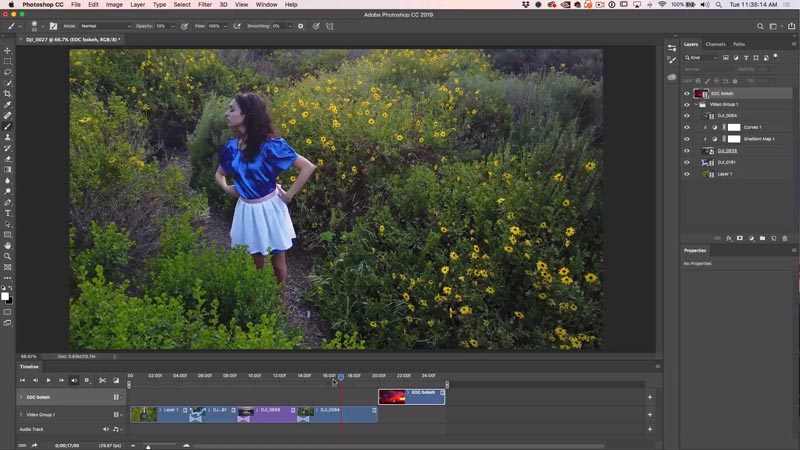
Trim each clip by dragging on the start and end of each in the timeline. A window will appear to preview the clip.
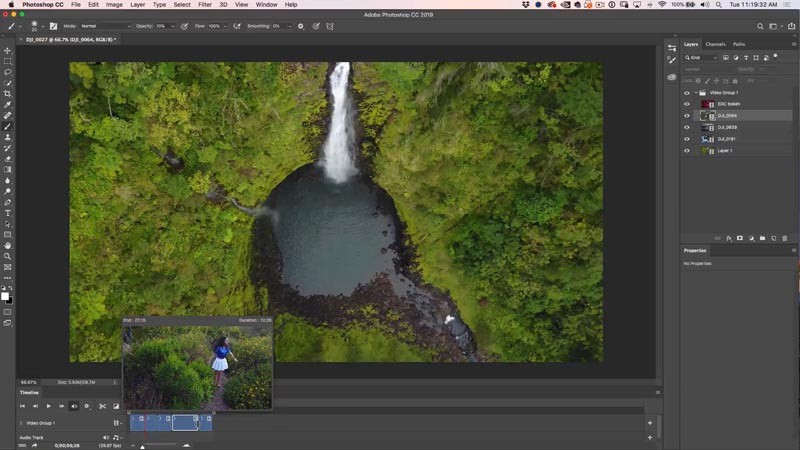
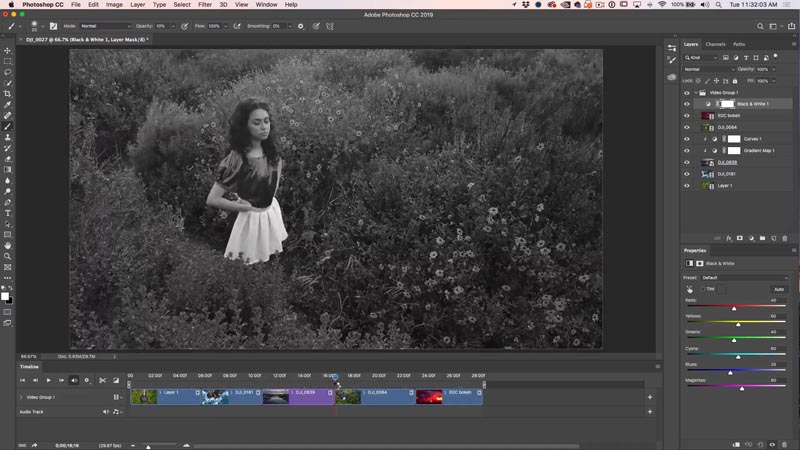
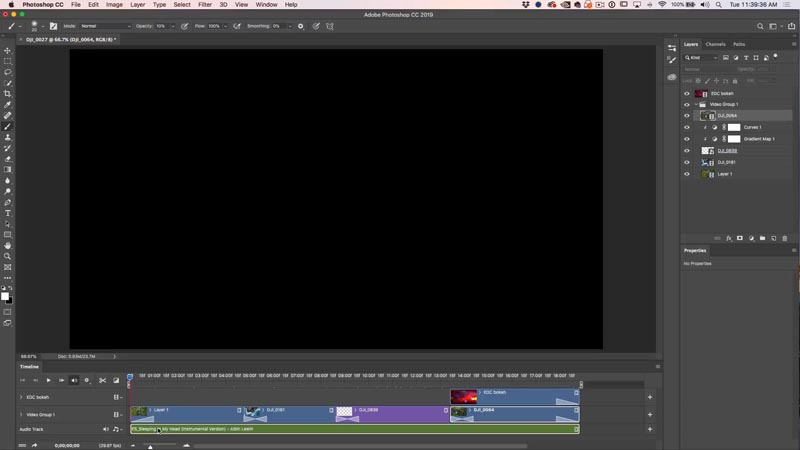
Here we have all the clips arranged. This is your first step, organize, order and trim you clips. Try to tell a story with your video editing: a start, middle and end
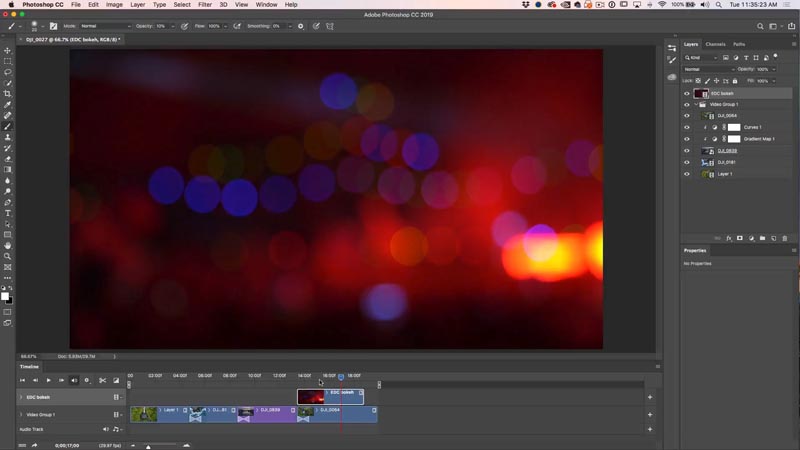
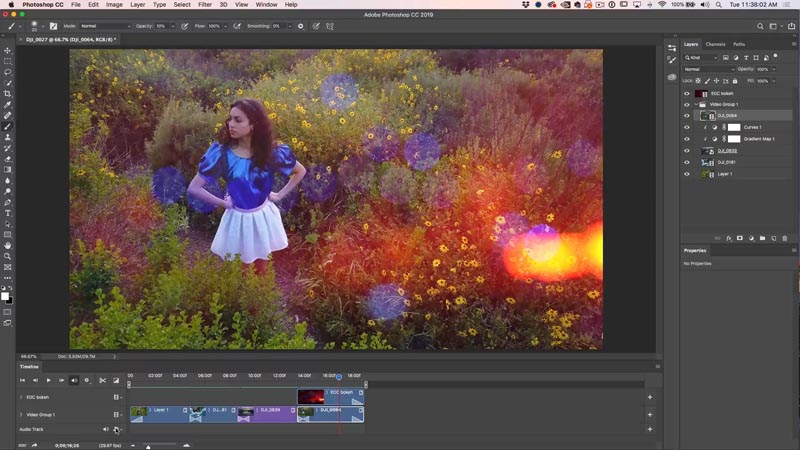
Notice this last clip is abstract. I shot this out of focus to create some nice bokeh effects. There is audio on this clip, we want to mute the sound.
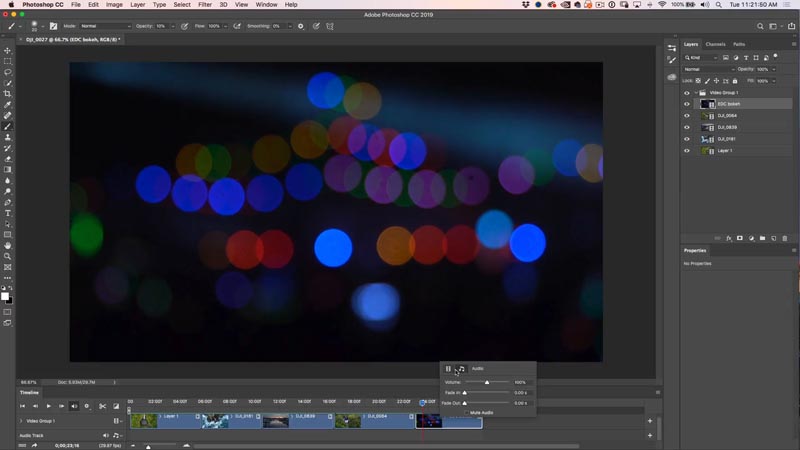
Right-click on the clip. Click on the music note and here you can adjust the audio, including a mute option.
Step 2, adding filters and effect to color grade the video
You can add filters and Adjustment layers to video.
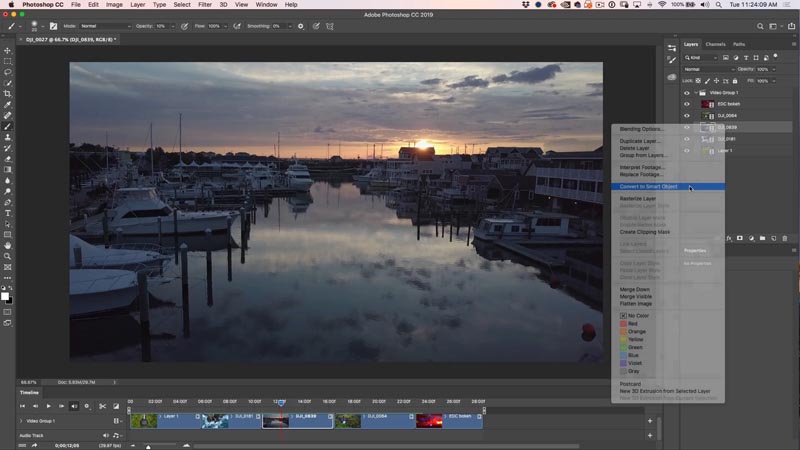
Let’s work with filters. You first have to convert to a Smart Object, otherwise the filter will only effect a single frame. (I go into much more depth in the video portion of this tutorial).
Right click on the video layer in the Layers panel and choose Convert to Smart Object.
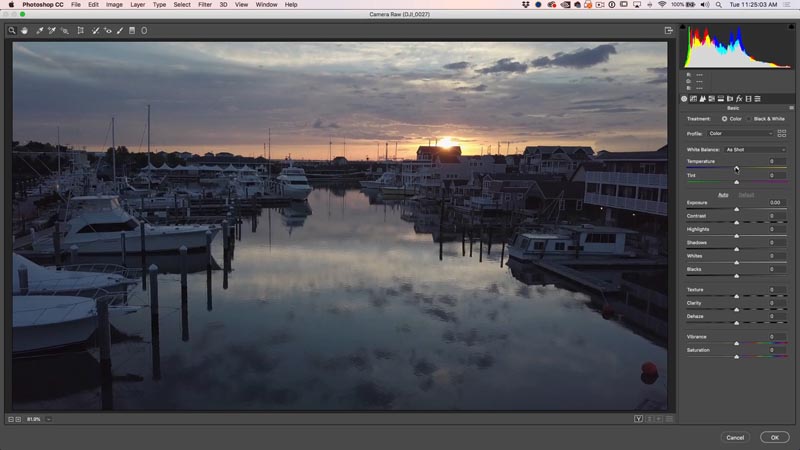
Now apply almost any filter you like to the video, even Camera RAW. ACR (Raw) will run a little slow on playback, because its a huge amount of data to compute. However, once rendered, it will play back smoothly.
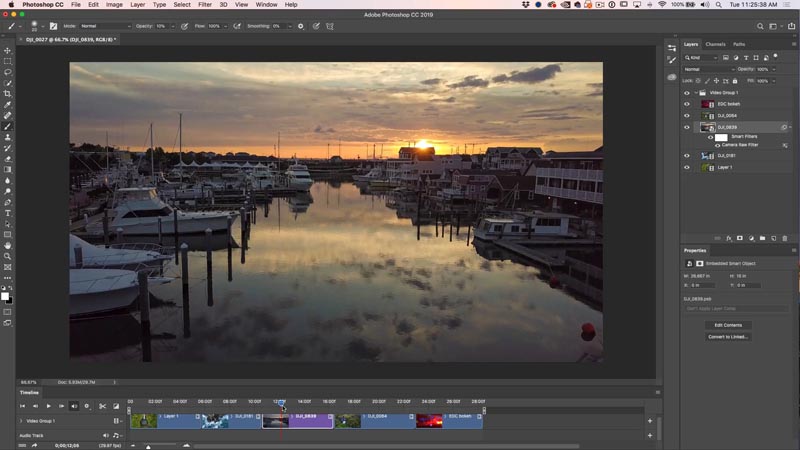
Here is the video after applying the RAW adjustment (you can see all the settings in the video portion of this tutorial, at the top).
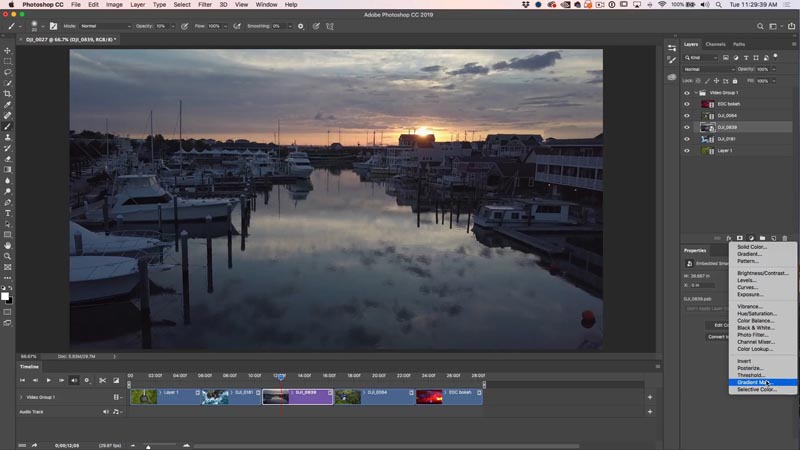
To apply an adjustment layer: select the clip you want to apply the effect to in the Layers panel.
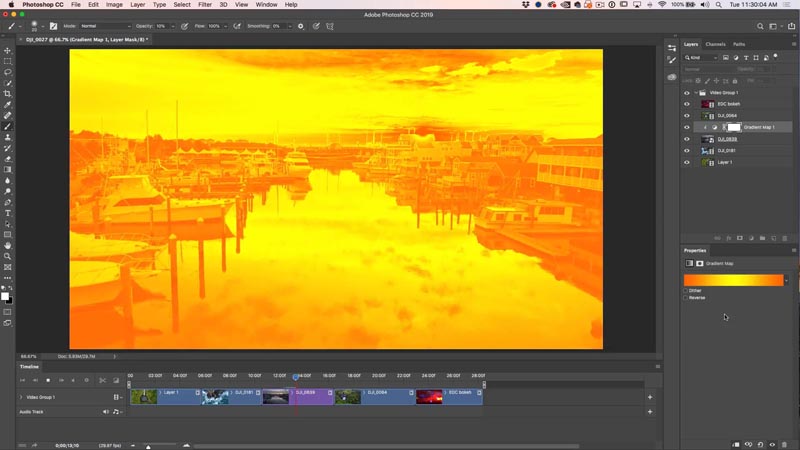
Choose your adjustment Layer, in this case we are using Gradient Maps.
Here is the basic Gradient Map. Its bit too strong, we will fix it in the next step.
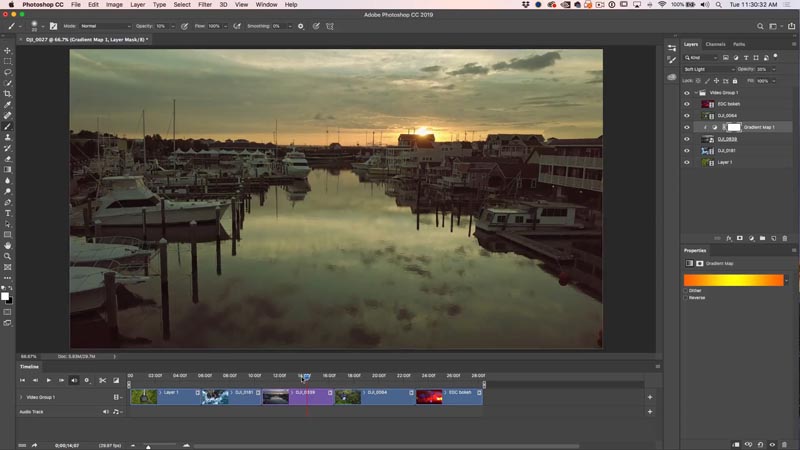
Where it says normal in the layers panel, click and change it to Soft Light, you have just changed the layer blending mode.
Drop the opacity until it blends-in better like shown. Usually around 30% will look good.
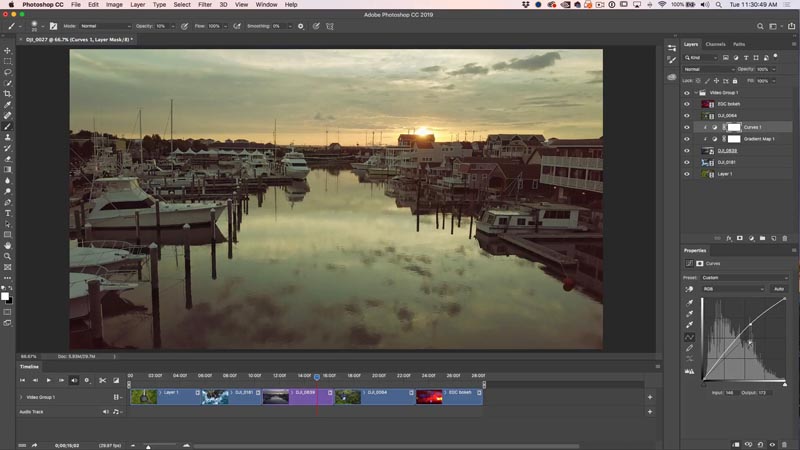
You can also stack adjustment layers. Try adding a curves layer and brightening up the mids as shown.
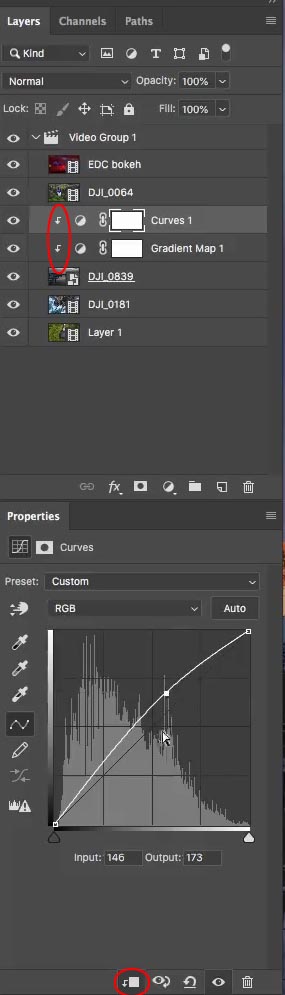
See the little arrows to the left of the adjustment layers? These clip it to the layer directly below it. Click the clipping button (at bottom of image) or place your cursor between the layer and the adjustment, hold alt/option and click.
This clipping makes the adjustment layers only affect that layer directly under, and no other layers.
NOTE: more about using adjustment layers (tutorial continues on step 3).
If you want to apply the adjustment to multiple clips, then create it at the top of the video layer group and make sure the clipping group isn’t on. (no arrow).
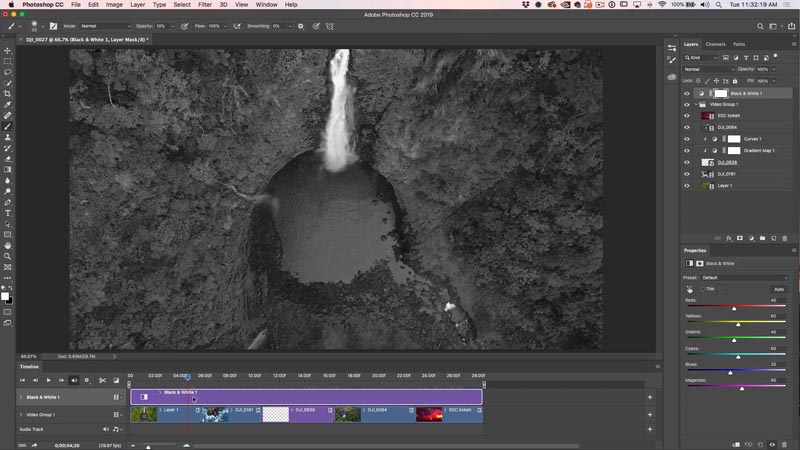
Alternatively, if you want to apply an effect to all the views, make an adjustment layer. Drag your adjustment to the top of the layers panel and above the Video Group.
You will see a purple bar on the timeline. Drag the bar all the way out to effect the entire video clip as shown below with a black and white adjustment layer.
You can also trim the adjustment layer to isolate the adjustment to certain parts of your video as shown below.
(This is very simply demonstrated in the video portion of the tutorial above if you are confused).
We have now applied color correction to the video. The next step is transitions.
Step 3, Video Transitions
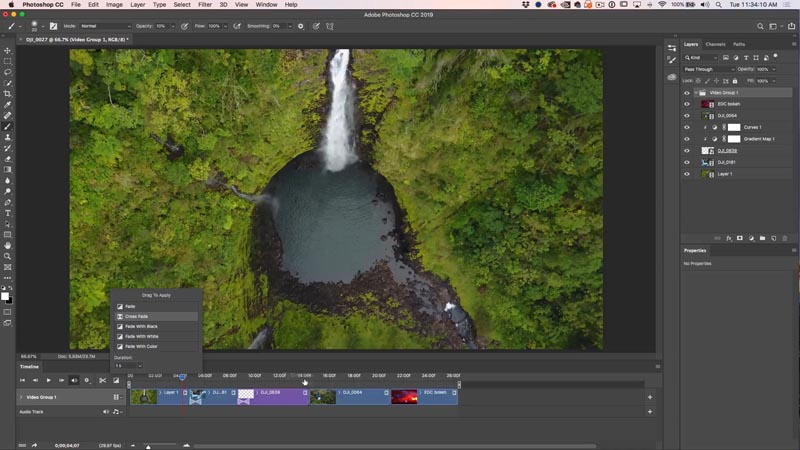
Click the box with the diagonal white and black box on the left of the timeline. These are your transitions. Drag those to the beginning, end or between clips to apply transitions.
Drag a dissolve transition between each clip in the timeline. This will cause the clips to fade between each other rather than a hard cut.
Step 4, Stacking clips
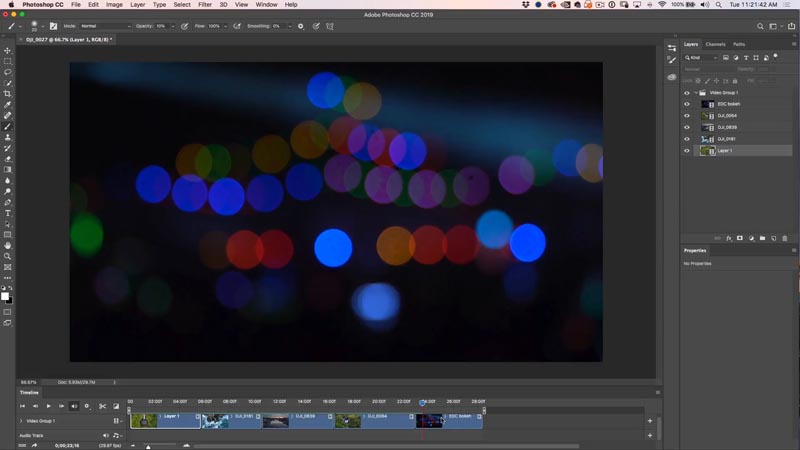
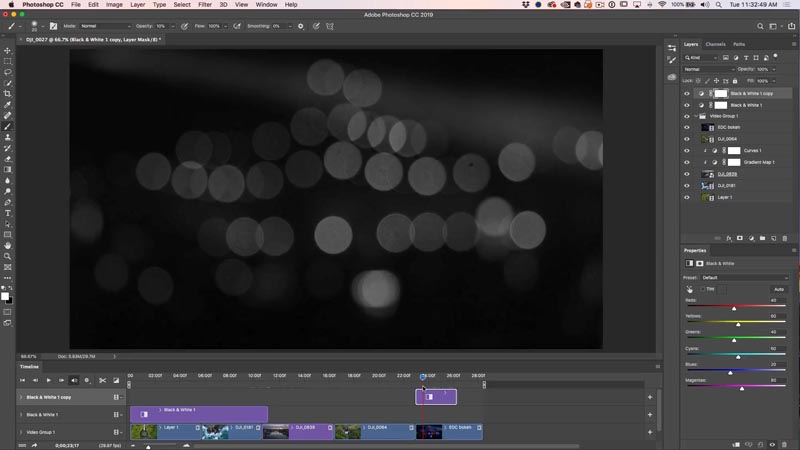
We are going to take the last clip of the bokeh effects and overlay them on the last video, this will create a nice layered video effect.
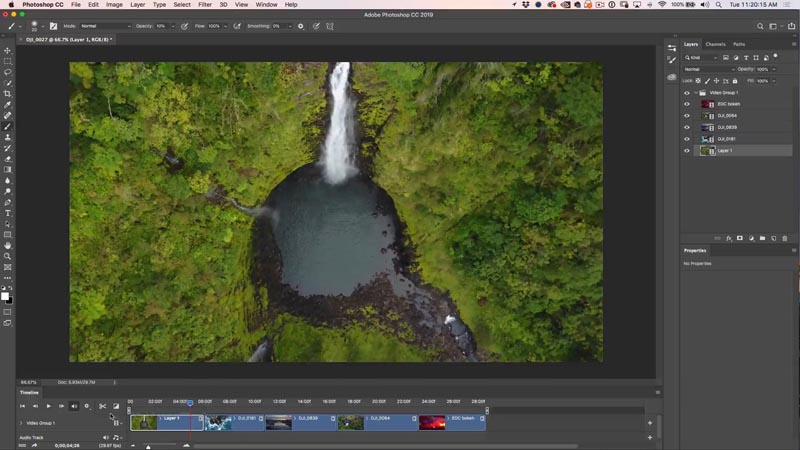
To stack the clip, drag it to the top of the layers panel, above the Video Group as shown
You will see a new Layer in the timeline.
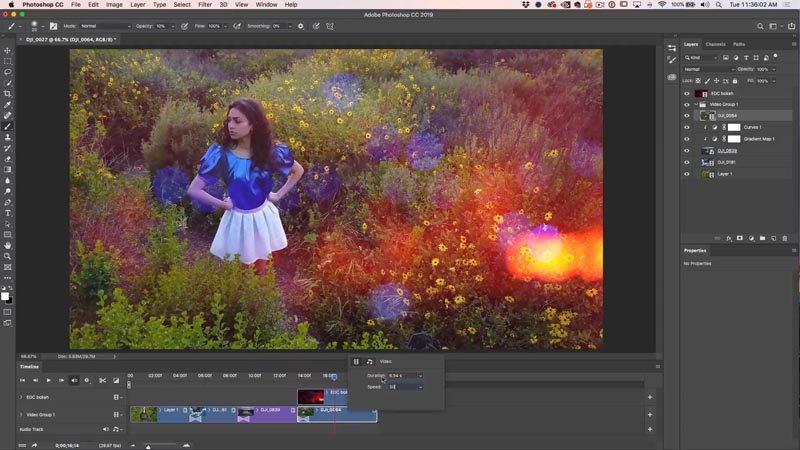
In the timeline, slide the clip to the left until its above the other clip (Natasha in the Alice Costume).
Change the Layer blending mode to Screen. Play back the video and it looks really cool. (Tap spacebar to play and pause video)

If you want slow motion, right click on the clip and change the speed to 50%, for 1/2 speed.
Here, we have dragged, fade to black transitions on each of the layers as well as trimming everything up nicely.
Step 5, Adding Music
Sound and music adds a LOT to a video, if you don’t believe me, try watching a movie with the sound off.
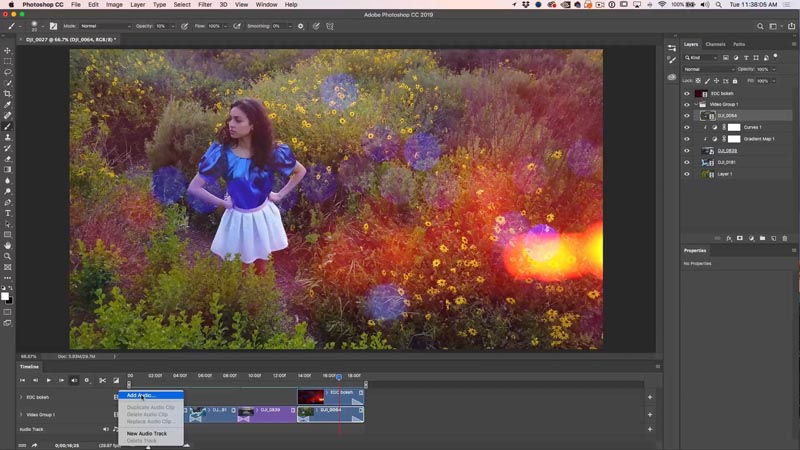
Lets add some music. You will see an audio track in the timeline. Click the button to add audio. (see mouse click on previous screen shot).
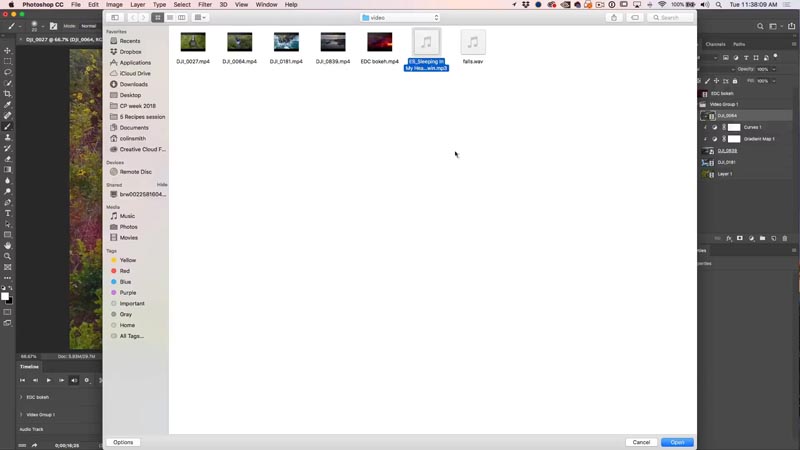
Navigate to an audio file.
I’m using royalty-free music from a fantastic (and affordable) source called Epidemic Sound.
The audio track will be added in green. You can create multiple audio tracks.
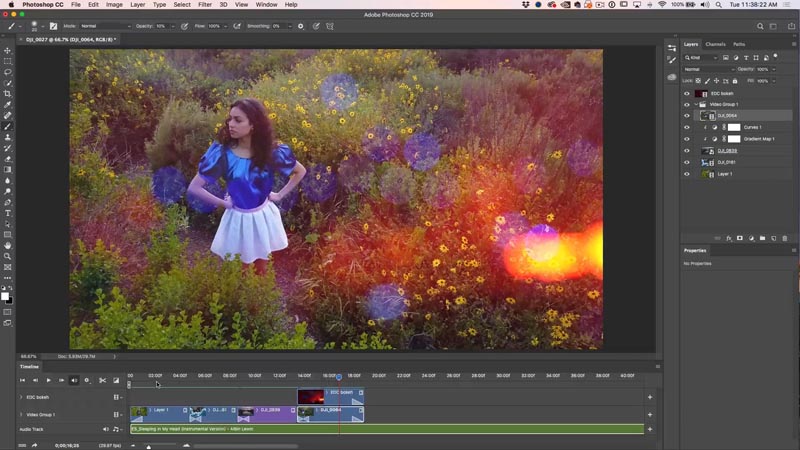
Make sure you trim the audio clip by dragging on the end, just like video.
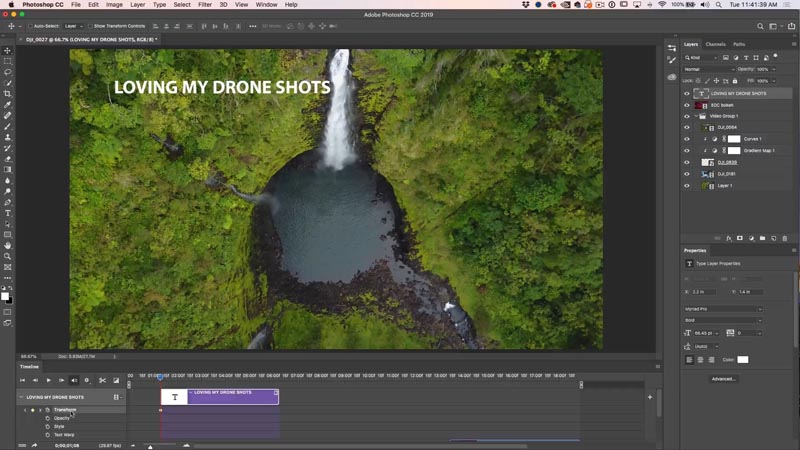
You can add text to a layer and even animate it, like we do in the video, Its hard to show animation with text and photos.
Make sure you save your project. PSD will work just fine.
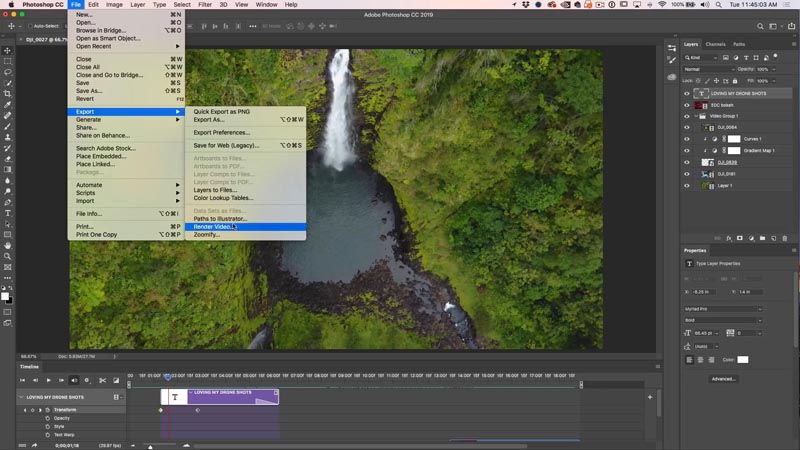
Step 6. Rendering the Video.
The final step is getting this video project all encoded into a video that you can upload to youtube, share on your webpage or social media. Thankfully, Adobe has made this really easy for us.
Choose File>Export>Render Video.
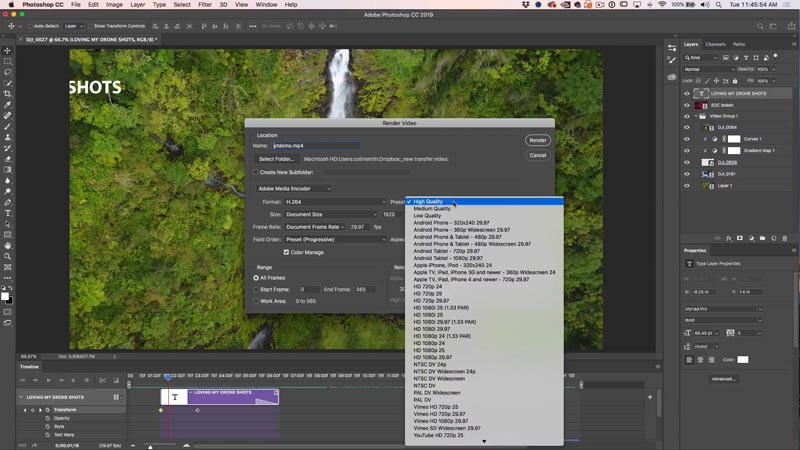
You will see many settings, but the default H.264 is perfect for most things.
Choose the presets and select the one that most closely resembles how you want to use the video. I choose Youtube HD (1920 x 1080) for most.
You will se a rendering progress bar. The time it takes to complete, depends on the length of the video, and the power of your computer.
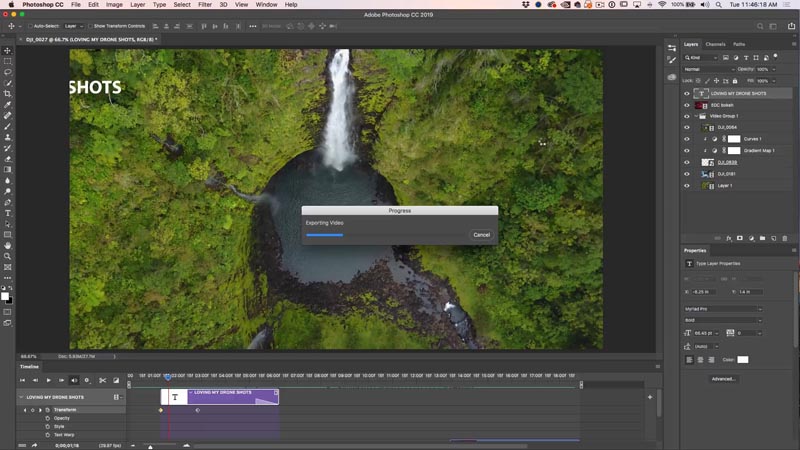
And your video will be all ready. See it above in the video portion of the tutorial.
I hope you found this useful.
I know there is a lot of info here, feel free to check out my premium videos for more step-by-step tutorials on editing video and creating motion graphics and animated slide-shows. They also include all my source-files for you to follow along. There is some really cool stuff you can do. My 2 Courses are both working the same in Photoshop 2025+:
- Video In Photoshop – Photographer and designers guide (PS CS6 or CC+)
- Making Movies in Photoshop (Photoshop CC +)
Thanks,
Colin
PS Don’t forget to follow us on Social Media for more tips.. (I've been posting some fun Instagram and Facebook Stories lately)
You can get my free Layer Blending modes ebook along with dozens of exclusive Photoshop Goodies here

29 thoughts on “How To Edit Video in Photoshop: Free mini Course”
Leave a Reply
Adobe's new camera app, Project Indigo in depth. How it works and simple user guide tutorial on using it.

This Photoshop tutorial shows how to make a blended background blur, the blurry background looks like the depth of field...
How to use Split Warp in Photoshop 2020. (It does more than you think)/ This deep dive shows how to...


I have your Video “Making Movies in Photoshop” and enjoy it. This was a great little refresher on that course. Thanks for all the great video tutorials over the years.
You are welcome William
This is a really cool tutorial! I take and edit video just for fun for the family. I don’t do enough to really learn the bigger, more robust vidoe editing programs. But I already work with Photoshop for my photography (have worked with it for many years). It’s great that I can use that knowledge to edit videos. Thank you! You’re the best!
Thank you for this great mini course!
Thank you for this cool tutorial.
Is it possible to remove a sensorspot in a video with Photoshop ?
Yes it is with clone source, but easier with content aware fill in After Effects if you have it.
I just found this post today. Awesome. I am new to video editing. My edited clips have turned to blank layer pixels. I know I need to relink the videos back into PS, but I’ve tried everything I can think of to no avail. Are you familiar with how to do that?
Can you edit out greenscreen in videos with Photoshop? If so, does your making movies with photoshop course tell how?
You can, but its much, much easier in programs like Premier Pro
Hi Colin, this video was extremely helpful.
I don’t have the whole CC, only Photoshop. Can I still render and export my videos?
I currently make short videos for YouTube. I used Premier Pro or Rush before my subscription ran out. I’m unemployed and just can’t afford the whole Cloud package.
Yes you can export videos from just Photoshop
Again, excellently explained, thanks a lot for the tutorial
I’m new to editing videos in Photoshop. I use Photoshop CS6 Extended. I’ve been trying to import video and audio footages but received error message: “Could not complete your request because DynamicLink is not available”. What exactly is the dynamic link and how can I solve the problem?
Colin
Just purchased your course edit videos in photoshop and am really enjoying it and learning a lot. I have a question that is not covered. I am submitting my videos to stock and want to remove the audio track completely how do I do that? The audio was on when I shot it and it is people talking in the background. Thank you for a great course. Johnny
You can mi=ute the audio in Photoshop in the timeline, right click and turn volume to 0
Fantastic mini course! Thank you Colin! This is really helpful. I have been dabbling in video with Photoshop, and this clears up a few things. I need video clips for promotional web pages, and not really wanting to jump into the pricery programs. Thanks again!
Thank you so much for this helpful and quality tutorial, it clarified all needed to make a solid video.
i want to make a siren head video to scare my brother hopefully this works
Hi Colin. Enjoyed watching your tutorial.
I am trying to clean up some mp4 videos that were produced from scanning old, poor quality, 8mm films. Any suggestion on best photoshop application for things like; remove blank spaces, add transitions, adjust speed / framing, add text, remove or minimize flicker?
Great video – thank you . I have a problem after editing with Export/ Render. When I open up Render Video the drop down window shows the file name as a JPG, and a whole set of jpeg images are saved. I can’t get it to the mp4 format. Any suggestions please on what I am missing?
Don’t use image sequence, which is what I think you are doing.
Also the exporter is supper buggy, maybe something you are dealing with?
Thank you so much Colin. Using image sequence was the problem. In my searching I did not see any mention of that. Thank you for solving my frustrating problem.
Thanks for the video guidance. How can I create a slow motion effect? I’m shooting my video in 100 fps and it did play slow during editing but after rendering, the final video play in normal speed.
you have to make the video 25% speed or the slow mo won’t work
Wow… I had no idea I could use photoshop cc 2022 to edit and render my drone shots..
Thanks.. I’m a professional photographer in Texas… I use photoshop to edit all my images..
I think I can “nix” my video editing software ..
Thanks again.
A million thank yous. This was just what I needed. As always a great teacher.
This is amazing! Thank you!
Can I add a speech track or somehow add speech?
Yes you can add an audio track