
Advanced Photoshop landscape editing workflow
In this Photoshop tutorial, Colin Smith shows the entire process of editing landscape photos, start to finish. This tutorial joins all the dots and shows the production pipeline for photo retouching and editing,
I have made tutorials on individual techniques (And I’ll link them all here). Rather than do small tutorials, I have put everything together so you can see how I actually retouch and edit a real photograph. This is a photo I shot with my DJI Phantom 4 Pro drone. It doesn’t matter what camera you use, the steps are the same. This video tutorial shows me working on the Wacom Cintiq 16. I did a review on the tablet here | Buy tablet here (This isn’t sponsored).
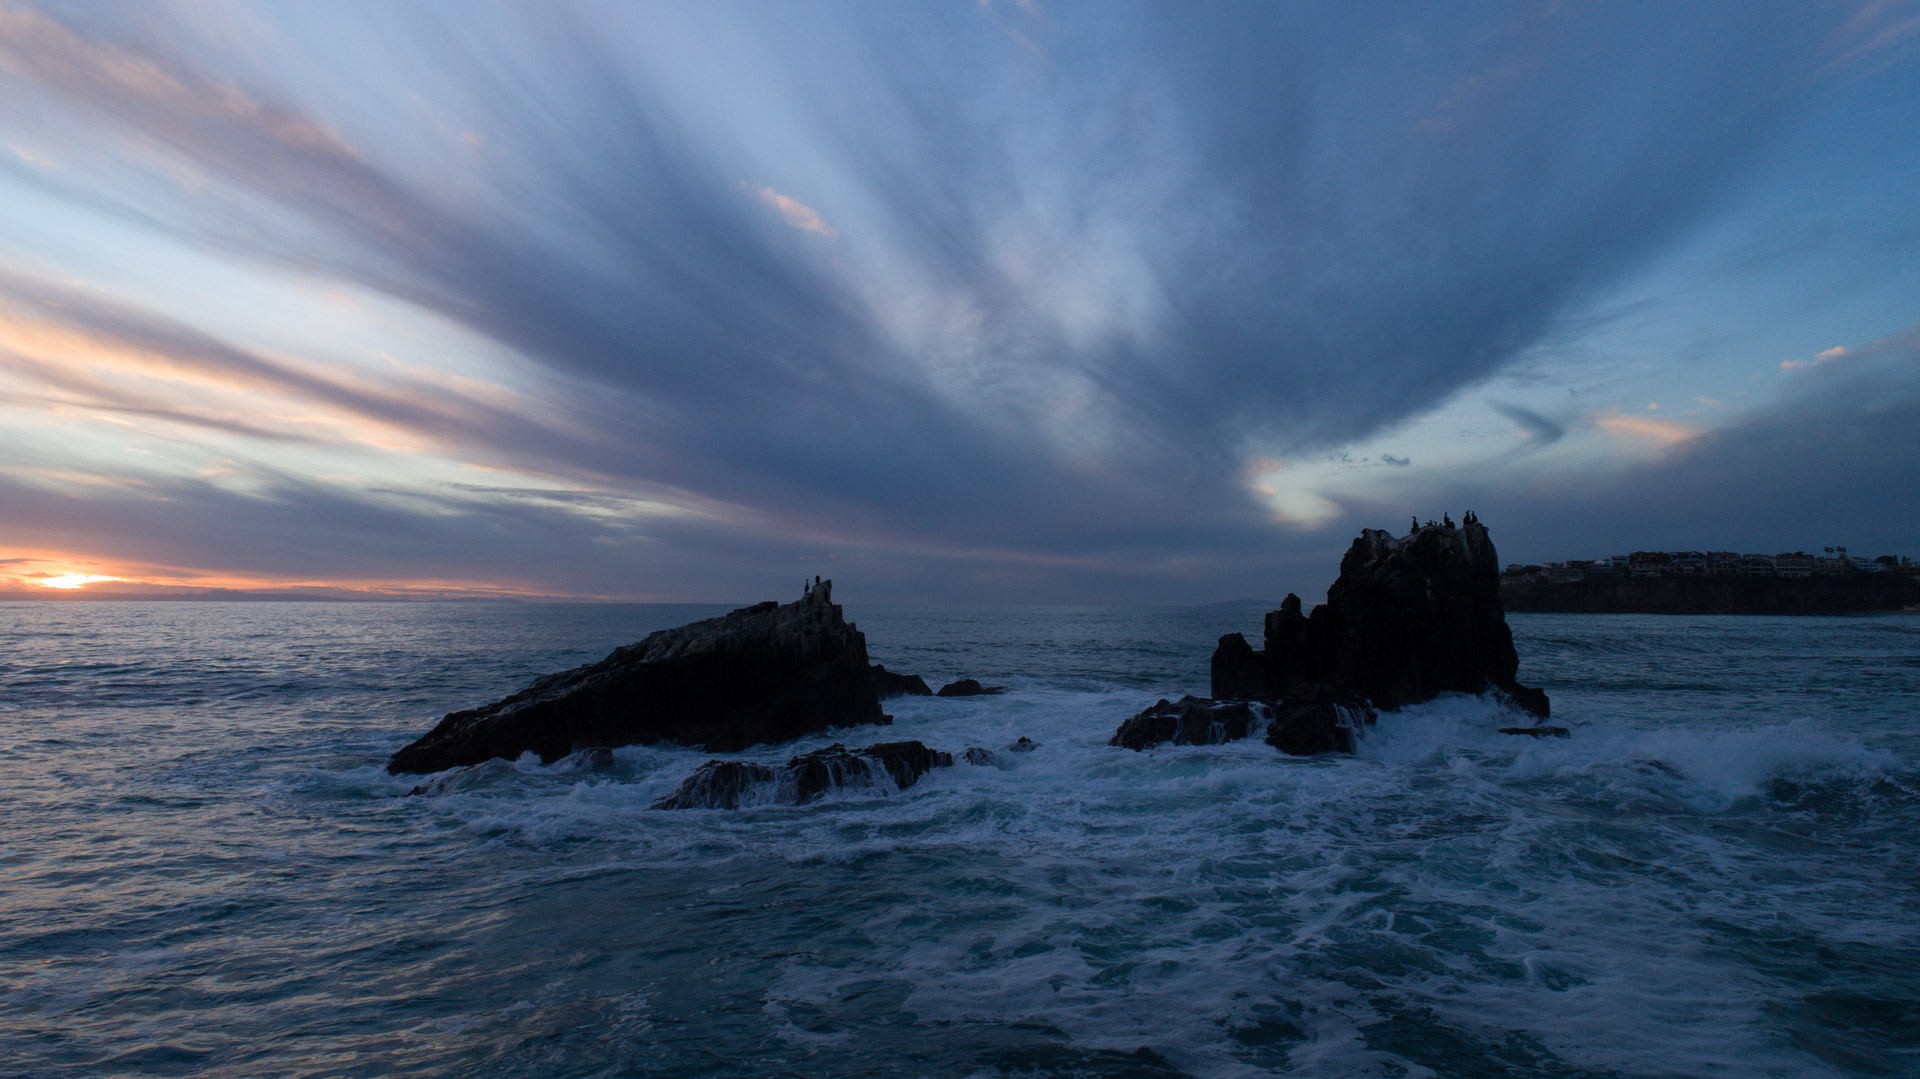
Here is the photo before (SOOC) Straight Out Of Camera
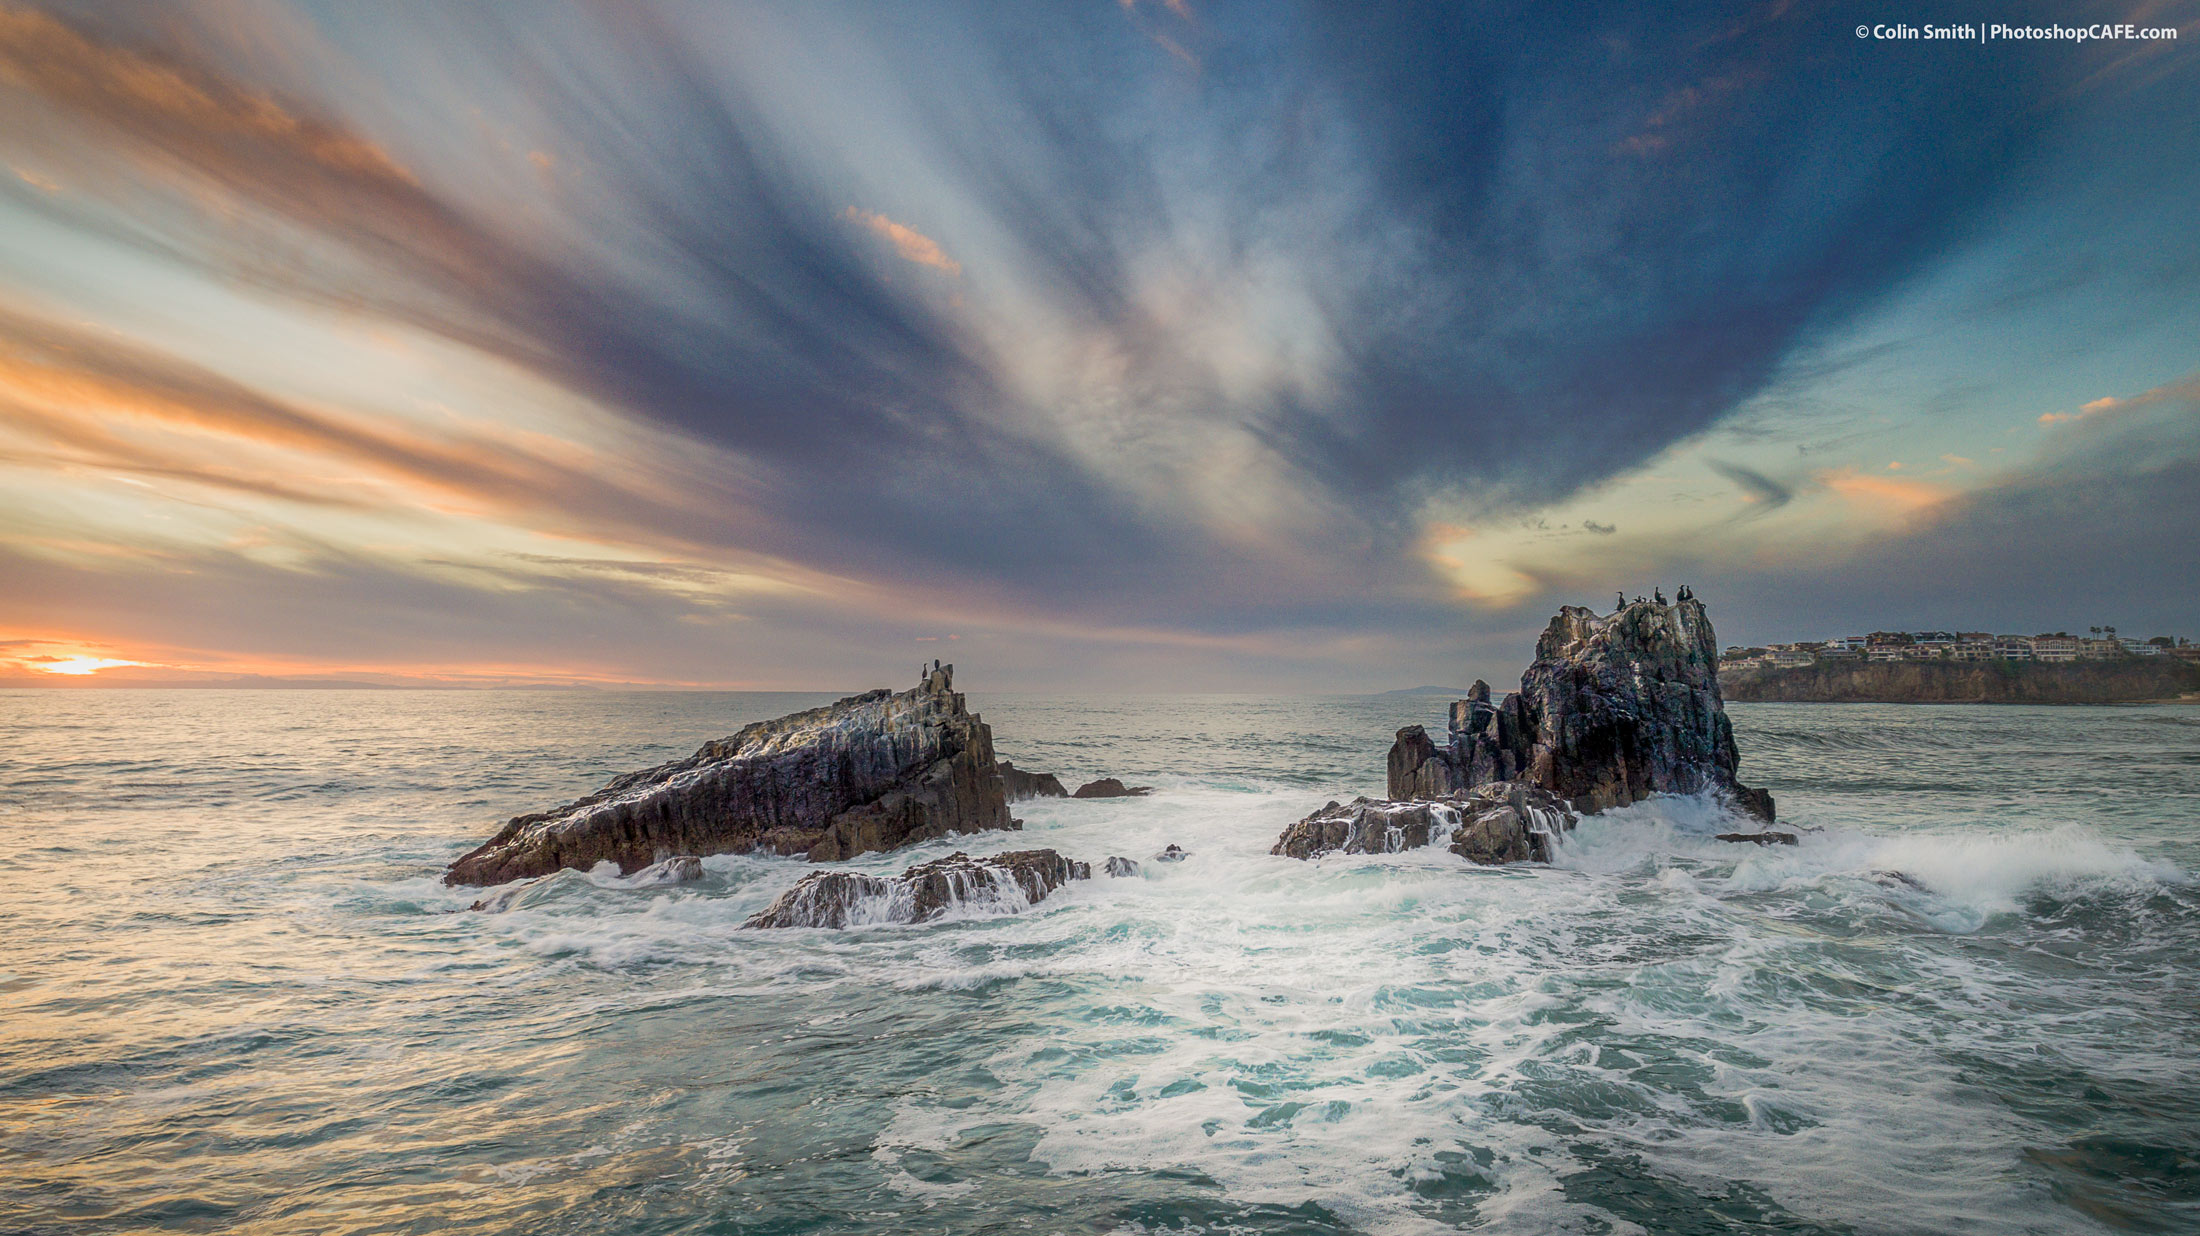
And here is the photo after my edits. (see it on Instagram)
There are a lot of techniques we go through for this image, but I really want you to concentrate on the way it all works together and the decision-making process. Unlike regular tutorials, where I am highlighting a single technique, this is an unrehearsed real-world approach to how I edit my photos every day. As anyone who has been here at the CAFE for a while knows, I love to share my tips and techniques with you, but I am first a working artist and secondarily an educator. Experimenting and practice is how I come up with my techniques. Some decisions aren’t right or wrong, they are subjective and really depend on your style and the mood you are trying to communicate.
If you aren’t happy with your edits right now, don’t worry. Keep practicing and in time things will begin to click. Please follow me on Instagram for regular updates that might help inspire you.
Individual tutorials for the techniques used in this tutorial
Here are tutorials for you to bookmark. If you do all these tutorials, you will build up the basic skills that can be combined to make any image look great.
- Exposure Blending
- Dodge and Burn
- Combining Photos in Photoshop
- Non Destructive Sharpening
- Smart Objects
- Basic Editing in Camera Raw / Lightroom
Thanks for checking this out here at the cafe :
Colin
PS Don’t forget to follow us on Social Media for more tips.. (I've been posting some fun Instagram and Facebook Stories lately)
You can get my free Layer Blending modes ebook along with dozens of exclusive Photoshop Goodies here


25 thoughts on “Advanced Photoshop landscape editing workflow”
Leave a Reply
This Lightroom CC tutorial shows you lots of things you can do with video in Lightroom. Cinematic color grade, use...

Updated ai selection tool in Photoshop is stunningly good now

The best way to blur the background of a photo in Photoshop, with no dark edges.


Outstanding video Colin. Really interesting insights and tips here. Thanks very much for sharing this.
I loved seeing the whole process as I am trying to learn how to do this. Thanks Colin!!!
Interesting and Informative as always. Thanks for sharing your vast knowledge.
Yes-the total picture puts all in context
I liked this full workflow video…more of this would be nice…thanks Colin
Yes, Colin. More of this type of video would be great. Like to see the actual workflow you choose as you go.
Loved the full workflow video..!
I loved this as I have been trying to get a work flow together
Great Tutorial. Interesting insight into your processing workflow
Very helpful to also see the bigger “picture”.
Colin, Great tutorial. Good to see it all come together in one video. Thanks.
Colin, Great tutorial, loved the full workflow! Very helpful.
Great video! I like watching your complete workflow. It helps me to learn and understand more.
Thanks Colin – I do prefer this full workflow lesson.
Entire process for me. Partly because I like seeing how your creative vision works…
Yes love these type of tutorials where you show us how it all comes together, great work.
a good combination of both in depth single focus and a full workflow provides a good educational strategy that helps the student in specific areas and then is able to apply the learnings to files that would be appropriate for the individual. Good tutorial, enjoyed it.
excellent tutorial
Got yourself a new subscriber. Fantastic work!
Thanks
Great keep this format coming
Nice presentation. I have a similar workflow but use different steps to achieve similar results. Yours seem more efficient and I will try them. One comment about your final, if you look at the hard edges (rocks against sky) there is a thin halo that most people will not notice. I normally take those out using darken blend mode and paint or clone the sky into the halo.
Good tip, thanks
Finding this format much more interesting and relaxing, step by step is so regimented, not really getting as much thought process. Thanks for being so innovative!
Thanks for your job.
You speack clearly, and so “non English” can follow you easily.
(Sry for my bad English)