
5 Photoshop Tips for working with Layer Styles
I’m going to show you 5 tips that you might not know, working with layer styles.
Tip 1: Drag effects by hand
Add a drop shadow, just to get us started and here is one of the things, with the drop shadow, we can do all kinds of things here but one of the things you might not know is that we can drag these around. Look at that, manually, on the screen.
Now that doesn’t just work for drop shadows, it also works for things like Gradients and other things like that.
Tip 2: Copying Layer styles
We can replicate these two other objects really easily by holding down the option key on Mac, Alt on Windows and just click and drag. Notice, as we do that, we can add these to the other ones.
Okay, that’s tip number 2.
Tip number 3: Replicating Layer style settings
Every right click and we choose copy layer style and we just select the rest of the layers here that we want to attach them and we right click and we choose paste layer style. Now, we can put the layer style on all of them without having to do it individually.
Tip number 4, one size doesn’t fit all.
Let’s grab a layer style and see take Creative and drag and drop that layer style on there. And that looks terrible! It’s a hand-me-down and it is too big for their type. That’s easy to fix. We just right click on the word ‘Effect’, choose ‘Scale Effects’, and now, we can just go down and scale that to fit there because whenever you create a layer style, it’s saved out in the size it was created. So, it doesn’t automatically scale. So you want to scale those to make them look good.
Tip number 5: How to create a better bevel.
So, let’s create a ‘Bevel and Emboss’, just hit the little ‘fx’. You see ‘Bevel and Emboss’, that’s open above and watching down here.
Okay, so here is one of the things, we can try to get a good bevel and it’s not bad but it doesn’t really look crisp and it doesn’t look sharp and here’s the trick here, is to make sure you turn on a ‘Contour’ and make it ‘Anti-aliased’. If we turn on the ‘Contour’ here, we can give different shapes for that bevel, look at that, and you know if we want to make it look more metallic or whatever, you know, we can do that on here. So, I kind of like that one there.
So, if we look at this before and after the ‘Contour’, see how it just gives a lot more precision.
So that’s it guys, it’s short and sweet. If you like this, hit the subscribe button right now, become part of the Cafe Crew, get a new tutorial, every single week and add a comment! Let’s get a discussion going right now, I’d love know what your favorite layer style is, let me know.
And until next time,
Ill see you at the Cafe.
Colin
PS Don’t forget to follow us on Social Media for more tips.. (I've been posting some fun Instagram and Facebook Stories lately)
You can get my free Layer Blending modes ebook along with dozens of exclusive Photoshop Goodies here


How to combine photos and match the colors in Photoshop. Free photoshop tutorial for beginners.
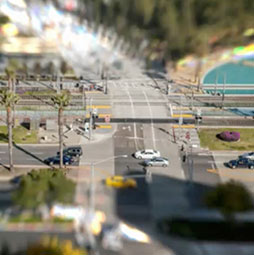
This tutorial teaches you how to take a photograph and make it look like a miniature model in photoshop instead...
How to replace the sky in photoshop, the ultimate free photoshop tutorial. Download additional skies. Chart that explains exactly how...


