 Create text on new layer 1. and rasterize – PC right click on name in layers pallette/Mac-Cmd Click >rasterize
 Make new layer 2. and using rectangular marquee tool make a box around the text.
Deselect – Cmd/Ctrl +D
 Fill the new box with white.
While layer 2 still active, Ctrl/Cmd click on layer 1 thumbnail.
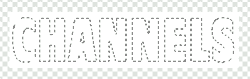
 press del, should look like this
 hide layer 1 and Ctrl/Cmd click on layer 2.This is the image we are going to make 3d.
You could start at this point with any image as long as it is on a layer and filled with white.

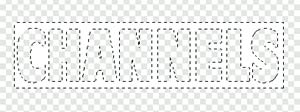
![]() Click on the new channel button in the Channels Pallete. Alpha 1 will apper. fill your selection with white, it should resemble the image shown.
Click on the new channel button in the Channels Pallete. Alpha 1 will apper. fill your selection with white, it should resemble the image shown.
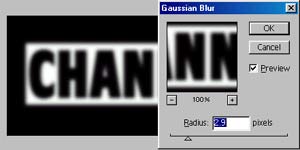 Deselct and go to Filters>Blur>Gaussian blur. The higher you make the blur the more your image will be bevelled.
Click on the rgb channel at the to of the pallette.
 Go back to the layers pallete and select your image layer
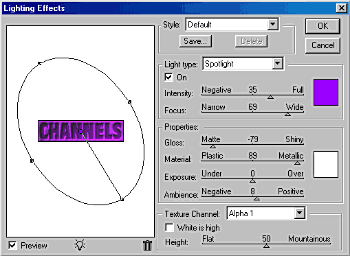
Here is where the magic happens. Filter>Render>Lighting effects.
Use the settings here or play around with your own.
Click on texture channel and load Alpha 1. I deselected the white it high for this example.
Click on the color picker to give your light some color. We used purple.
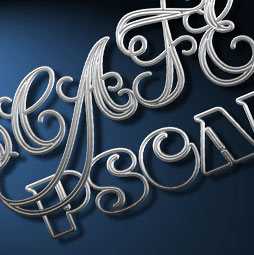
 Click ok and say “wow.” The finished result. I put a drop shadow and a blue gradient in the background for coolness sake.
For more cool techniques like this on an easy to follow video format check out Photoshop Secrets Special FX
Get in-the-know!
Access valuable Photoshop extras and goodies for free and much more a

This site uses Akismet to reduce spam. Learn how your comment data is processed.
In this Photoshop tutorial, learn how to create text that looks like it's made out of metal wire. The text...

One of the most popular features here at photoshopcafe is the “Super Tutorials”.In Super Tutorial #3 This will be a...

How to make a levitation effect in Photoshop. How to make objects and people look like they are floating in...


Very good Guide Thanks for its help alot