Tattoos, love ’em or hate ’em. If you love them, you will learn how to painlessly add one in Photoshop, if you hate them, then you can learn how to remove them without the use of lasers in Photoshop. This tutorial shows you how to do both. Have fun!
I hope you enjoyed this photoshop tutorial.
The photo used is from Adobe stock, you can find it here
You can get 10 free images right now to try this out
I’ve got a great tutorial for you. In fact, it’s two in one and we’re dealing with tattoos. So first of all I’m going to show you how to remove a tattoo from this photo, and then I’m going to show you how to add a tattoo to a photo.
So here’s a photo that I got from Adobe Stock and maybe it’s the exact photo that you wanted to use, but you want to do it sans tattoos.
Choose the Patch Tool. (If you don’t see it, it’s hiding under the Spot Healing Brush)
The chest is going to be the easiest, so why don’t we just start with that and then we’ll move on?
Make a little selection around the area that we want to remove. Grab the new area by simply dragging the patch tool. Make sure that the edges of the shirt are aligned or it’s going to be really hard and we release it and it will blend those in.
Now if you have little areas that you do need to touch up later on, you can do that using the Clone Stamp Tool, Liquify and different things like that.
Let’s move on to the arm here and notice that I can’t really make a patch there and replace all of that because it’s just too much. So what we want to do is just take that same approach. We want to be taking this color here and just kind of work it down.
So the way to do it is we’re going to start here. We’re just going to start from a little bit, just that section there, and pull that up, and just kind of release it and see, we can just kind of build it up as we go along there. And so we’re going to get this in several pieces. All right, maybe we can get this last piece in one go; let’s try it. And, boom, not looking bad at all, okay.
So we got those areas. I’m just kind of noticing that. If you get an area that you just want to kind of touch up a little bit, you can do that easily enough like that. See that, you can just keep going over it? Now, here we go. Now we come to a challenge. This area is going to be more of a challenge.
All right, so one of the things I might want to do, and this is an option you can do, is to take a Quick Selection Brush and actually isolate the area that you’re going to be working on. And the reason I’m doing this is because I don’t want to like reshape that arm. I want to protect the arm there. So let’s just go up and we’re going to grab the arm, and we’re just going to hit Select and Mask in here.
So what we’re going to do is just maybe just hit the Smooth a little bit, just kind of smoothen up those edges, give it a little push of contrast and a little touch of radius there. There we go, we’re just trying to get a decent arm there; just going to drop that down with that little Feather Tool there and just kind of run it over that edge for a second and this contrast will actually force it to create more of a solid selection. See that?
So now we’re going to output this to a new layer with a Layer Mask and click OK. All right, so essentially, what we’ve done is we’ve just dropped this arm above the other one. See that there? And we’re just concentrating on this area, but I just didn’t want to really mangle the shape of her arm, so now that we’ve got a layer mask selected, everything that we do is going to happen within that layer mask. Let me demonstrate.
If I grab a black brush and I paint, notice it will fit only within those areas. All right, so that’s going to make it a little bit more forgiving and easy for us to work in this area there. Now, if you wonder what it does, just hit the backslash key and you can see the mask. That’s the backslash there and that will just kind of let you know where your boundaries are. So why don’t we just work with that mask on and let’s go back to our Patch Tool again.
And this time, what I’m going to do is I want to kind of get this working in here, but maybe, we got to think about the strategy here because this goes quite a way across, so maybe what I might do is I might start kind of working inside this area a little bit and then kind of patch it up there, so let me show you what I mean.
So we’re just going to go in here and just kind of build it up just a little bit at a time. See that? Don’t worry about the colors getting a little smudged. We’ll deal with that later. So what we’re doing is just trying to kind of get those areas up there. Okay, looking good. Let’s see if we can kind of fix that up a little bit more.
Let’s get the edge now. The first edge, we want it to align, there we go, and let’s do it here. Maybe we can try this last bit here in one go–it’s a big piece–and let’s see how it works. And if doesn’t, we can always undo it and come back. There we go. Nice.
Now, let’s have a look here. Let’s turn on all our layers and everything back on. So we got some discoloring going on here, almost as if she has some bruises. And it’s very difficult to get rid of unless you know how to adjust one setting, and that’s the Diffusion.
If we take the Diffusion and we turn it up to a very high number and we make this selection and we pull it up, notice what happens is it creates that very kind of soft edge. Maybe we’ll just undo that and we know it did look better, but if we take the Diffusion down to a lower number, and let’s just make that selection again and pull it up, notice what happens is it will force those other colors on here and actually removes those much better. See that?
So, it’s literally pushing those on there. The only downside is we get these little rough edges. Well the way to fix that is we just go back up now and turn our diffusion back up to a higher number like a 6 and then just grab these edges, and then we can just go in here and just allow it to heal these edges on that smaller diffusion. See that?
So, basically, just by playing around with that Diffusion, we can take something that would be difficult and make it a lot easier. So there we go, we’ve got that. We’ve got rid of the tattoo.
All right, so what we’re going to do is just go directly in here. We’re in the library panel right now. If you don’t see it, it’s there. Grab that Library panel and just type in “Tattoo design.” And what we’re going to do is we’re actually going to search directly within Adobe Stock right there. See that?
And it’s actually coming up with some different tattoo design pictures, so we’re just going to go there, and these are tattooed people. So maybe what we want to do is just change the criteria here from photos to illustrations. And now, when we do that, we can actually get some designs. There we go; looking good.
So let’s just find something that we might want to use now. We’ll go with this kind of wolf thing. So what we’re going to do is we’re just going to click and we’re going to download it. So, we’re going to download it into here. All right, so we’re just going to take this and we’re just going to drag it into our document. There we go, and let’s resize it.
So I’m just going to hit the Shift and Option key to resize this from the middle, and let’s scale it down and just hit Enter. Now, obviously, this is not going to quite work because we need to make it blend in there. So let’s have a look at some different Blending Modes.
So, if we go up here, the ones we want to choose are these ones, the Darkening Modes, because they all hide white. So, if we look at Darken and we can kind of move it over, we can see how that would look. We can look at Multiply. It gives it kind of the same effect, but a little stronger. It’s not bad, actually.
Let’s look at Color Burn. It kind of looks like a henna. If you want a henna tattoo, that would be the way to do it. Linear Burn, okay, that works quite well as well, maybe a little strong for the photo and darker color. So the one I like the best is Multiply.
So what I want to do here is I just want to make sure that I select this area and nothing of the text or anything like that. I want a tight box around it. By the way, if you want to license the photo, just right click and choose License Image, and then that will give you the High Resolution version without any watermarks.
So I’m going to right click on here now and I’m going to rasterize that layer and just get that, so I’m going to create a nice tight box around it. So I’m using the Rectangular Marquee Tool and the Spacebar will enable me to move it around. So what we’re looking for is a nice, nice tight box. Okay, that looks pretty good.
All right, so I’m going to hit Ctrl J to copy that to a new layer. Notice it’s very dark because I just doubled up on it, though we’re going to hide that layer underneath and let’s just get rid of it. So now we want to position it. Let’s select our layer and let’s position it. What we’re going to do is hit Ctrl T and a lot of what we do now is going to happen inside of this Free Transform.
So, if I hold down the Shift key, it will constrain it. There, see that? And if we want to do it from the center, also hit Alt or Option, and we can move it down there. All right, so let’s position this, and maybe kind of tilt it a little bit. All right. Now, right click and you’ll notice we have other options in here. And one of them is really useful is the Warp Option.
So, we can literally warp this and make it fit her arm. So let’s kind of bring it down a little bit and I’m just kind of dragging in those little areas there, just trying to make that fit in there. See that? And we’re just literally positioning that to fit the shape of her arm. We can stretch it a little bit and maybe go there a little bit more.
So what you want to do is think about where is the arm bulging and that will create a realistic kind of a shape for what we’re looking for, so we want to kind of bulge it from the center a little bit and just kind of come down a little there. Hit Enter and we’ll just reposition it slightly.
All right, so we kind of got that, but it feels a little strong. We can drop the Opacity down a little bit and just kind of blend that in. So there we go, we’ve just removed the tattoo and then we just added a tattoo right there inside of Photoshop.
So anyway, guys, I hope you liked this tutorial. If you did, become part of the Cafe Crew, hit the Subscribe button right now, and every week, you’re going to get a brand new tutorial in Photoshop and Lightroom and other things.
If you like this, hit that Like button and smash it hard. Let’s get lots of likes going. Add a comment. Let’s get a discussion going, and until next week, I’ll see you at the Cafe.
Thanks for checking it out!
Don’t forget to check out our extensive library of full-length premium tutorials from myself and a team of hand-picked world-class authors! See them all here
Thanks
Colin

This site uses Akismet to reduce spam. Learn how your comment data is processed.
I'm going to show you how to use the gradient tool in Photoshop. Gradient tool basics, making custom gradients, how...
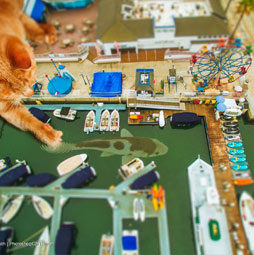
Learn how I made the image and added the tilt-shift effect. For this image, I wanted to do something creative....

This Photoshop tutorial shows you all the steps to make a watermark from a signature. How to make the signature...


This is a very useful tutorial. I love the way you described. I think Photoshop Retouching is the most important technique that should be applied for removing tattoo from the skin.
I am looking forward to your written steps. Thanks for sharing this post.
This is really nice
You published a very informative article. I am an adobe user and I want to learn something new about this. I found your post and read it. Really this is effective for me and I think also effective for all adobe users. I appreciate you! “REMOVE A TATTOO IN PHOTOSHOP / ADD A TATTOO IN PHOTOSHOP TUTORIAL” Thank you for sharing your experience.