
How to wrap text around a photo in Photoshop tutorial
In this Photoshop tutorial, I’m going to show you how to wrap text around a photo using displacement maps and image warp. This method will make the text follow every contour and wrinkle and produce a very realistic result. You can wrap pretty much anything around any photo using this technique. I have another very popular tutorial I wrote where I’m wrapping text on the surface of a rock.
In this tutorial, I give you written instructions as well as a video, which I have been doing for most of our tutorials now.
Here is the video
Step 1
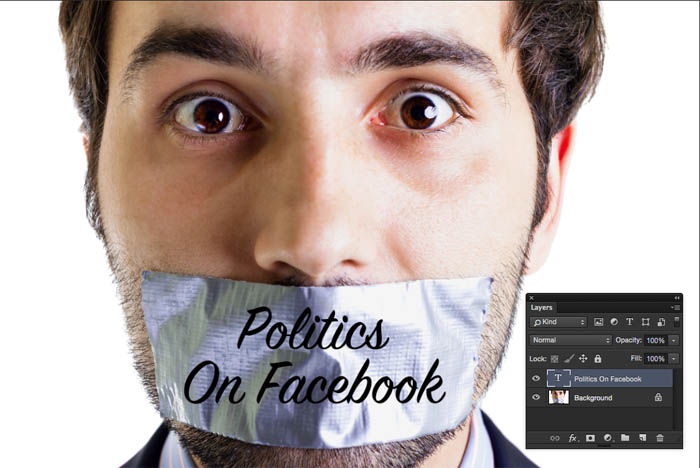
Matching Perspective of the Photograph
I began with a photograph that I got from Adobe stock

Step 2
Create some type in Photoshop on a new layer
Step 3
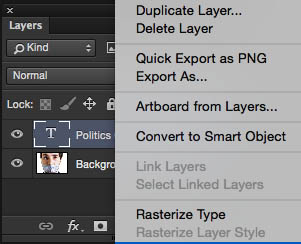
In order to warp the text, it has to be Rasterized as you can’t warp native text
Right click in the Layers panel and choose “Rasterize Type”
Step 4
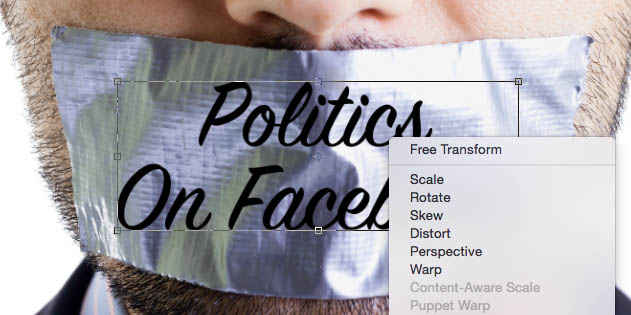
Press Cmd/Ctrl+T for free Transform
Right click and select Warp
Step 5
Drag on the grid to match the perspective of the photograph

Displacement Map, matching the wrinkles in the photo
Step 6
Hide the text layer and click on the image layer

Step 7
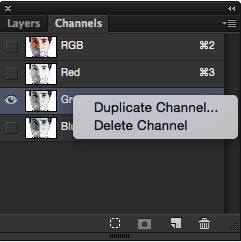
Open the channels panel.
Choose the channel with the most contrast detail in the duct tape, in this case it’s the green channel. We want to create a brand new document from this channel. The document should be in multi-channel mode (eek!) Don’t worry, it’s easy, follow along…

Step 8
Right click on the channel and choose “Duplicate Channel”
Step 9
You will see a dialog box
Change the Destination to “new” and name it (remember the name)

Step 10
A new document will now be created from this channel this will be in Multi channel mode.
Open up levels (Cmd/Ctrl+L)
Add contrast by moving the triangles in the levels. In this case I moved the blacks and mids. The goal is to get as much contrast as possible while still keeping details in black and whites.

Step 11
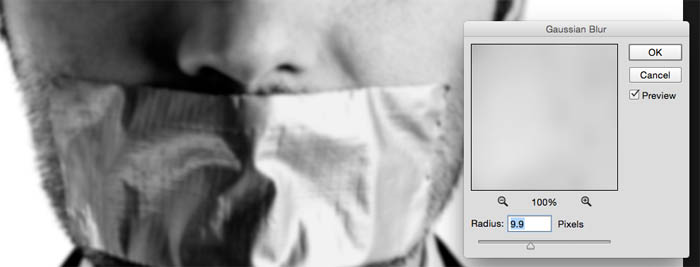
Right now the detail will make the text unreadable, so we need to soften it
Choose Filter>Blur>Gaussian Blur and choose an amount that gets rid of fine detail while still keeping the wrinkles. This image was large, so 9.9 works. If your image is smaller, use a less amount, maybe 5.
Step 12
This is our map for displacement. Choose a location and name that you can remember and and save this image as a psd (Its has to be a PSD or it wont work). I named it map-photoshopCAFE.psd
Using the Displacement Map
Step 13
Go back to your original document.
Click on RGB in the channels to make sure all channels are back on.

Step 14
In the Layers panel, turn on the text layer and make sure it’s the active layer.
We are now ready to displace it

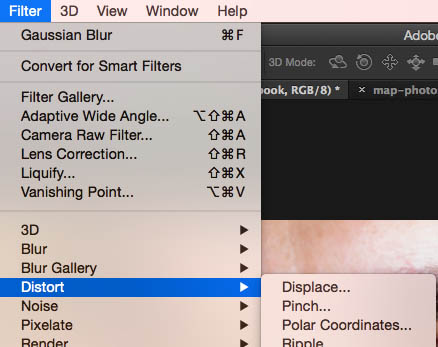
Step 15
Choose Filter>Distort>Displace
Step 16
The Displace box comes up with a default of 10 and 10 for vertical and horizontal. (This works for most images)
For smaller images try 5, for larger try 15 (You might have to try a number and undo and try a different one if its too weak or too strong)

Step 17
Once you click on, a box will appear asking you to locate the Displacement map image.
This is the one we created earlier. Choose it!

Step 18
And, bam! You text should now wrap nicely! Almost done!

Xtra Credit
For a bit more realism, you could lower the opacity a little bit and soften the edges with a tiny bit of blur. Also try different blending modes to blend it even better.
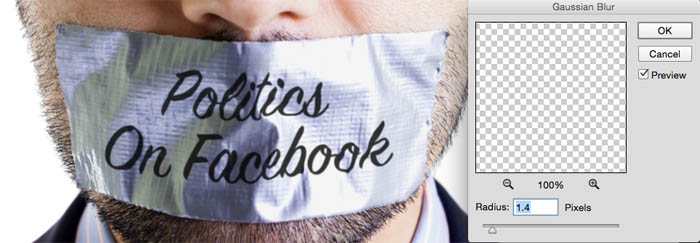
Here is our final result! I used overlay blend more and duplicated the text layer so it would be darker.

I hope you enjoyed this! Check out more tutorials here at PhotoshopCAFE, as new one is added every week!
Thanks for reading!
Colin
PS Don’t forget to follow us on Social Media for more tips.. (I've been posting some fun Instagram and Facebook Stories lately)
You can get my free Layer Blending modes ebook along with dozens of exclusive Photoshop Goodies here


One thought on “How to wrap text around a photo in Photoshop tutorial”
Leave a Reply

How to sync images and edits between Lightroom Classic and Lightroom mobile eco-system
Match color and tone on background with Harmonize in Photoshop 2022
how to photograph a lunar eclipse for beginners, the gear and techniques to photograph the lunar eclipse. Photograph blood moon.


Step by step tutorial is always useful to me i am like fan of this kind of post thanks for sharing.