
How to Shoot & Retouch for High-key Architecture in Lightroom and Camera RAW
by Frank Bramkamp
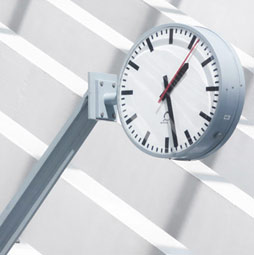
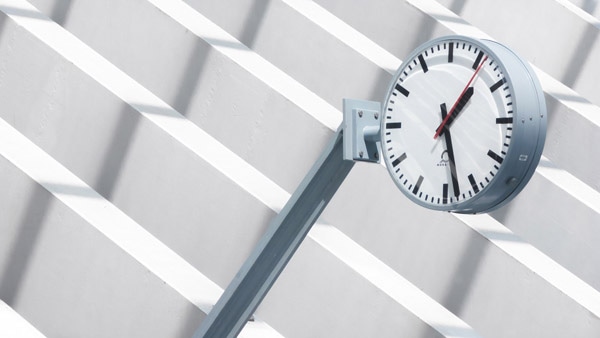
In this tutorial we will share some techniques how to shoot and retouch for a high-key effect in architectural photography. The complete retouching will be in Lightroom (but can be done the same way in Camera Raw) , so it is easy to follow and to apply to your own photos. The technique works best if the architecture lends itself to a high-key look, i.e. it should be of light color. In this example I have photographed a clock in the rail station of Liege-Guillemins, Belgium.
Step 1 Shooting
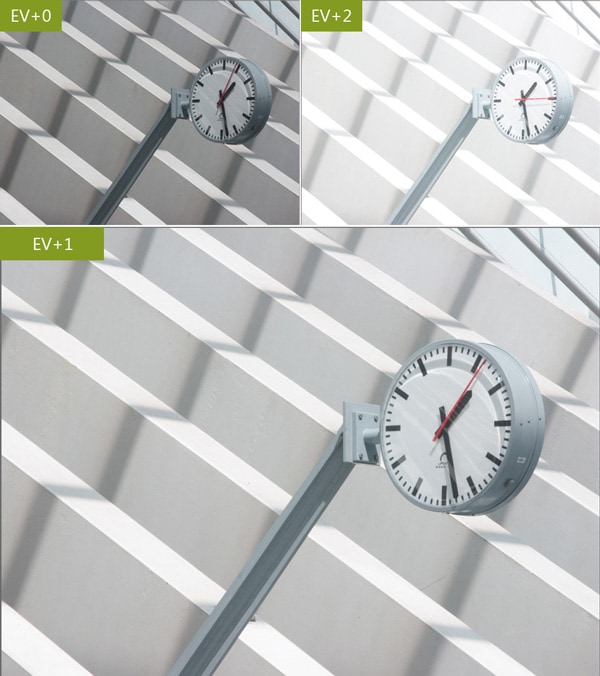
The first step to create the high-key effect is essentially based on the exposure you shoot the scene. Let us have a look how the scene looks at different exposures, namely the base exposure (EV+0) and two over exposed settings, EV+1/EV+2. Here, EV+1 means that the time of exposure has been doubled compared to EV+0. The aperture and ISO values remain fixed. The metering of the base exposure was automatically set by the camera, using aperture priority mode. The base exposure is clearly underexposed and looks dull. This is typical when you shoot a light scene like this. Since the metering of the camera wants to expose the whole scene according to a 18% grey, very light scenes become too dark, while very dark scenes get too bright. You will encounter this problem particularly when shooting snow. The main trick to achieve the high-key look is to over-expose the picture in camera. This way, the photo will automatically lend itself to a cool high-key look.
We still want to maintain detail in the highlight regions and also recover contrast in the darks. In this case, we choose the EV+1 exposure, since the highlights in the EV+2 frame are already too blown out.
Step 2 Process
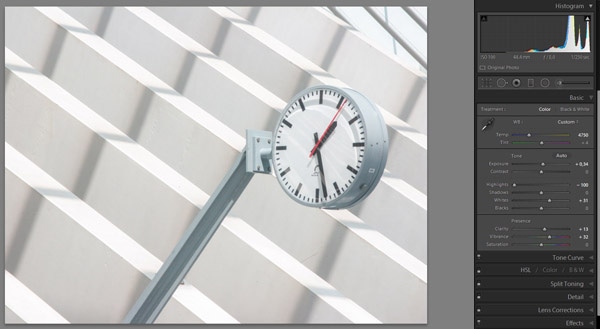
In the next steps, we are going to refine the high-key effect in post-processing. First, we increase the Exposure of the image. The Highlight slider does not have much effect here, so I recovered the highlights to avoid blown out areas. In other situations, increasing the highlights may be a good choice. Next, we adjust the white point as far as we can, without over exposing highlights.
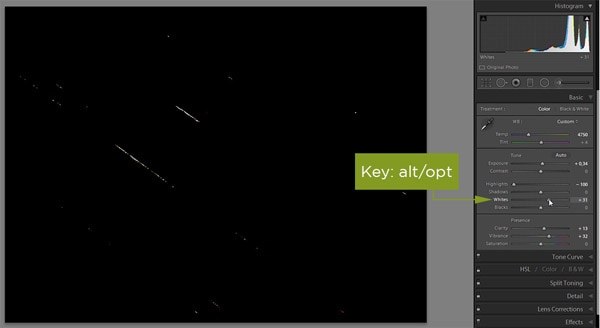
To see where highlights are clipping, we hold the alt(PC)/opt(MAC) key and move the Whites slider to the right, until we see a few white spots, which indicate highlight clipping. If we go much further, we lose highlight detail. We also add a bit of clarity and slightly increase the vibrance to give more color to the steel of the clock.
Step 3
The concrete of the architecture already looks good, but the clock is missing some contrast. In the next step, we darken the shadows, which gives more punch. In contrast to the white point, we do not set the correct black point, since this would make the image too dark. We even lighten the blacks, until we are satisfied with the result. This closes the exposure settings.

Step 4
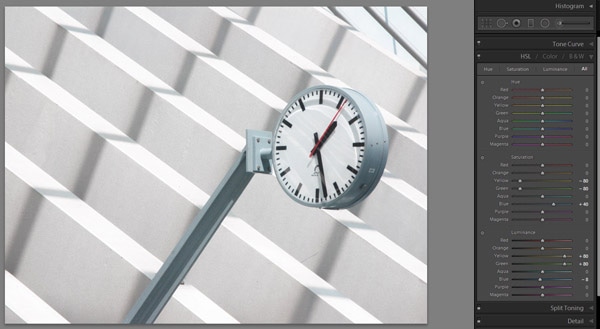
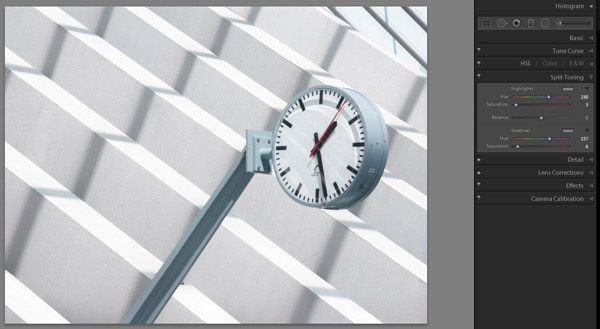
We want to give the architecture a very clean and futuristic look. To achieve this, we are going to apply two steps: First, we remove an existing warm color tint. Second, we will add a slight blue tint to the image. Since I shot the photo original in natural sunlight, the image will have a natural warm tint, even if it is not very visible. To purify the high-key look, we reduce the saturation of the yellows and the greens in the HSL tab. In order to see which colors are present in the photo, simply move the sliders to their extreme values. Here the yellow and green turned out to be present in the concrete. Changing the saturation of the other colors almost had no effect, so we did not alter them. To accentuate the steel of the clock, we slightly increased the saturation of the blue. While we decreased the saturation of yellow and green, we will increase their Luminance. This will further brighten parts of the image, and contribute to the high-key look. To finish the clean look, we add a slight blue Split Toning effect.
Step 5
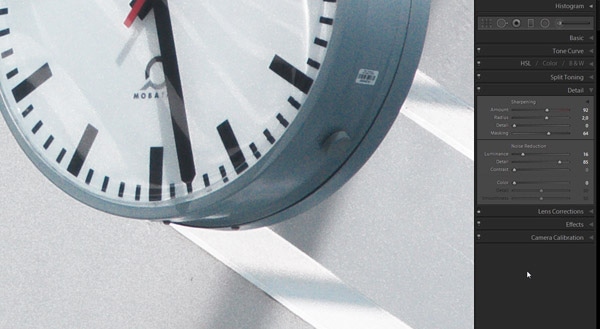
To finish the photograph, we sharpen the image and reduce the noise. I shoot with a Canon G9. I think that my pictures are typically a bit more blurry. Therefore I apply a bit higher settings for sharpening. The image only needs a small amount of luminance noise reduction. I typically set the Detail around 80% to maintain good detail information. But we can identify pronounced color noise. The default setting of 25% is sufficient to reduce the color noise.

Step 6
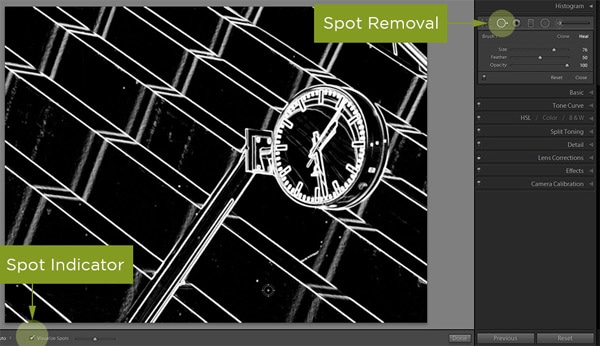
The final finishing touch is spot removal. Particularly when you print high-key images, spots that are hard to identify on-screen may suddenly be apparent on the print. Lightroom 5 (and camera Raw) can help you to identify spots. When choosing the spot removal tool you will find an additional Visualize Spots option. When you activate this option, the black and white mode will help to detect spots more easily. With the associated slider you can control its sensitivity. You can also remove spots in this view.
Result
This concludes the retouching of the high-key architectural photograph. We just crop it for the final result.
PS Don’t forget to follow us on Social Media for more tips.. (I've been posting some fun Instagram and Facebook Stories lately)
You can get my free Layer Blending modes ebook along with dozens of exclusive Photoshop Goodies here


Check out all the new Photoshop features in Photoshop 2024 July update

Here is a cool little effect I just made up. I know this one is going to be popular. A...


