
How to Light a Photo in Photoshop with Lighting Effects
How to Light a photo in Photoshop
Get ready to relight your photos in Photoshop. I’m amazed at how many people tell me they have never heard of the really powerful LIGHTING EFFECTS filter.
In this Photoshop Tutorial we are going to use the Lighting effects filter to simulate real lighting. This filter has a lot of powerful features. I’ll show you how to use them in this tutorial. We are going to d 2 projects. The first is adding colored gels in Photoshop and the second is relighting a scene and adding texture. This is also part 1 of a 3 parter on the Lighting effects filter, look for the other 2 parts here on PhotoshopCAFE. Please watch the video for more detailed explanations and extra tips. This written component will serve as a great reference for you.
To make the 3D and other retired features work in Photoshop, do this
This is part 1 of a series. Part 2 is here.
Lighting effects isn’t working?
I have received a lot of messages about different things not working, here are the common solutions.
- Make sure you are in RGB mode and 8bit color. (under Image>Mode)
- If you don’t see the controls, press Cmd/Ctrl+H
- If its not working try going to Preference>Performance and make sure Use Graphics Processor is turned on.
- Sometimes you have to quite Photoshop and go back in when changing texture channels, as it has a few little bugs.
Making Colored Gels in Photoshop
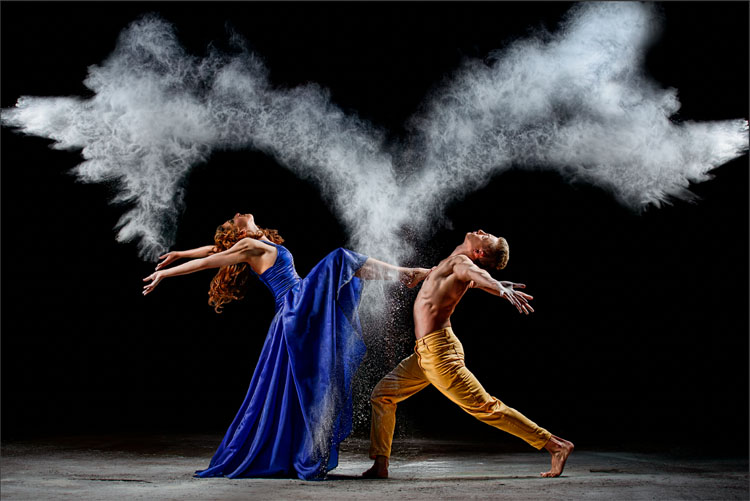
Here is a photo I grabbed from Adobe Stock. Lets start with a double gelled spotlight effect
Step 1.
Choose Filter>Render>Lighting effects
(note, you need to be in RGB mode and 8 bit for this to work, you can find this under Image>Mode)
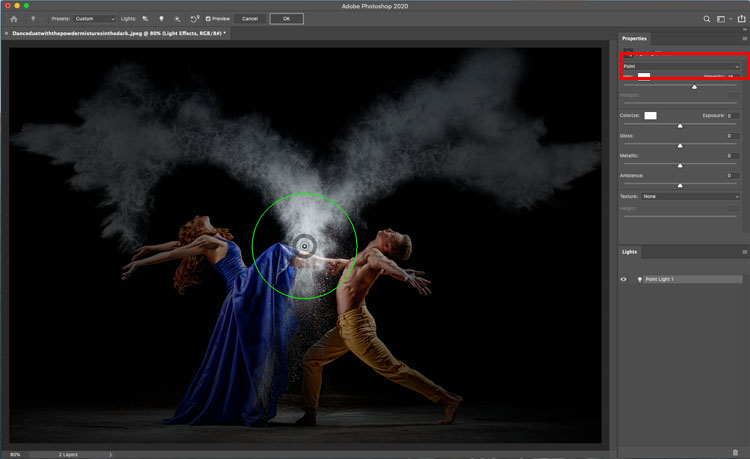
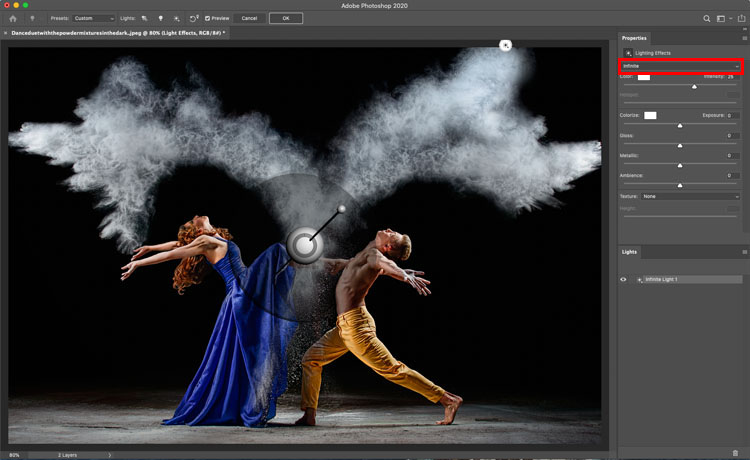
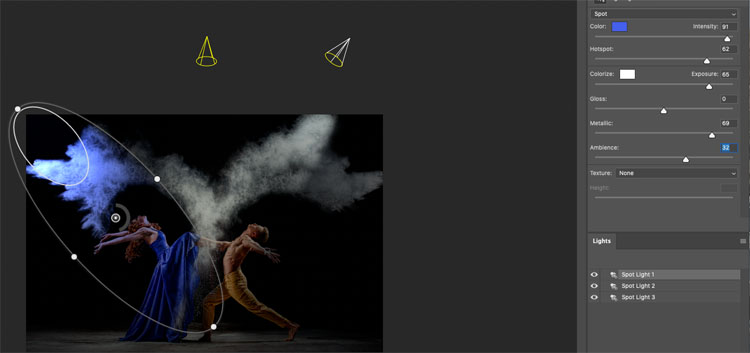
There are 3 types of lights available
This is spot which is a spotlight / floodlight
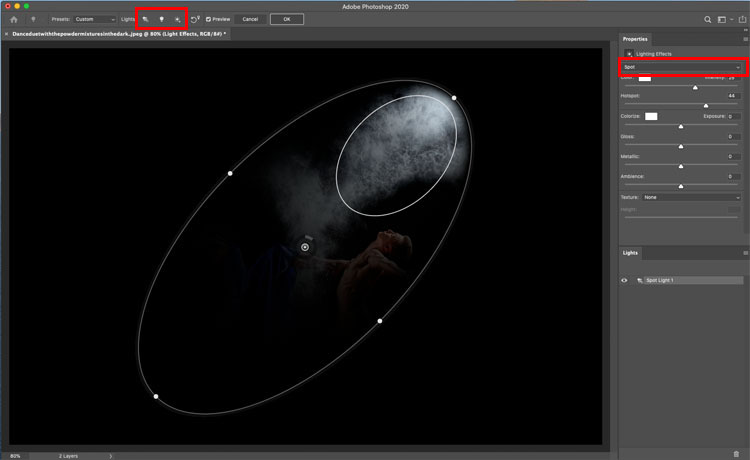
Second light is a point light. This is a like a lightbulb in space.
Third is an infinite. This is a directional light, like the sun.
Step 2
Under the presets at the top, choose a Triple Spotlight. These presets are quick ways to get started and some of them are quite cool looking.
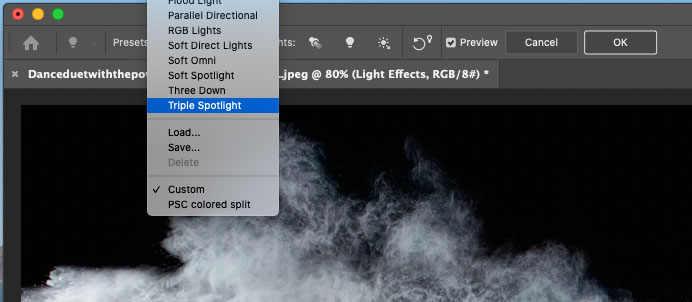
You’ll see this
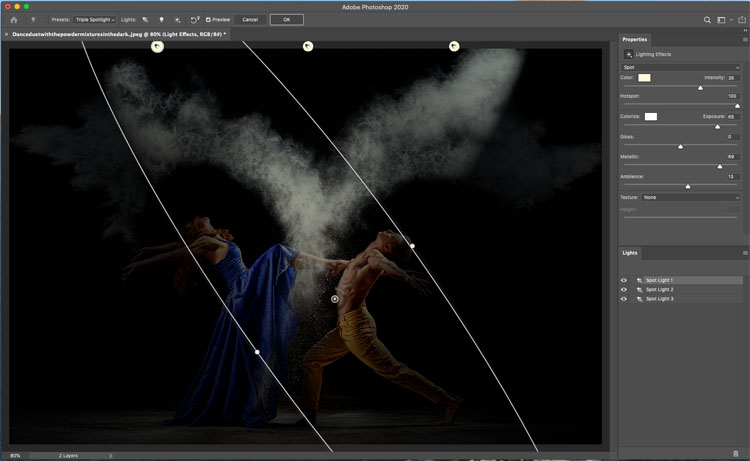
Step 3
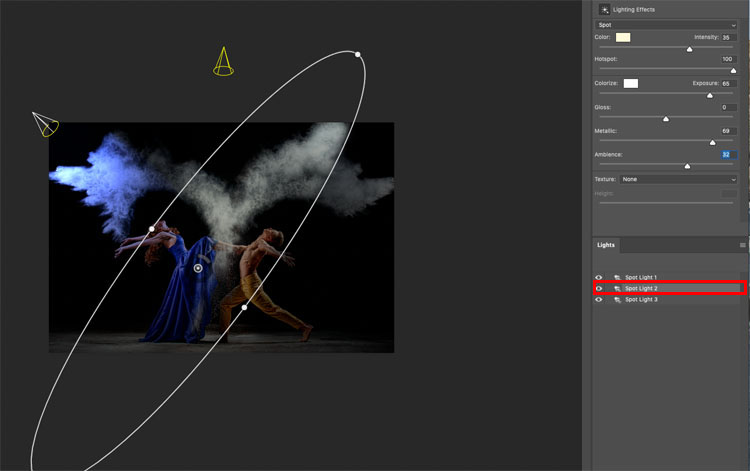
Zoom out but using the zoom settings in the bottom corner, or Alt+scroll wheel on your mouse.
You can drag on the points to change the size brightness and angle of the light.
Adjust the hotspot for a softer falloff.
Step 4
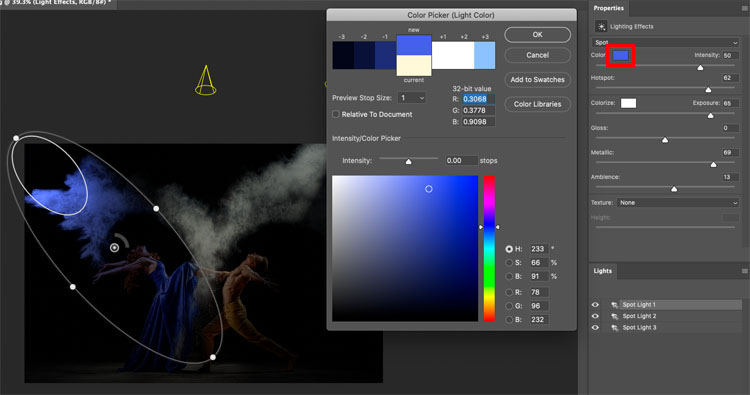
Click on color to add some color to the light.
Drag inside the square swatch to choose the color. It works just the the color picker in Photoshop.
Step 5
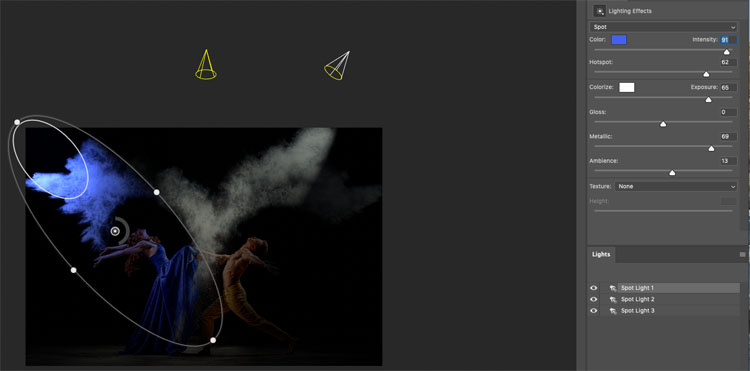
Adjust the intensity to choose the brightness of the light
Step 6
You can brighten the rest of the photo with the ambience slider. This adjusts the overall brightness of the entire image.
Step 7
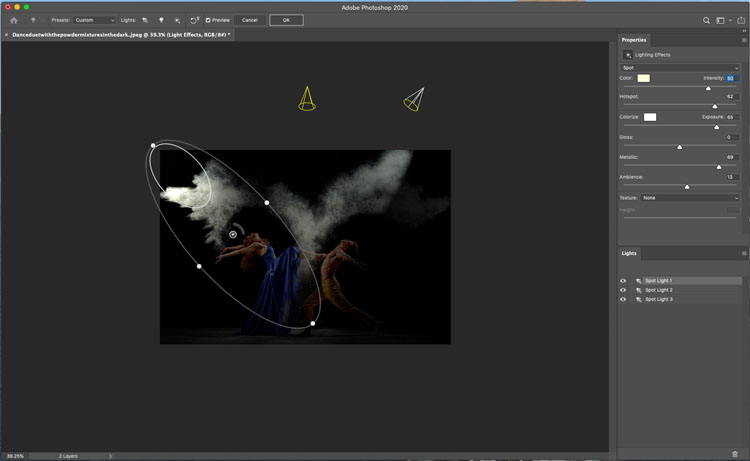
Choose a different light to adjust. You can select by clicking the light in the Lights panel.
Step 8
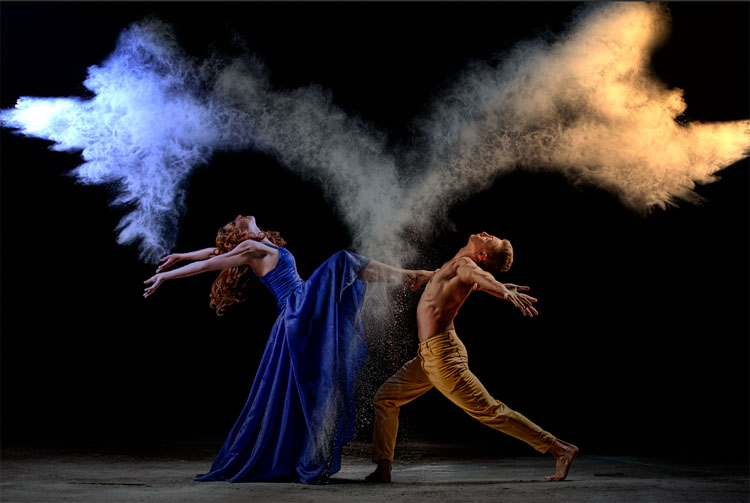
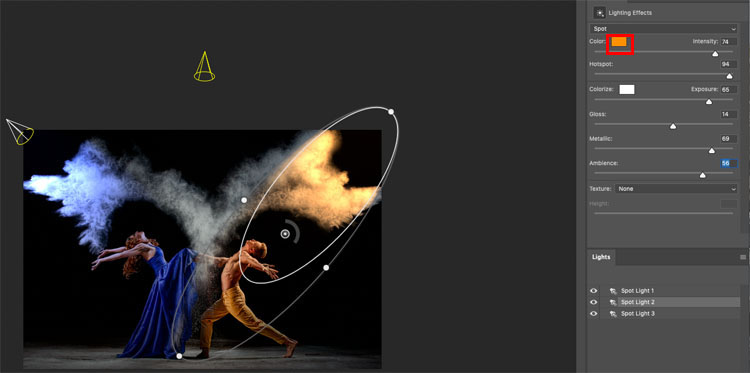
Let’s choose a complimentary color. A nice orange this time.
Step 9
For the 3rd light, you can hide it by clicking the eye icon next to it in the lights panel, or select it and press the trash icon to remove it.
In this case, let’s keep it but lower the intensity so we can still see some of the chalk in the middle of the image. (the smoke effect is made by throwing chalk).
And the result looks like we lit the sides with colored lights, or colored gels on spotlights. Let’s continue..
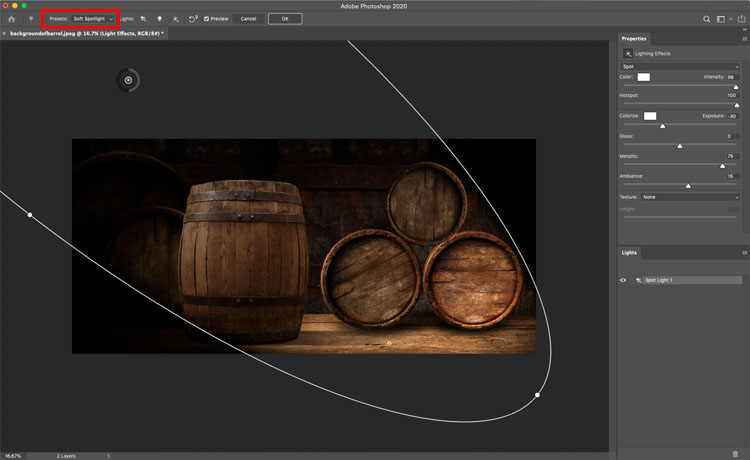
Lighting a photo with a spotlight and realistic texture in Photoshop
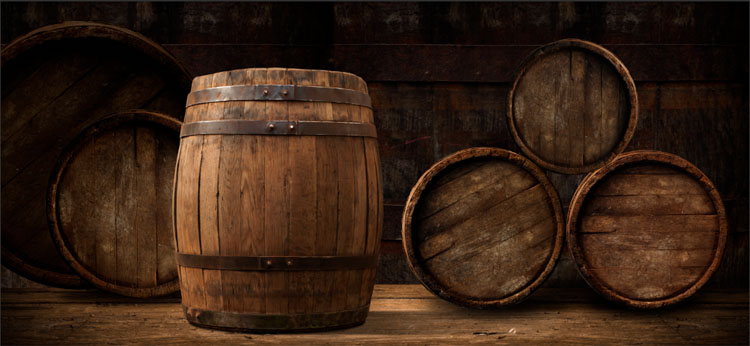
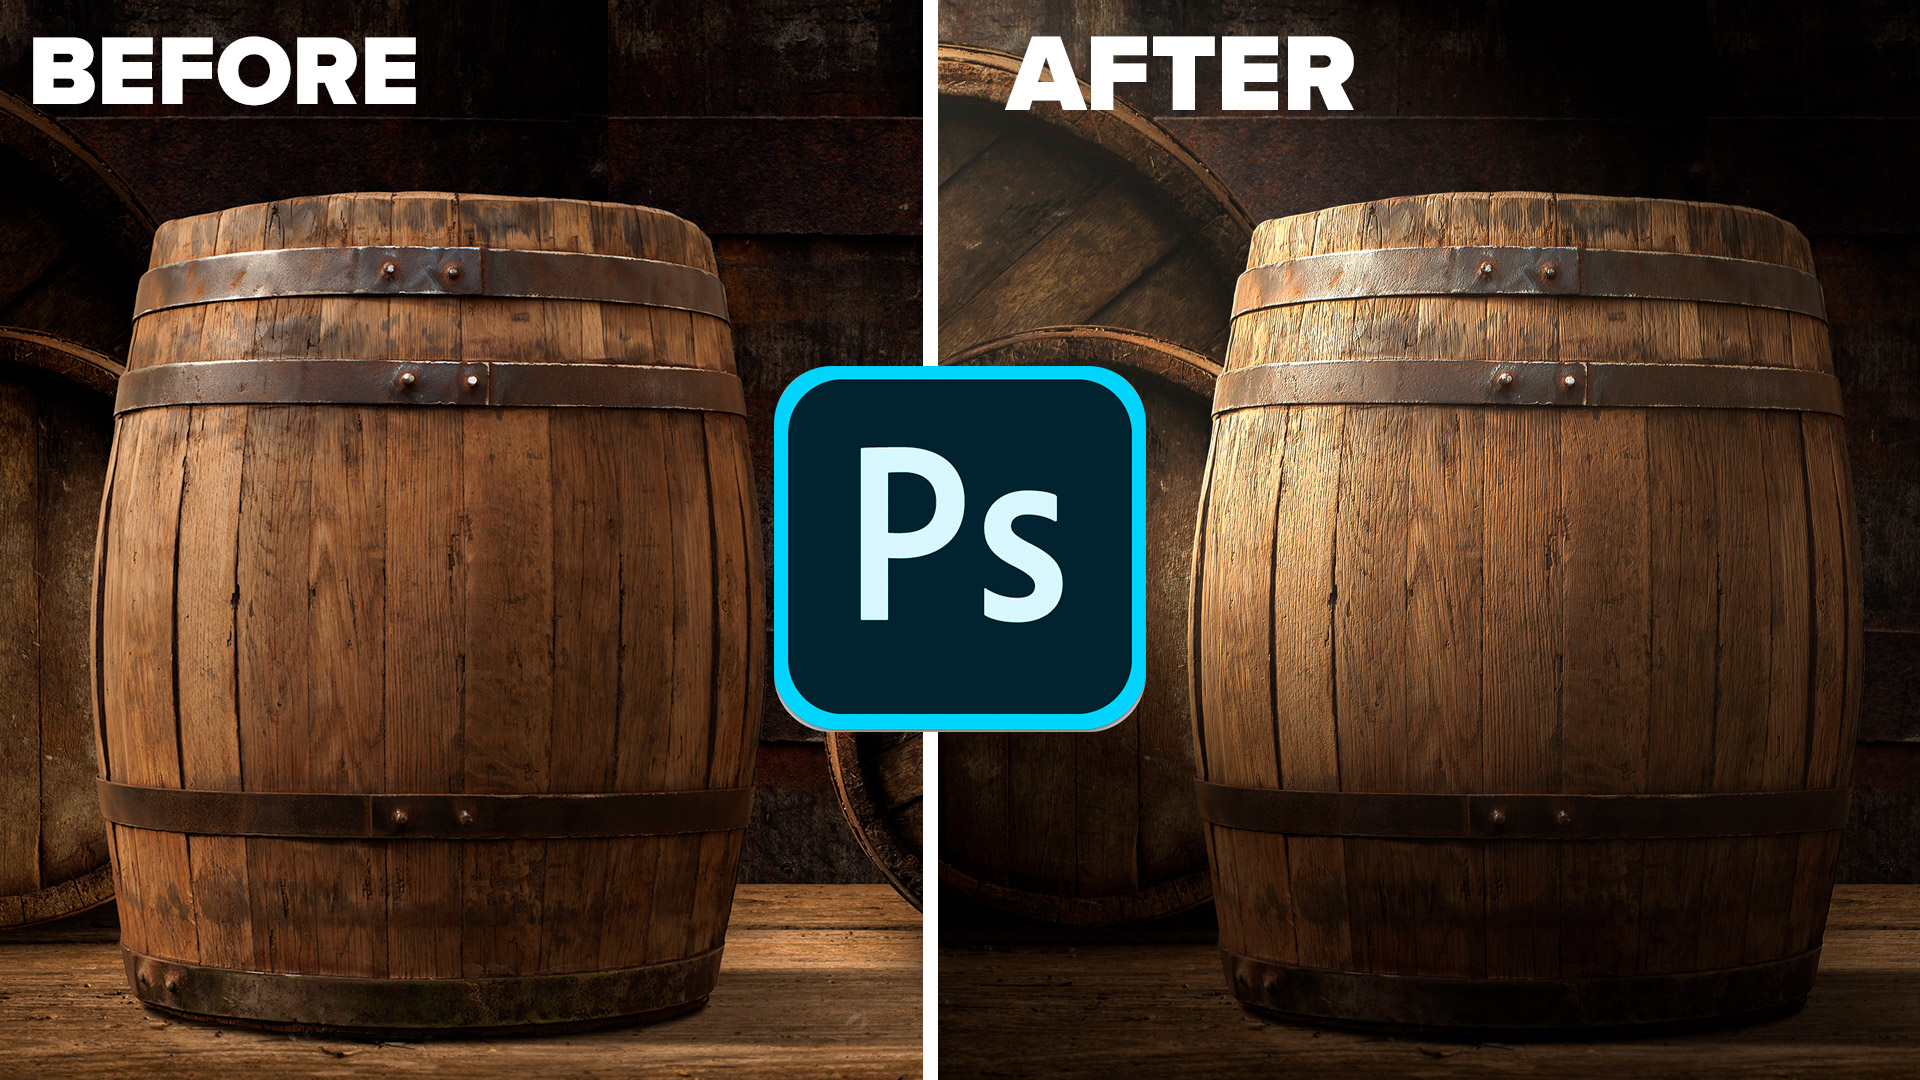
Let’s step it up a bit more with another photo from Adobe Stock. We will add a dramatic spotlight.
Step 1
Unfortunately, the Lighting effects filter has recently been retired. If you aren’t able to run an earlier version of Photoshop, This tutorial shows how to get lighting effects with new Gradient features. The rest of the tutorial works fine, just substitute radial gradient for lighting effects.
Choose Filter>render>Lighting effects
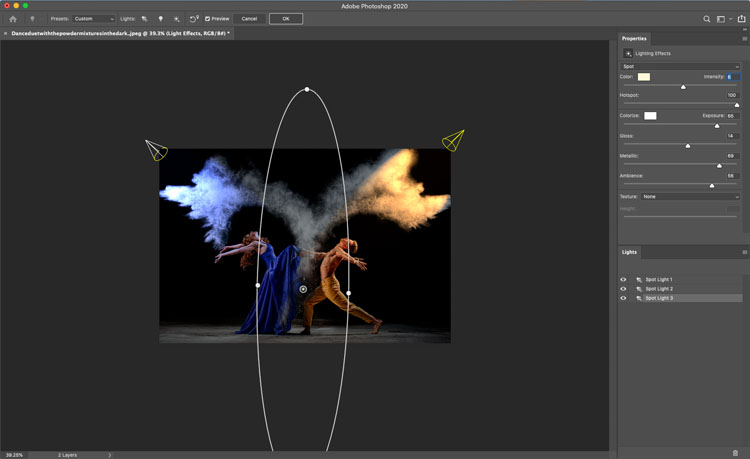
This time choose Soft spotlight from the presets.
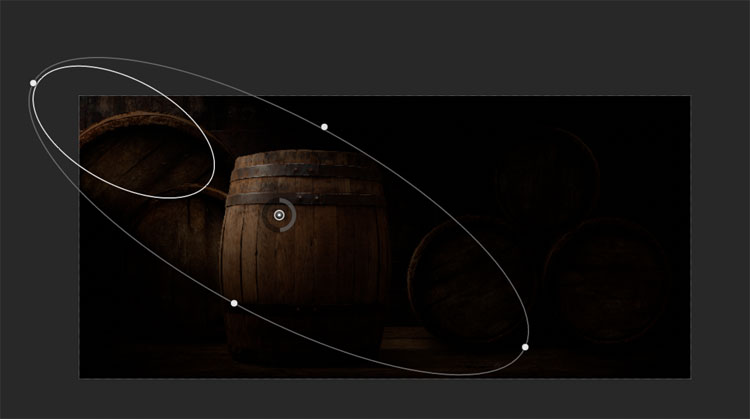
Step 2
Resize the position the light so send the beam down from the left side.
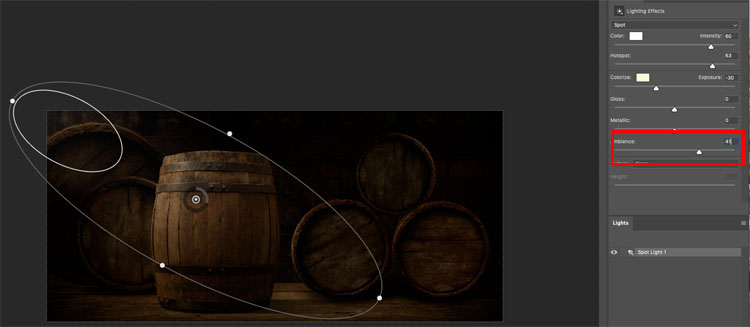
Here are the settings Im using
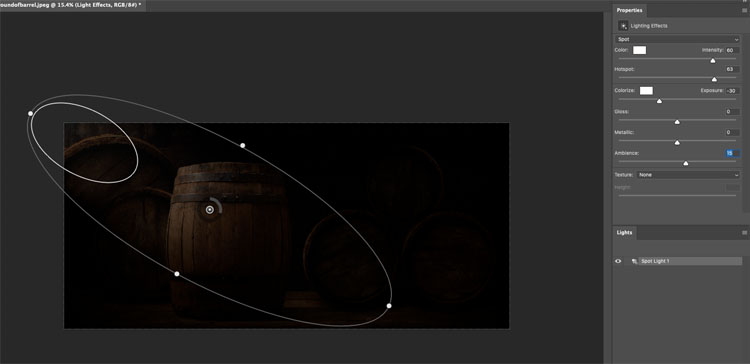
Step 3
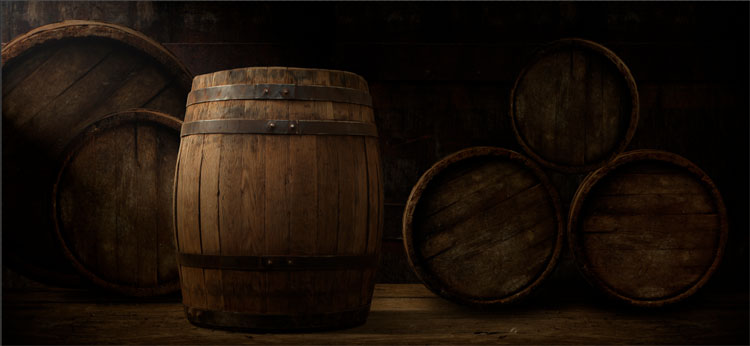
Increase the ambience until you can just see the background, but its still dark enough that the spotlight has a strong effect.
(This is a great trick to simplify a busy image and provide a nice area to add text for designers.)
Step 4
Now for some magic.
Under texture, choose red. We are now loading the red channel into the lighting effects (We will do WAY more with textures in upcoming tutorials on this, very soon).
Set it to the lowest value of 1.
Look at how it popped the texture on the barrel. This is more realistic because when you side light something (called raking light) it casts tiny shadows and pops texture.
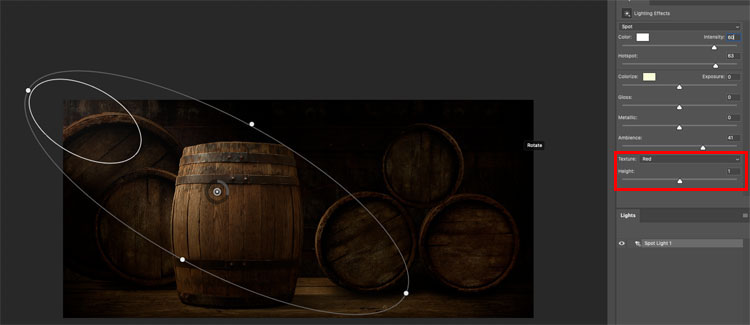
And the result.
Please come back soon I am adding 2 more parts:
as well as how to do crazy realistic and 3D looking textures with this filter.
I hope you enjoyed this tutorial. Please tell all your friends about PhotoshopCAFE.
Browse our hundreds of other free tutorials here, or search for what you are looking for in the search at the top of the page.
Great to see you here at the CAFE,
Colin
PS Don’t forget to follow us on Social Media for more tips.. (I've been posting some fun Instagram and Facebook Stories lately)
You can get my free Layer Blending modes ebook along with dozens of exclusive Photoshop Goodies here

40 thoughts on “How to Light a Photo in Photoshop with Lighting Effects”
Leave a Reply

This simple video and written guide explain what image resolution is in Photoshop. You will understand image size and resolution...

This Photoshop tutorial shows you different tools and techniques to remove anything from a photo. We will remove braces from...

How to automate high resolution in Adobe Generative Fill in Photoshop with actions. The best Generative Fill hack


WOW been using photoshop for awhile and I think this is one of the best tool ever , Thank you so much for sharing
Is this only for 2020 as my Photoshop CC does not have anywhere I can adjust the beam. All the adjustments are down the side for ambience etc but I cannot adjust the direction, the beam is static.
Didi you want the video? it goes into much more depth, make sure you have the right kid of light such as spotlight
Hi Colin
One of the things that I find so frustrating about PS and trying to learn it from tutorials like yours is that I can follow the exact same steps as an instructor and not even get the same screens that they do.
In this cas I have the latest PS CC and when I go to render and spotlight effects I merely get a spotlight with none of the rings or dials that enable me to position or otherwise modify it.
If you can tell me why that might be I would certainly appreciate it
Cheers
Alexander.
Press Ctrl+H
Wow, thanks. Love the barrels.
This is one of your BEST tutorials ! Why? Because you spoke at a slower pace; AND you took time to point out the
“Buttons”…”filter…render…lighting filter . Much better pace for us retirees who sometime struggle to follow along.
Thank you. Colin
Great tutorial, though experienced in Photoshop, this was new to me, so thanks, and yes I would be interested in knowing more on this subject.
Another fantastic tutorial.
Thank You.
Great tutorial. I’m now re-excited about using the Lighting effects!
This is so helpful to boost a photo. I am able to give a photo more dimensionality.
Very helpful and well expressed. Can I get the written instructions w/o the photos?
Thanks.
Copy and paste into a plain text editor, it will strip out the images 😉
I am an amateur photographer and use PS almost every day. Colin, I enjoy all your tutorials. Tuesday is my favorite day of the week (And now Thursdays too). This “Lighting Effects” tutorial is one of my favorites and I am very anxious to give it a try. However, I can’t access the Lighting Effects filter. I have tried Image>Mode RGB Color and 8 Bit. I have also looked at Edit>Color Settings and Edit>Convert to Profile. These last 2 are very confusing to me and I don’t know if I should be messing with them. (I updated PS 2 days ago)
Any suggestions or am I just out of luck ? Thanks for your time.
This was great Colin. Really enjoy your PS tips and instructions
Am using an image with RGB in 8 bit mode but cannot access this filter. Please advise.
I had totally forgotten about this effect! I have CS6 Master and a few years ago I used the effect for dramatizing some UI designs I did. Your demo is much more sophisticated than what I did and opens up new possibilities for me. Thanks again for another great tutorial!
Can’t find the handles for this effect. It appears that many other can’t find them either. Can you help with this? I too am using RGB in 8 bit mode.
Press Ctrl+H
Always looking forward to your news – not sure I can obtain and remember all the knowledge from you – unfortunately – but in small steps I get more and more knowledgeable about Photoshop – and as that is my main goal – I am still progressing – only using Photoshop for fun – and by your help is still fun!!!
Great tutorial. First time I became aware of this filter. I love the way you provide a written tutorial with your video. Don’t need to madly scribble down notes while watching the video like I do with others. Great work.
Love this tutorial Colin. I have not had much success with this tool in the past but I see there has been some improvements made so I am interested in any other tutorials you might make on this subject. Thank you for sharing.
Thanks for this tutorial Colin. I haven’t used this filter in years, I’m not sure why, I just forgot that it existed!
well Colin, this is the first time I have seen this lighting affects. and I was impressed and I going to give it a quick try out . so I can use in the future .thanks for a good well explained tutorial
Great tutorial on a filter that I did not know about. You are the man.
Great tutorial. I have Photoshop 2020, however in the Lighting Filter I do not have the Lights Panel where I was hoping to delete the different lighting effects.
Please advise
have received a lot of messages about different things not working, here are the common solutions.
have also added this to the article…
Make sure you are in RGB mode and 8bit color. (under Image>Mode)
If you don’t see the controls, press Cmd/Ctrl+H
If its not working try going to Preference>Performance and make sure Use Graphics Processor is turned on.
Sometimes you have to quite Photoshop and go back in when changing texture channels, as it has a few little bugs.
i’m do everything you said: RGB mode and 8bit color., Preference>Performance and make sure Use Graphics Processor is turned on. but after apply theLightning filter it’s a result, when i save it’s all Black. Help me, please. I’m using Photoshop Cc 2019
Make sure the light is turned on in the lights panel. Is there a reason you aren’t using PS 2020? Sounds like compatibility issues with your graphics card, all I can suggest at this point is to update your graphics driver.
Hi Colen, even after the control H, and preferences on button i still do not get the handles where i can adjust so can’t make it to 1st base with this tutorial..Thanks for trying
The latest tutorial starts with all the things that you should try if it doesn’t work
Where we can get these lighting effects filter?
Its in Photoshop
Never knew about the Lighting Effect filter. Great tool! See? I learned again!! Thanks!
Great tutorial; never knew this stuff was in Photoshop and will definitely use it…
An excellent guide to improve my qualifications! Thanks!
This tutorial is great! I needed a reminder on how to add lighting effect for client work, but as I watched this video and tried to do it on my own photo, I was brought back to the real world (quite brutally!). Photoshop has stopped supporting 3d tools, including lighting effects! I am now wondering: is there a substitution tool? Or some trick that can do almost the same effect? The Adobe help website is of no use, as they are hinting at other software… Thanks so much in advance!
You can still run an older version of Photoshop at the same time, I made a tutorial on how to kee the 3D tools working in Photoshop on the site somewhere, you can find it in the search
This video/tutorial is no longer relevant with current versions of Photoshop. As the last commenter stated, 3D tools are no longer supported and thus there are no longer transform functionality to adjust the size and position of the lighting effects. I too wonder what the current way is to achieve the same effects.
See my other tutorial on Making the 3D features work in Photoshop, it might even be linked from this tut