
How to combine and blend photos in Photoshop: night sky
How to combine photos, seamlessly blend and match the colors in Photoshop.
A very important skill to have in photoshop is the ability to combine photos and blend them together seamlessly while matching the color and tone. The doesn’t have to be difficult guys. Here is my Photoshop technique to make this so easy, it’s fun. Watch the video first and then use the written steps as a reference. If you like this, tell your friends about PhotoshopCAFE, they will love you for it 😉
Step 1.
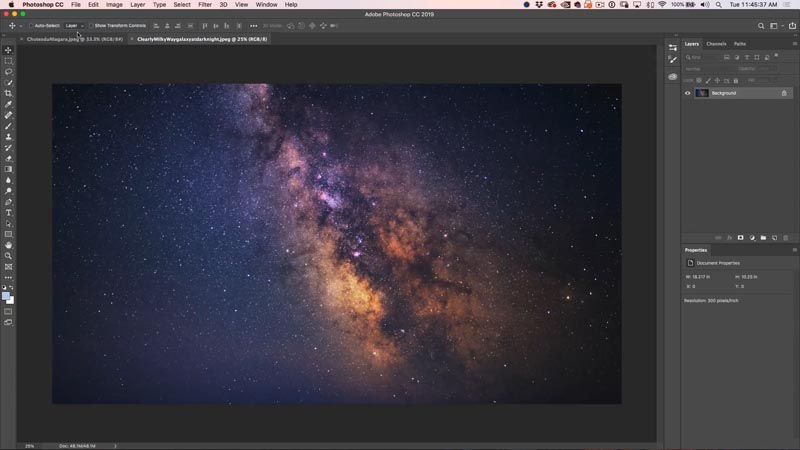
Open the 2 images in Photoshop, they are in separate documents, we need to get them into a single window.
Step 2.
It’s as simple as a 3 step process, Click, hold and release. This has to be done just right though.
1. Choose the move tool (v). Click and drag up into the the tab of the document you are moving it to.
2. Don’t let go yet, wait a couple of seconds and the destination image will open, keep holding (I feel like Braveheart, hold, hold…)
3. Move your cursor to the middle of the image and release. (Hold Shift to drop it in place).

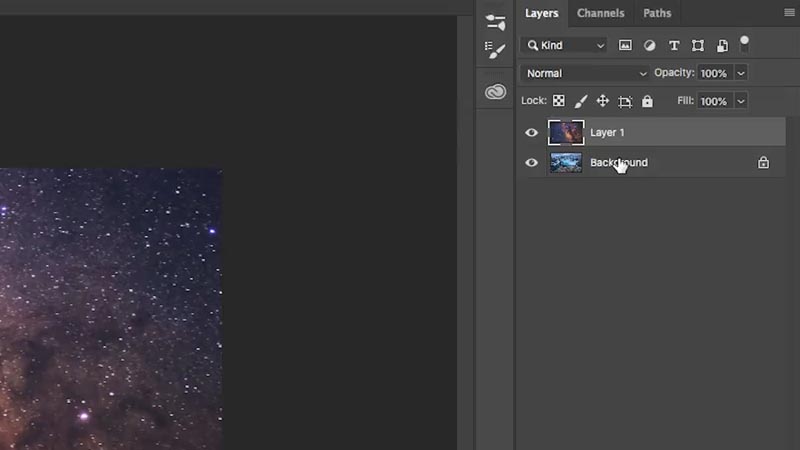
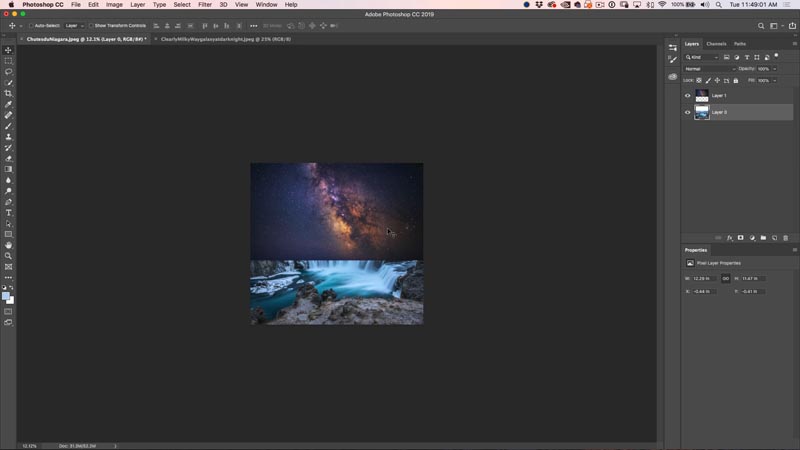
You will now see the images as 2 layers. Lets position them
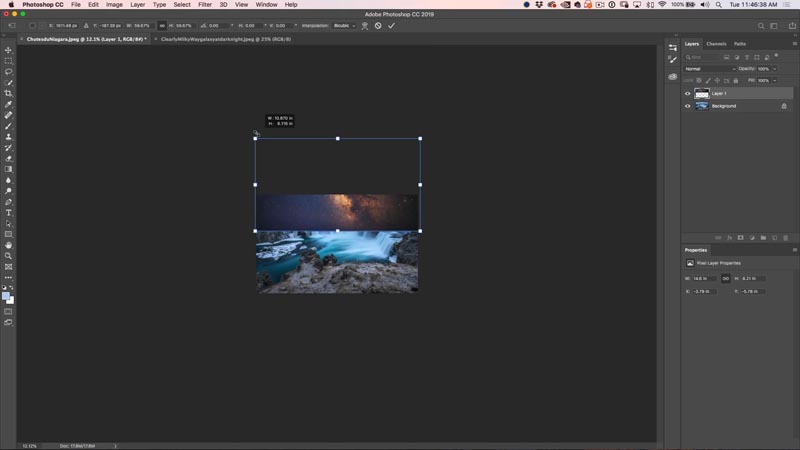
Step 3.
Drag the top layer into position. If you press Cmd/Ctrl+T you will see the boundaries.
Press Enter when it positioned correctly
Step 4.
Let’s resize the canvas to show the whole composition.
Choose Image>Reveal all
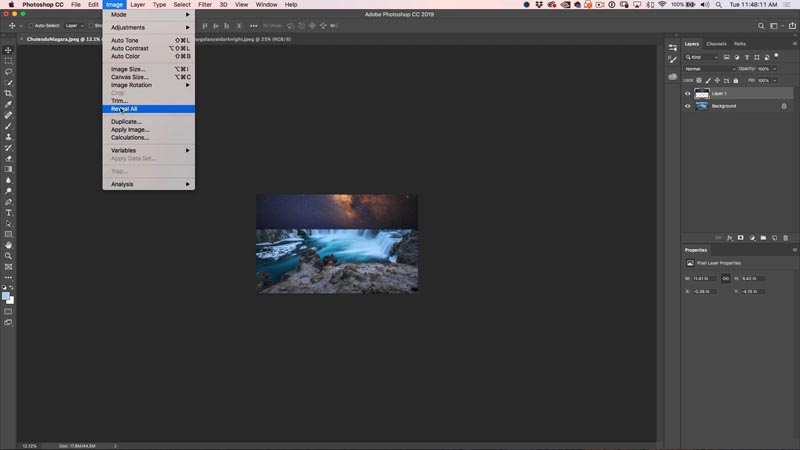
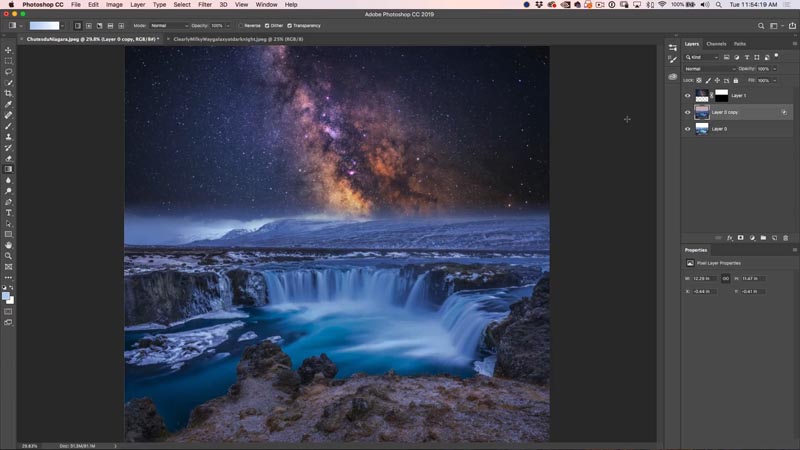
And, boom, now the canvas is now the correct size.
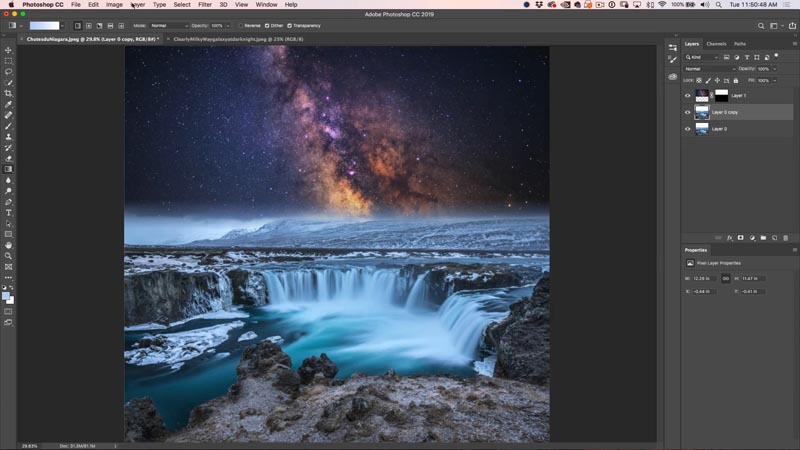
Step 5. Blending the images seamlessly
Choose the top layer and click on the new Layer mask icon

Step 6.
Choose the gradient tool (G), reset foreground and background colors (D).
Make sure the gradient is set to Linear, Foreground to background, normal blending mode and 100% opacity (default settings).
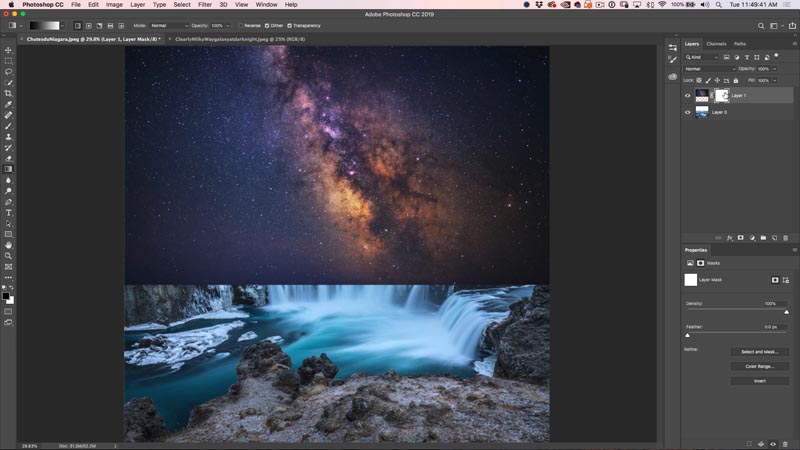
Step 7.
With the layer mask selected, drag the gradient in the area between the 2 images to get a seamless blend. Watch the video above to see this in action.
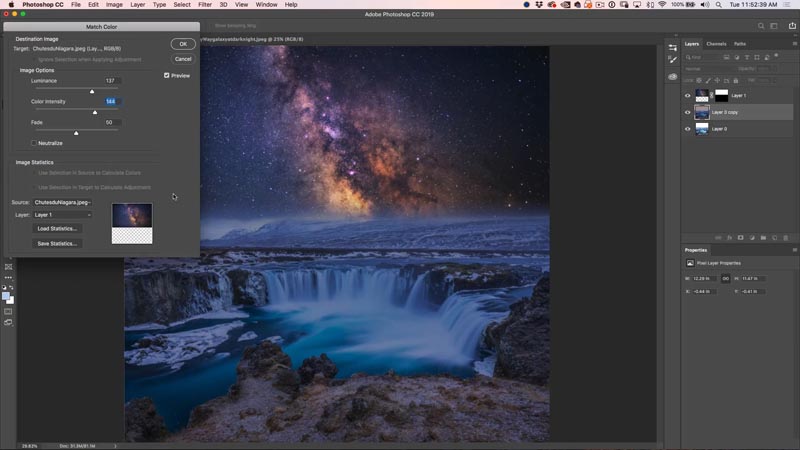
Step 8, matching colors across layers in photoshop
We have a nice blend, now we need to match the color and tone of the images.
Duplicate the background layer (waterfall) Ctrl/Cmd+J
Step 9.
Choose Image>Adjustments>Match Color
Under Source, choose the same document that you are working on.
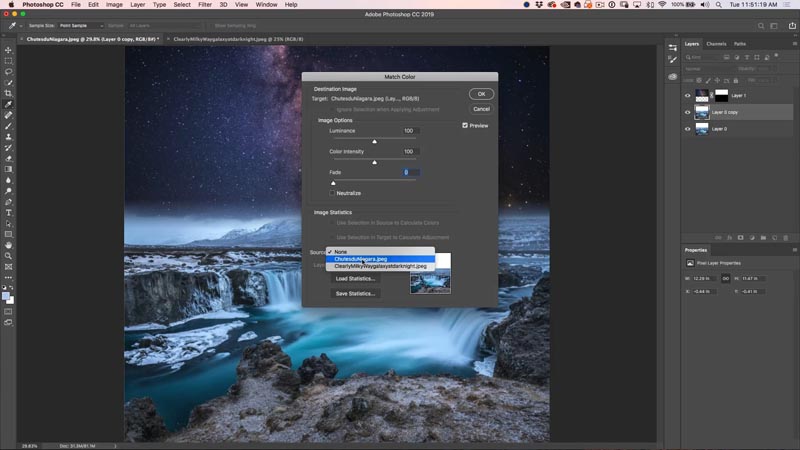
Under Layer, choose the layer that you want to get the color palette from. (Layer 1, milky way).
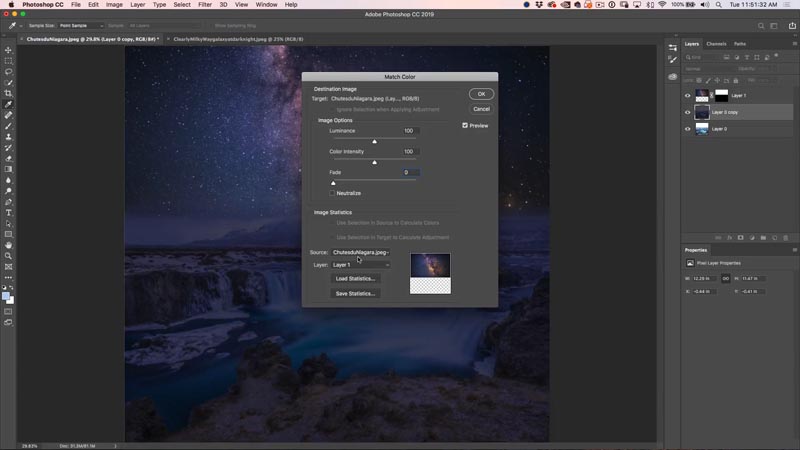
Step 10.
Adjust the 3 sliders until it matches (see video for more details).
- Luminance: Brightness
- Color Intensity:Saturation
- Fade: Amount of effect
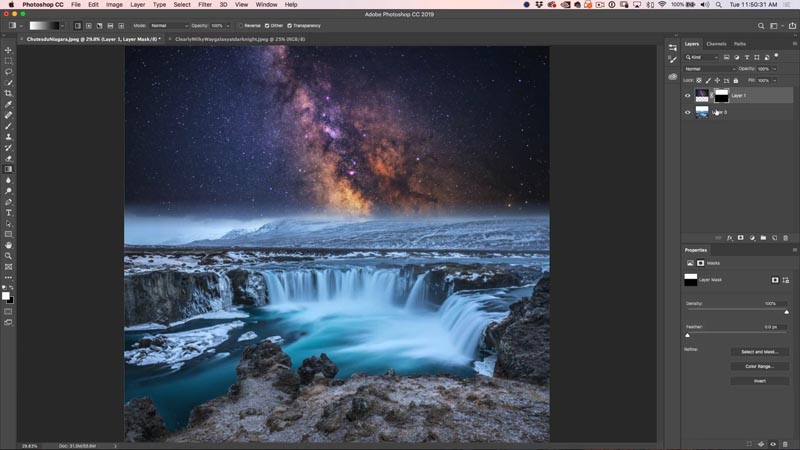
Step 11: Cleaning the highlights.
The colors are matching, but the highlights are looking washed out, lets make them pop.
With the top layer of the background selected (the one we applied match color to). Click on the fx button on the Layers Panel.
Choose Blending Options at the very top of the pop up.
In Blend if, move the top white triangle to the right. You will see the whites come back in the waterfall. It looks posterized, let’s fix that.
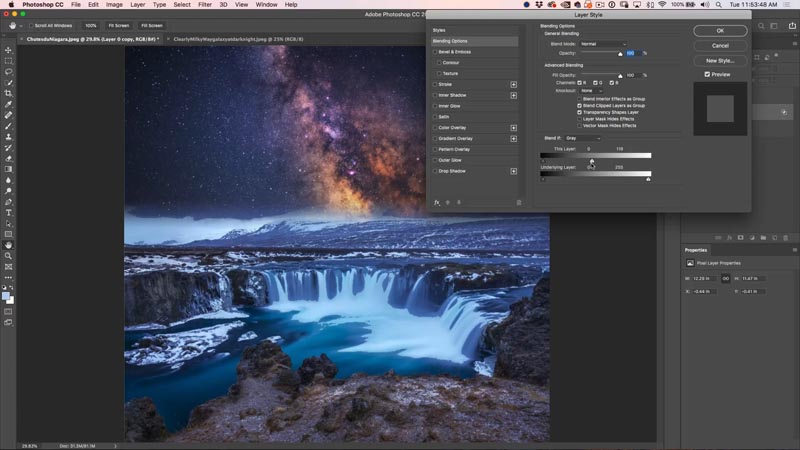
Hold down the alt/option key and drag on the right side of the white triangle. It will separate and allow for a nice even blend of the whites.
Make it look like the screen shot.

And we are all done! Congrats!
I really hope you enjoyed this week’s tutorial and that you learned some useful things about combining images. If you did, share this page with your friends!
Thanks,
Colin
PS Don’t forget to follow us on Social Media for more tips.. (I've been posting some fun Instagram and Facebook Stories lately)
You can get my free Layer Blending modes ebook along with dozens of exclusive Photoshop Goodies here

16 thoughts on “How to combine and blend photos in Photoshop: night sky”
Leave a Reply

The best way to blur the background of a photo in Photoshop, with no dark edges.
Photography workshops and tours in stunning Iceland

These 7 tips are going to make you kick yourself, that you didn't know them all before. All of these...


Every time I watch one of your videos I learn something new. May not be a biggie but it is something that I need to know. Thanks for what you do for us novices.
Hi Colin,
I just want to thank you for your PS tips
the time and effort you put into these is greatly appreciated
I am not in the position to purchase training, so these are a big aid to my journey with Photoshop
Thanks again & cheers,,Paul
Windows for me
Hi Colin, really great tutorial!
Would you like to tell me (us) how you can blend (of another solution) two animals to a hybrid animal?
Thanks! Best regards of a fan,
Dorien
Windows
I use a Dell PC with windows 10. I am an amateur and pursue photography as a retirement hobby.
Enjoy you tutorials.
Windows and happy with it.
Happy with Windows
Mac all the way. I used Windows for years, I then went to Mac and would never use Window again.
Windows
Like you, I’m waiting for the new MacPro. My old 2010 tower, with as much extra RAM added as possible (32GB) is struggling. Always used Macs. We have been a total Mac family. But if they don’t build a good MacPro soon, I’ll be gone. I left iPads – because they no longer support some favorite old apps. Maybe even leave the iPhone. Nokia9 is pretty interesting. I have the Light 16 compositional camera, and I like it. A new (better) MacPro for graphics (with a good Eizo screen) will probably decide whether I stick with iPhone, or move on entirely.
Windows – Started with photoshop when it was a run time version for windows. I have run both Win and Mac and I’m ok with the two key difference so I’ll stay with Windows.
Mac all the way.
Mac all the way, first on the Apple Lisa in the mid-80s. I’m ‘ambidextrous’ enough to use Photoshop in Windows, but know very little otherwise about the OS. Two others in the household are Windows users, and it seems they have far more issues, crashes, and dissatisfaction with the OS than I have ever had with my Macs.
Do you post the source photos somewhere so we can following along? Not sure if that is possible or not.
My premium tutorials come with all the source files.