
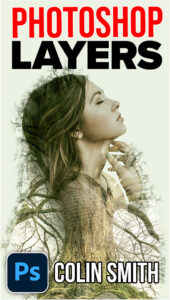
How to make Double Exposure with custom brushes in Photoshop
How to make a better double exposure in Photoshop
The double exposure is a great digital art technique and it’s very popular, because you can get really high end looking results with a small amount of effort. I’ve made more than a few of these over the years for magazine covers and editorials. Where a lot of double exposures fall short is with a boring silhouette. In this Photoshop tutorial I’m going to show you how to create a custom brush that will make the edges of your double exposure way more interesting. Of course I will show you how to create a double exposure along the way. We are using Photoshop 2022, but this will work in any version of Photoshop.
Start with a photo. A profile picture is a good way to start.

Now we will select the person in the image
Choose the Object Selection tool

Click on Select Subject to load a selection around the woman.

Press Cmd/Ctrl+J (Cmd mac / Ctrl Windows) to copy the selected area to a new layer

Now we will add a solid white layer between the original and the cut out
Choose new Adjustment layer and Solid Color

Select white for the layer and drag it underneath the cutout layer.

Choose an image that we are going to use to overlay with our person. I am using a photo of a tree. Choose FIle>Place Embedded to get the second image, or dig it in from another window or library (How to combine images in Photoshop)
If the image is underneath out person, drag it to the top of the layer stack.
i
To fit the image inside the cutout, we will make a clipping group.
The your curser inbetween the 2 layers in the Layers panel, hold down the alt/Option key. You will see an arrow. Click to clip the top layer into the one under it.

This is what it should look like with the top layer clipped to the shape of the cutout.

Let’s blend the layers together.
Top layer selected, Choose Normal and change it to screen on the layers panel.

In screen mode you will see the 2 images blend together.
Screen blending mode produces a result like shining 2 projectors with different images at the same screen.

Press Ctrl/Cmd+L to open levels.
Move the white triangle on the right towards the center. As you do this, you will notice the brighter areas turn white and make the effect look even better.
As you can see the blend looks really nice. However the edges are a little dull. Let’s spice them up by adding tree branches all the way around.

Making a Brush in Photoshop
To add the cool looking twigs or branches, we will make a brush out of a photo.
Find a photo of a tree

Press Ctl/Cmd+L to open Curves
Make the white slider to lighten the bright areas.
Use the black slider to make the shadows darker.
The more contrast the better when you are making a brush.

Press ok
Now we need to blend out the bottom. Those hard edges won’t work well on a brush.
Choose White as the foreground color.
Choose the gradient tool
Select foreground to transparent as the gradient type and linear

Create a new layer
Apply the gradient to blend out the bottom

Grab the rectangular marquee tool
Make a selection around the area we are going to turn into a brush.

Choose Edit>Define Brush
A new brush will be created and added to your brushes library.
The brush will also be active in the brush tool.
Create a new layer just above our cutout layer. We will be painting onto the new layer.

Before we paint we need to unclip the new layer from the cutout and clip the top tree layer to the new layer. (move curser between layers and alt/option+Click) This will allow us to see whats happening as we create the new edges.
The screen effect won’t show on the woman right now, but it will show on the new brush strokes we create, we will easily fix that that later.
If any part of this is confusing, please watch the video at the top as its quite a simple process once you see it.
Your layers panel should look something like this. Note: The levels adjustment shows because the tree layer is a Smart Object. If it wasn’t a smart object, you won’t see levels, either way will work the same for this tutorial. If you don’t see Levels, it doesn’t matter..

Make sure the bush tool is active and set the color to black, although the color won’t really matter much.
We are going to be changing the brush a bit and painting on the edges. Here are some shortcuts to help you with the brush.

Use the arrow key to rotate the brush, so the branches are pointing out from the middle. If you don’t see the brush overlay, use the [ ] bracket keys to change the size of the brush.
As we paint with the edges of the brush we will see the branches start to appear around the edges of the image.
This type of brush shouldn’t be dragged. Click to stamp with the brush.

Open brush settings and use Rotation, flip X, Y and size to vary the brush stokes so they don’t look too repetitive.

Here we have painted all the way around. It’s a bit more repetitive than I like on the arm, but it will work. (If the size had been varied, it would look even better,)

Notice the screen effect is working on the edges, but not the woman. Let’s fix that now.
Hold Down the Shift key and click on the woman layer in the Layers panel.
Both layers should now be selected (the edge and the woman)
Right click and choose Convert to Smart Object

The 2 layers will now appear as one and the screen effect should be working correctly.
If not, make sure you clip the top layer to the woman layer.

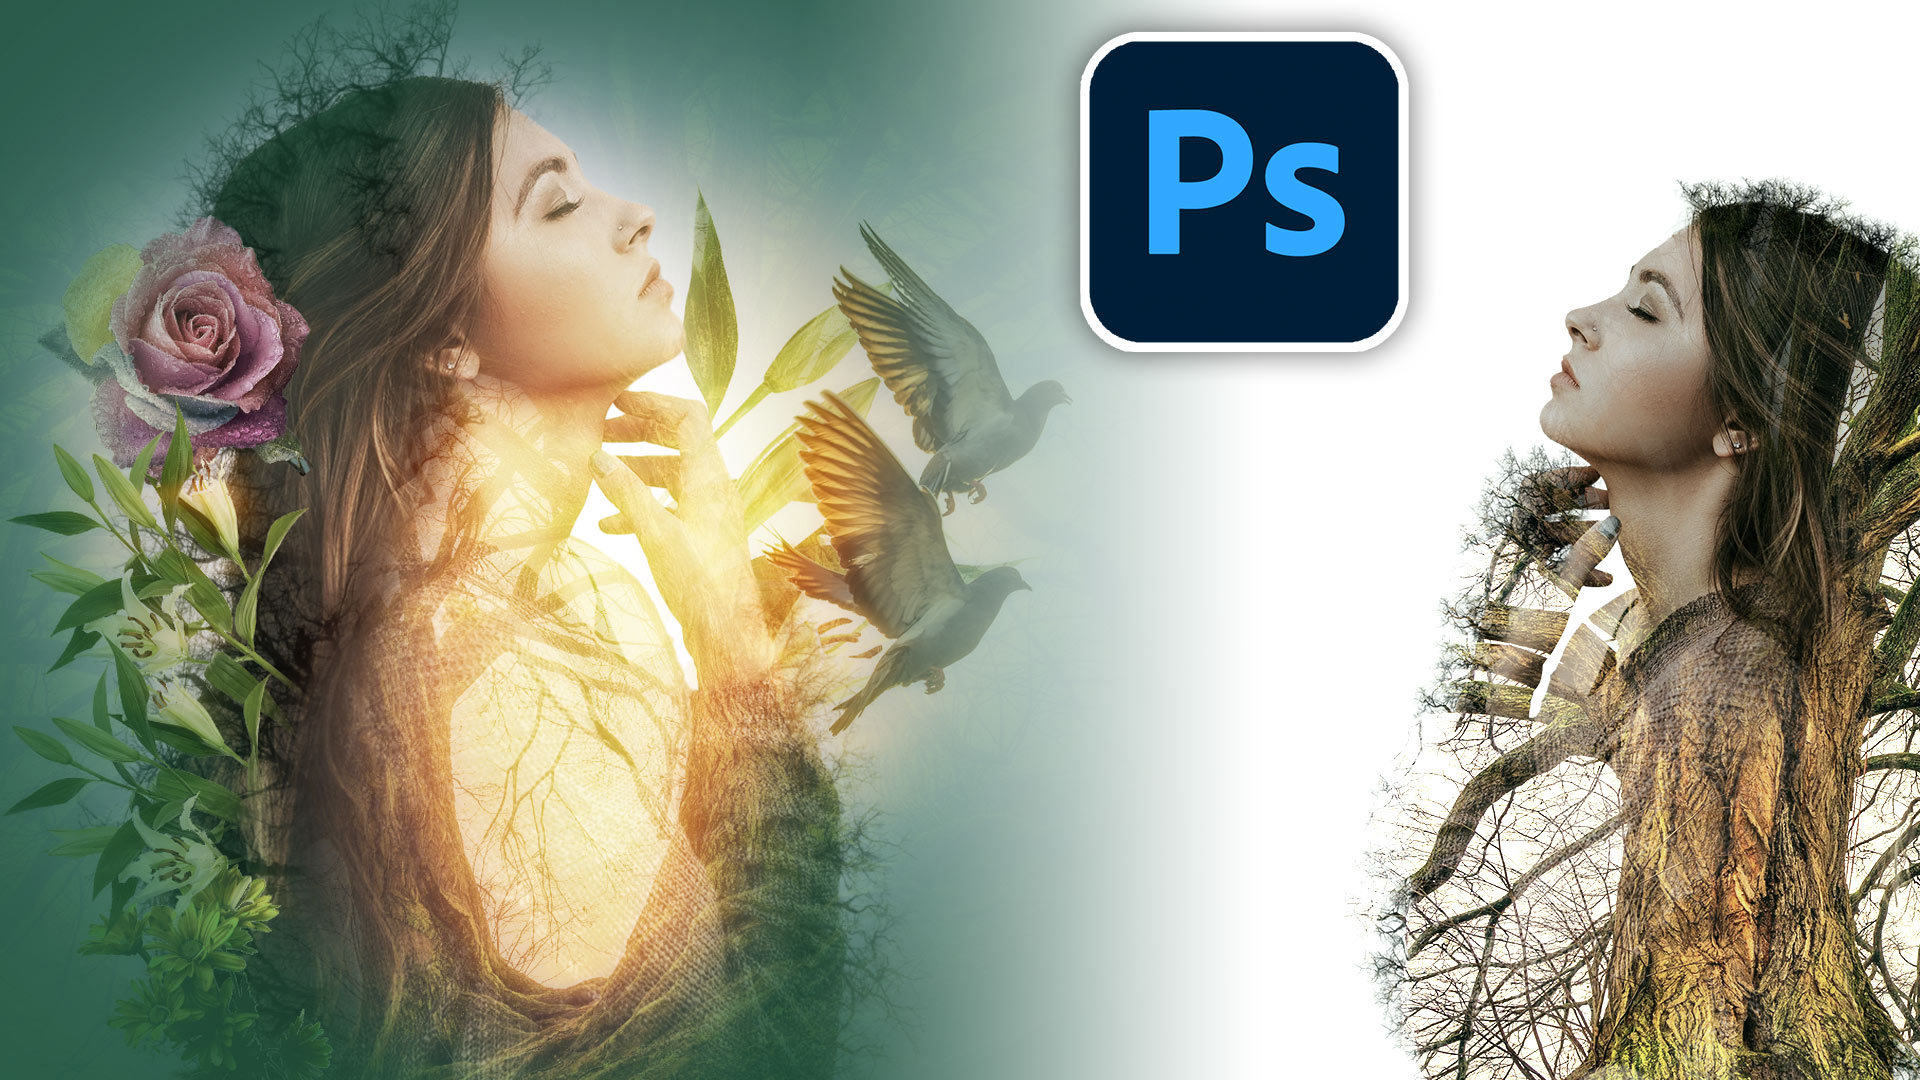
We now have the basic double exposure.

If you want to color it, create a new solid color Adjustment Layer on top. Change to color blending mode
Adjust the opacity for effect. This is all shown in the video at the top.

Here is what the final result looked like after I added a few more elements and did a bit of masking.
Of course, there are so many directions you can take this.

Thanks for checking out this weeks tutorial.
If you like this kind of tutorial, this is actually an example taken from my brand new course I released today! Photoshop Layers, is all about using Layers and masks in Photoshop to create digital art, design, collages, composits and more. There are introductory lessons on the basics and then we jump into several projects to make the learning experience practical and fun.
If you prefer the online Streaming option, check it out here.
PS Don’t forget to follow us on Social Media for more tips.. (I've been posting some fun Instagram and Facebook Stories lately)
You can get my free Layer Blending modes ebook along with dozens of exclusive Photoshop Goodies here

One thought on “How to make Double Exposure with custom brushes in Photoshop”
Leave a Reply
How to edit video in Photoshop. The definitive tutorial for editing video and motion graphics in Photoshop CC and CS6.
How to Update Photoshop without losing anything. This tutorial shows you how to update Photoshop, what do do before updating...
There are many methods to creating rust in Photoshop. Here is one way to make rusted type. We can make...


Marvelous tutorial on Double Exposure, you just illustrated a unique tip, you made my day.