How to get perfectly smooth edges on cutouts of people in Photoshop
Using Channels with Dodge and Burn to get perfect cutouts in Photoshop
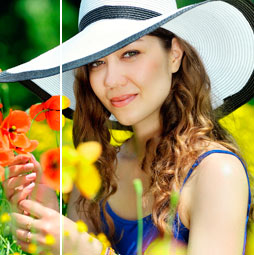
While there are many ways to extract an image from the background in Photoshop, each method has its place. Each image has its own unique challenges. I’ve made lots of different tutorials on cutting out images, from simple to complex backgrounds and using everything for the selections tools, to pen tool. The truth is, most of the time, a combination of techniques will get you the best result, which is why I made a course that goes in depth with selections to tackle any cut out task. In this tutorial we are looking at how to get clean and smooth edges with a simple background. This is a common setup for a composite, shooting the elements to build a photo composite/collage. One of the things I’ve noticed with a lot of cut out techniques, is that the limbs, are and legs tend to get ragged edges. This tutorial will show you how to fix that and get smooth limbs. As a side note, this works really good on hair too.
We will be using Channels and well as dodging and burning to create our mask. This type of cutout is sometimes called a channel pull, although many channel pulls just use levels and don’t include the powerful dodge and burn technique you will learn here. It will work with all version of Photoshop.
Step 1.
Make a selection around the subject. Choose the Quick selection tool and click on select Subject. On earlier version of Photoshop make a selection around the subject using quick select, magic wand, or whatever you have available.

Step 2.
Go to the Channels Panel

Step 3.
Choose the channel with most contrast. (Blue Channel) Click on “Blue”

Step 4.
Drag the Blue channel to the new channel icon at the bottom (the square with the plus sign in it)
This will make a copy of the channel for us to work on.

Step 5.
Choose Select>Modify>Contract and enter 10-15 pixels

This shrinks the selection to the inside of the image.

Step 6.
Fill the selection with black. Press the D key to reset colors. Alt/Option+Delete will fill with foreground color.

Step 7.
(This varies a little from the video, because I wanted to show off the technique better in the video, so this step is optional)
Choose Select>Modify>Expand 20-30 pixel depending on image resolution.

Step 8
Press Cmd/Ctrl+Shift+I to inverse the selection

Step 9.
Fill the selection with White. Ctrl/Cmd+Delete will fill with foreground color.
Press Ctrl/Cmd+D to deselect.

Notice that we now have a thin edge. This is where we will smoothen it to get a perfect cutout.

Step 10.
Choose the burn tool and set the Range to shadows and the Exposure to 15%

Step 11.
Work your way around the edges, notice how to burn tool can darken the edges in a nice smooth way.

Step 12.
When you have finished with the dark edges switch to the Dodge tool
Set it to highlights, and paint around any of the edges that need to be lightened. (The video shows this is action very well)
Often you will use both dodge and burn for hair.


Step 13.
Cmd/Ctrl+Click on the channel thumbnail to lead the selection. All the white areas will be selected.

Step 14.
Click on RGB to turn the channels back on.

Step 15.
Hold Down Alt/Option and click on the new Layer mask button.
You will have a nice cutout. You can touch it up by painting on the layer mask with black or white.

I hope you enjoyed this tutorial. I make a new tutorial each week here at PhotoshopCAFE. Browse our other tutorials and bookmark PSC so you don’t
miss any new tutorials.
Great to see you here at the CAFE
Colin

Keep growing with Premium Courses
Photoshop 2026 for Digital Photographers
Learn Photoshop properly, from the basics to pro retouching, step by step.
$129.00 · one-time purchase · instant download

Free for you
The Photoshop Vault
Get my free Layer Blending Modes ebook along with dozens of exclusive Photoshop goodies: actions, brushes, presets and cheat sheets.
You're on the list, so your free goodies are waiting for you in the Vault.
Get Free Photoshop Goodies Open the Vault

How to cut out trees quickly in Photoshop tutorial
How to cut out trees in Photoshop in seconds. This Photoshop tutorial shows you how to perfectly cut out trees in seconds... Read tutorial
Making semi-transparent selections with Alpha channels
Here is a tutorial that you can use for layered collaging. While it might be easier to use a layer mask or... Read tutorial
Crazy Cars, Being creative with Photoshop tools
This tutorial shows you how to make some fun cartoon styles cars from Photos using the Content Aware Scale tool in Photoshop.... Read tutorial
Photoshop basics. complex selections with the marquee tools. Adding and subtracting selections
s it possible to make a selection of this semi-complex shape in only 3 selections? Of course the answer is yes. Ok... Read tutorial
Wrapping objects with Displacement Maps Photoshop Tutorial
Displacement maps see like such strange and difficult animals until you learn to tame them. In this long overdue tutorial, I will... Read tutorial







Katrin Eismann used to teach a technique where you used a black or white brush in overlay mode on a mask to refine the edges of difficult selections. Do the dodge and burn tools effectively replace this technique or are they in some ways complementary? I use Eismann’s technique for cutting out fine selections of leaves, grass, hair, etc. on complex backgrounds, but it does take time to get things really right.