
How to edit a photo taken in direct sunlight in Lightroom or Photoshop ACR
How to fix a photograph shot in harsh sunlight
Many of us know the ideal times for making photographs, and typically none of those are at noon or when the sun is at its peak. The light is very hard and results in high contrast. This means highlights are too bright and the shadows are very dark, resulting in a photograph thats difficult to make out details in highlights and shadows and just generally unpleasant to look at. Now reality, most of us don’t have the luxury to wait until magic hour or get to the location early enough that the morning sun is still sweet.
So, for those other photos, here is a tutorial to get the most out of them. Fortunately if you shoot RAW and use either Lightroom or the Camera Raw filter in Photoshop (they have identical settings) you will be able to recover more detail than initially meets the eye.
We break it into 3 phases:
- Luminosity. Let’s get the shadows, highlights and midtones right first.
- Color: Remove color cast and stylize if required.
- Texture and detail. Dialing in the perfect amount of surface detail and sharpening.
In this tutorial I am using Lightroom Classic. You can use Lightroom or Camera Raw in the same way, just use the same settings.
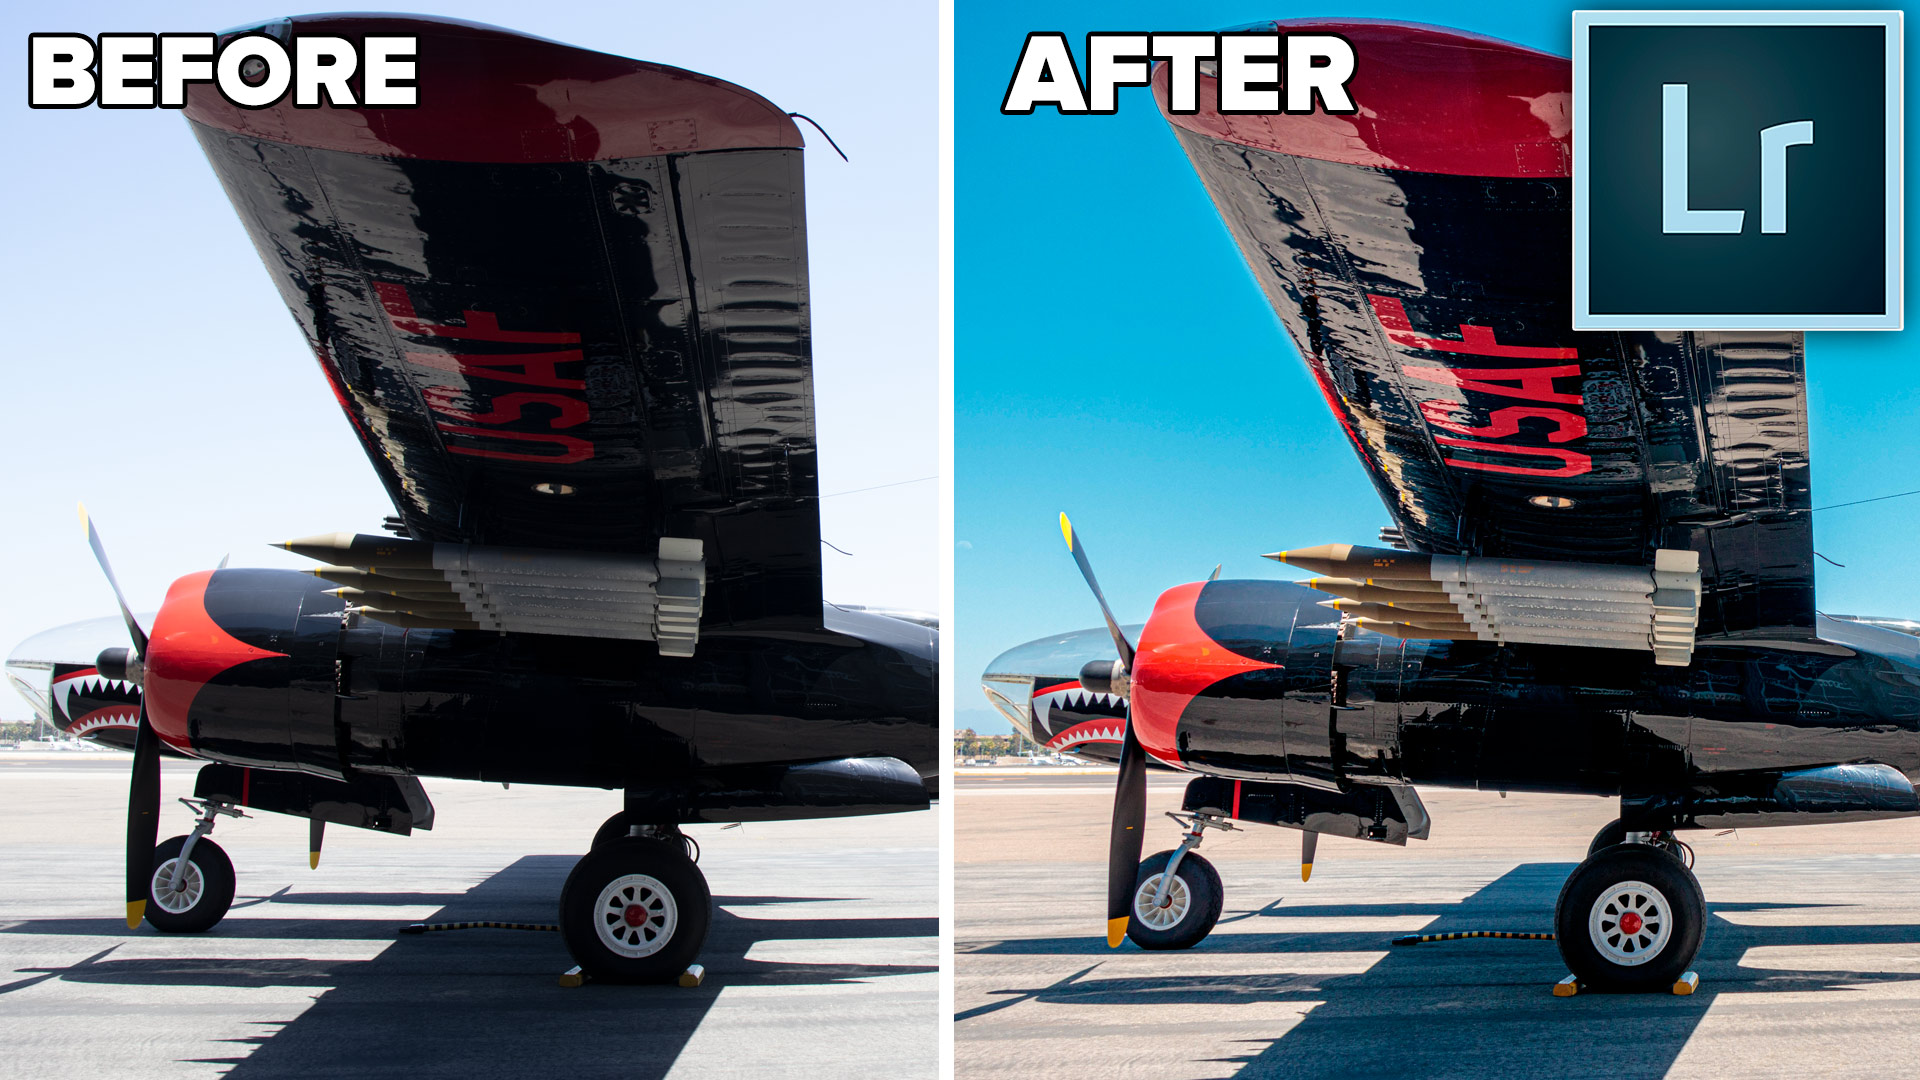
Here is the starting image, do the dark tones and blown out sky look familiar?
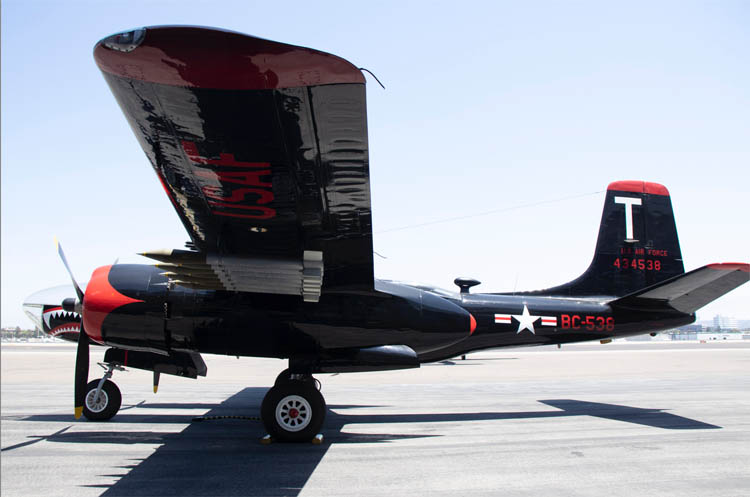
Step 1.Luminosity
A lot can be done by moving the highlight and shadow sliders to recover the details in the darks and light areas.
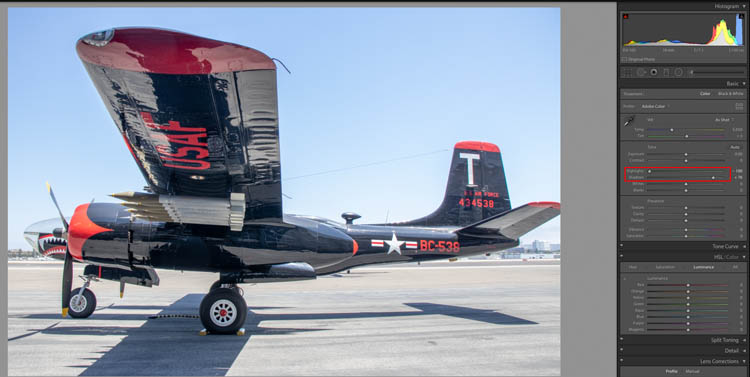
Step 2. Blue Skies
Go to the HSL section
Choose Luminance and darken the blues to make the skies colorful.

Step 3. Color Fringing
Sometimes these extreme adjustments can bring out Chromatic Aberration (The red and Cyan fringing around the edges)

Under Lens Correction, Turn on Profile correction and Remove Chromatic Aberration. This fixes it.
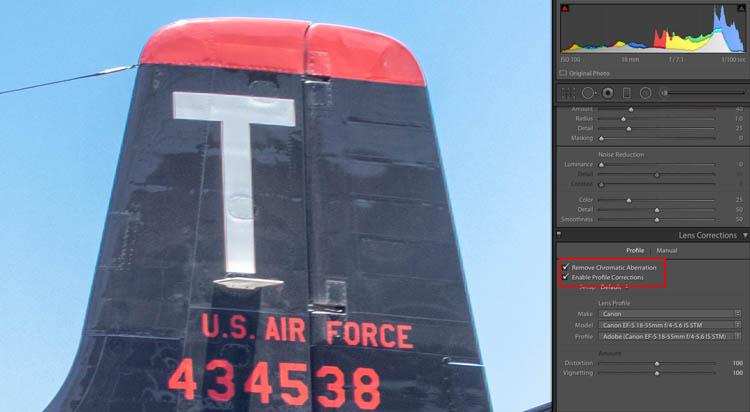
Step 4. Fix Vignette.
Notice that the blue sky is lighter around the edges now. This is a vignette.
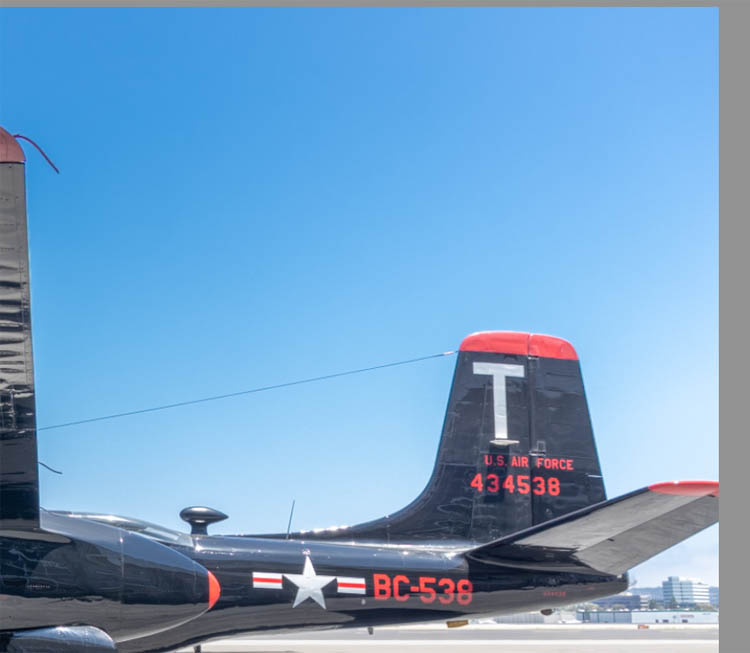
Slide the vignette slider in the Lens Correction panel to even out the sky.
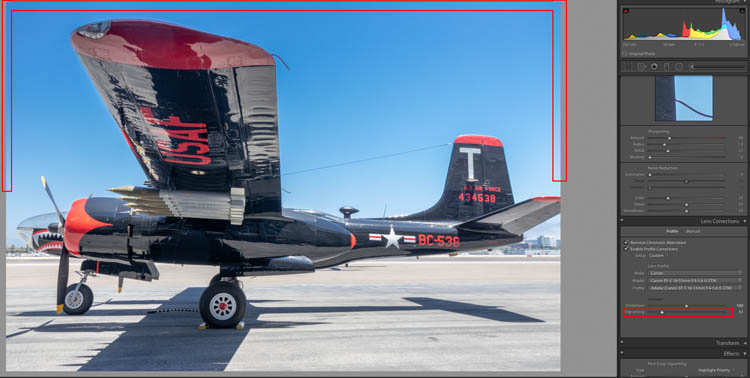
Step 5. Contrast.
If you want to add contrast, use the White and black sliders, this gives the images punch.

Step 6.
Sometimes I slightly warm an image by moving the Temp slightly to the right for a warmer look.
You can bring out more detail and surface texture by adding some texture clarity and dehaze (the video at the top explains the difference)
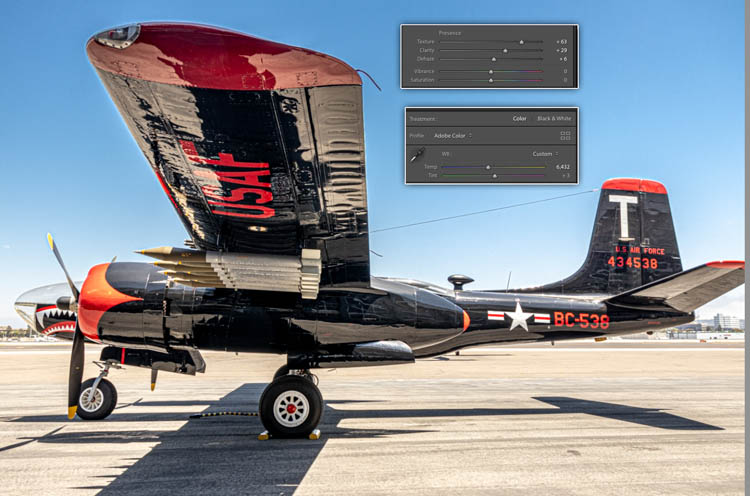
Step 7. Fixing the halo (not on the video)
All this exaggerated adjustment action has caused a halo around the wing of the aircraft.
Lets move to Photoshop to fix this.
Make a selection around the wing with the quick selection tool.
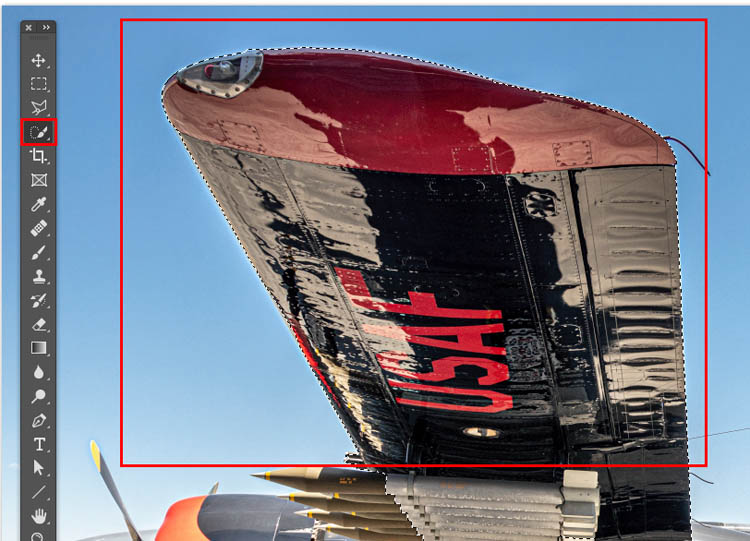
Step 8
Press Cmd/Ctrl+Shift+I to invert the selection. Now the wing is protected and you can paint in the sky.
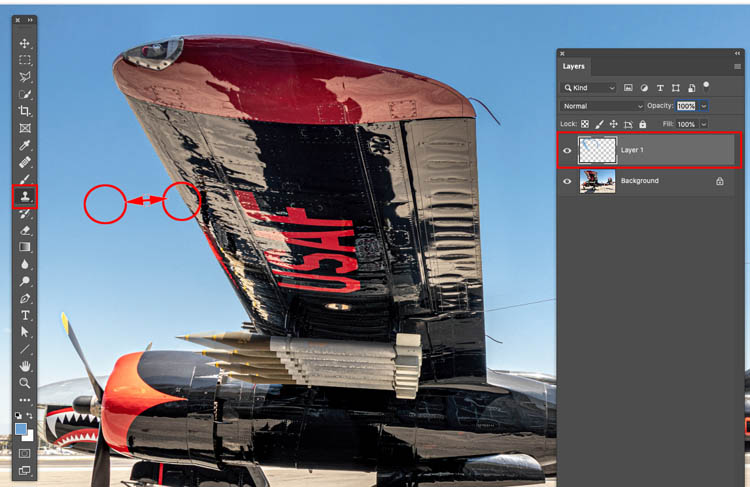
Create a new Layer
You would think a brush would work, but there is a gradient in the sky and it would be very difficult to brush.
Instead choose the Clone Stamp tool. Sample off to the side (Hold alt/Option and click to sample) of the wing and then drag down the edge of the wing.

Notice how easy it is to fix the halo around the edges.
I hope you enjoyed this week’s tutorial and you are now able to make those harsh photos look nice. Look around, there are a lot of useful tutorials here at the CAFE and I make a new one every week.
Great to see you here at the CAFE
Colin

Free for you
The Photoshop Vault
Get my free Layer Blending Modes ebook along with dozens of exclusive Photoshop goodies: actions, brushes, presets and cheat sheets.
You're on the list, so your free goodies are waiting for you in the Vault.
Get Free Photoshop Goodies Open the Vault
Keep Growing with Premium Courses
When you're ready to go deeper, Photoshop 2026 for Digital Photographers takes you through Photoshop step by step.
10 thoughts on “How to edit a photo taken in direct sunlight in Lightroom or Photoshop ACR”
Leave a Reply
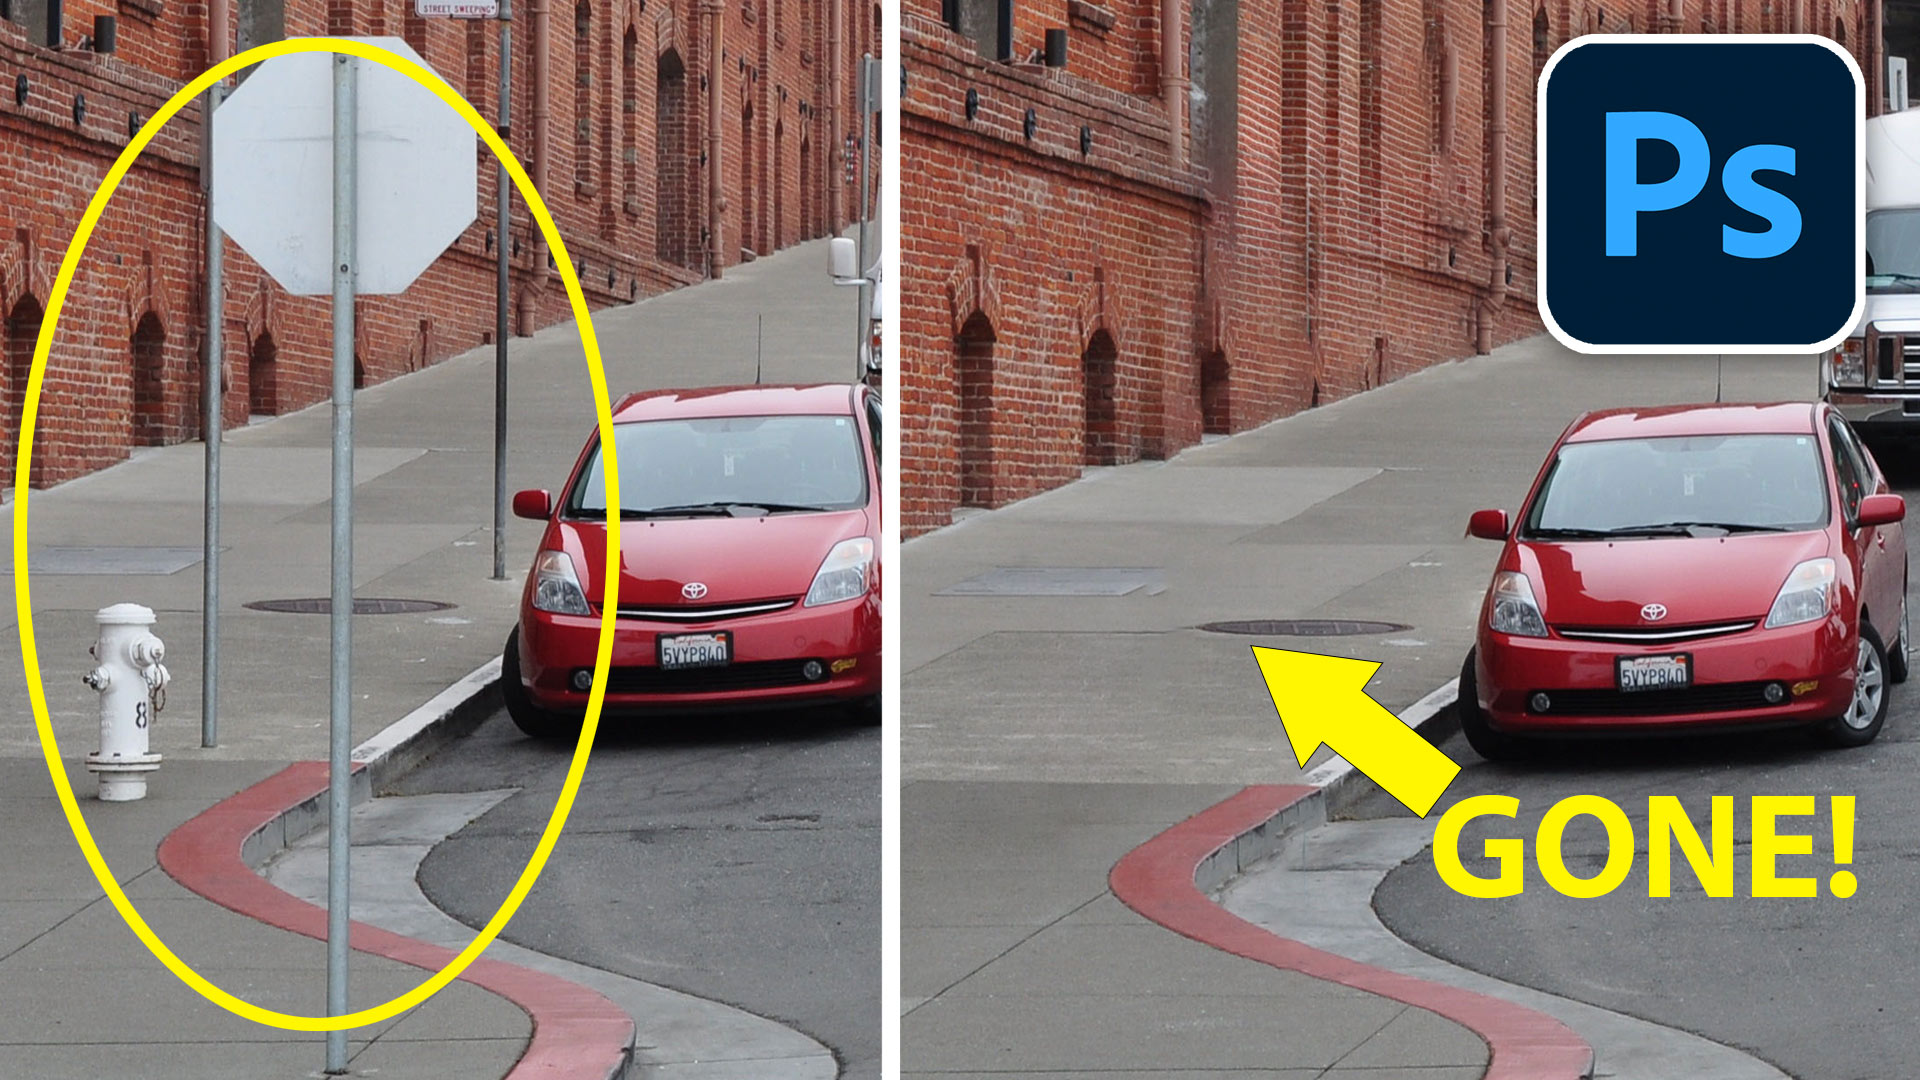
How to install and use the new Remove Tool in Photoshop to remove anything from an image using ai technology
Frequency Separation allows retouchers to separate the high frequency pixel information from the low frequency pixel information in images and...
How to make a color splash, or partial color effect to a black and white photo in this Photoshop tutorial....








Nice refresh and some extra like the vibrance insteaad of the saturation slider.
Hi Colin,
Thank you for this demonstration, the biggest thing I did learn was about the color profiles, never knew about them at all.
Thanks a bunch,
As usual, your tutorials are a wondrous learning tool for things we thought we knew. Much subtle information in each lesson step.
Hi Colin,
Thank you very much for this tutorial. I appreciate much that you explain the differences between the saturation and vibration sliders, what really do the Highlight and Shadow sliders do etc. They make me understand much more than just moving the sliders to see which makes the photo looks better.
I didn’t even know that the luminance pin was there to correct within the image, I always wondered what the difference was in using the Highlight/Shadow and Black/White sliders, and I never used the color profiles before.
Just pointing out the need to look for vignetting after a specific action was excellent. I really enjoy this type of tutorial, as little tricks in using common tools and the proper progression order of implementing them vastly improve my understanding of image enhancement.
Thanks for a very instructive tutorials (as always). Not so much news but repetition (of the things you thought you knew) is always good . I wonder though… you do not use the Ctrl+U – command? I often feel this gives me a good starting-point
I loved the tip on how to fix the fringing around the wing.
Hi! I generally work in PS, not LR. I can’t find the pin under the HSL tab in Camera Raw. Does this feature not exist in PSCC 2020? Thanks! Great tutorial!
Its there, click on the 4th tab. Make sure you are working on a color layer and not a layer mask.
These are really useful and I have found myself using the same things in ACR.