
How to use Path Blur to add motion to a photo in Photoshop CC
This tutorial shows how to fake a slow shutter speed photo of movement in photoshop by using Path Blur which was added in photoshop CC.
How to use Path Blur in Photoshop Tutorial
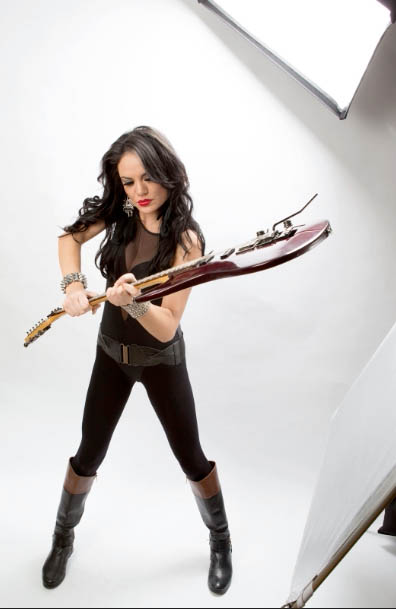
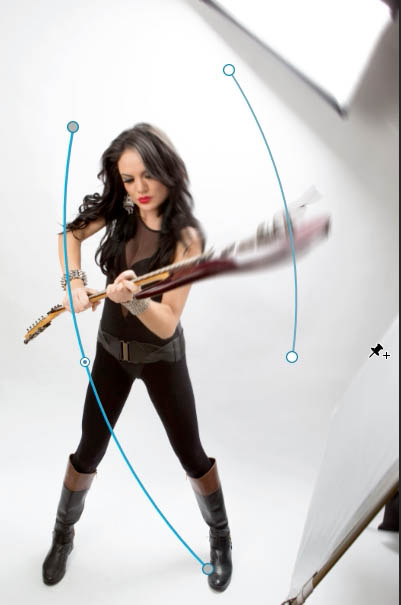
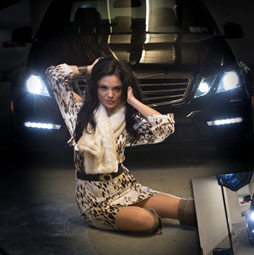
I’m going to show you how to create a Path Blur, so this is an addition to the Blur Gallery and it enables us to put objects into motion across paths in different shapes. In this photo, we have Lina holding my Ibanez guitar. I would never let her really swing this around and start smashing things up in the studio, but I can definitely make it look that way.
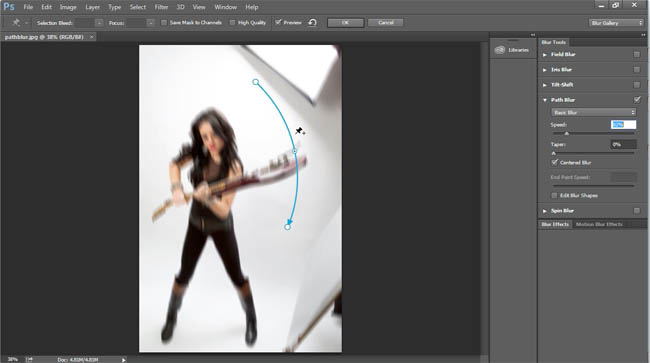
Step 1
Filter >Blur gallery>Path Blur.
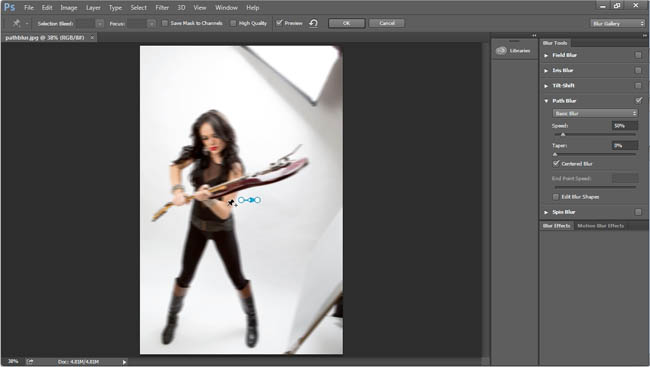
You’ll see a blue path. You can change the direction by dragging the points. It will blur in the direction of the arrow,
Step 2
You can change the Speed to increase the blur effect. This will make it easier to see what we are doing too. (I have also slightly changed the direction)
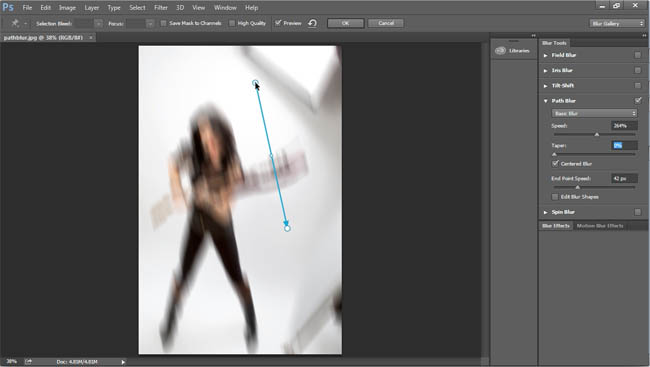
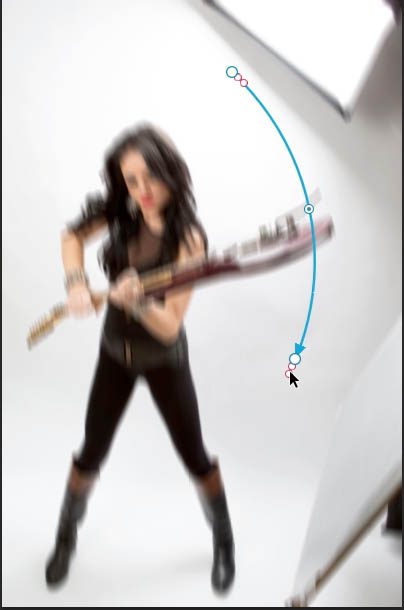
Step 3
Let’s make it look like she’s swinging the guitar around, so you can actually grab the center point and we can pull this out and create a little bit of a curve.
Bring the speed down to about 82, so it looks like we’re kind of swinging the guitar a little bit.
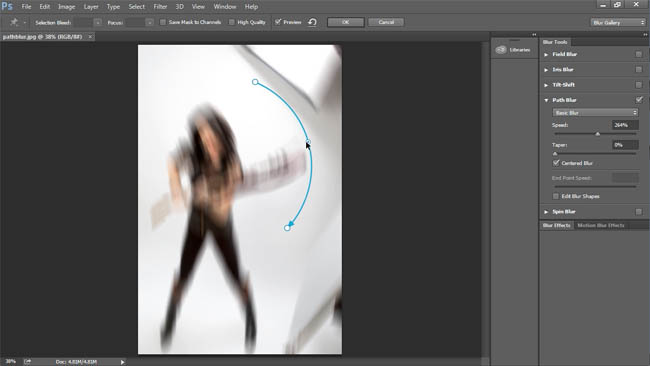
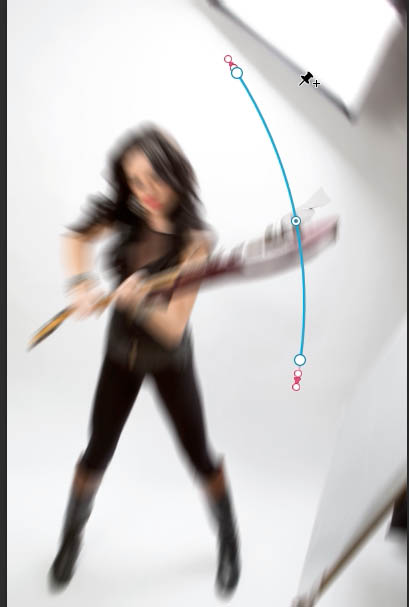
Step 4
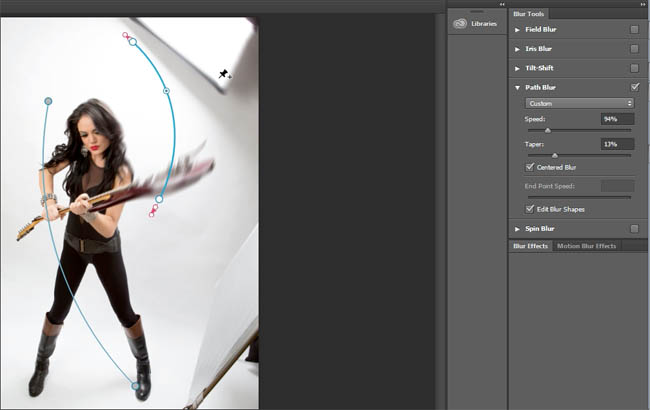
Turn on the Edit the Blur Shapes, with the Blur Shapes, we can literally exaggerate the movement by adjusting the little red points.
Step 5
Notice how it’s blurring the entire background and everything with it. I’m going to bring it down a little bit, not a lot of movement to get the result we need. I just wanted a little bit extra motion path to the guitar.
Step 6
We have all these blurring going on with our model too, so it’s not too useful right now. Let’s protect this area. Click once to add a new tool, I’m just going to use this one here to protect the rest of the image.
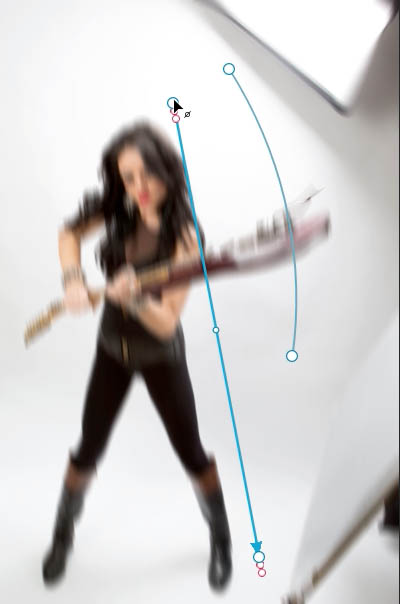
So this is what we do, we go over it, we select it. And I’m going to hit the Ctrl key and you’ll see this little symbol; double click and that will set that to zero. Let’s go down the bottom. Do the same thing, double click, and that will set that to zero. So what we’ve done now is, essentially, we’ve protected the rest of the photo.

Step 7
We can even bend and move the points and it’s looking more believable
Step 8
You can now go back to the original path and tweak it a bit.
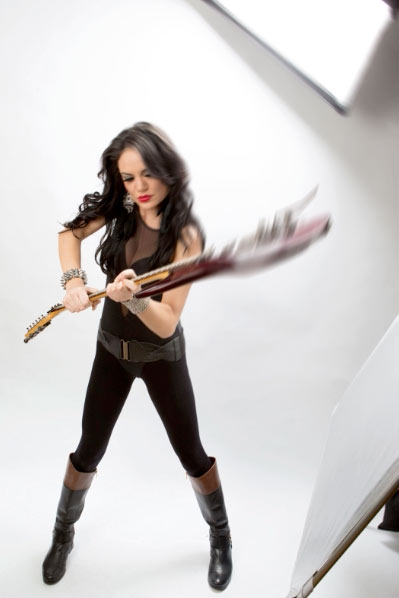
You just want to experiment a little bit until you find the right settings for you. Click OK now and apply this, we can see it looks as if she’s swinging that guitar and there’s no guitars harmed in the making of this.
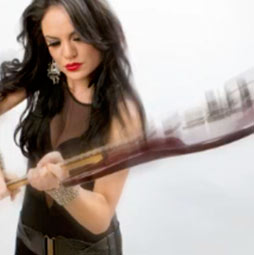
If you check out the video above, you can see an alternative method of creating this effect that gives a little bit more control. Its a bit more work, but you know how it is, swings and roundabouts. We can get good results quickly, or spend a bit more time for great results.
Im added new tutorials here at the CAFE every week.
Colin
PS Don’t forget to follow us on Social Media for more tips.. (I've been posting some fun Instagram and Facebook Stories lately)
You can get my free Layer Blending modes ebook along with dozens of exclusive Photoshop Goodies here

Learn how to use the Radial tool to create ovals of any size, angle and shape in Adobe Lightroom. This...

The top free Photoshop and Lightroom tutorials. 12 best free Photoshop and Lightroom tutorials are right here.

Create clean circular and arched text using Dynamic Text in Photoshop


