Create a magical flying ship with Photoshop and the ParticleShop plugin
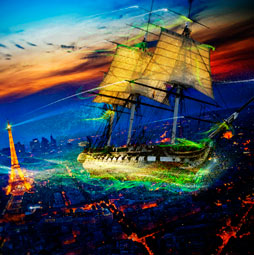
Create a magical flying ship with Photoshop and the ParticleShop plugin
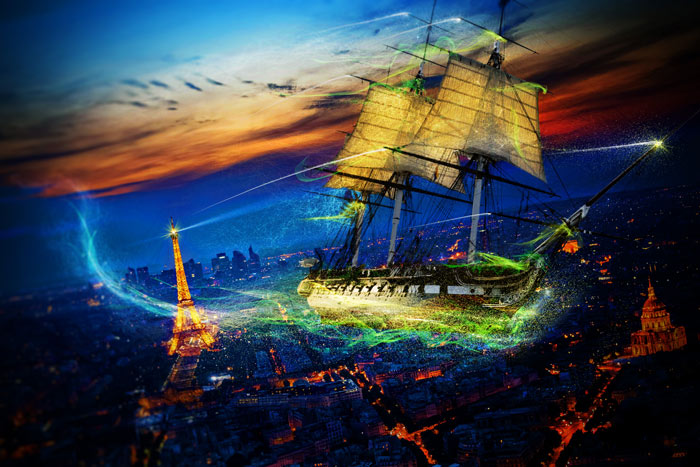
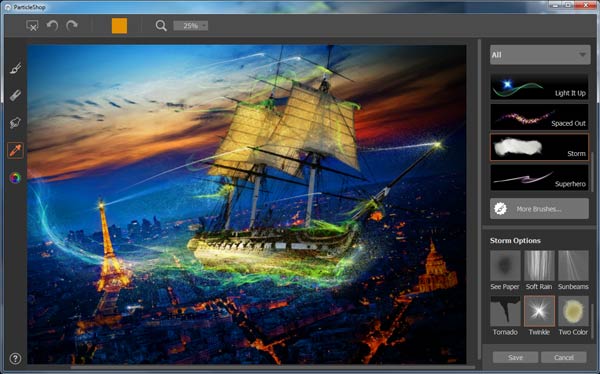
One of the most exciting Photoshop plugins to come out in years is the Painter ParticleShop plugin that makes it easy to add brilliant special effects with an assortment of pressure sensitive brushes. The software ships with a starter pack of 11 brushes, but several more themed brush packs are available to add on. Plus the development team at Painter continues to create new brush packs to fill out the library.
The resources you need for this tutorial are the FloatingShipStarterImage.jpg . The starter image is a composite of a nighttime shot of Paris found here (https://pixabay.com/en/eiffel-tower-france-sunset-951517/) and an old US naval vessel found here (https://pixabay.com/en/ship-tall-frigate-historic-661625/) We are starting with the composited image because the focus of this tutorial is creating those very cool special effects!
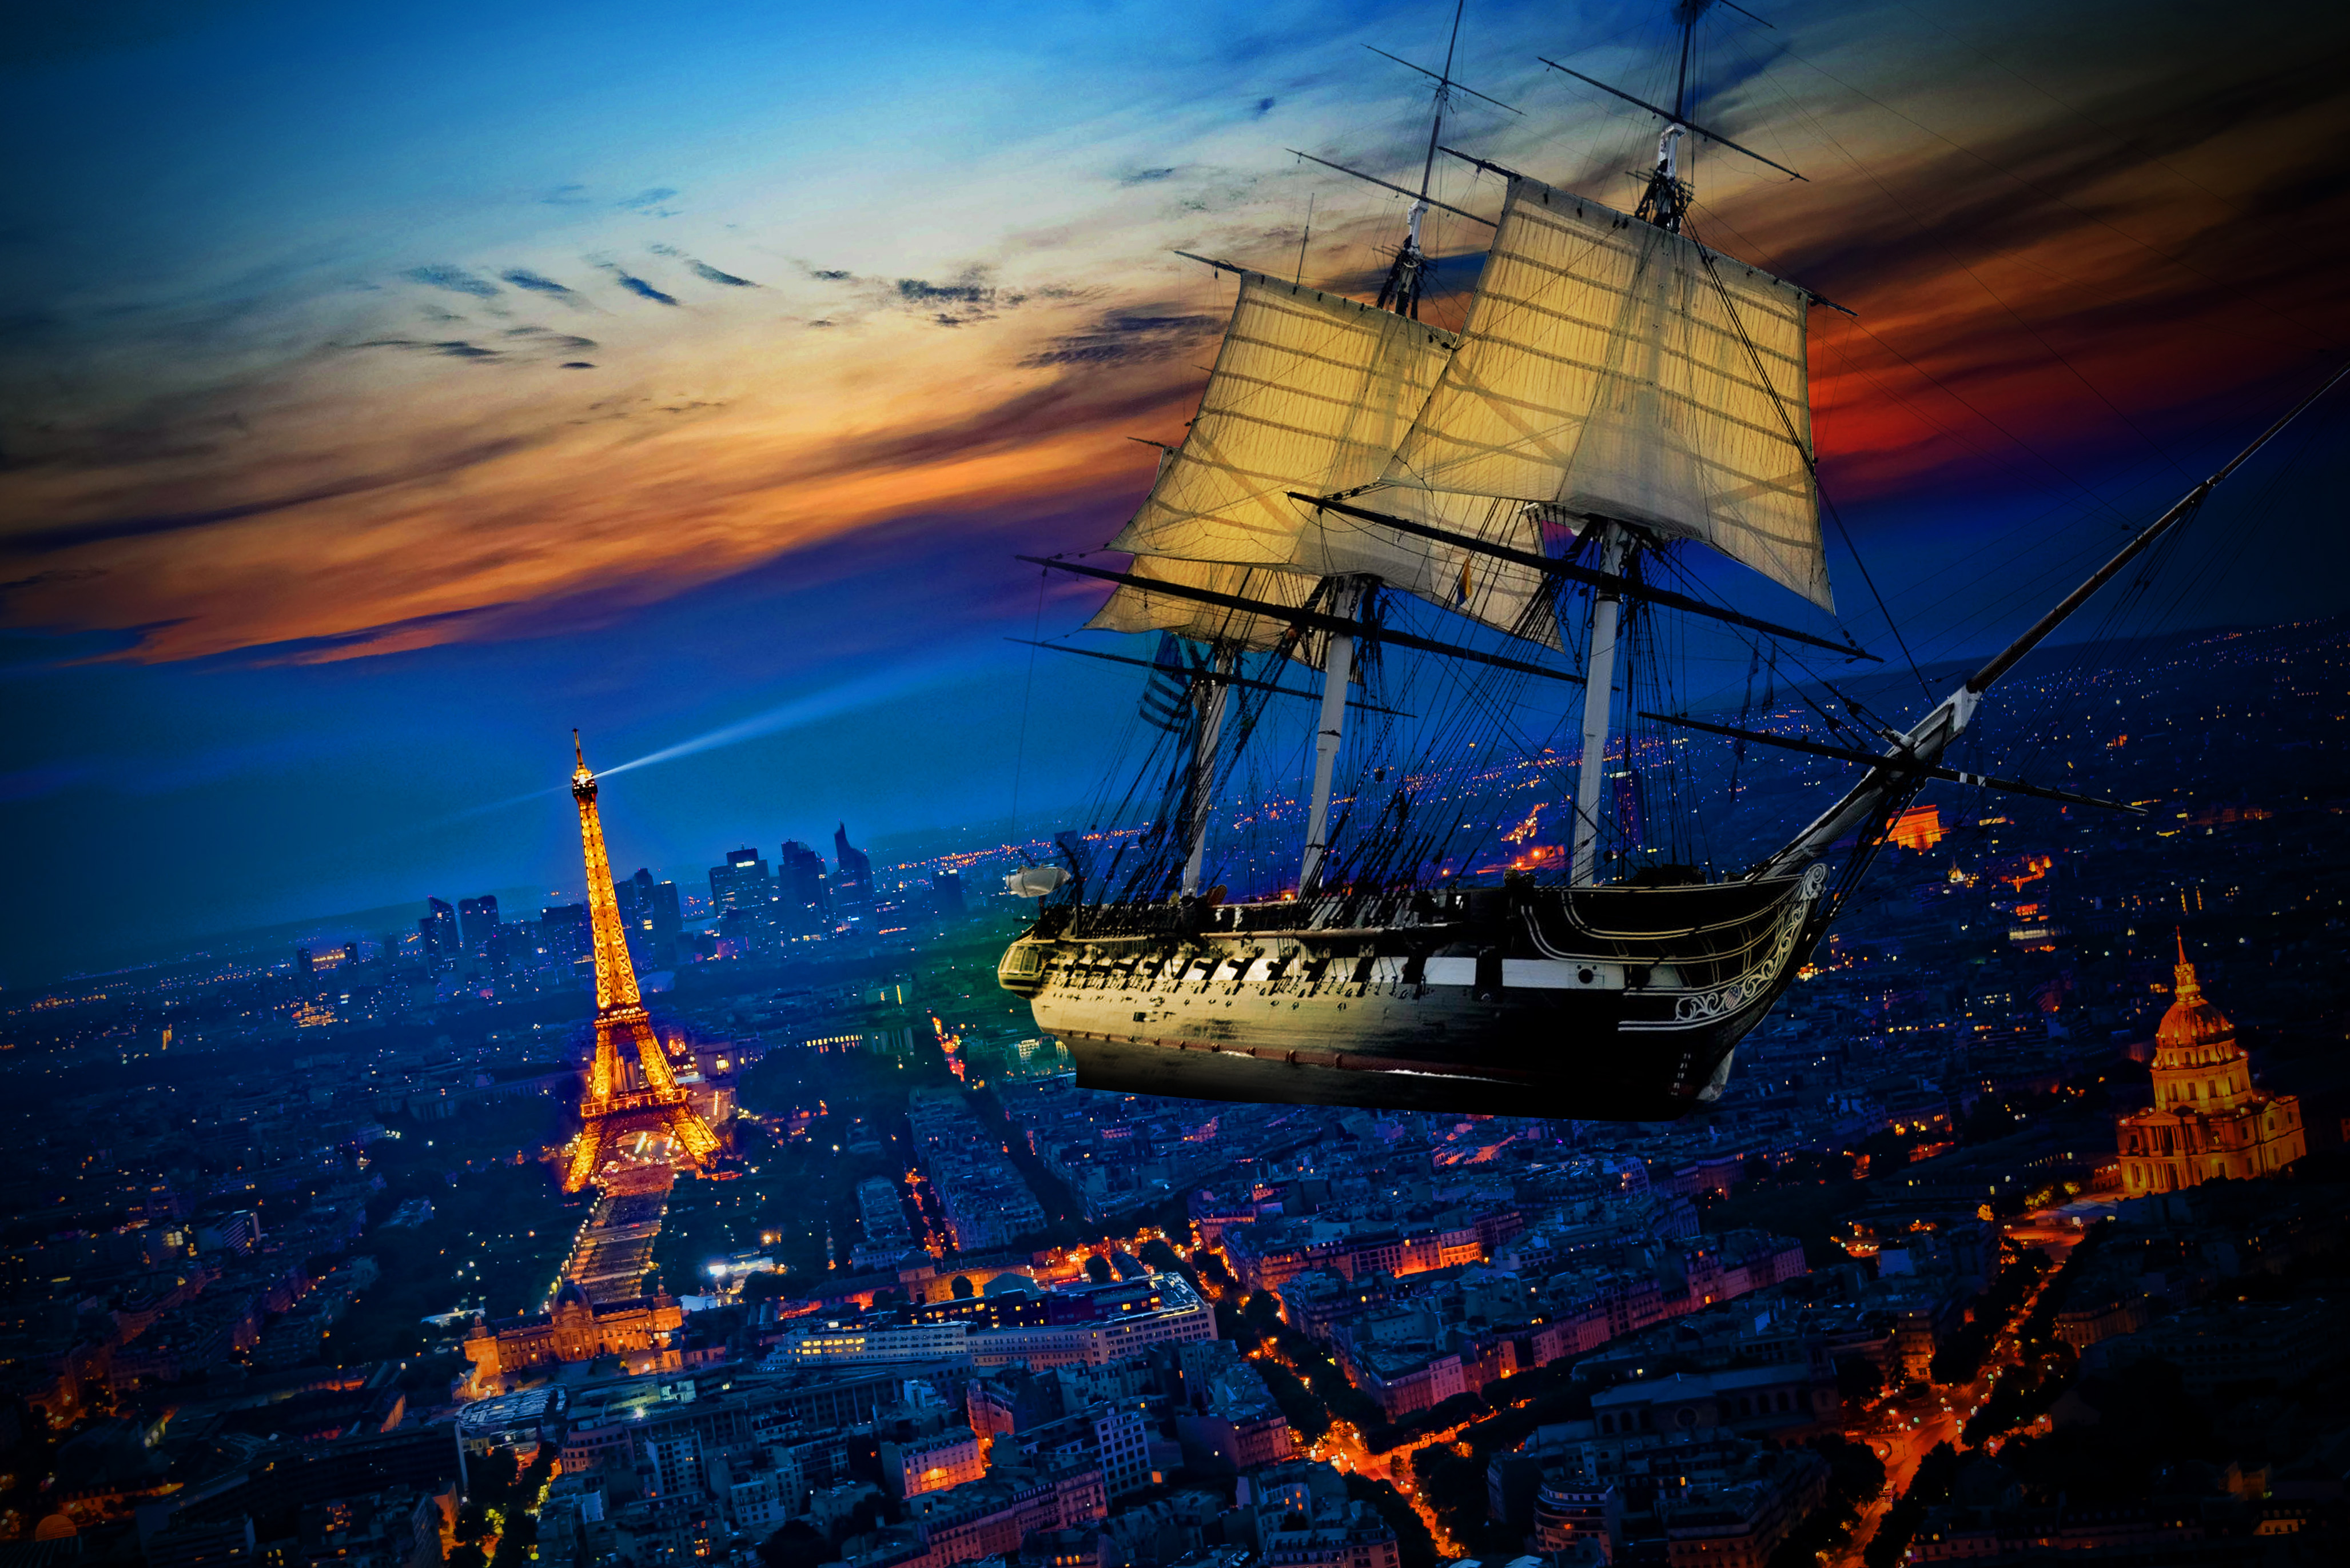
This tutorial also uses the ParticleShop plugin. We explore several of the additional brush packs just for inspiration, but a very similar effect can still be achieved with just the Starter Pack.
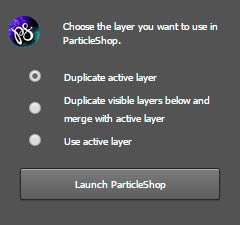
Open the starter image in Photoshop and then make sure the ParticleShop plugin is activated (Window > Extensions > ParticleShop) Launch the plugins panel and choose the Duplicate active layer option.
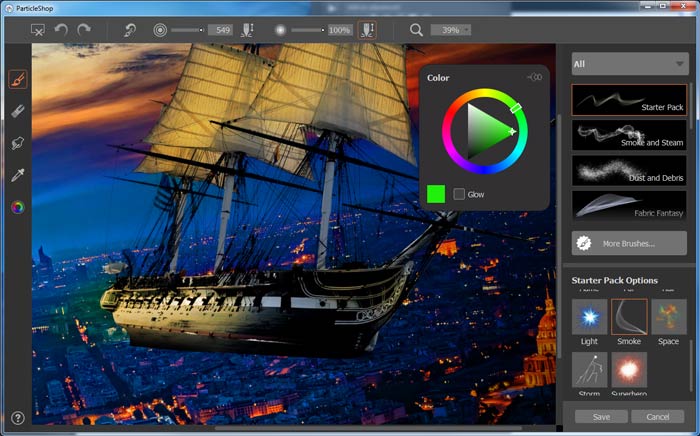
From the Starter pack select the Smoke brush and use the color selector to use a bright, ghostly green color.
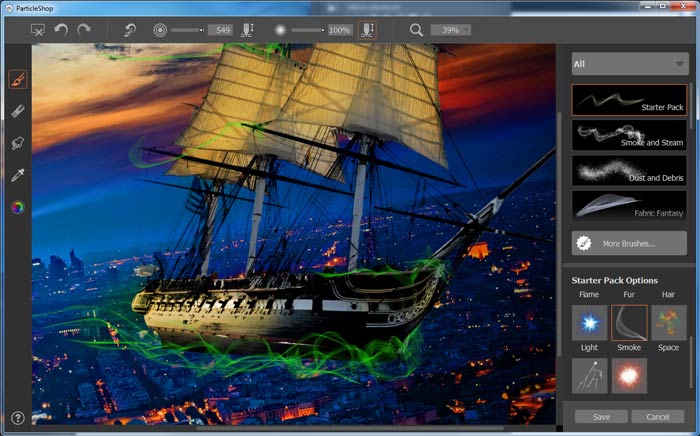
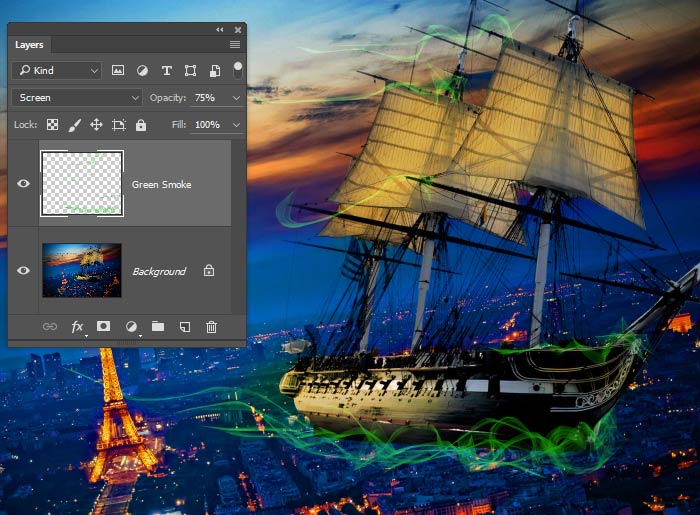
Use either the mouse, or a pressure sensitive tablet (which is preferred) to draw out long tendrils of green smoke trailing from the cross sections of the mast. The faster and longer the brush strokes, the more wispy the smoke will appear. Then use large, circular strokes to create the “waves” along the side of the ship
Click the Save button and Particle Shop prompts you with a choice. Select the Save only brushstrokes option and the program will generate the effects on a separate layer in Photoshop, leaving your original image untouched.
One of the biggest benefits to having the effects isolated on a separate layer is that they can be easily manipulated with the other tools in Photoshop. Change the layer name to Green Smoke, set the blending mode to Screen and reduce the Opacity to 75%.
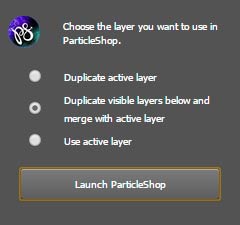
To continue adding effects that are isolated onto individual layers, launch the Particle Shop plugin again, but this time use the Duplicate visible layers below and merge with active layer option. The rest of the particle effects in this tutorial will be done using this option.
In the Smoke and Steam brush pack there’s a Windblown brush. Use this to add wispy vapor trails to front of the bow and the ends of the crossbeams. Then save this out to a layer.
Use the Flame brush from the Starter pack to add a few licks of green flame near the tops of the masts and the head of the ship. Save this effect to a layer as well.
Step 10
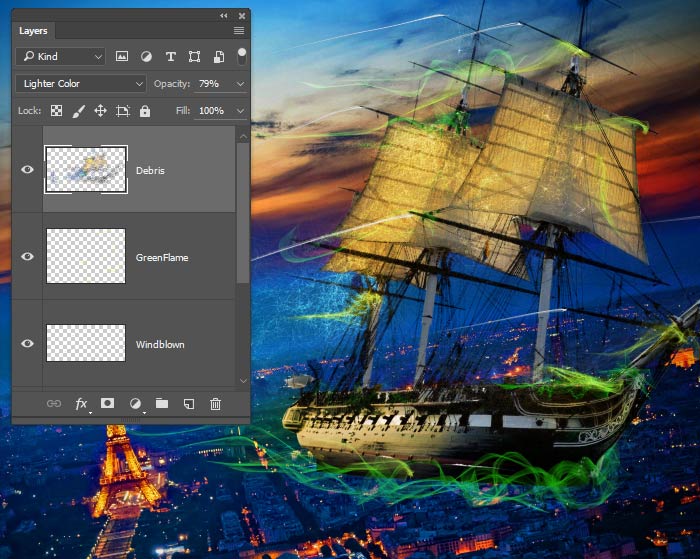
Use the Debris brush from the Starter pack to add a bit of chaotic light effects over the ship. When you return to Photoshop, set this layer to Lighter Color and reduce the Opacity to 79%
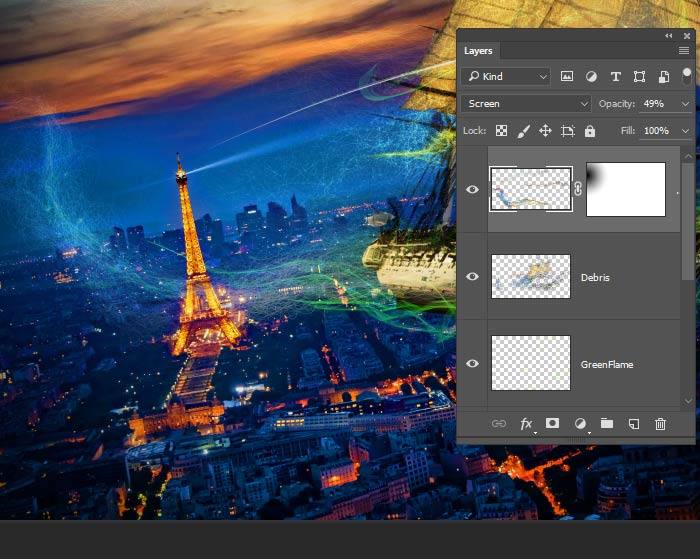
Use the Debris brush again to create a trialing path from the ship curling its way into the distance. Return to Photoshop and set this layer’s blending mode to Screen, reduce the Opacity to 49%, then add a layer mask and use a gradient on it to fade the effect out so it appears to dissipate in the distance.
Step 12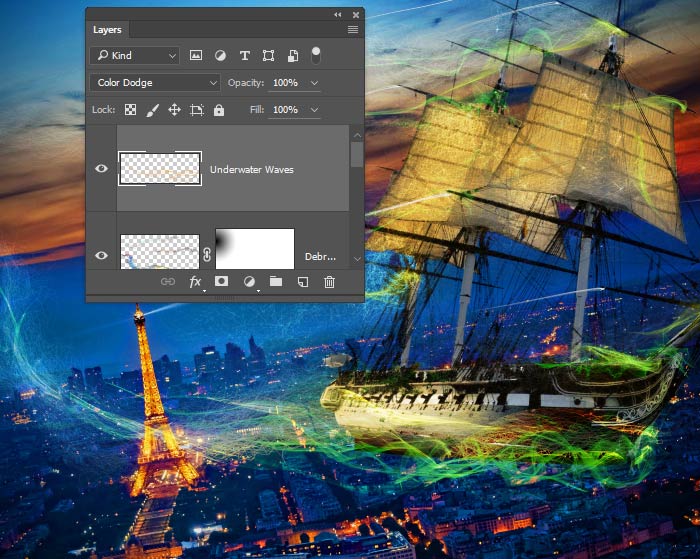 Use the Underwater Waves brush from the Smoke and Steam pack to add another textured effect to the magical waves the ship is riding on. Return to Photoshop and set the blending mode to Color Dodge to intensify the magical appearance of the effect
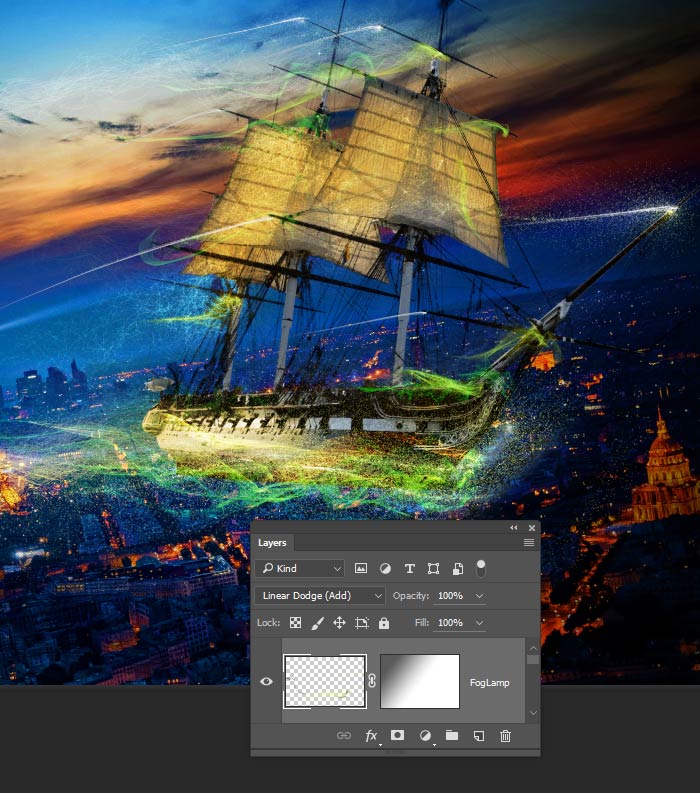
Use the Fog Lamp brush from the Storm pack to add a generous amount of “fairy dust” sparkles around the ship. Use the pressure sensitivity of the tablet to trail the sparkles off while tracing along the path of the ship. Save this effect out to a layer in Photoshop and set the blending mode to Linear Dodge and use a gradient layer mask to fade the effect into the distance.
In the Storm brush pack there’s a Twinkle brush that is perfect for adding the light flare to the tip of the tower in the background. Before adding it, use the eyedropper tool to sample the color of the tower’s lights. Then do the same for adding a green twinkle to the bow of the ship. Save this out to a Photoshop layer as well.
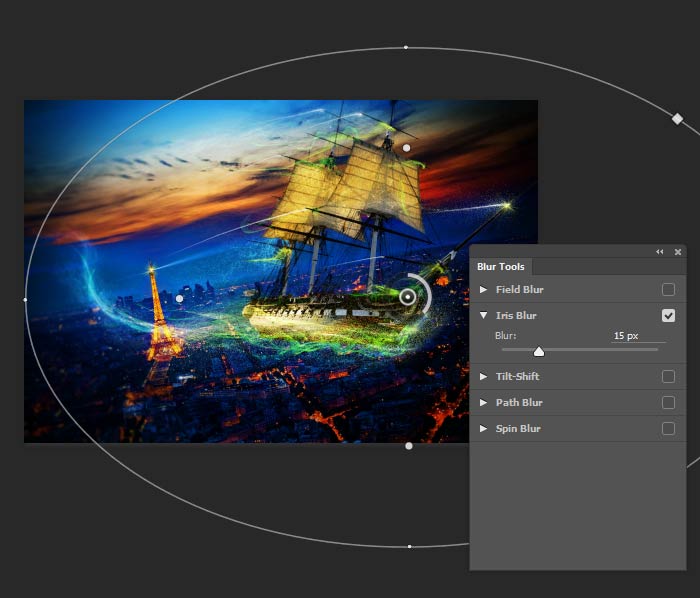
For a final effect, create a merged layer at the top of the layer stack by holding down the alt key and going to Layer > Merge Visible. Then go to Filter > Blur Gallery > Iris Blur. Set the center of the blur at the bow of the ship and pull the blur handle out to meet the opposite edge of the canvas. Set the Blur amount to 15 px and hit OK. You are Done!
PS Don’t forget to follow us on Social Media for more tips.. (I've been posting some fun Instagram and Facebook Stories lately)
You can get my free Layer Blending modes ebook along with dozens of exclusive Photoshop Goodies here

7 thoughts on “Create a magical flying ship with Photoshop and the ParticleShop plugin”
Leave a Reply
New tool in Photoshop removes anything in a photo instantly, new remove option in Generative Fill. Generative remove
how to use the DJI Intelligent flight modes for the Phantom 3 and the Inspire 1. Course lock, home lock,...
How to remove difficult subjects from photos in Photoshop tutorial. Remove anything using healing brush, Content aware fill, clone stamp...







well the light it up brushes are not in the download and I had to contact Corel to figure out how I download them.
Thanks for this info. I’ll contact them and make sure we fix that!
Still no word from Corel on getting the brushes.
I have reached out to them, Ill let you know when I have an answer
they escalated my ticket but still no response
Can you please send me a message though our support link at the top and give me your email address, they are going to send it to you through email
Always i’m more appreciating step by step tutorial reason i thing that, step by step tutorials are more easy to understand for all . So great thanks .