
Lens correction in Photoshop Tutorial
There are a lot of different things that can be done with the Lens Correction Filter in Photoshop. There are automated things like upright in lightroom tutorial here) | Upright in Photoshop Tutorial here and lens profile corrections (more corrections here on this video) and then there are things that you can do manually. We will touch on the Auto settings here, but we will concentrate on the manual settings that will work with any image.
Here I have opened an image that was shot with a DJI Phantom 2 Vision Quadcopter camera. Notice the fisheye distortion?
Choose Filter>Lens Correction

Simply turn on the Geometric Distortion open and the Fish eye is removed because the Filter has access to the metadata of the photograph and matches it with presets from the Adobe Lens Correction database of cameras and lenses. 
Ok, onto the Manual Lens Correction on a very difficult image
The Lens correction filter is truly amazing, being able to repair all kinds of distortions. Not only can it remedy the bulging created by a wide-angle lens, and the weird distortion created by taking a photo too close to subject – such as the bulging nose of a friend – but it can also straighten images taken at angles and make them appear as if they were shot straight on. To demonstrate, let’s take an image that suffers from many problems, and correct it.
Step 1
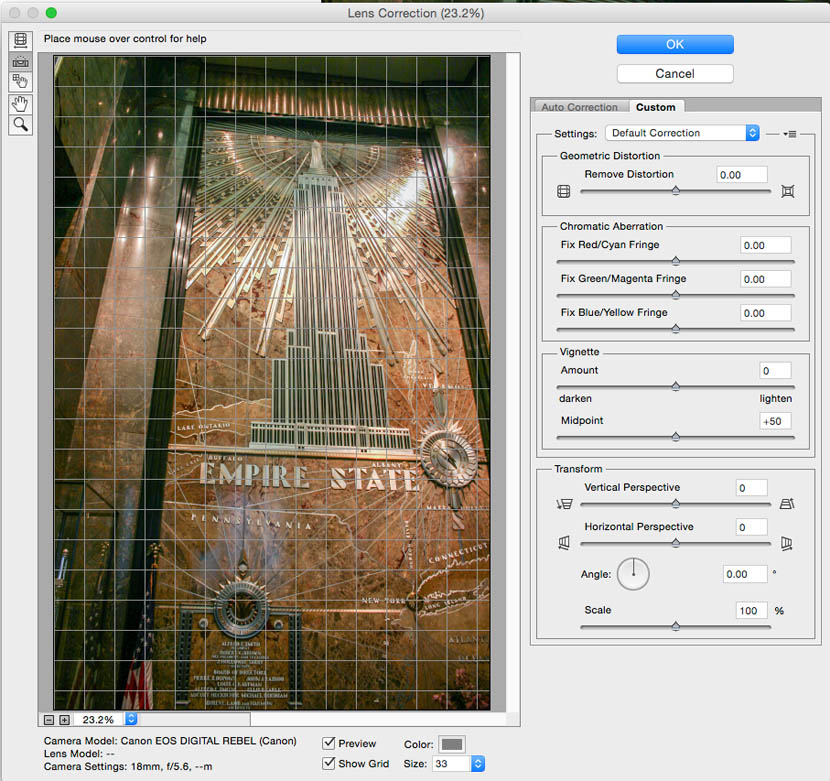
Open an affected image and choose Filter>Lens Correction and click on the custom tab
Notice the grid that assists us in lining things up, you can also change the size of the grid with the slider to make it match your photo

Step 2
The first job is to straighten the image. It’s impossible to fix all the other angles if the image is not straight first.
Choose the straighten tool for the left side of the dialogue box ![]()
Click-&-drag across the image to define the new horizon, Try to follow a horizontal line in the image if there is one.

Step 3
The image suffers from keystoning – it’s narrower at the bottom than the top – so we’ll adjust the Vertical Perspective to make the top and bottom the same width.

Adjusting the Horizontal perspective appears to rotate the image through 3D space. What’s really happening is that we’re making one side narrower than the other to combat perspective problems. You can also change the Angle to counter a diagonal distortion
Adjust the scale slider to see more of the image if necessary

Step 4
Notice how the image appears to bulge. Move the Remove Distortion slider to the left to ‘bulge out’ and move to the right to ‘pinch in’. This also works by choosing the Remove Distortion tool, which is the topmost tool icon on the left of the Lens Correction window. Once the tool is selected you can drag in the image, although I find that the sliders give you more control.

Step 5
After adjusting the distortion, you may need to go back and again tweak the perspective. The Vertical Perspective has been readjusted to compensate.

Step 6
Click ok to apply
To finish off the effect, crop the image to suit your needs. As you can see this really is a great tool for fixing distorted images.
Extra Credit
Sometimes when you have been doing heavy lens correction like we have here (or even with the upright adjustment in Camera Raw) you can end up with a skewed effect, almost as if one side has been pushed up and the other side pushed down.

This can be fixed by choosing Ctrl/Cmd+T for free transform mode
Right click and choose Skew. Drag on one side to fix the skewed problem. 
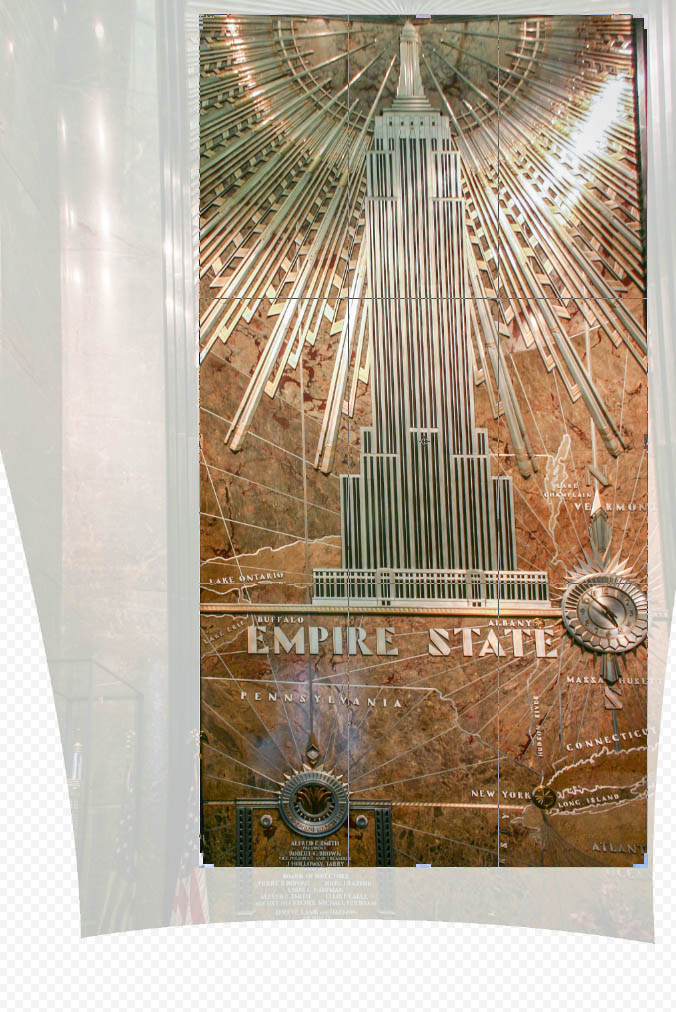
And the final result

Note that is was an extreme example to show you the workflow and features in the Lens Correction tool.
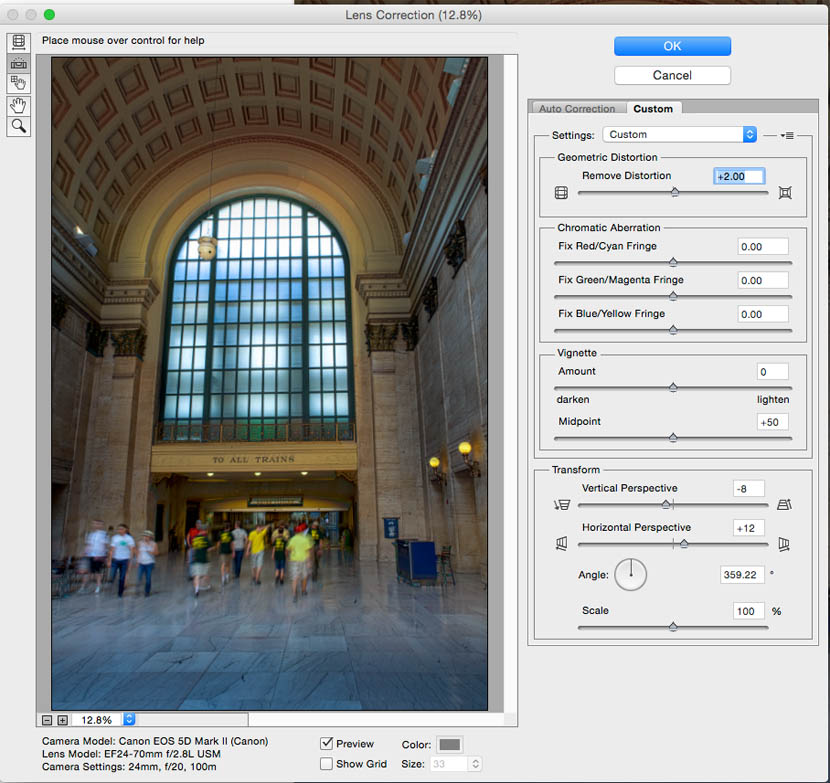
Here is a more realistic case

Here are the settings inside Lens correction, notice I didn’t use every options, just the ones I needed and I also used much more subtle settings here.
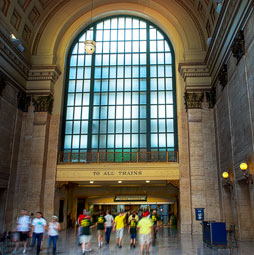
Here is the result of a quick Lens correction to a Photography that I shot of Union Station in Chicago.
I hope that you found this tutorial useful. If you did, please tell your friends, share on social media and comment below.
See you at the CAFE!
Colin
PS Don’t forget to follow us on Social Media for more tips.. (I've been posting some fun Instagram and Facebook Stories lately)
You can get my free Layer Blending modes ebook along with dozens of exclusive Photoshop Goodies here

One thought on “Lens correction in Photoshop Tutorial”
Leave a Reply


How to make a photo collage in Photoshop by blending layers together. Photoshop collaging and compositing tutorial

Updated ai selection tool in Photoshop is stunningly good now


I’ve just opened a file and “lens correction” is faded on the Photoshop menu. Any ideas why?