
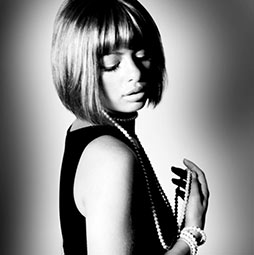
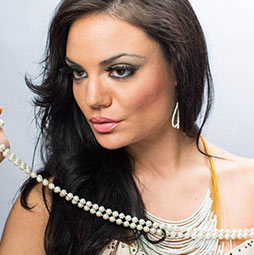
How to Convert Photos to Black and White in Photoshop, the best way!
As you know, there are a number of way to convert a photograph to black and white in Photoshop.
- You can convert to grayscale mode (and lose 2/3 of the information)
- You can desaturate the image, this will give you no control over the conversion
- You can use the Black and White Adjustment (A very good method, but be careful not to add artifacts).
- You could do it in Camera RAW, awesome results too.
We are going to do it with Channel Mixer. I’m going to show you why, I believe this is the best method in Photoshop for most black and white conversions.
You can also use 3rd Party plugins like Macphun and Nik that produce excellent results too.
As always, this is my preferred way to work (Although I do use the Black and White adjustment a lot too). Try this out, and see if it fits into your workflow.
See this tutorial on Black and White Noir effect
Thanks for watching,
See you at the CAFE!
Colin
PS Don’t forget to follow us on Social Media for more tips.. (I've been posting some fun Instagram and Facebook Stories lately)
You can get my free Layer Blending modes ebook along with dozens of exclusive Photoshop Goodies here


7 thoughts on “How to Convert Photos to Black and White in Photoshop, the best way!”
Leave a Reply

How to make a realistic looking shadow in Photoshop. This photoshop tutorial shows how to cast a shadow, Colin Smith's...
What am I missing? Why Lightroom for Bridge users If you already use Bridge and Camera RAW, you can do...

How to create Cyberpunk styled colors and lights in Photoshop.


I like how guys from FixThePhoto working with B/W effect in landscape photos. Your techniques look like him
Thanks for the tutorial. Clearly the channel mixer is the best way to convert to b/w, but just curious about converting to LAB and clicking on light. I remember being taught that years ago. Is that any better than the first 3 ways for a quick and dirty solution?
It’s another option (a good option), but less control over specific color regions
Thank you for this tutorial. I tried it with great results! However, I have a question: can an image converted in this way be submitted for printing as part of a black and white publication? The file itself is still RGB even though it looks B&W, but in the actual printing no color inks will be used at all, just black. I am worried that the adjustments will be lost and the printer will be mad at me.
You need to convert it to CMYK or Monochrome (depending on the printing process) before sending to print.
Would there be times you’d use a Black & White adjustment layer over Channel Mixer?
Sure, lots of times 🙂 I like that there are multiple ways to do things in PS