
How to Remove Shadows from a Photo in Photoshop
How to Reduce distracting shadows from a photo in Photoshop
This Photoshop tutorial shows you how you can easily remove or reduce harsh shadows from any photograph in Photoshop CC and Photoshop CS6.
Sometimes you get the perfect photo, but there are unwanted shadows on it.
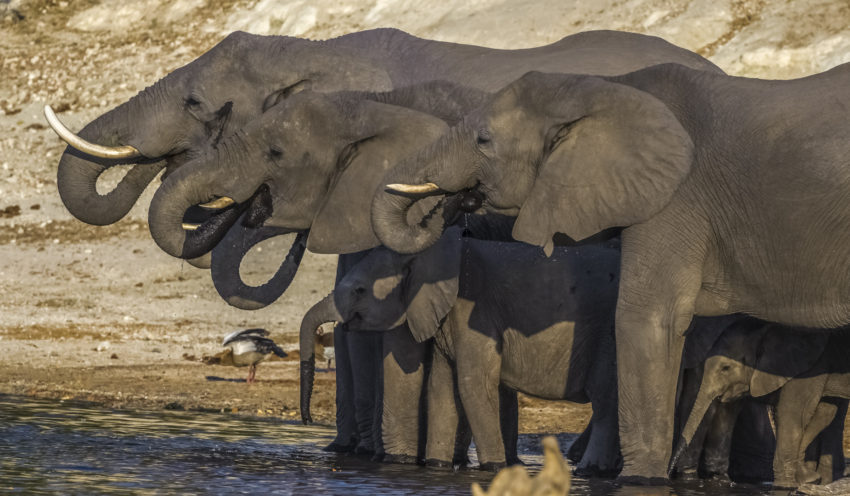
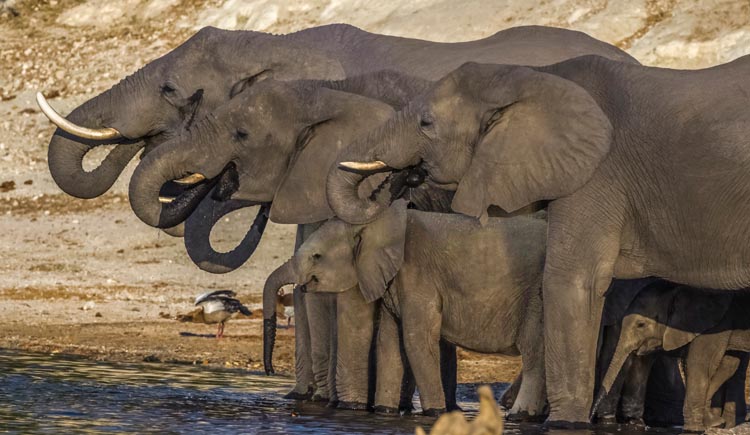
This picture was sent to me by one of our members: Richard Pilcher. He asked…
“I have a NEF file of elephants drinking – refer to attached jpeg. Is there any way to reduce the impact of harsh shadows on the baby elephants? Hopefully you can address this common issue at some stage in the future.”

Fortunately, yes, we can fix this in Photoshop. Thanks for the question and sending the lovely image, Richard.
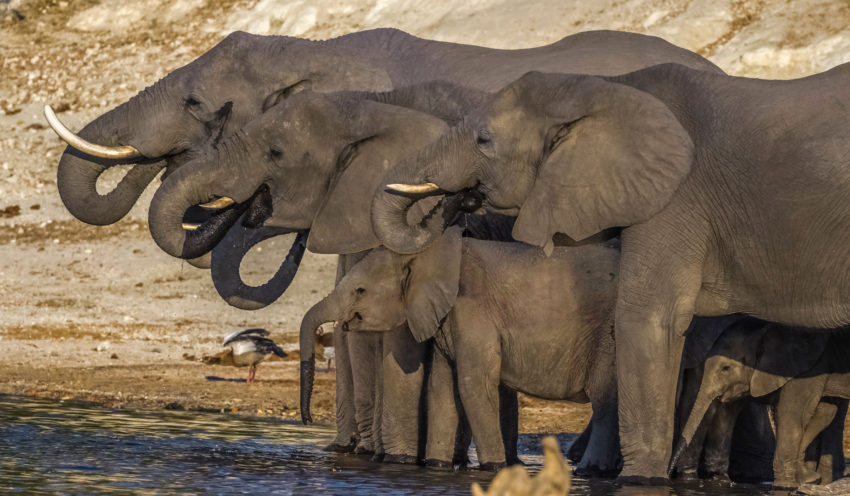
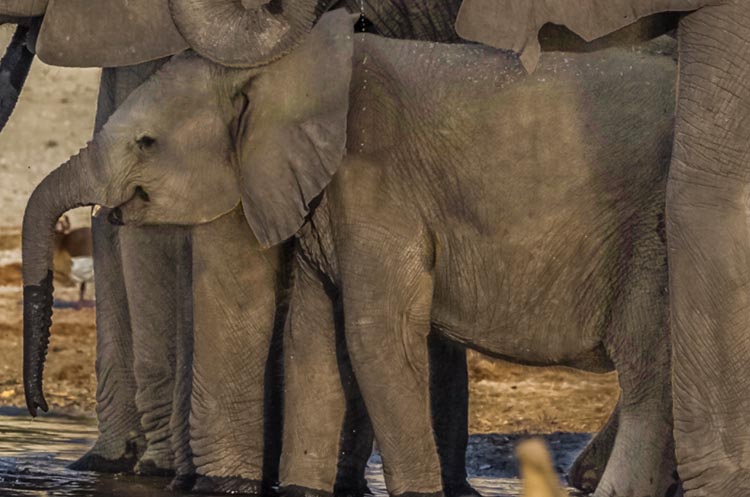
Here is my fixed image. I worked from the jpg, so if you are working from an original raw file, you should get even better results.
Ok, let me show you what I did.
Removing a Shadow from a photo in Photoshop
This tutorial is made in Photoshop CC, but it will work on Photoshop CS6 as well. Make sure to watch the quick video at the top of the page to see the tutorial that walks through this and adds a bit more information.
Lets begin with our picture of the elephants.
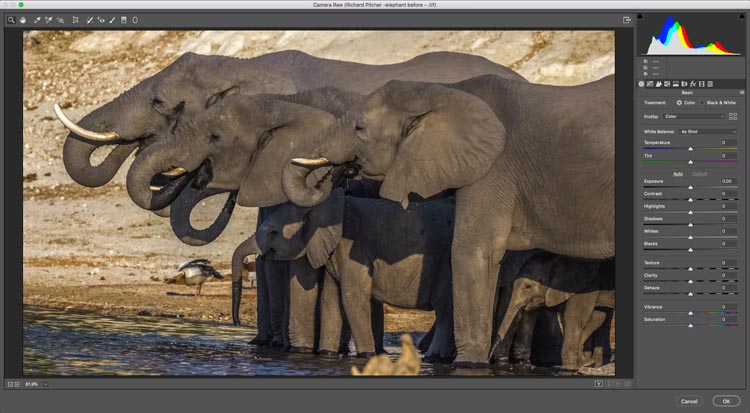
Step 1.
Choose Filters>Camera Raw filter
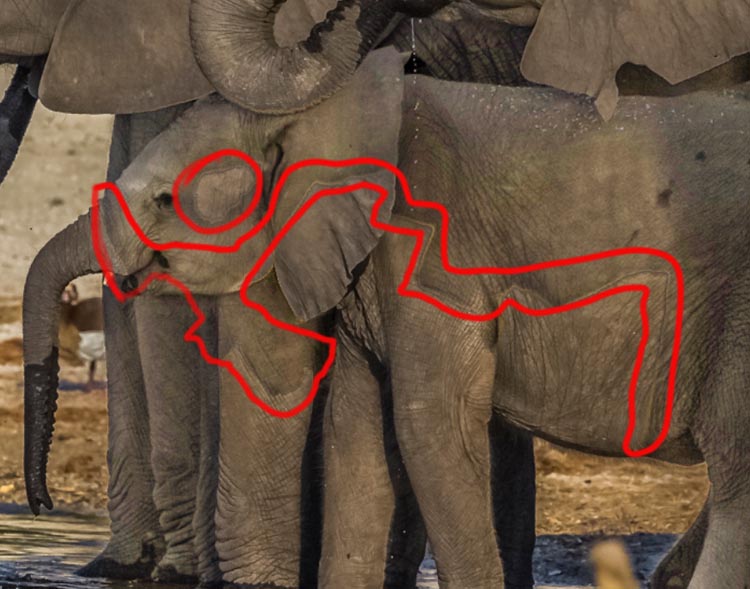
Step 2. Isolating the shadow area.
Let’s select the shadow.
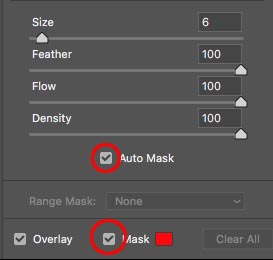
Click on Masks, Choose the brush .
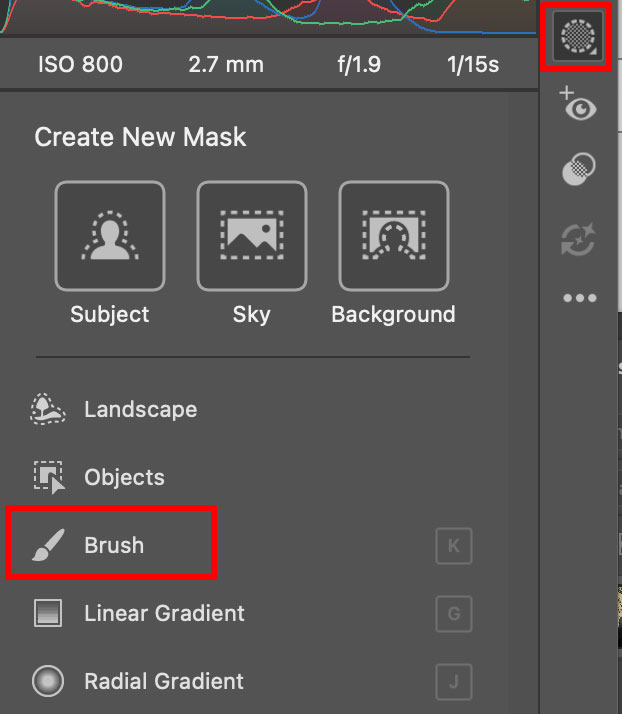
At the bottom of the panels, choose Auto Mask.This will detect the edges.
Turn on Mask, so you can see where you are painting.
Step 3.
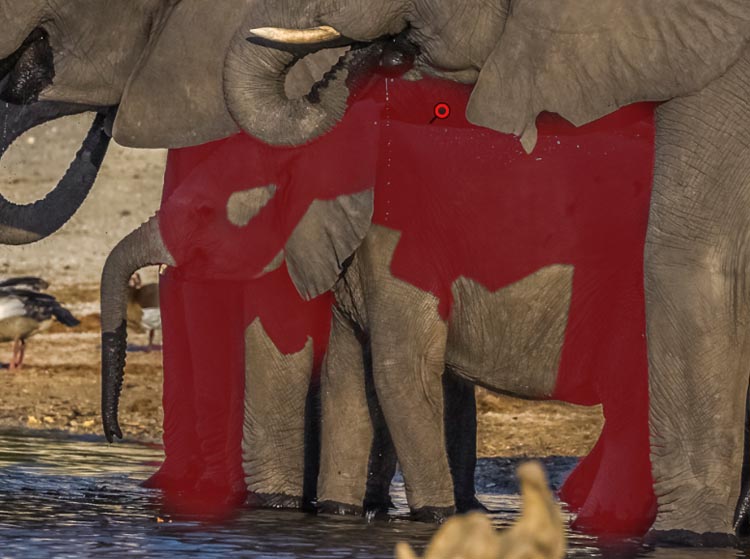
Paint over the shadow area. Auto Mask will keep it inside the lines.
Step 4.
Turn off Mask overlay, so you can see the image.
![]()
Click the 3 dot menu to the right of the Brush.
Click Reset Brush Settings. This zeros out all the adjustments.
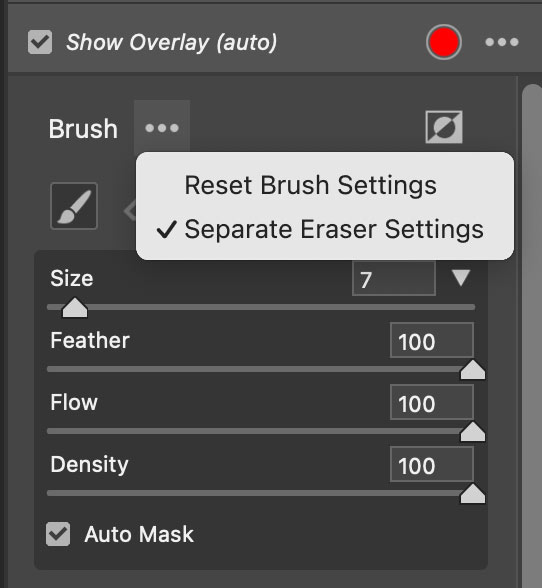
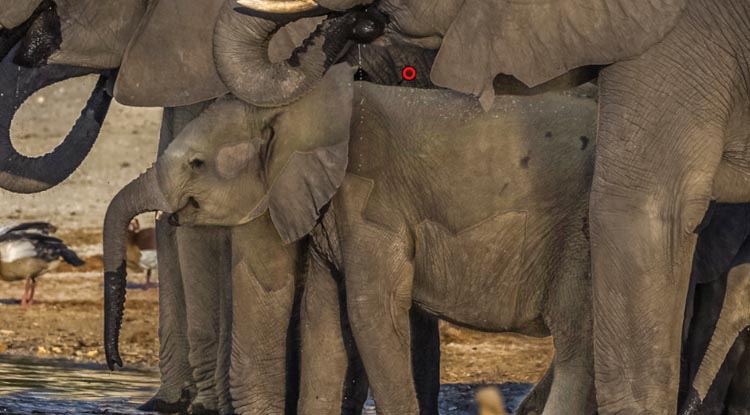
Here is the area we want to work on.

Step 5. Balancing the shadow area.
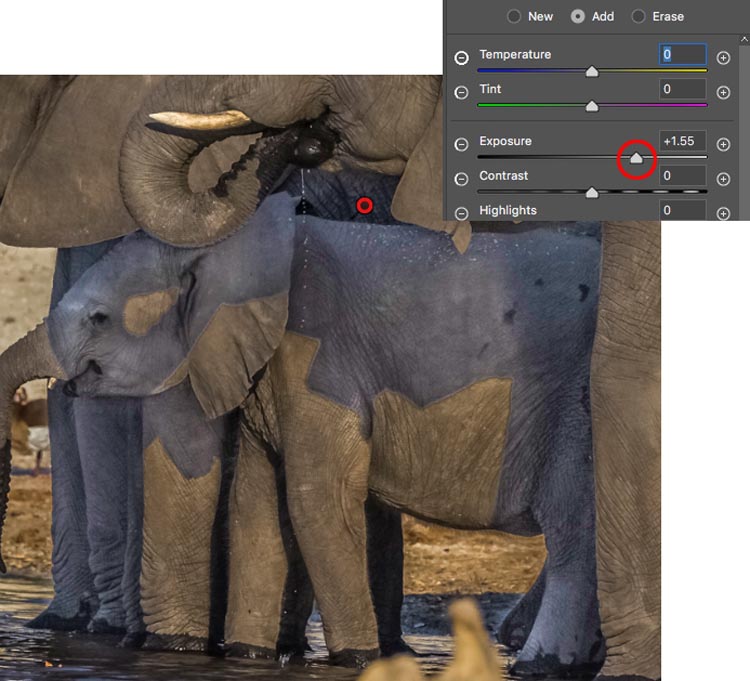
Now we want the selected area to match. There are 2 things to pay attention to. Brightness and color.
First of all, move the Exposure slider until the brightness matches the surrounding areas. (Also try the Shadow slider)
It’s looking good, but notice how the color temperature in the shadows is cooler than the rest of the image.
Step 6.
Move the color temperature to the right to warm it up.
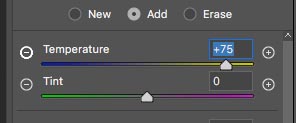
See how we have almost matched the shadow area just with exposure and temp?
Step 7.
Make more adjustments to try and get the match even better.
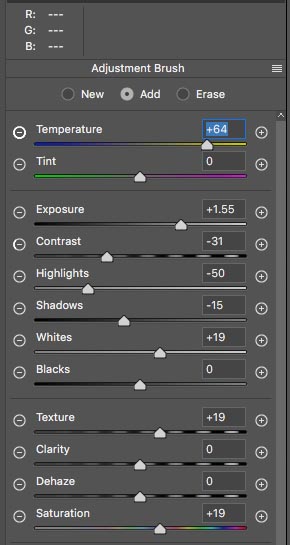
This is what I have come up with. The shadow areas are looking good. The image looks patchy because of the edges, we will fix that now.
Click ok to apply the ACR (Adobe Camera Raw) adjustment.

Step 8, Fixing the edges.
Choose the Spot Healing Brush.
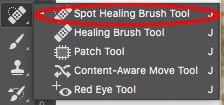
I have highlighted the areas to fix.
Move the brush over small areas at a time.
Here is face is fixed in a few seconds.
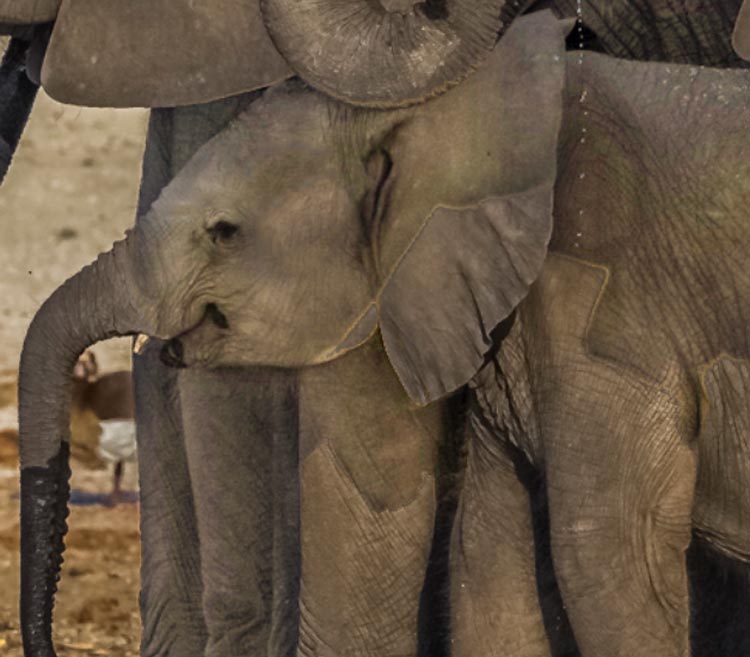
Almost done.
And we are finished.
Compare that to the before image!
You can of course repeat these steps for the trunk if you wish.
I really hope that you found this video and written steps useful and that this helps you fix distracting shadows in your photos. If it was helpful, please tell everyone about PhotoshopCAFE and share this tutorial on your social media.
Great to see you here at the CAFE
Colin
PS Don’t forget to follow me on Social Media, Im posting daily shorts and reels on Photoshop.
PS Don’t forget to follow us on Social Media for more tips.. (I've been posting some fun Instagram and Facebook Stories lately)
You can get my free Layer Blending modes ebook along with dozens of exclusive Photoshop Goodies here


24 thoughts on “How to Remove Shadows from a Photo in Photoshop”
Leave a Reply

Learn how to use Lightroom Presets in Photoshop. This tutorial shows you how to make a cool preset in Lightroom...

How to apply photo adjustments to multi layered images. Tips for clipping adjustment layers to single layers and how to...
In this tutorial I will demonstrate how to place a person inside an image using the "paste into" command. You...


You are a wizz , amazing result even on jpeg . I won’t be able to send NEF file before Friday as I had my appendix removed yesterday, however jpeg looks good. You have my full approval. You have the best photoshop tutorials on the web. Many thanks
Thanks Richard, and great elephant picture!
Would love a tutorial on taking a vector (CAD) drawing or any line drawing, and making it look like a realistic blueprint in Photoshop.
I have a lot of problems moving back and forth between Illustrator and Photoshop combining an illustrator file with PS or the other way around. Maybe it has to do with Smart objects. I don’t know. Sure would be helpful especially understand when to rasterize or not.
I will be putting together a fine-arts website of my work. Is there a process for optimizing jpgs so that they closely match the original (from which prints are made)? I am concerned with color/tonal fidelity; is it enough to “Export As” jpeg, setting dimensions and embedding sRGB? If there’s more to it, a tutorial on preparing images for the web would be great! Thanks.
Great tutorial, like always!
Great tutorial, Colin!!!!!!! Loved it.👍🏼 Colin it would be nice to see you do more of video editing/manipulating. Especially size rendition for different kind of platforms. Thanks once again for your amazing work.
This is very helpful, Colin! But I’m a real estate photographer and often have a problem with dappled sunlight casting a shadow on the exterior of a home or the grass. Is there any way to correct this without having to mask every little spot of shadow? I can send you an example if it would be helpful. Thank you so much!!
Please send an example
Great tutorial. I have several images of the exact same scenario that I will be revisiting now and experimenting. Many thanks and just love your Photoshop tutorials – always learn something new
Hi Colin, another great tutorial!
If the problem had been just the opposite, that instead of a shadow it had been a very bright sunlit area (not blown out) could you have applied a similar technique?
Thanks Keith
To a certain degree, digital photos hold mode shadow detail than they do highlight detail
Thanks Colin …I just ordered/downloaded your selections e-book…sure hope I can maste selections 1/2 as good as you! I have struggled for a very long time with selection’s etc. It’s like one person already commented…YouTube videos just don’t give you “all” the information you need. I am going to try this remove shadows immediately…from images I shot at a wedding. Thanks so much
Hi Colin This tut is of huge help with wildlife images where you do not get to choose the lighting. Thanks very much. How about a tut clarifying the hidden secrets of the Clone source panel?
I only have CS6 – are there tools I can use to replicate the camera raw filter that you used here?
yes, you have camera Raw, right click in Bridge and choose open in CameraRaw
Very interesting TUT. How would you do this in PS5CS where you cannot just switch from PS to PS Raw Filter.
Is it possible?
Can you update this with the recent version of Photoshop and the Camera Raw filter? The interface doesn’t match and I couldn’t find some of the options used in your workflow.
They are all the same options, just in different places. I will consider your request though as its a good suggestion.
How to remove colour which were shaded to an image or picture and return to original picture or image
Wow, a very helpful tutorial, thank you! I’m often “fighting” with such issues.
The ability to create realistic drop shadows in PS continues to elude me. Some more tips and tricks would be appreciated.
I recently made a tutorial on making shadows, use the search feature to find it
Great Job with such an in-depth and detailed tutorial!