
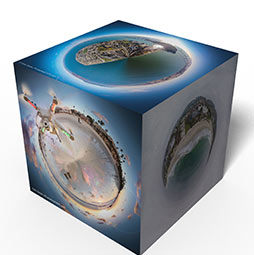
Make 3D Photo Cube in Photoshop (and animate it)
Here is a fun tutorial. I’m going to show you how to wrap your photographs onto a 3D cube. Don’t worry if you have never done 3D before, this is really easy. These instructions are for CS6 Extended (Standard doesn’t include the 3D or video tools) or all versions of CC, If you have an older version of Photoshop that doesn’t have 3D, I have a manual way of doing it here.
(Note, at the end of this tutorial (bottom of page) I show you how to animate the cube)
1.
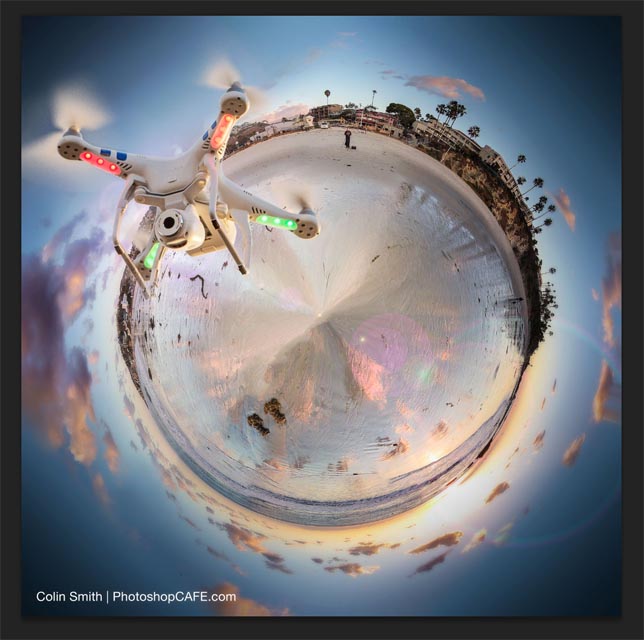
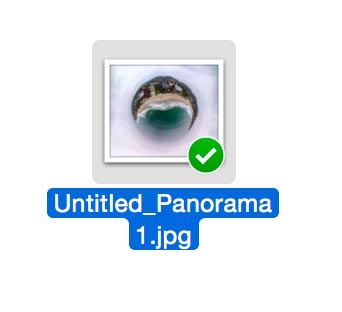
Start with a square photograph. In this case, I’m using my aerial Tiny Planet photos. You can learn how to make those here.
2.
Time to put it on a cube.
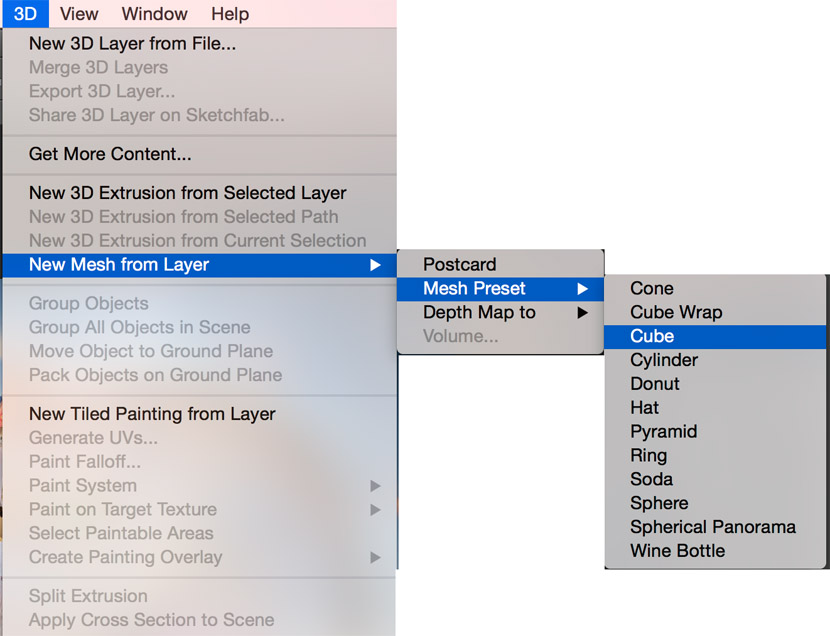
Choose 3D>New Mesh From Layer>Mesh Preset>Cube
 You will see an option to with to the 3D workspace, accept this option
3.
you will see some tools at the top, grab the tumble tool and drag on the screen to rotate the cube

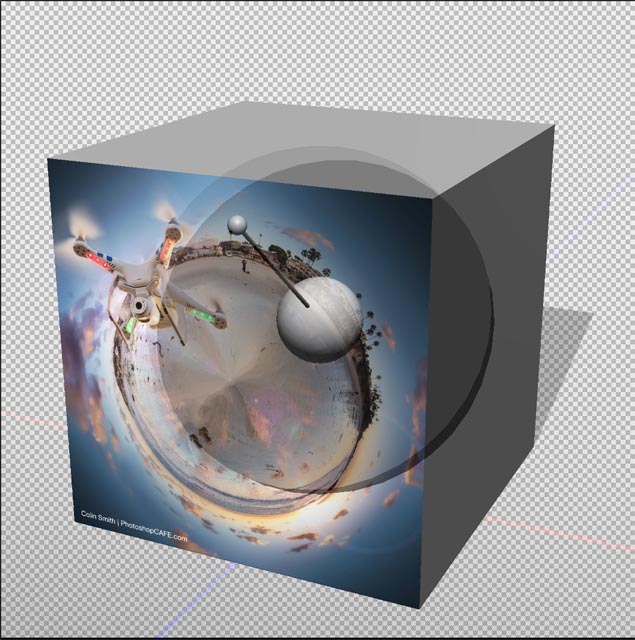
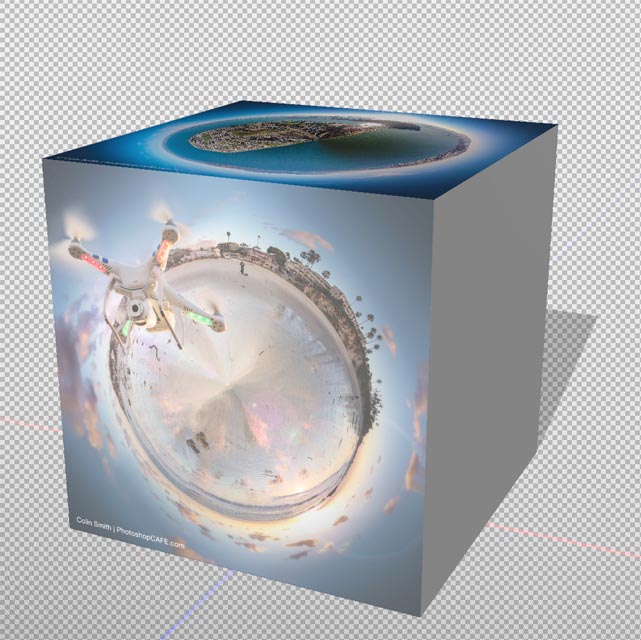
Your photo on the front face of the cube, cool!
4.
Let’s add an image to a different face
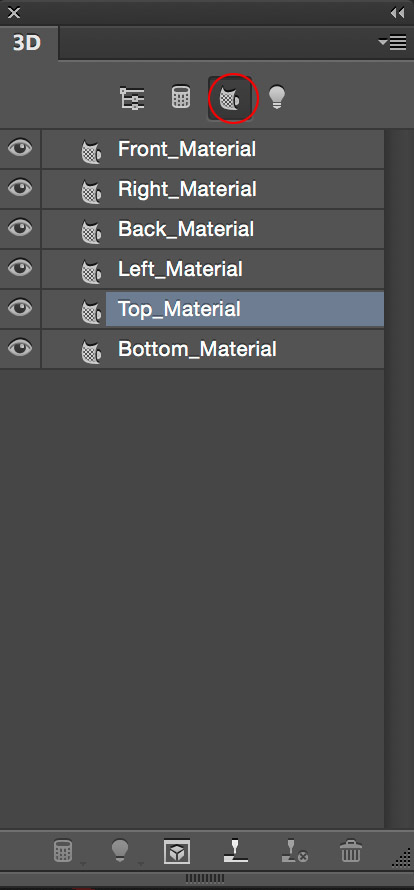
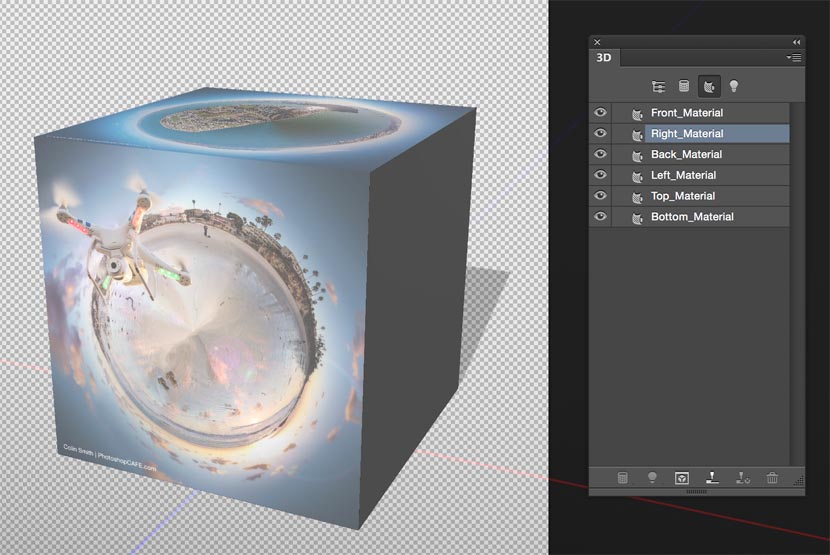
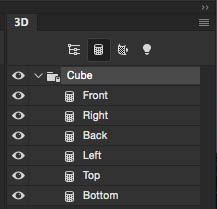
Choose the 3D panel. Click on the 3rd button across, this is the materials panel where all the textures (images) are controlled from.
Choose the Top_Material
5.
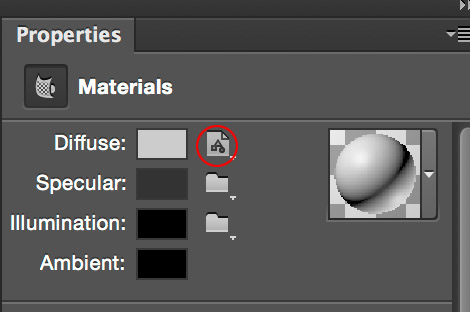
Choose the Properties panel, this is where you can use an image for the texture.
Click on the icon to the right of the Diffuse
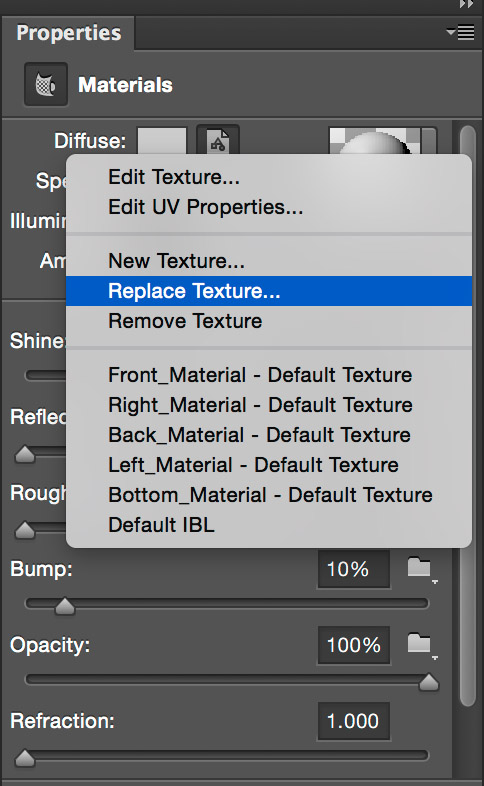
Choose Replace Texture
6
Navigate and select the photo to use from your computer
7.
The image will now appear on your cube. Pretty easy huh?
8.
To add images to each surface, you are repeating the steps above for each face. We are adding another photo to the right face now. Click on Right_Material form the 3D panel.
Choose Diffuse from the 3D panel and select photograph
9.
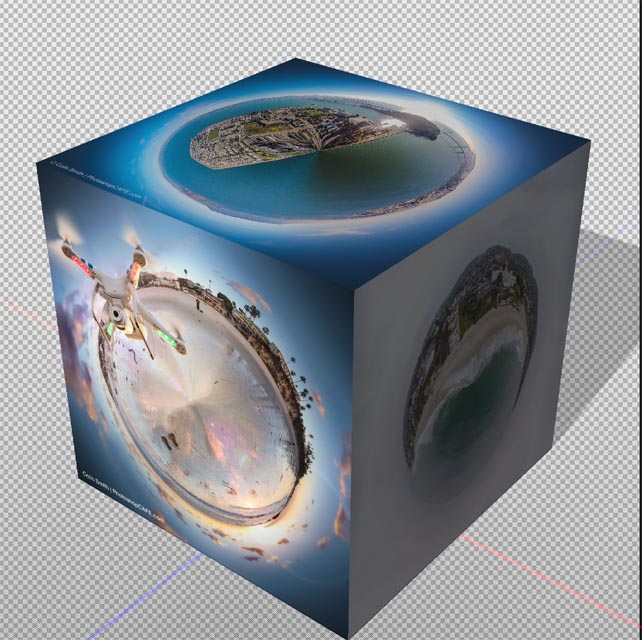
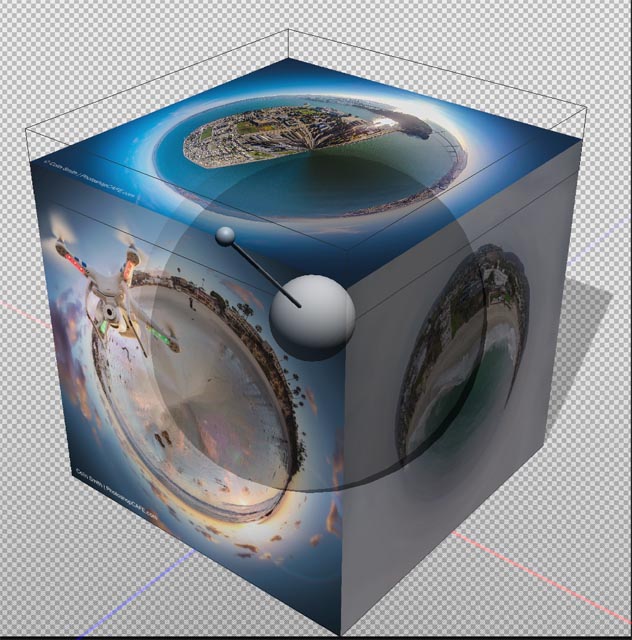
We now have images mapped to all the visible faces.
10.
Let’s dress it up a bit and finish it.
What we need to do is get the lighting all set up to make the cube appear how we want.
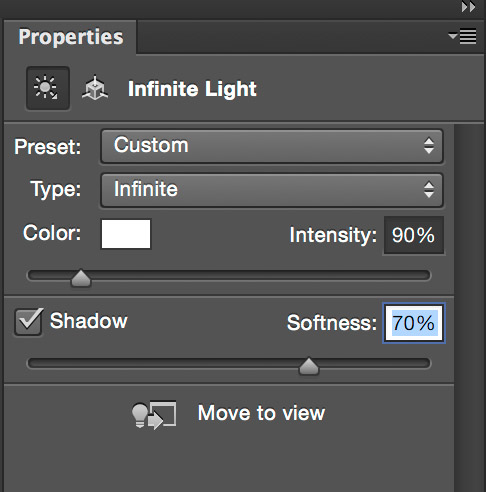
On the 3D panel, choose the Lightbulb icon to switch to the Lighting options.
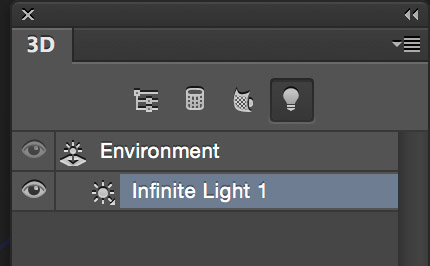
You will see a Lighting widget (a ball with a stem)
Click and drag with this to set the lighting direction. (You can also Shift+Drag on the shadow)
11.
To make the shadow softer, Change the Softness amount in the Properties panel.
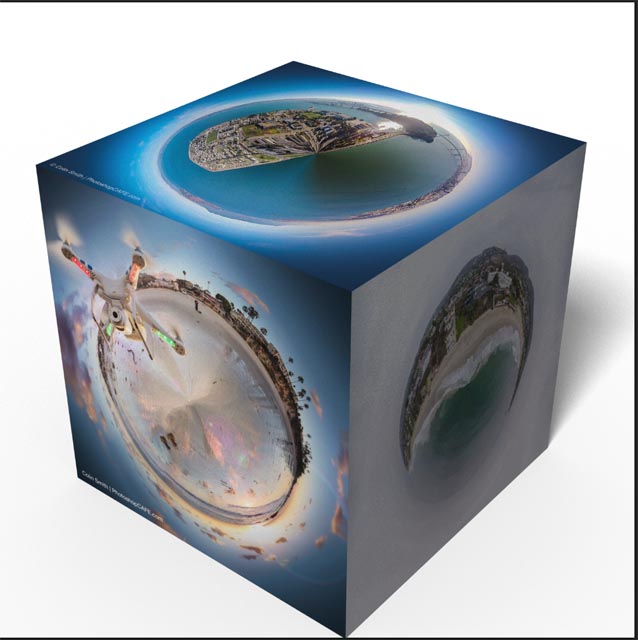
And here is your Final cube. Press Cmd+Shift+Option+R (Ctrl+Shift+Alt+R -windows) to render. Photoshop will create a higher quality purview when you render the 3D model and Lighting, this can take a while.
How to animate a cube in Photoshop
Ok, once you have made the cube following these written instructions, or the video at the top, here is how you can animate it!
Step 1
Open the timeline and click the Create Frame Animation Option

Step 2
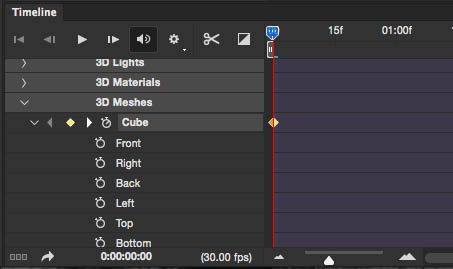
Move the playhead to frame 1 if it isn’t already there.
Find the cube under material. Click the stopwatch as shown
Step 3
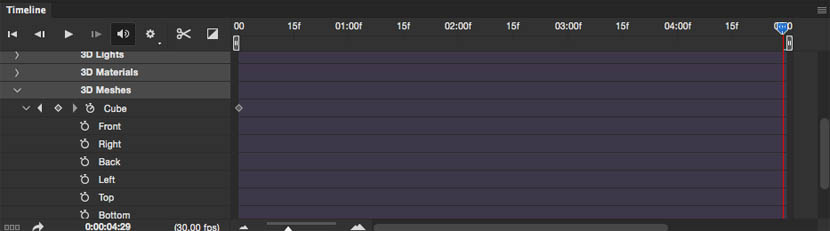
Move the playhead to the end of the timeline.
Step 4
Make sure you have selected the 3D panel and choose the materials tab. Choose Cube.
Step 5
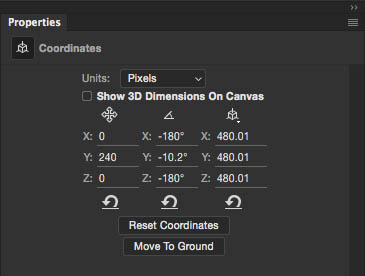
Open properties and look for the Y axis rotation
Change the y-rotation, you should see your cube spin in the main window.
Step 6
A new keyframe will automatically be added to the timeline.
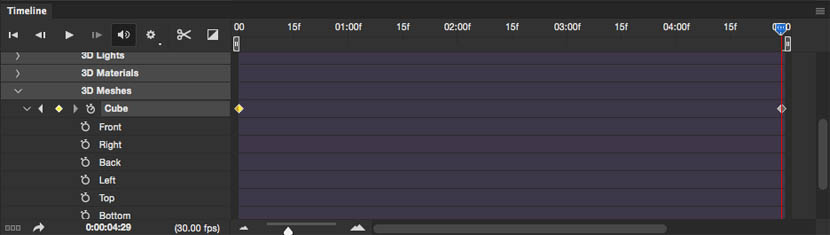
Press play in the timeline to see the cube rotate.
Time to Render the animation to video
Step 7
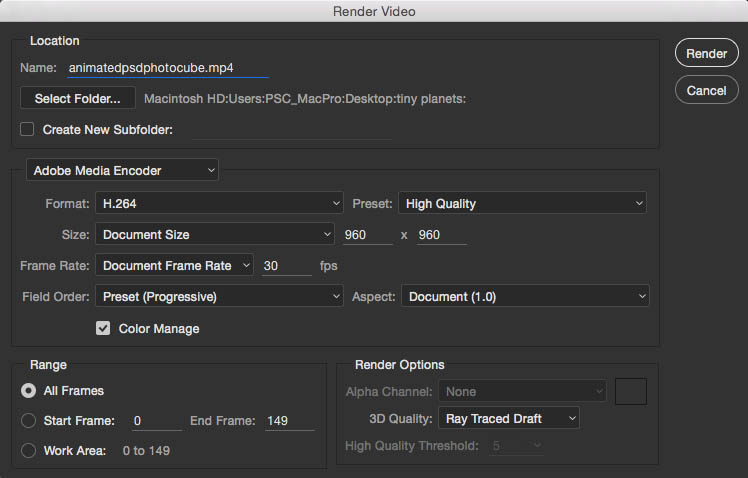
Choose File> Export>Render Video
In the bottom, Under Render Options, you will see 3D quality.
Step 8
Select raytraced draft to test the animation. This will render somewhat crappy, but it’s faster and lets you see what the final will look like.
Step 9
If you like the video, export to video again. This time, change the 3D quality toRay Traced Final.
Now, it will take hours to render, but the quality will be great. (Make sure you hit render when you can go away and do something else).

I hope you enjoyed this little tutorial. Add a comment and let me know what you think and let me know what types of tutorials you will like to see here at PhotoshopCAFE!
See you at the CAFE
Colin
PS Don’t forget to follow us on Social Media for more tips.. (I've been posting some fun Instagram and Facebook Stories lately)
You can get my free Layer Blending modes ebook along with dozens of exclusive Photoshop Goodies here

19 thoughts on “Make 3D Photo Cube in Photoshop (and animate it)”
Leave a Reply
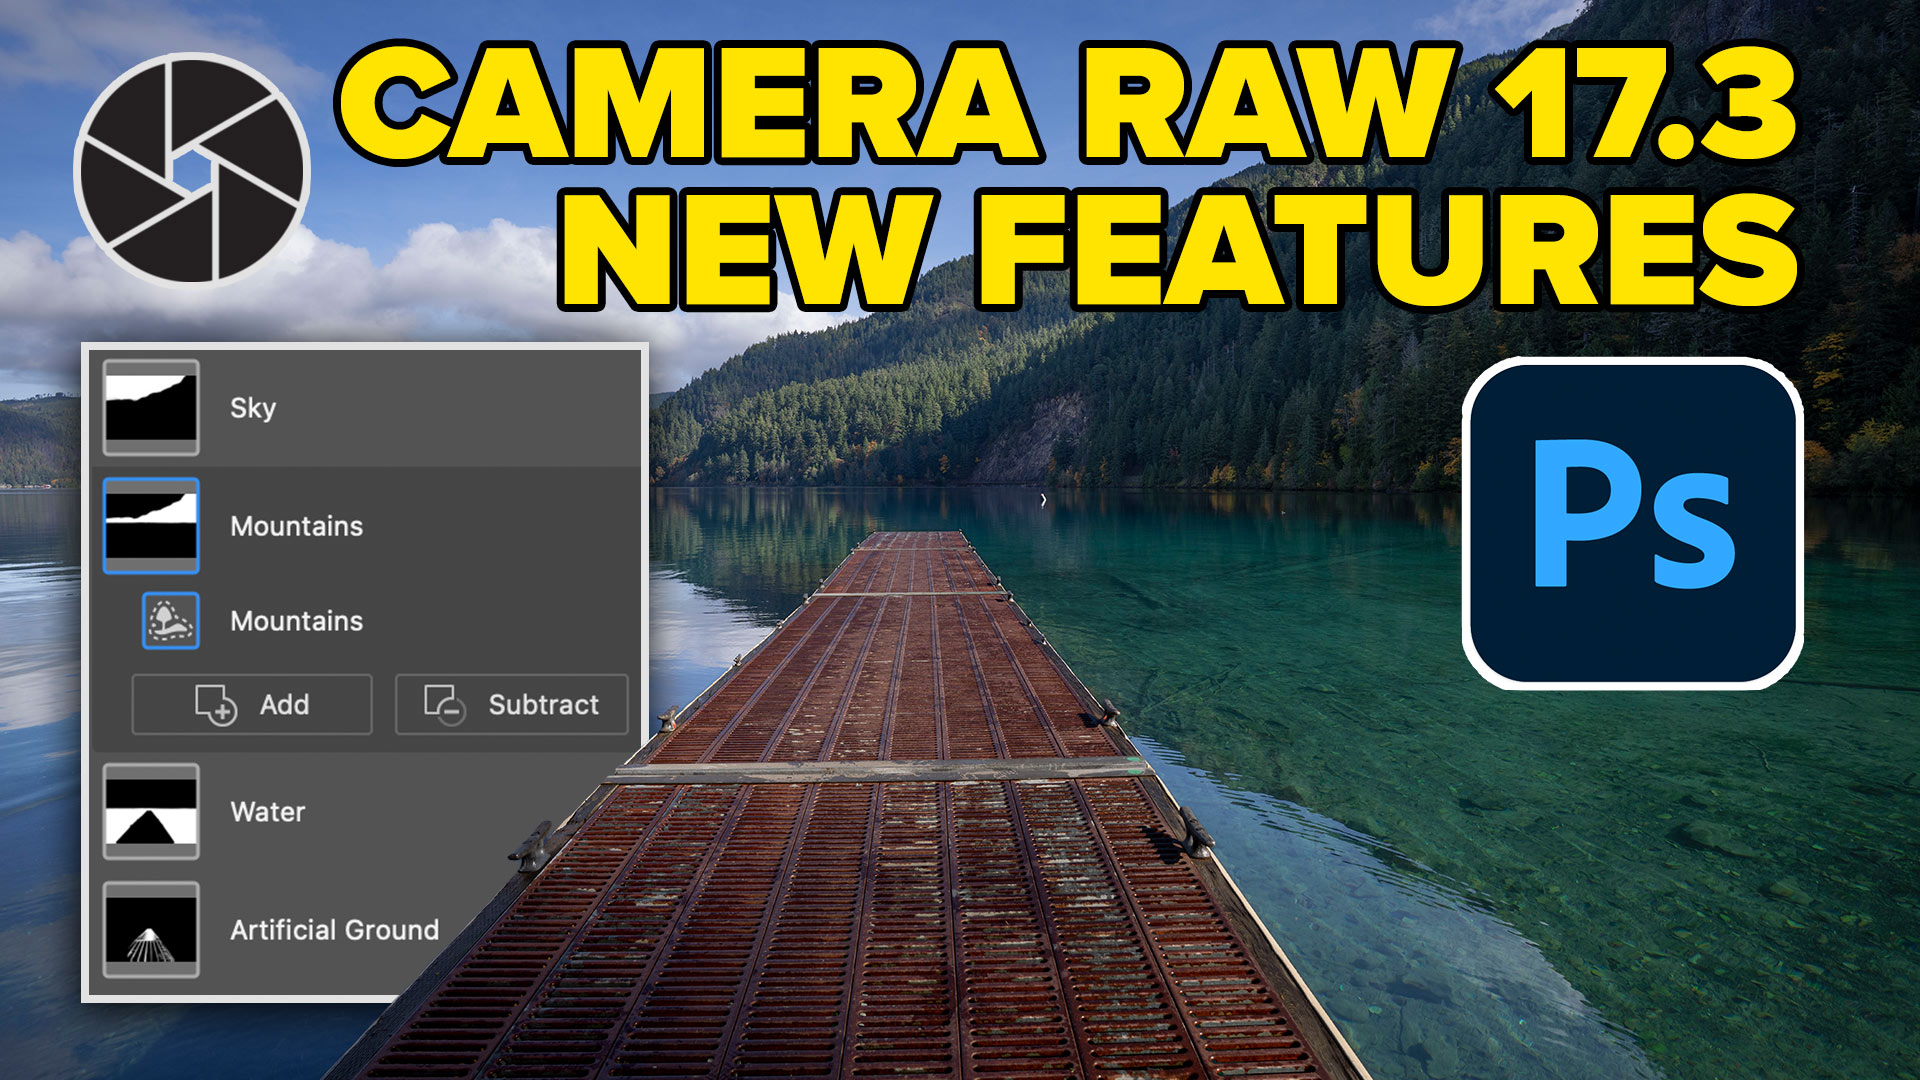
New Features in Adobe Camera Raw 17.3 ACR in Photoshop 2025 April update. Landscape Masks and reflection removal updates

Here is my Version of the ever popular Segmented Pipes photoshop tutorial. A staple for interfaces.Enjoy
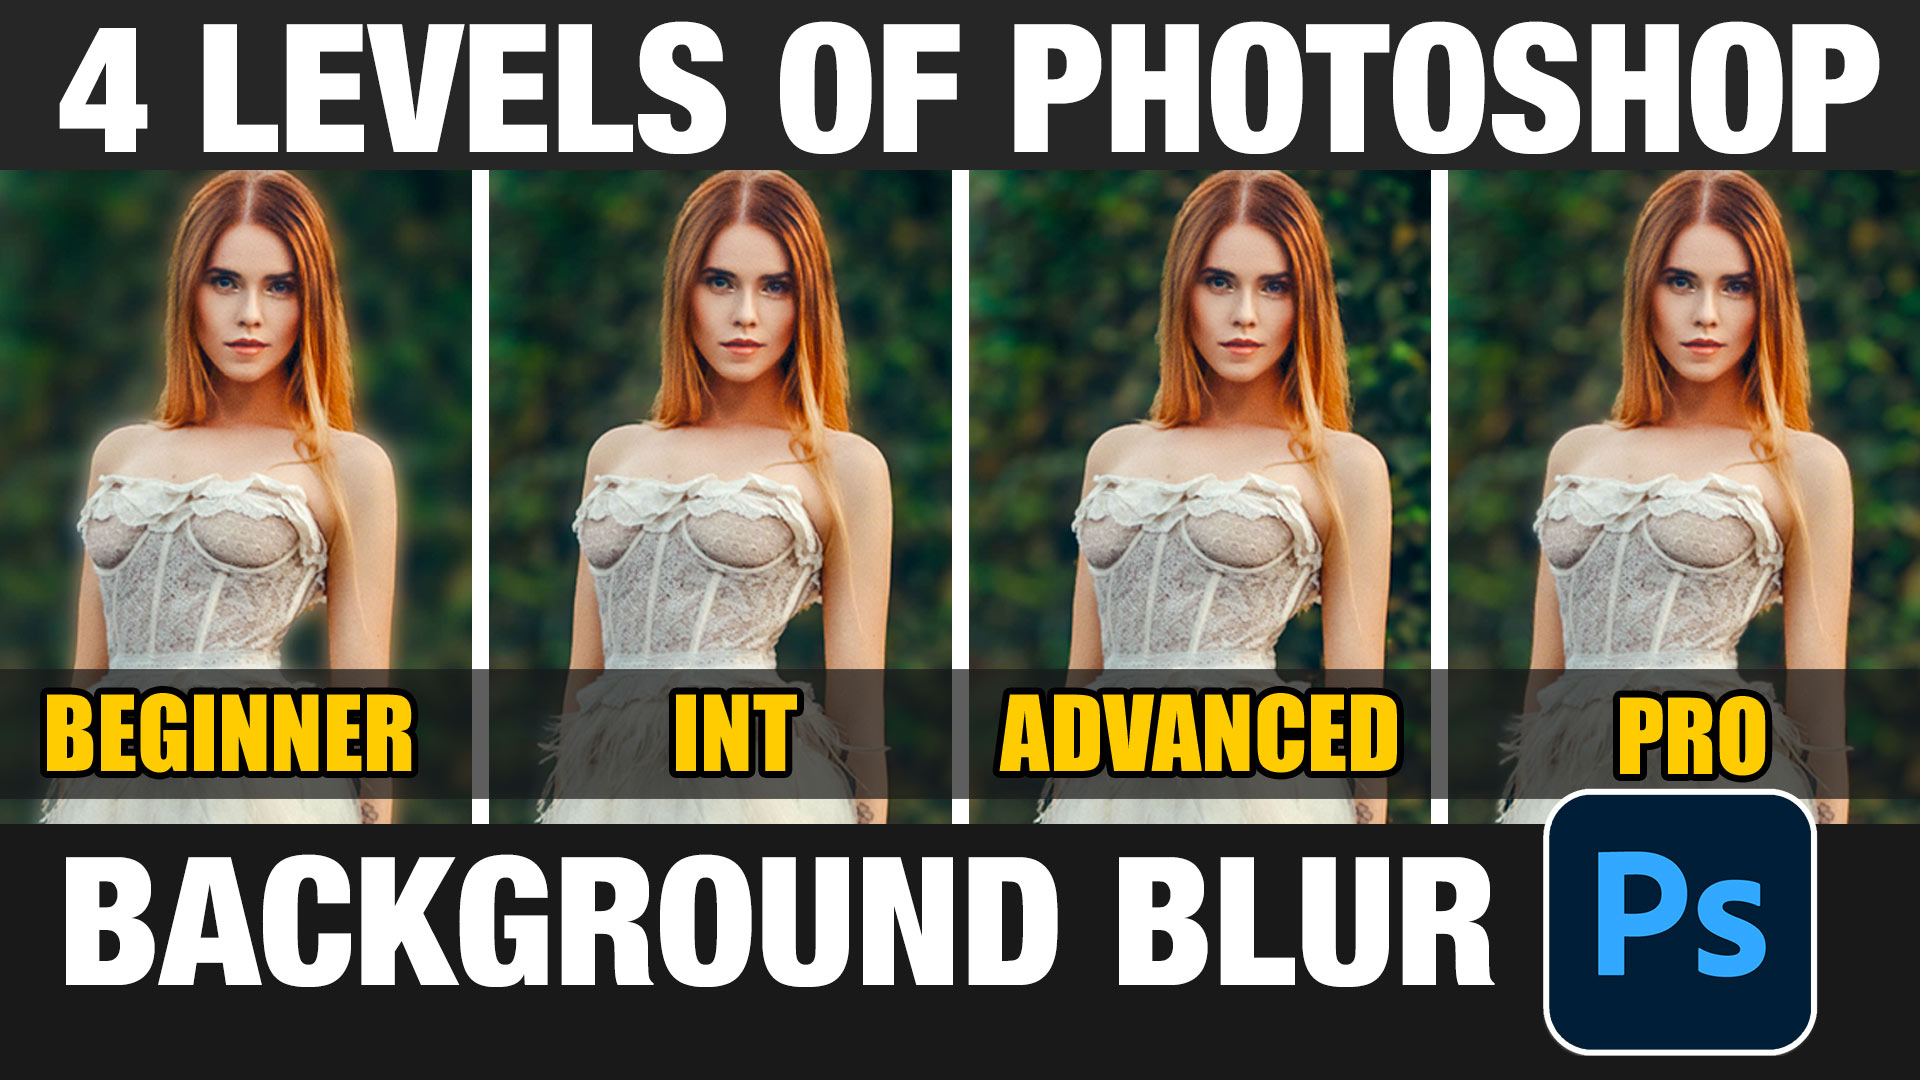
4 levels of background blur in Photoshop, ultimate Blur background tutorial


so uhm, what if there doesn’t pop up any 3D? Is that something I need to download, or is it my school-pc which is lacking of power?
SophusLJ@ that means your photoshop version is either older or not extended…
Hi Colin, first of all thanks a lot for all this help you bring, you make it much easier for us the beginners.
I’m working in a project where i want to make a rubik’s cube with images (by face not by square by square), and i would like to know if there is a way to put a grill (to make it look like a rubik’s cube) after doing the 3d cube (or i just have to do it before putting the images?). And the other question, if it is possible to cut the 3d cube, like to make it seem is moving, also like a rubik cube.
🙂
Thanks
see you!
(sorry my english is not my native language)
You could fake it with normals (google 3D normals in Photoshop) you could animate each part too, but that would be a lot of work and too much to explain here
Thanks for the tutorial. Is there any particular size that the images need to be? I also really learnt a lot from the “Remove powerlines (content aware)” tutorial.
not really, you can make it any size you like
Thank you.
Really cool guide. I haven’t done much regarding animation in photoshop but will definitely try it out now! Thanks.
The tutorial is good teacher. Thanks
I tried your tutorial but the cube doesnt rotate after setting the keyframe (and Y rotation) in the end of the timeline. Should i render the 3d object first and then animate? enthousiastic at first but some hours later…
Hi, thank you very much for this site it’s really amazing idea to teach people and giving them your help and experience.
Hi Colin, Wonderful tutorial. Problem outputting cube spin. Changing the parameter for the cube’s rotation value to 360 or even 359 on the Y axis doesn’t seem to work. Set Cube mesh to rotation keyframe at x-0, y-0, z-0, go down the frame animation timeline, change Y rotation to 360 or 359 and no animation. Try to change the rotation using the Rotate object tool and anything greater than 180 won’t go. Any suggestions?
Hmm, it was a long time ago I made this tut. Ill have to look into doing an updated one on 3D animation. Let me see if I can find time to trouble shoot this, just don’t have the time right now.
First of all, this is not Frame Animation, but video animation.
Secondly, I cannot watch video on Youtube from China. Anyway, i tried alot times to rotate 3D objects in CS 6 or PS 2019, it doesn’t rotate like i expected – around Y axis. it rotate in a mess.
If i set timeline based on 3D cube like what you do above, the cube doesnt rotate at all.
I can only do animation based on 3D camera position. I don’t know.
Thanks for advice!
Tiger
I love this tutorial. Any advice on how to create a 12 sided 3d (dodecahedron) cube.
You can import any 3D model in .obj in Photoshop
najbolji tutorijal koji sam nasao !sve radi,odlicno uradjeno!
best tutorial i found! everything works, great done!(sorry google)
Thanks, Colin! This is great! One key item that I tripped over when first trying to use the 3D is that the source images for each of the faces MUST be in RGB, not CMYK. Also, you need to be in that mode when you open your first image.
That being said, I am trying to create those old school type alphabet blocks where I have the text letters on top of the images that I placed on each face. I’ve had zero luck finding a tutorial about placing text with the text tool onto the faces of a 3D object. Do you have any hints? Is it possible to have more than one layer on each face, so if I have individual images of the letters I want to use on the faces, I could stack the layers on each face so the letter is on top of the images originally placed on each face of the cube? Thanks again!