
Particle disintegration effect in photoshop tutorial Avengers Infinity War meme
This tutorial shows how to create the Marvel Avengers, Infinity Wars disintegration effect in Photoshop. I have put my own twist on it with the person turning into waves of particles as if they are being turned into dust I call this the particle disintegration effect and I have made it easy for you in this free PhotoshopCAFE tutorial.
Marvel Avengers, Infinity War DUST effect: How to create a disintegration dust effect in Photoshop.
“Mr Stark, I don’t feel so good.” Here is how to recreate the disintegration effect from Marvel Infinity wars.
Now, this kind of effect has become very popular, especially since the disintegration memes started up. You are kind of seeing it everywhere and there’s a lot of different things we can do. Splatter we can do, dispersion we can do disintegration by using different types of brushes. And the effect is actually really easy. I am going to show you how to do it right now.
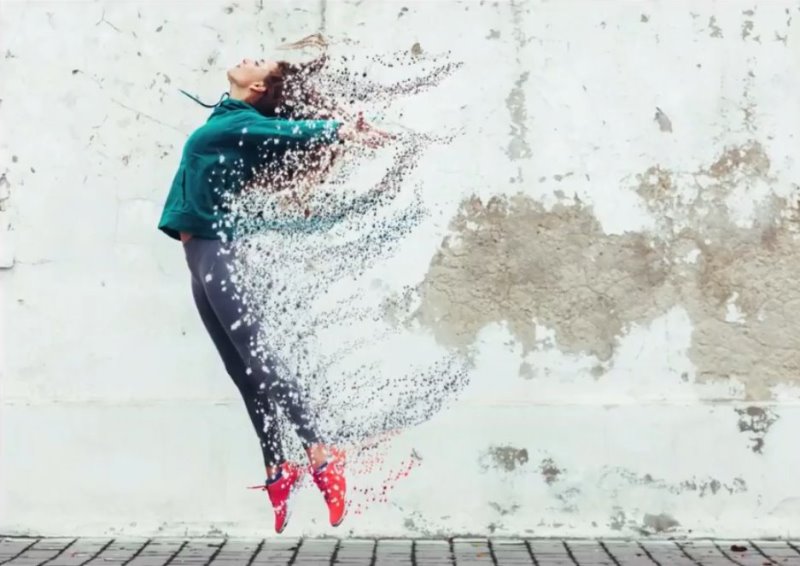
I started with this photo.

Step 1
Select the background layer.
Click Ctrl J for Windows or Command J for Mac to copy it.
Click Ctrl J/Command J again to copy it once more.

Step 2
Rename the newly created layers.
I named these “inside” and “outside”.
Hide the inside layer

Step 3
Select the Outside Layer.
Grab a Lasso Tool
![]()
Make a selection around the person in the photo.

Step 4
You now want to fill with Content Aware.
Press Shift+Backspace for Windows, Shift+Delete for Mac.
Color Adaptation selected.

Click OK.

Press Ctrl+D to deselect.
Step 5
Select “inside” layer and turn its visibility on

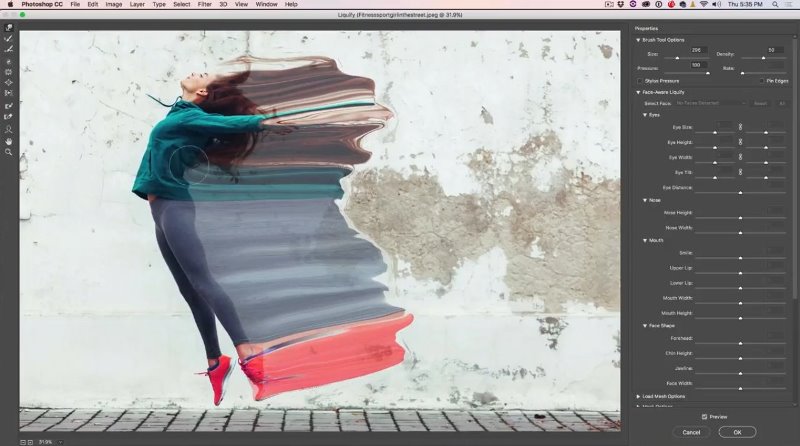
Go to Filter>Liquify
Increase the size of the brush by pulling up the size in the properties panel.
Grab the Forward Warp Tool.
Grab and drag with your brush.
Step 6
Get Freeze Mask tool. ![]()
By using this you protect the specific areas from changes.
Paint the lower part of the leg with the mask.

Grab the Forward Warp Tool.
Grab and drag the area around the other leg with your brush.
Click OK.

Step 7
Now we hide the Inside Layer, by masking it.
Hold down Alt key/Option key on Mac and click the mask icon to create an inverted mask (black).

Do the same for the Outside Layer.

Step 8 Getting the brush you need to apply a dispersion splatter.
Grab your shatter/splatter brush, or Get one through creative cloud if you are a subscriber
(If not an all apps member, try searching places like Deviant Art of Brushezy for free brushes and skip to step 9)
Go to Adobe Creative Cloud>Assets>Market
Do a search for splatter brush.
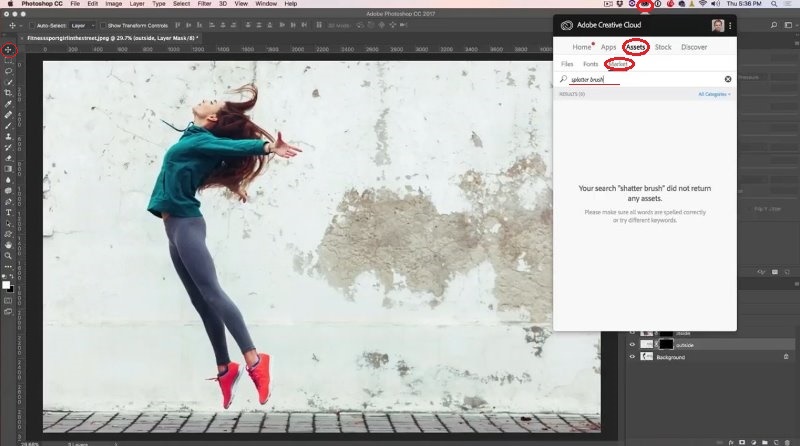
Add the brush to your library.

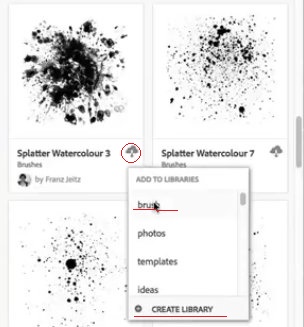
Click on that little icon. ![]()
Create a new library and click on it to download the brush or just add the brush to the existing library.
To see all your brushes you go to Window>Libraries
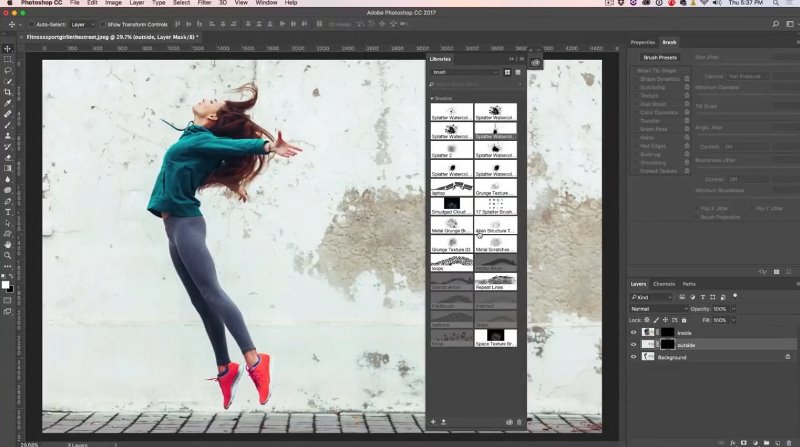
Step 9
I’m going to modify the brush.
Go to Brush Panel, Window>Brushes
In the Brush Panel select Shape Dynamics.
Increased Size Jitter
Under Control, choose Pen Pressure if you want to use a Wacom or Surface pressure sensitive pen.
Pulled up Angle Jitter a bit.

Step 10
Select Scattering right below Shape Dynamics.
Increase Scatter as well as Count and Count Jitter.
Under Control select Pen Pressure. (If you are using a Wacom tablet)

Close the brush panel.
Make your brush smaller by pressing the Left Bracket Key.
Step 11
Open the Layers Panel.
Now we’re going to apply the effect to the Outside Layer.
Select Outside Layer Mask.

We have the brush selected.
White as a foreground color.
Opacity 100%.
Begin to gently paint inside the person. Not too close to the edges just yet.
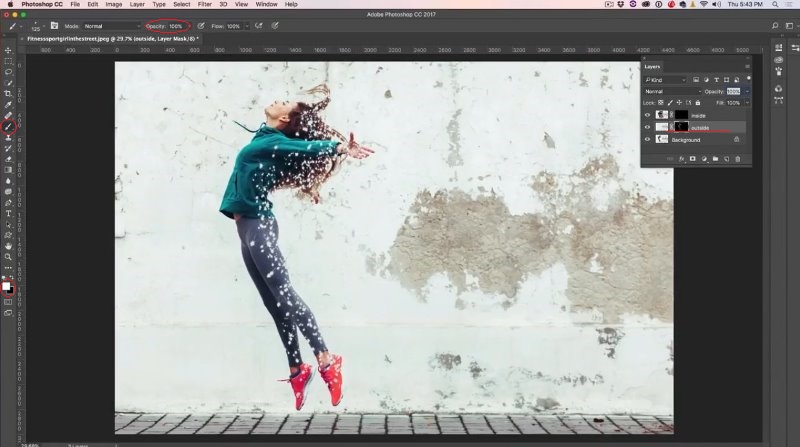
Make the brush smaller by pressing the Left Bracket Key.
Paint on the edges, so that the edges start to disintegrate.

Step 12
Select Inside Layer Mask.

Make a brush a bit bigger by pressing the Right Bracket key.
Paint on the edges to add dispersion there.
Step 13
Make the brush really small by pressing the Left Bracket Key.
Paint stream-like or wave-like shapes.
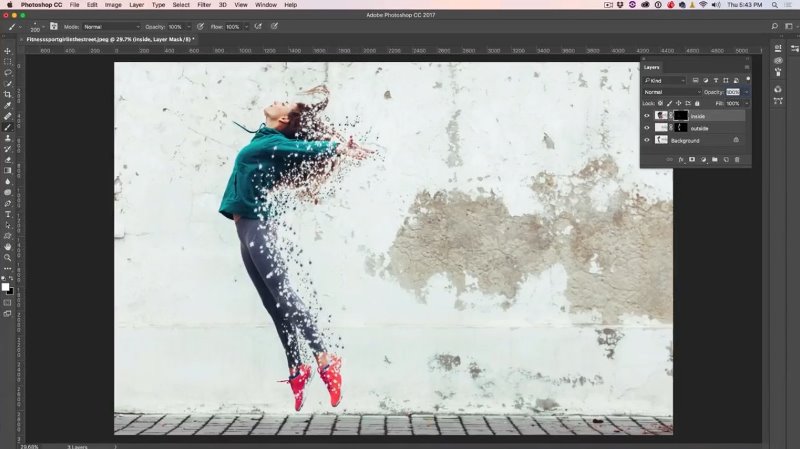
And here is the end result:

Isn’t this effect fun?
Now you can disintegrate your friends and turn them into dust “Mr Stark, I don’t want to go” (Watch the Avengers Infinity Wars if you don’t get it).
Add a comment. Also, don’t forget to sign up for our newsletter. New tutorials are on their way and by signing up you make sure not to miss out on any!
And until next time, I’ll see you at the Cafe.
Colin
PS Don’t forget to follow us on Social Media for more tips.. (I've been posting some fun Instagram and Facebook Stories lately)
You can get my free Layer Blending modes ebook along with dozens of exclusive Photoshop Goodies here


14 thoughts on “Particle disintegration effect in photoshop tutorial Avengers Infinity War meme”
Leave a Reply

The DJI Mavic 2 Pro and Mavic 2 Zoom have been announced this morning. A big feature is hyper lapse,...
How to light a photo in lightroom or Camera RAW. How to add a rim light, floodlight and balance light...
How to Light a photo in Photoshop with Clipping masks. Simulate Lightroom _ ACR Masks in Photoshop


Thank you Colin! You are amazing and always inspire through your education. I met you briefly at MARS and I hope you’ll find a way to come back so I can take your class next time!
Hi Colin,
Wow, that pretty darn cool! I’m definitely going to try it out on some photos.
Thanks,
Dennis
Learned a great new effect. Thanks. William
Very cool effect! Plan to try it out! Thank you!
I LOVE the NEW site, Colin! So nice!!
Su
Nice tutorial I like it
Thanks so much…..I’ll give it a try
Mr Stark, I don’t feel so good
Photoshop… I don’t feel so good…
Is there a work around in PSE?
I already have cs5 superguide, cs6 superguide, destination and blending mode
Don’t forget to share your images with the community on our facebook group https://www.facebook.com/groups/53878338135/
Been wanting to try this effect out for ages- your tutorial really makes it nice and easy plus logical- I like the way you give us both the video and written explanation- intend to do many more of these tutorials.