
How to make animated rain in Photoshop or After effects
Making animated Rain in Adobe Photoshop CC
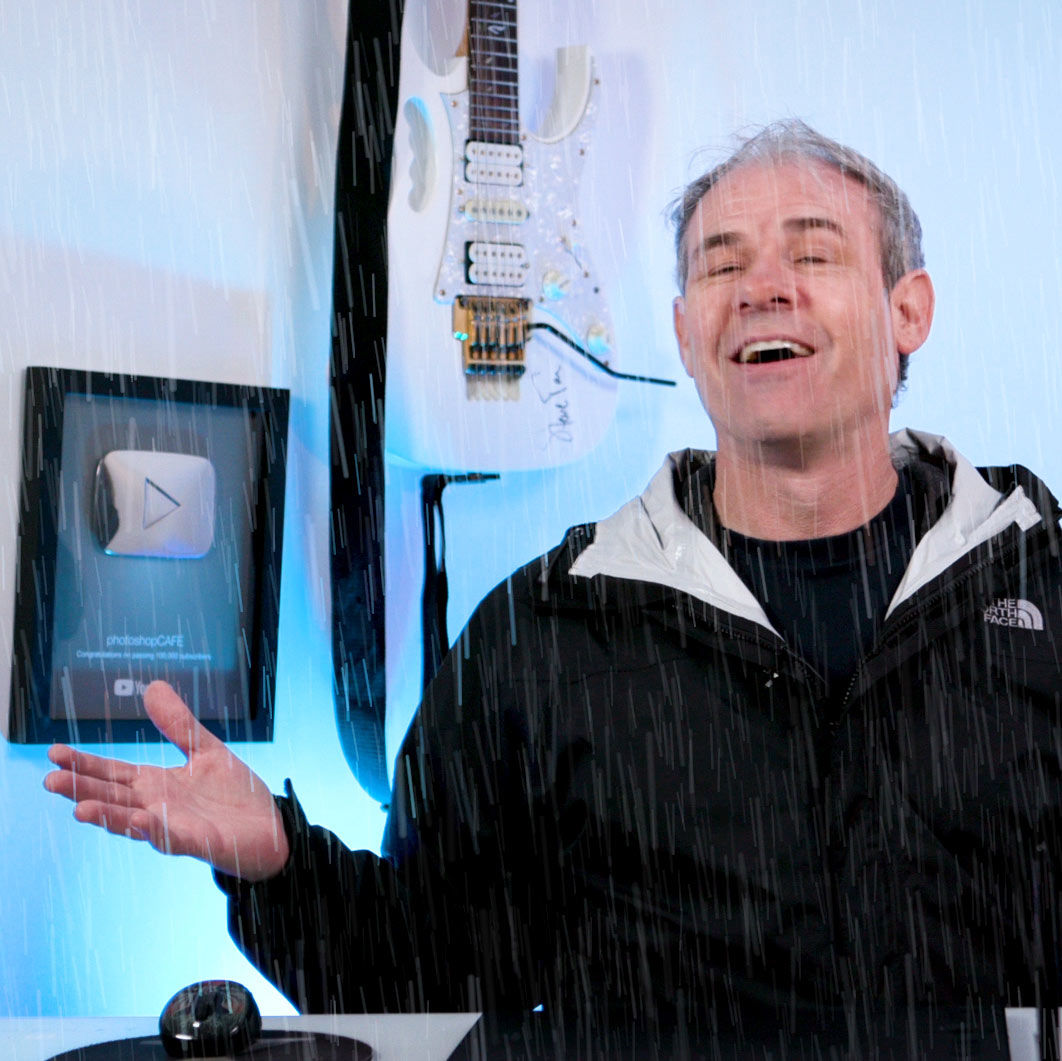
Who says you can’t control the weather? Let’s make it rain in Photoshop. I will now walk you through the steps for creating realistic, animated rain in Photoshop, one drop at a time.
Watch the video to see the steps as well as the results. For those who ask “why not do it in After Effects?” I have also added an After Effects, make it rain tutorial at the end of the video.
To make it rain in Photoshop we are going to make a single drop and animate it. Then, Ill show you how to leverage smart objects and nested animations to create a complete downpour.
Step 1. make a raindrop
Let’s start by making a raindrop. Remember though, it needs to be a streak with motion blue to look effective. So, we are actually making a dash.
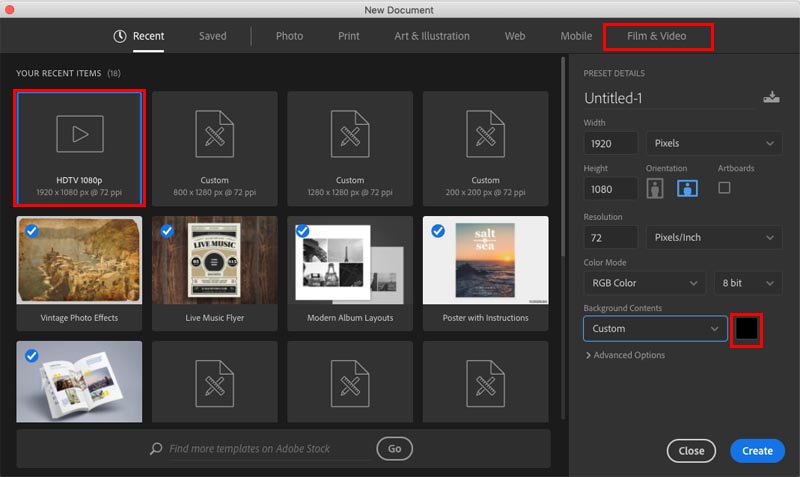
Start with a new document, I made it 1920×1080 do it will work for HD Video.
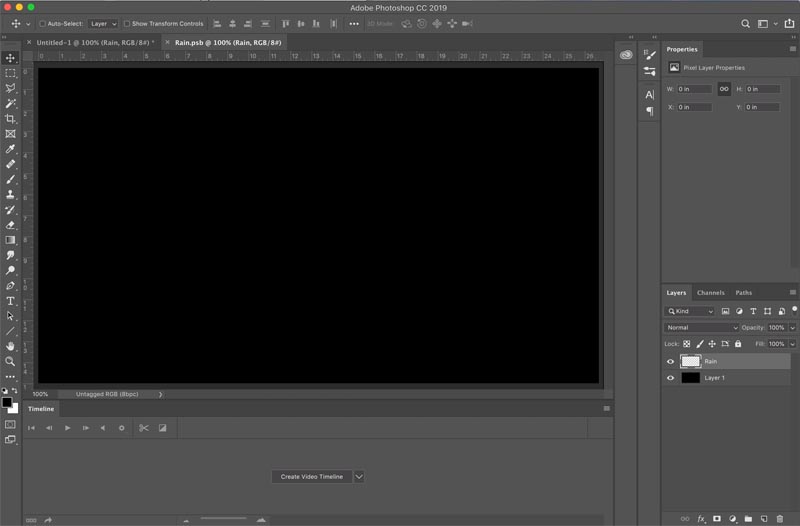
Create a new layer (called rain)
Choose a small hard-edged white brush
Tap once to create a dot
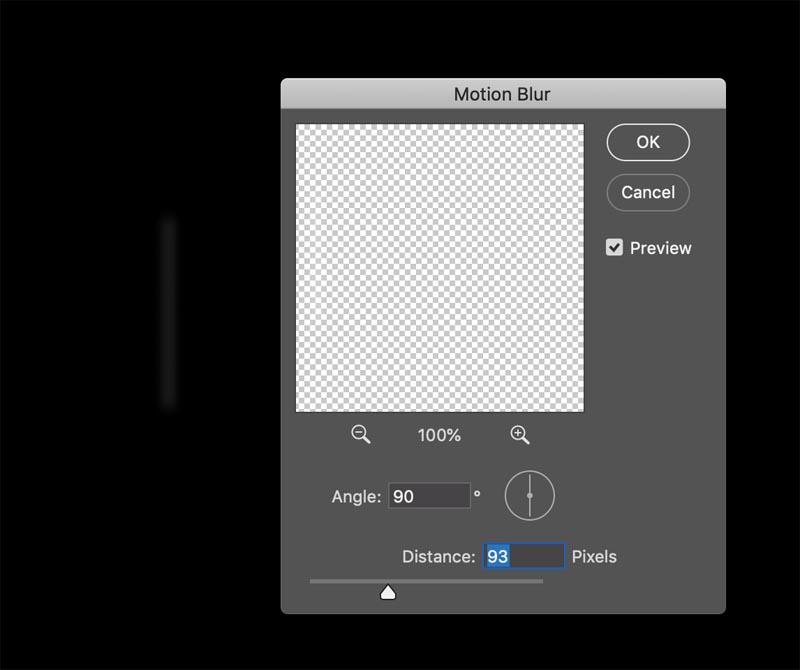
Choose Filter Blur>Motion Blur set it to around 93 distance and choose 90 for the angle (It will be much easier to animate in at 90deg and rotate the result later, than to try and animate in at an angle. I’ve seen other tutorials where they animate the angle and the rain looks like it sliding sideways, not a good look.
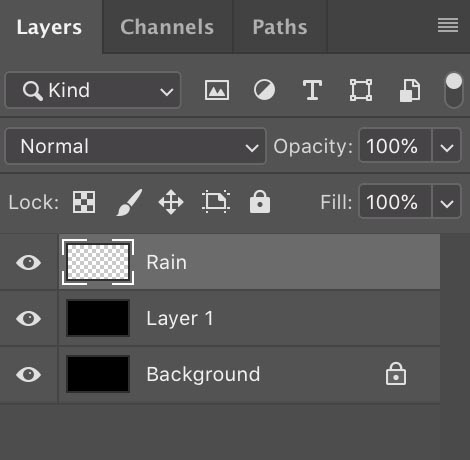
If it’s hard to see the dash, Press Ctl/Cmd+J a few times to make a few layers of the dash. Select them all and press Cmd/Ctrl+E to merge them into a denser version (I use a blurred dot rather than a line because it tapers the ends a bit more naturally than a hard Line.)
Step 2. Making the Smart Object animation
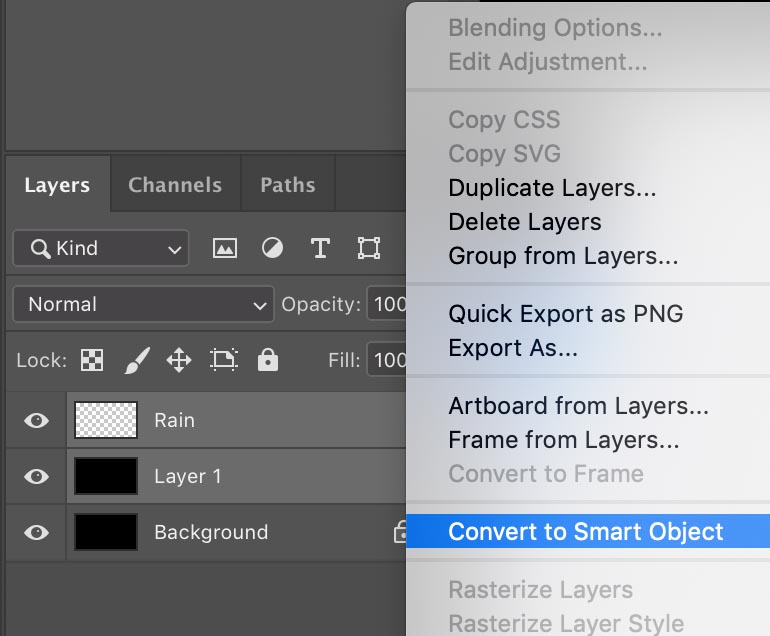
Copy the background layer (we will use this to create a smart object the same dimensions as our document (otherwise it would be the size of the drop and won’t work) see my in-depth tutorial on Smart Objects here
Choose BOTH the black layer and the raindrop (Hold Shift and click to select both)
Right click and choose Convert To Smart Object
Double click the Smart Object in the layers panel to open it in a new document.
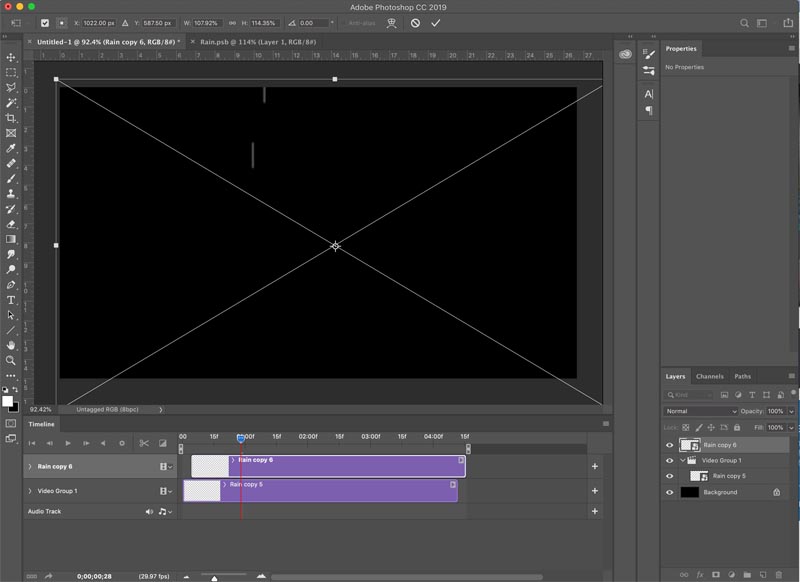
Step 3. Animating the Raindrop
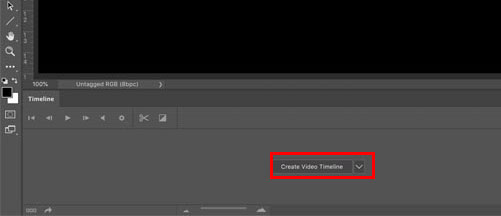
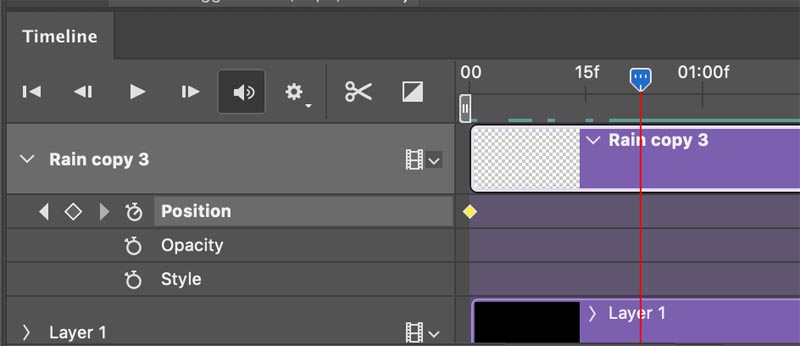
Choose Window>Timeline to open the timeline.
Click on Create Video Timeline in the timeline
Open the options in the timeline and click on Position stopwatch to set the first keyframe
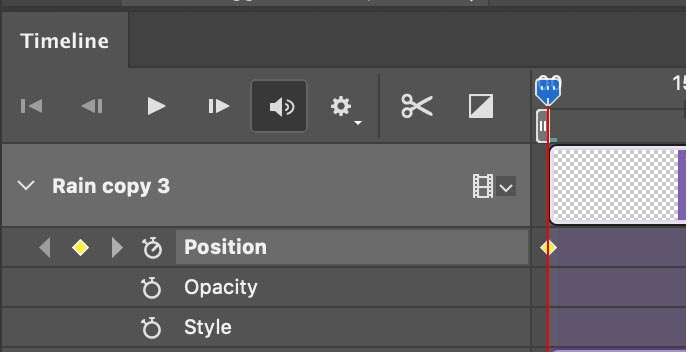
In the document window, move the raindrop to the top, so it’s just off the screen. This is the start of the animation.
Move the playhead forward to a little less than 1 second (Changing the timing and other details are in the video above if you need more help).
Holding down Shift to constrain the movement to perfect vertical, drag the raindrop to the bottom, just out of sight.

Press the spacebar to playback. You should see the raindrop move from the top to the bottom (If not, please watch the video)
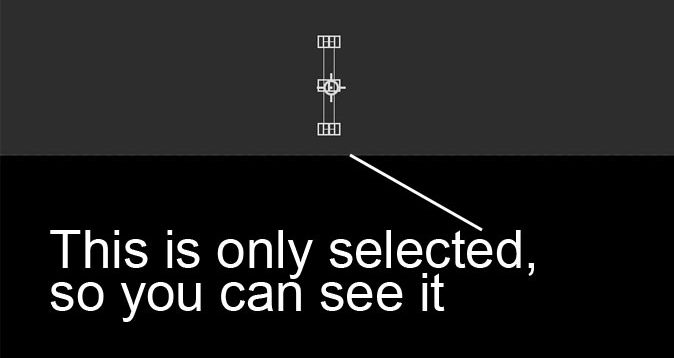
Hide the black layer )it was just a guide so we could see and also to force the 1080 HD size.
Drag the right side of the timeline layers to the left to match the length of the animation.
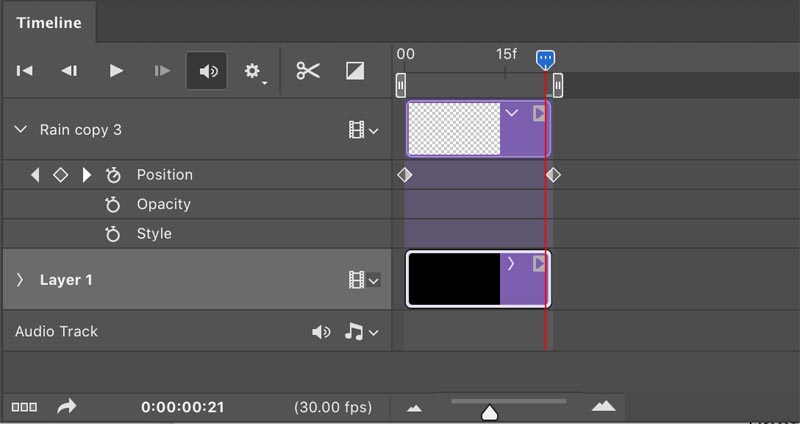
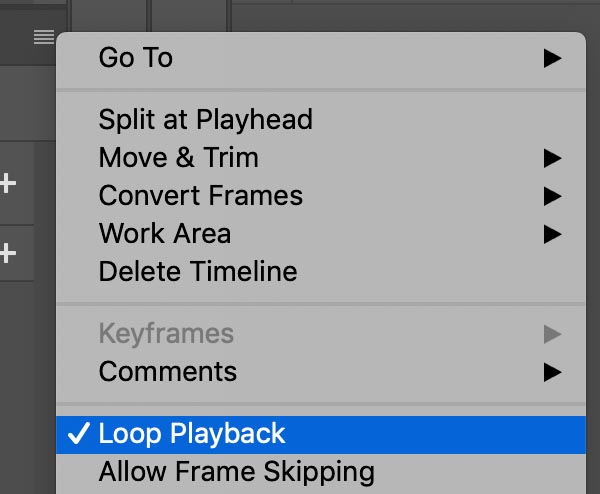
Make sure looping is turned on tin the menu at the right top of the Timeline.
Press Ctrl/Cmd+S to save the Smart Object changes and close the window.
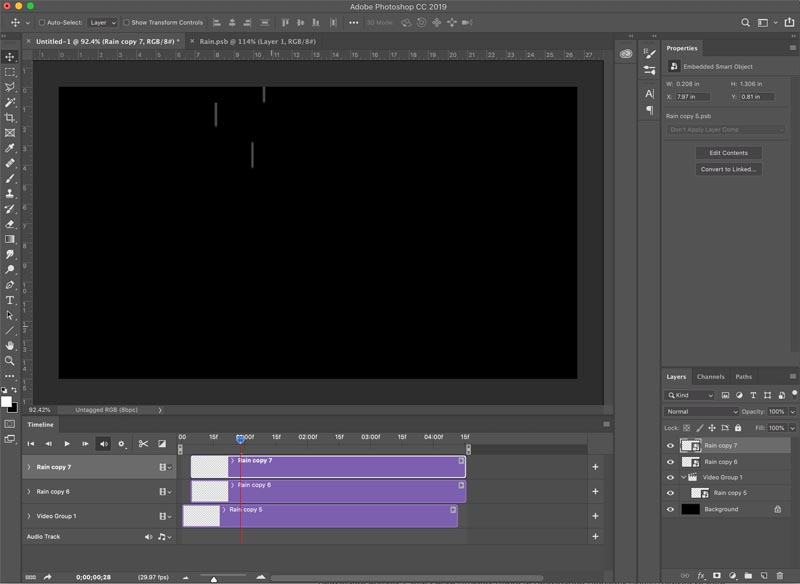
Step 4. Extending the rain.
Now it’s time to copy the drop and make the animation last longer.
Open the timeline and press “Convert to video animation” from the timeline.
If you play it back you will the drop animate a single time (it will keep going because of the looping, but its only animated once). Let’s extend the animation
Choose the rain Smart Object and Press Ctrl/Cmd+J 2x to duplicate it twice.
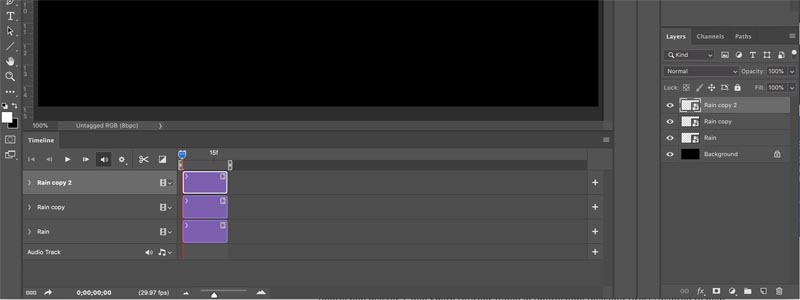
Drag the clips to Position the clips one after the other. It will now play through 3 times.
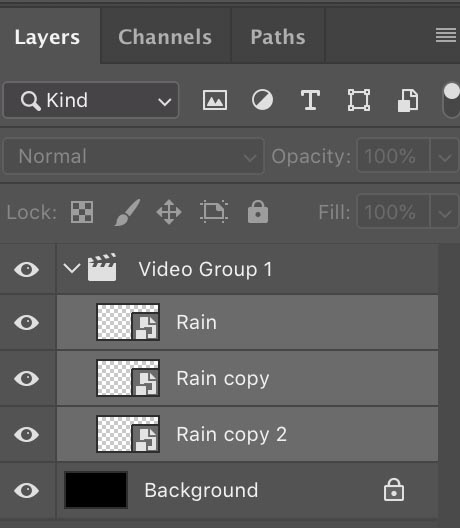

Let’s double it. Click, Shift + click to select all 3 layers that are smart objects. Press Ctrl/Cmd+J top copy them. You will now have 6. This is long enough. Make sure they are all together in the timeline.
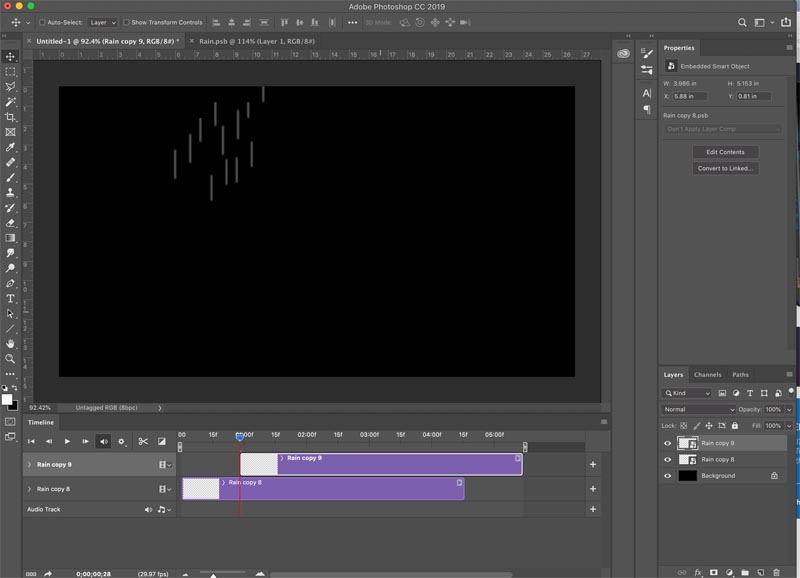
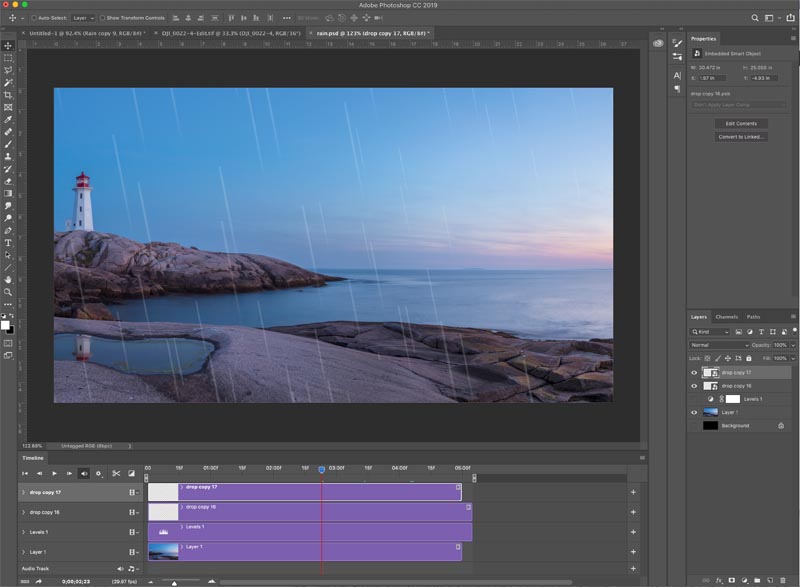
Step 5. Turning a drop into a downpour.
Now it’s time to multiply the drop and make more rain. (Note: Your computer will be taxed by this process and start to slow down, this is expected).
Select all 6 smart object layers and right-click on the layers panel and choose Convert To Smart Object We have now nested them into a single object, which is easier to manage.
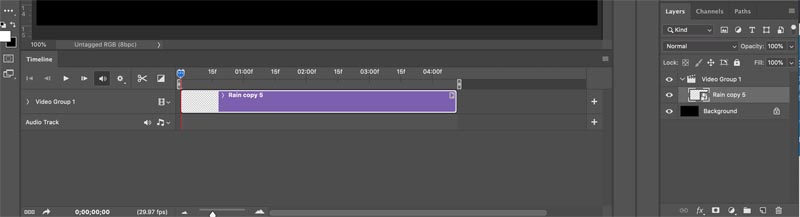
Press Cmd/Ctrl+J to copy the smart object
We need them stacked above each other, not next to each other

Drag the copied smart objet out of the Video Group in the Layers panel, Drag near the very top of the layer stack, until you see a thin white line. Let go.
Now drag the top layer to the left tin the timeline so its at the start of the timeline on a second layer as shown here.
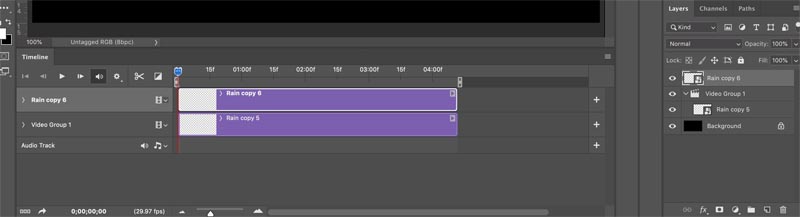
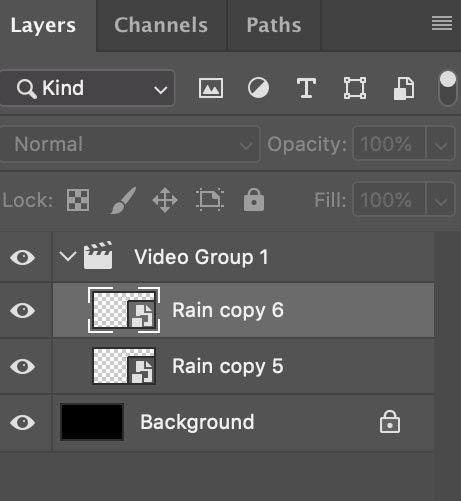
Press Ctrl/Cmd+T for free transform. Drag a corner to make the new drop larger than the previous one. This will also stagger the timing a little bit with the larger one appearing to move faster, which is how they behave in real ilifes because of perspective.
In the Timeline, drag the top layer to the left a little bit, to stagger the timing, so they don’t start at the same time and look fake,
At this point, all we need to do is keep duplicating the result, and build up the rain.. as so..
A. Press Ctrl/Cmd+J to copy the smart object. reposition and stagger timing.
B. Select all the Smart Objects and right click. Choose Convert to Smart Object
C. Press Ctrl/Cmd+J to copy, repeat. As you can see, each time we duplicate, we are doubling the rain. It’s starts off slowly, but you will very quickly start to get very dense rain.
How we will rotate the rain so it moves at an angle. (Make sure all the rain is inside a single Smart Object (like we have been doing)
Select the smart Object . Press Ctrl/Cmd+T for free transform.
Drag outside a corner handle to rotate the the rain to place it at an angle. The steeper the angle, the stronger the wind.
Also size it so that the rain isn’t being cut off on the corners. (I put a background image in, so you could see it better)
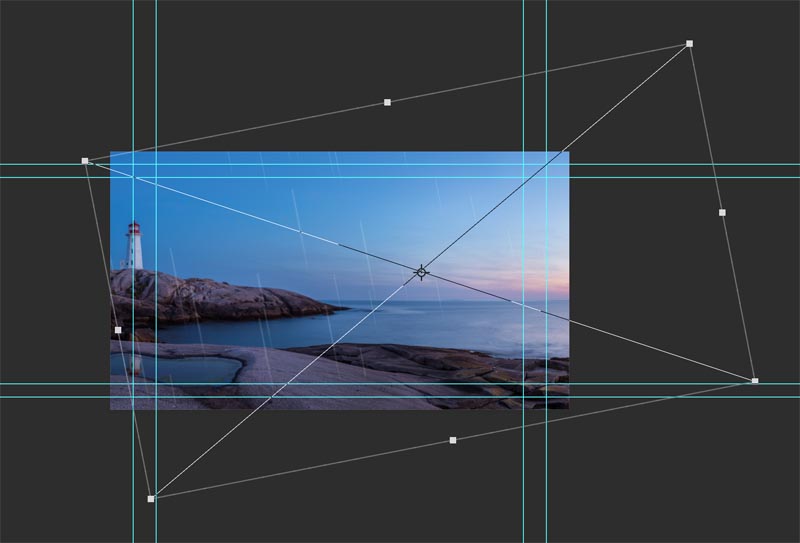
Change to Lighten Blending Mode (Get my free ebook on Blending Modes) and drop the opacity down to around 25% and place a video or an image underneath to see the effects.
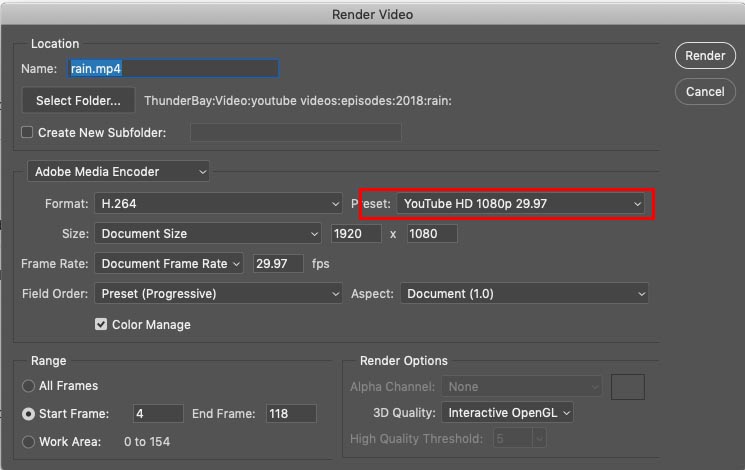
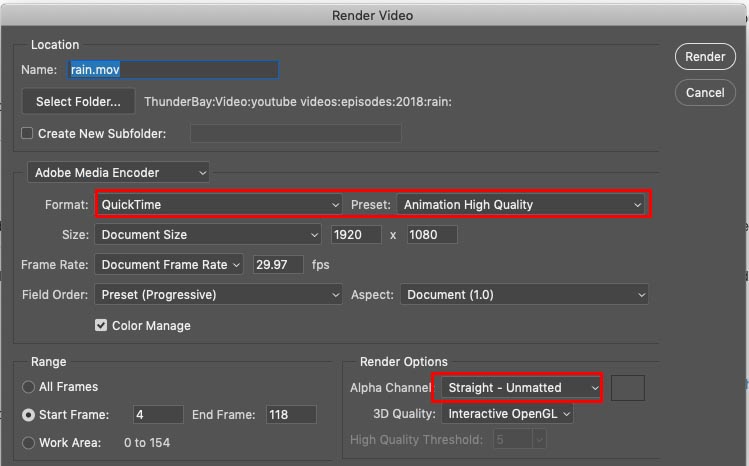
Step 6. Rendering the video of rain
Now we have made the rain, we need to export it, so we can use it.
Now we have 2 options.
A. If you have completed the animation in Photoshop. meaning the image or video is beneath the rain and ready to go, Choose Export>Render Video. choose the presets and select youtube 1080. Select a destination and choose render video.
B. If you want to use the rain in Premiere Pro etc or overlay it as a video, do this. Turn off the black layer. Choose Export>Render Video. Select Quicktime Video and Animation Codec. Make sure you choose Straight Unmated from the matting options at the bottom to show transparency.
Making Animated Rain the Adobe After Effects
This process is much easier in After Effects, because it has a rain filter built in.
Start with a new Comp and set it to 1920×1080
Import the image or video that you want to use as the base. (You could also choose Replace with After Effect Composition from Premiere Pro and use Dynamic link.)
Choose Effects> >CC Rain and play around with the options. (My video above shows you each option)
I have more Photoshop animation tutorials here
- How to Animate in Photoshop (animate a jet)
- Edit video in Photoshop
- Make Animated snow in Photoshop
- Make an animated cartoon Cinemagraph
- Make a Cinemagraph gif
- Make Animated Star Wars Intro
If you want to learn more about animation and working with video in Photoshop, check out the 2 premium courses I have
Great to see you here at the CAFE
Colin
PS Don’t forget to follow us on Social Media for more tips.. (I've been posting some fun Instagram and Facebook Stories lately)
You can get my free Layer Blending modes ebook along with dozens of exclusive Photoshop Goodies here

10 thoughts on “How to make animated rain in Photoshop or After effects”
Leave a Reply

How to get the Photoshop beta, troubleshooting photoshop beta. Why are the new features missing? Easy step by step tutorial
How to stack presets in Lightroom and Camera RAW There is something really important to understand about creating presets that...
How to cut out things in Photoshop using the amazing tools in the mask panel, color range and select and...


Just a note: In step 2 it says to hold “shit”. I don’t know if I’m comfortable doing that…lol
Just thought you should know of the typo.
LOL! thanks for the heads up!
Well, this tutorial inspired me so much I went over to your other ones and picked out the snow animation one. Spent an hour making an animated snow Christmas card out of one of my paintings to post on Facebook. Looks great. Thank you so much for sharing your hard earned knowledge, it is greatly appreciated. Just wish I could have worked out how to make the Christmas bauble swing as well.
Thanks! Im glad you are having fun with it 🙂
COLIN!!!!!!! AWESOME TUTORIAL!!!! I LOVE IT!!!! Thanks a million and never stope the fun and incredible work.
I am one of the 90+% of people who use a PC. Not just because those are my initials, but because I can run more programs, run them the way I want to do, (instead of the way Apple tells me too) and can do it for less than half the cost. In my eyes, Apple has no advantage over the powerful Microsoft platform in Photoshop, Illustrator or any other graphics programs. It all comes down to user preferences and Apple is for all the rebels who want to be different. Go ahead, let Apple tell you what to do and how to do it. I will be just as productive, just as detailed and just as good as any 3000 dollar Apple computer on my 500 dollar PC. Apple being, “better” at anything is a myth.
Hi there. I am made the rain effect but would like to layer it over a pre exisiting gif. However it won’t let me do so. How am I able to do this?
Many thanks
Hi Collin ! Thanks for the really helpful tutorial. I have managed to get a 15 second clip of rain up and running. Any longer than that and the computer lags a lot. My issue is that the start and end frame of the rain is blank without any rain. So if I loop the rain clip every 15 seconds the rain stops which is abit odd. Anyway to get around this ? Cheers !
just trim the video