Photoshop CS5 – What’s in it for tablet users?
A lot will be written about Adobe Creative Suite 5 and all it’s goodness for months to come. As it should be, seeing as CS5 represents one of the biggest updates to the Creative Suite since it has been bundled as a suite! But beyond all the marketing-speak, with each new release of the Creative Suite, what I really want to know is, “What’s in it for tablet users?” And I’m happy to say, “A whole lot!”
Photoshop CS5 is pen-centric through and through. We see this first hand with a new tool, The Mixer Brush. This brush emulates the effects of a traditional artist’s brush whose tip was dipped in multiple colors and then blended together. This blending of colors can be applied to a blank canvas to achieve the look and feel of various traditional media. Alternatively, you can use the Mixer Brush on a photo, picking up the underlying colors as if they were wet media, adding an artistic or painterly effect to any image.
This tool offers an extensive set of controls to alter the effects of the brush. For example, you can determine the wetness of the brush, how much paint is held on the tip, how much of that paint mixes between the tip and the canvas, and how clean the brush is after each stroke. Every characteristic that you would expect from a traditional paintbrush.


And speaking of traditional brushes, you are going to love new Bristle tips. Once you’ve selected a brush tool, you need to choose a brush tip (in the Brush panel, which I’ll get to in a moment). New Bristle tips offer stroke characteristics that rival traditional artist’s brushes. Brushes with a round, blunt tip or a flat fan brush for example. Beyond the shape of the brush, every aspect of a brush’s behavior can be modified to give you the most natural effects imaginable. Including the length of it’s bristles, their thickness, stiffness and angle of the brush tip. All of these characteristics affect the way in which color is applied on the image.
You can use one of the ten standard Bristle tip presets, or create and save your own to match your preferred look or style.
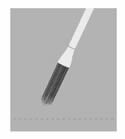
Assisting you in the creation and use of your new Bristle tip brushes is a Bristle Brush Preview feature which provides you with a real-time reference of the brushes look and behavior. This floating window gives you a visual representation of your brush when selected and active. This preview window is not only effective in the creation of new brushes, but also flat out fun!

These new painting tools and features are exciting stuff for literally every type of Wacom tablet and Photoshop user. Whether you are a photographer seeking the addition of artistic enhancements to your images, or an illustrator/artist wishing to extend their creative vision, or a designer who makes dynamic composites and effects. These new painting tools and functions are going to change the way you work!
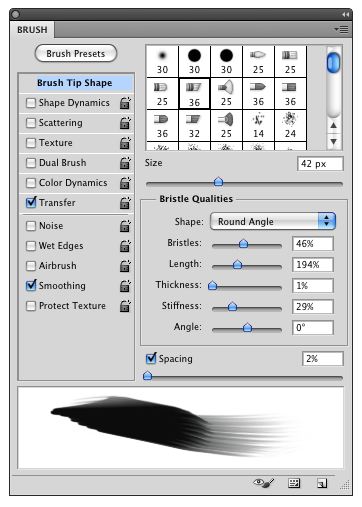
New is cool, but with CS5 newly redesigned is cool too! Savvy tablet users will immediately notice that the Brush panel icon found on the right-hand of the options bar has moved to the left to join some other brush related options. Clicking this icon opens the Brush panel, where you’ll find the majority of your dynamic (pressure) controls. The icon itself has changed as well. Formerly a dog-eared page full of bullet points, it now appears as a folder with a little jar of artist’s brushes on it.
Inside the Brush panel things look fairly similar to previous versions. A closer look will reveal that a button labeled Brush Presets has been added. Brush presets have been broken out into their own panel in CS5, and for good reason. With the inclusion of new Bristle tips—and a new way of thinking about brushes altogether—makes this a good move in my opinion. In the past, numerous size brush presets with similar attributes clogged up the Brush panel. Now, standard brush presets have been slimmed down to include base level brushes with only the most common dynamics applied.
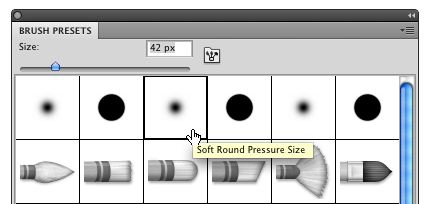

For example, tablet users need only select from a handful of brushes for basic pen pressure control. Should you wish to create more artistic, or stylized brushes, you can do so easily by selecting various dynamics, such as scattering, texture, color or transfer and setting controls for pen pressure. (Note: Users of Wacom Intuos4 pen tablets and Cintiq interactive pen displays may also use pen-tilt to control brush dynamics. Accessory pens for these tablets like the Digital Airbrush and Art Pen offer additional functionality.)
Also new in the Brush panel are options to modify the characteristics of the new Bristle tips (discussed earlier.)

Back on the Options bar, you’ll notice that two new icons appear when you select any tool that behaves like a brush. (There are 17 brush-like tools in Photoshop CS5). These tablet pressure icons (which resemble targets with a pen in them) enable pen pressure control of opacity and size of the brush tip. The controls govern the use of pressure, overriding any settings that may have been applied to the current brush.
![]()

This is a welcome return of a feature as it brings back an option to quickly turn pressure on and off for the two most popular controls—a feature not seen in Photoshop since version 7. Remaining visible, always on the Options bar, these controls are more accessible and more discoverable. This is refreshing for new tablet users, or those not very comfortable in the Brush panel. The tablet pressure icons toggle control on and off with the quick tap of your pen!
While Photoshop’s new painting tools and effects are redefining your creativity, here are a couple of new or improved tools that really shine when used with a tablet.
Topping my list of favorite new tools is actually an “old” but enhanced tool: The Spot Healing Brush. It takes advantage of CS5’s new Content-Aware feature, which delivers almost magical results! When painting over unwanted elements in an image, the structure and details around the area are preserved and smoothly blended in its place. In most cases, it is as if the element never existed! You can really power through an image when applying this tool with your pressure-sensitive pen!
While I prefer to do my sharpening at the very end of my workflow, and in most cases just before printing, I can’t help but appreciate the Sharpen tools new Protect Detail feature. This option frankly makes the tool actually usable in that it doesn’t immediately throw pixels into an oversaturated halo spin-cycle! Controlling its strength with pen pressure, and a gentle hand, it’s a nice tool to have in your toolbox for down and dirty enhancements to eyes, jewelry, and otherwise sparkly things. It won’t replace Nik Sharpener Pro by any means, but for that quick glimmer of light, it’s a cool tool.
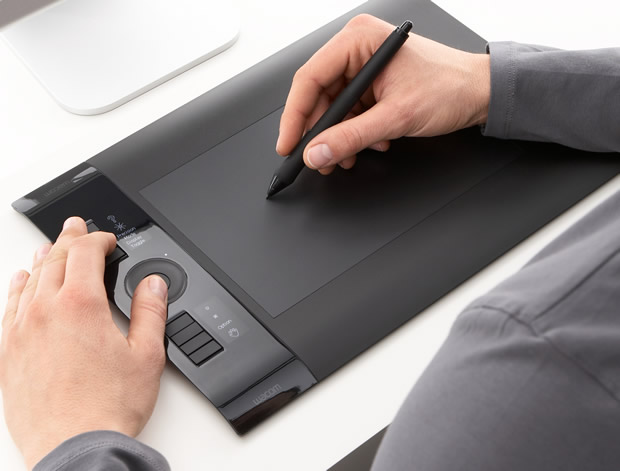
Making selections is a big part of every creative workflow, and there is no better and faster way to make selections than with the natural precision of a Wacom pen. CS5 offers new intelligent edge detection technology to give users an unprecedented level of control in the making of selections and masks. This is especially ideal when working with complex subjects like hair, and semi-transparent material. Once you’ve made an initial selection, use the slider controls in the Refine Edge dialog to tweak it. Then, finish it up with the Refine Edge Radius brush. This tool enables you to fine tune the edges of your selection by carefully painting the line around the selected subject. The action results in an expansion or contraction of the selection around the original edge. Ideal in situations where you wish to extract an element from a photo—free from residual background colors or contaminates—and place it on another background. This pressure-sensitive tool is a hidden gem, but very useful.
I can easily say that there are few—if any—images that I work on that don’t incorporate the use of some type of adjustment layer. Whether it is levels or curves for a tonal adjustment, or vibrance or hue/sat for some color, I’ve just got to have them! I’m addicted to them. There, I said it. When I learned of the new HDR Toning adjustment, I was intrigued with the effects that it can produce. Combinations of this new adjustment will most certainly find its way into my images.
Tip: The HDR Toning adjustment requires that you flatten your image. In early uses of this adjustment, I’ve created a duplicate image, applied the adjustment, then drag and dropped the adjusted image back into my working document, where I can add a layer mask for compositing. (Hold the Shift key while drag and dropping the adjusted image back in the open doc to place it in perfect register.)

Wow! That’s a brain dump on a lot of new features, and at the same time not much at all, huh. Like I said, there is a ton of new features in CS5. Especially for tablet users! If you are not already using a Wacom pen tablet, there has never been a better time than with Photoshop CS5! For tips on setting up your Intuos4 pen tablet or Cintiq interactive pen display and using it in Photoshop CS5, look for the upcoming title from PhotoshopCAFE: “Wacom Tablets and Photoshop CS5”. All new content this spring.

Help for Photoshop 2024 update, is generative fill a paid option? troubleshooting your Photoshop update Colin Smith answers your questions

How to choose the best Generative ai model in Photoshop. Firefly, Flux and Nano banana, which is best? The answer...
How to use the new Neural Filters in Photoshop 2021. Change the age or expression on a face and more.