
Auto Blend layers in Photoshop with Harmonize, includes Resolution Hack
Harmonize ai in Photoshop, auto compositing
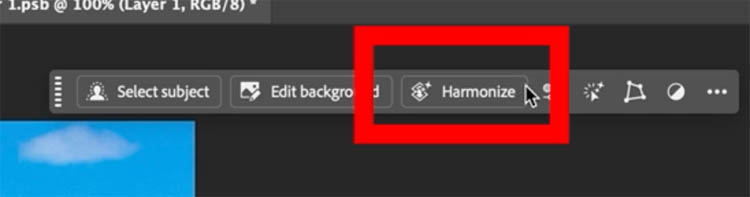
As promised, in my Photoshop top new feature overview, we are looking at the new Photoshop features in depth, beginning with Harmonize, not to be confused with the Harmonization Neural Filter.
Currently, this is Photoshop beta only. How to get Photoshop beta.
How Harmonize works
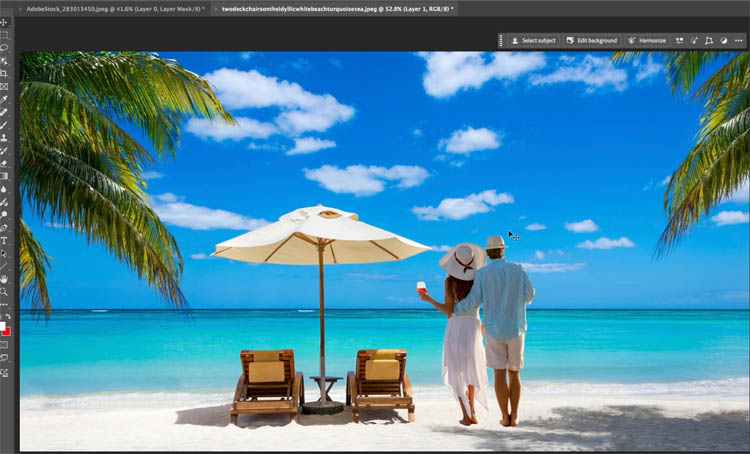
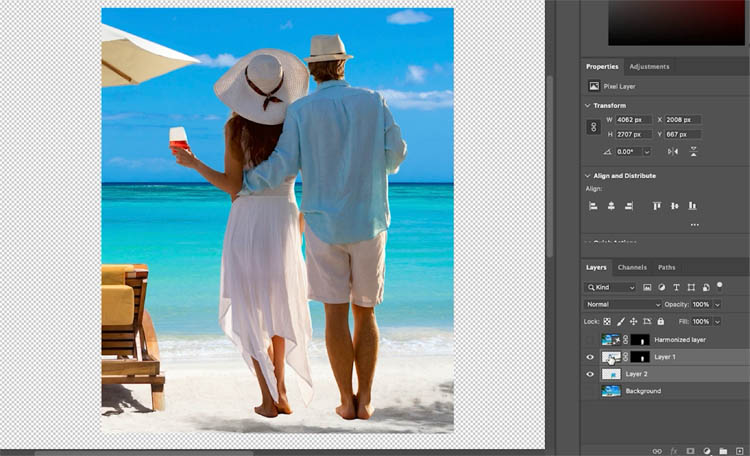
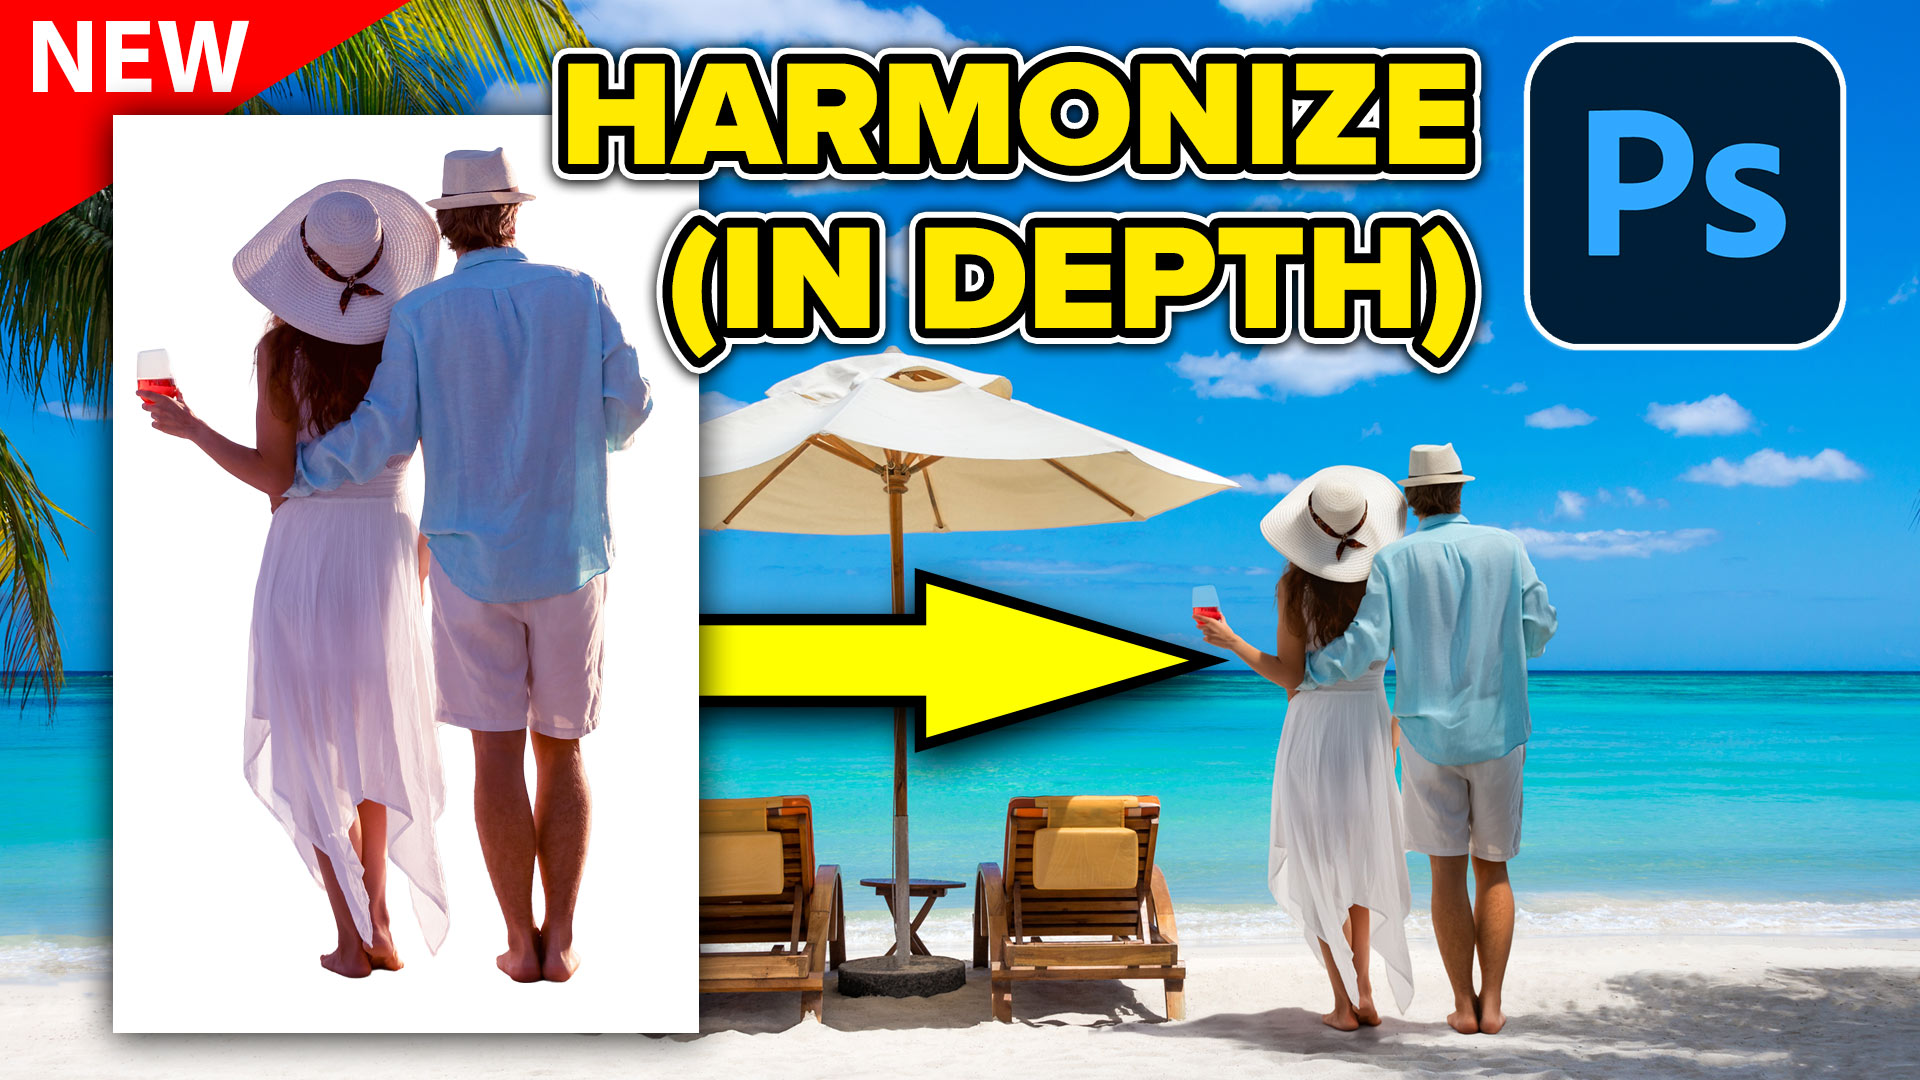
Let’s start with a picture of a couple. We want to put them on a beach, so it looks realistic.

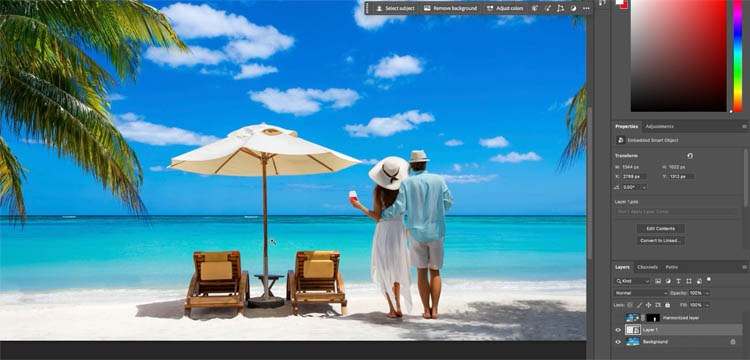
Choose remove background from the taskbar to mask out the background and isolate them.

To combine them with the beach image;
Choose the move tool (V).
Drag the cutout layer to the top tab of the image you want to combine them with (the beach). The image will pop open.
Drag your cursor into the center of the image and release. you now have both images in the same document. How to combine images for beginners.
Press Ctrl+T/Cmd+T (Free Transform) and drag the corners to resize and position the couple.
Problem: The color and lighting don’t match and there is no shadow, so it looks fake.
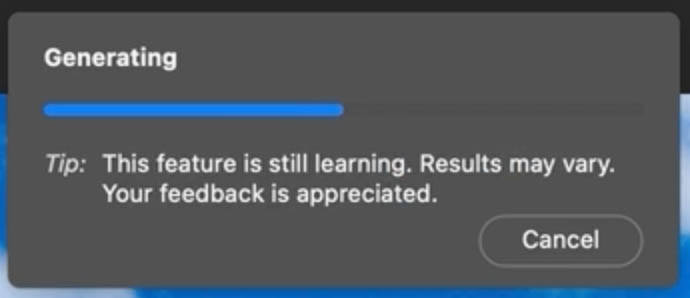
In the Task Bar, click on Harmonize.

This uses Generative ai (and 1 Generative credit)
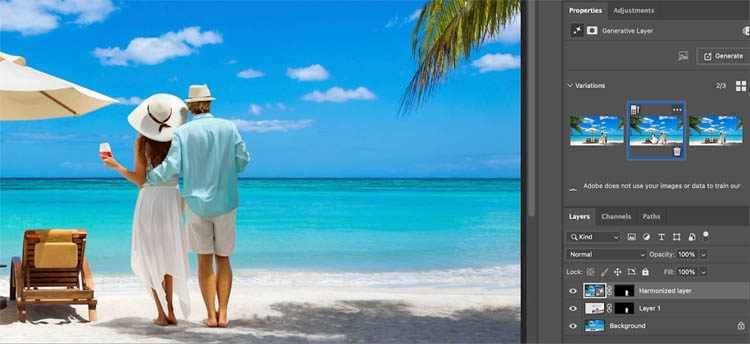
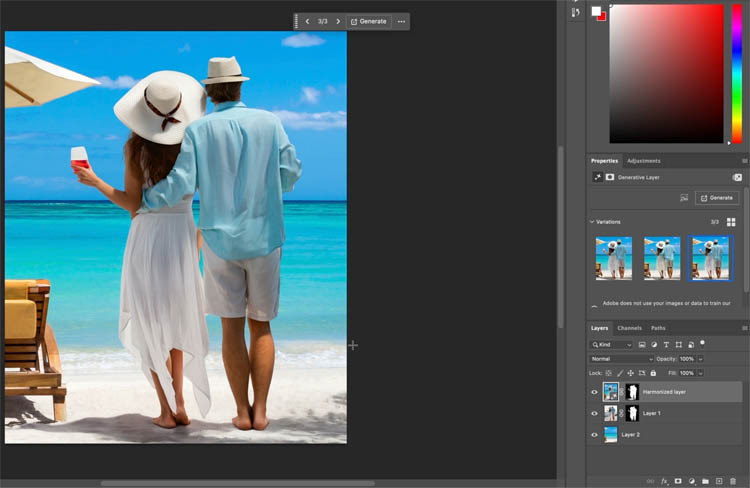
Now it matches and you can choose from 1 of the 3 variations.
How it works
What happens? A new generative layer is created on top. Photoshop combines both the layers into a new layer and matches lighting and shadows, making it believable.
Photoshop Harmonize masks out and shows just the areas that have changed from the original background. Here I have hidden the background.

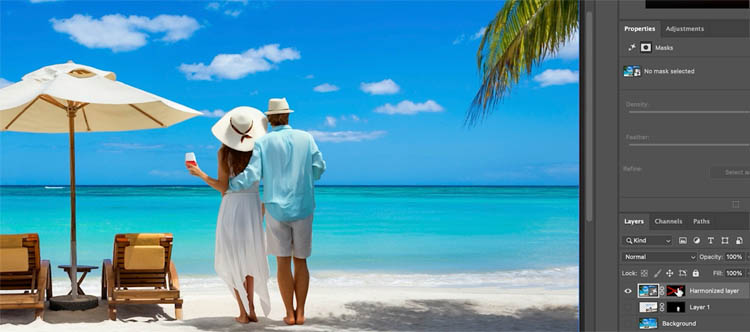
If we hide the Mask (Shift+Click on the mask) you can see the whole layer is generated.
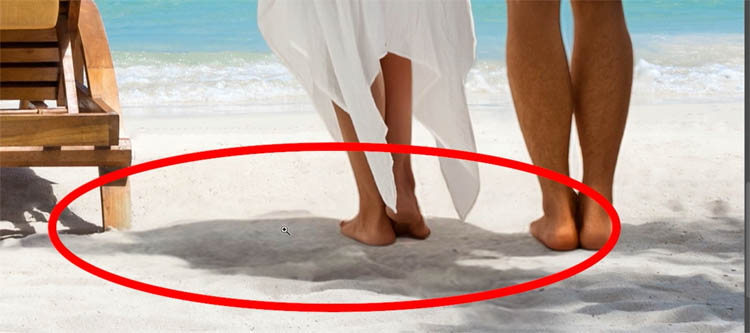
The problem is the resolution is limited to 1024 x 1024 which is stretched across the entire size of the image. You don’t notice on the background because the mask shows the original background. However, if you look closely at the subject, its resolution is softer than the original.
Hacking Resolution with Photoshop Harmonize
We are generating a much bigger area than we need and thus wasting our resolution. Here is how to be more efficient.
Choose the background.
With the rectangular marquee tool, Make a selection. Make it big enough that the color and lighting is clear and there is room to generate shadows, but not too big.

Press Cmd/Ctrl+J to copy the selection to a new layer. I have hidden the background so you can see, but you don’t have to hide it.
Cmd/Ctrl+Click on the layers in the layers panel to select multiple layers.
Select both the newly created layer as well as the subject that you want to harmonize (the couple of people) Select the 2 layers.
Right-click on the layer in the Layers Panel and choose Convert to Smart Object.
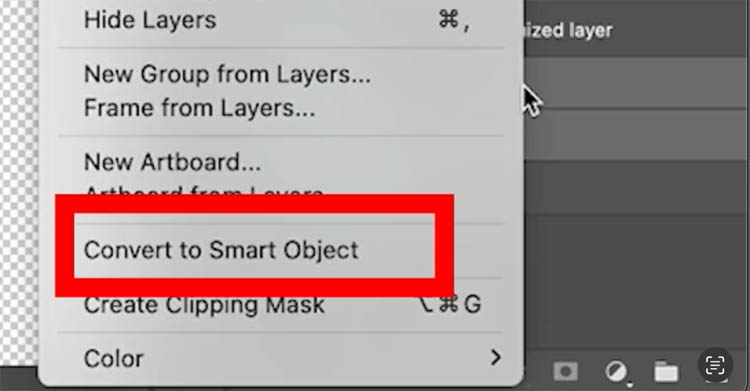
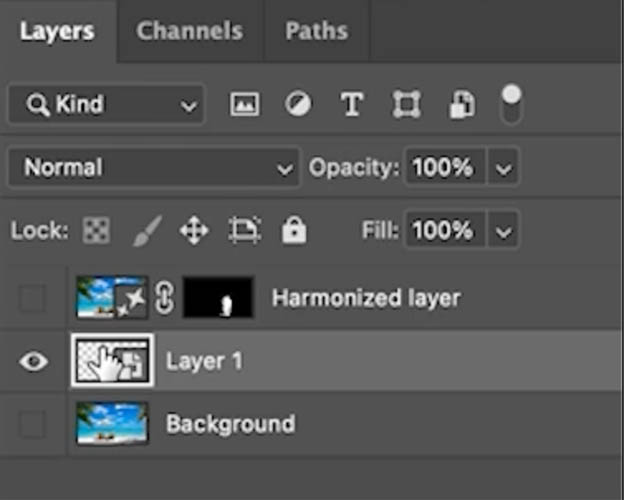
Both layers are now combined into a single smart object.
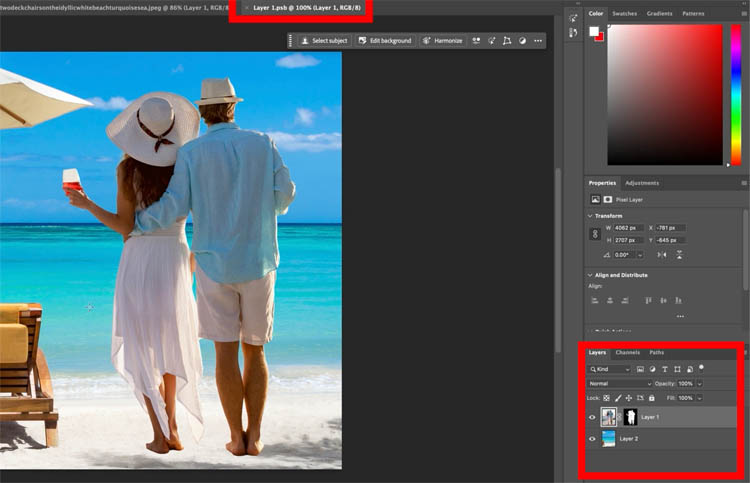
Double click the Smart Object in the Layers Panel to open the Smart Object.
This causes the Smart Object to open in a new window, with the layers intact.
Notice this time, it’s a smaller image than the original.
Choose Harmonize in the Task Bar
Select the best variation from the Properties panel.
(Optional) Hide the background, we won’t need it, but keep it visible if you want to, the result will look the same.
Choose File>Save and close the Window.

Go back to the original document tab and the Smart Object had updated with the harmonized layer.
Here is the harmonize without the resolution hack, notice it’s soft and fuzzy. Look at the shadow especially, it’s fuzzy.
With the resolution hack. See how much sharper and more detailed everything is. This shows well on the video at the top too.

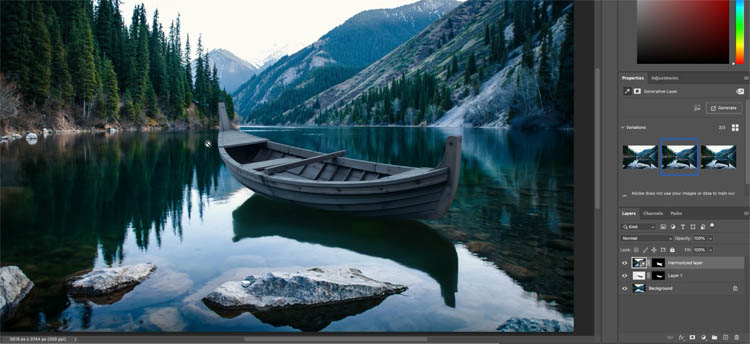
Harmonize with reflections
Harmonize isn’t all shadows, it also works well with water and reflections.
Take this boat and lake.

Choose Harmonize and notice reflections are generated as well as fixing the color of the boat.
Do We need to composite anymore?
The sensitive question arises, is this the end of our skills? Is it all automated now? What was the point in all that learning?
This is a valid question and one I have have been pondering since this feature was announced. To be honest, I was little uncomfortable the first time I saw this demonstrated (during MAX Sneaks).
My thoughts
Let me ask another question, if you are in ACR or Lightroom, do you press the auto button and move on? Or, do you take the time to fine-tune the adjustments into something that you like? There are a lot of creative directions you could go and once size doesn’t fit all. I think this a great feature for beginners or for making quick mockups, but skilled manual work is always going to be better and tell a better story.
Aside from the resolution limitations and mistakes ai makes, these will get better over time. But only you know exactly the story you want to tell and exactly how you want things to look. A skilled retouchers’ work is always going to look better, so YES, you should still develop your skills.
On top of that. I really enjoy the process of compositing. Sure, use the ai tools to help you (especially the extraction tools), but they aren’t the whole story, just tools to help you.
Using Harmonize in Photoshop Composites.
Let’s demonstrate this with an experiment I did on one of my composites. This is my final composite that I made by hand, no ai, just good ol’ Photoshop. I made the glowing bow and then painted the light and shadow onto Taylor, the model.
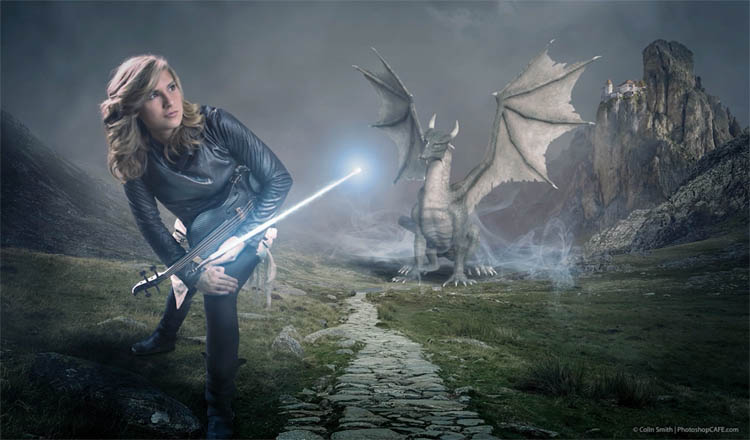
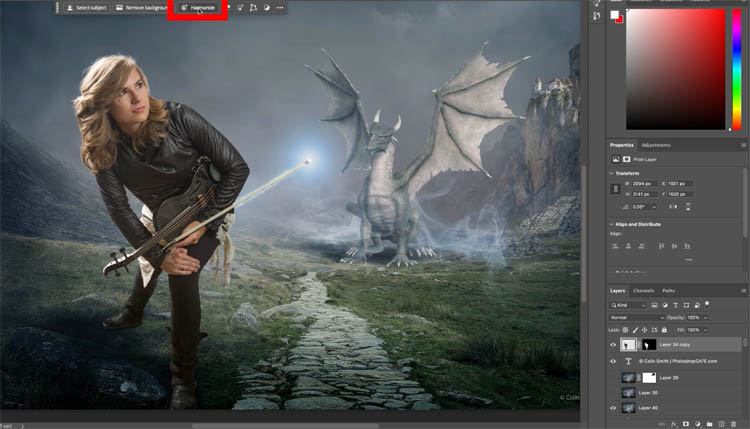
Here is the original photo that I captured in my studio, on the top of the background composite, without any adjustments. Yes, the shadows and vignette I painted are still at the bottom, we aren’t worried about that in this case.
Choose harmonize.
Here it matches in a pretty realistic way. You may not notice much difference in this image. Watch the end of the video it’s much more obvious.
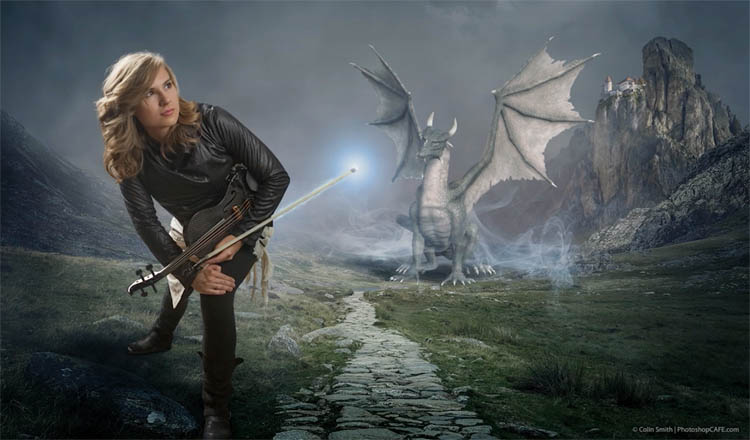
Compared to my manual work, where I stylized it a lot more, for a more custom and unique look that fits my vision for the composite. You can take creative liberties in a way that the ai can’t.
Harmonize is an interesting tool that can help save you time with composites. I hope you enjoyed this tutorial and it helps you explore Photoshop more.
Other new feature tutorials in this Photoshop update
Great to see you here at the CAFE
Colin
PS Don’t forget to follow us on Social Media for more tips..
(I've been posting some fun Instagram and Facebook Stories lately)
You can get my free Layer Blending modes ebook along with dozens of exclusive Photoshop Goodies here


in this free Lightroom tutorial learn how to make an HDR image in Lightroom 6 / Lightroom CC. Shoot bracketed...

You asked for it and you got it. More Intermediate/Advanced Tutorials Step up to the Microphone please. We are going...

Learn how to make 4 vintage photo effects in thisPhotoshop tutorial. Learn processing techniques that were historically used and how...


