
Hidden button to instantly fix color of photo in photoshop
Hidden button to instantly fix the color of any photo in Photoshop (not the auto button)
Hidden button to instantly fix color of photo in photoshop
I’m going to show you a button that most people don’t even know exists, and this will fix the color in just about any photo in one click. Let me show you on a couple of examples. We’re going to do a basic photo, then I’m going to show you how I would use it on a composite.
How easy it is to fix the color of a photo
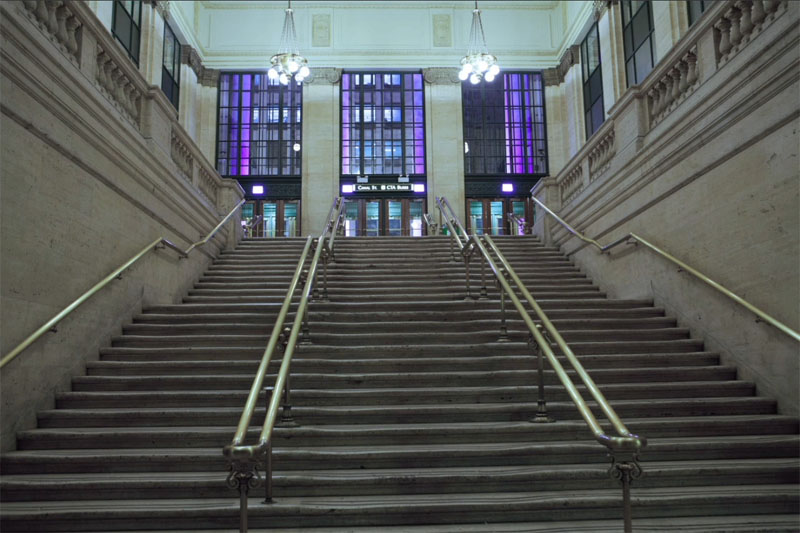
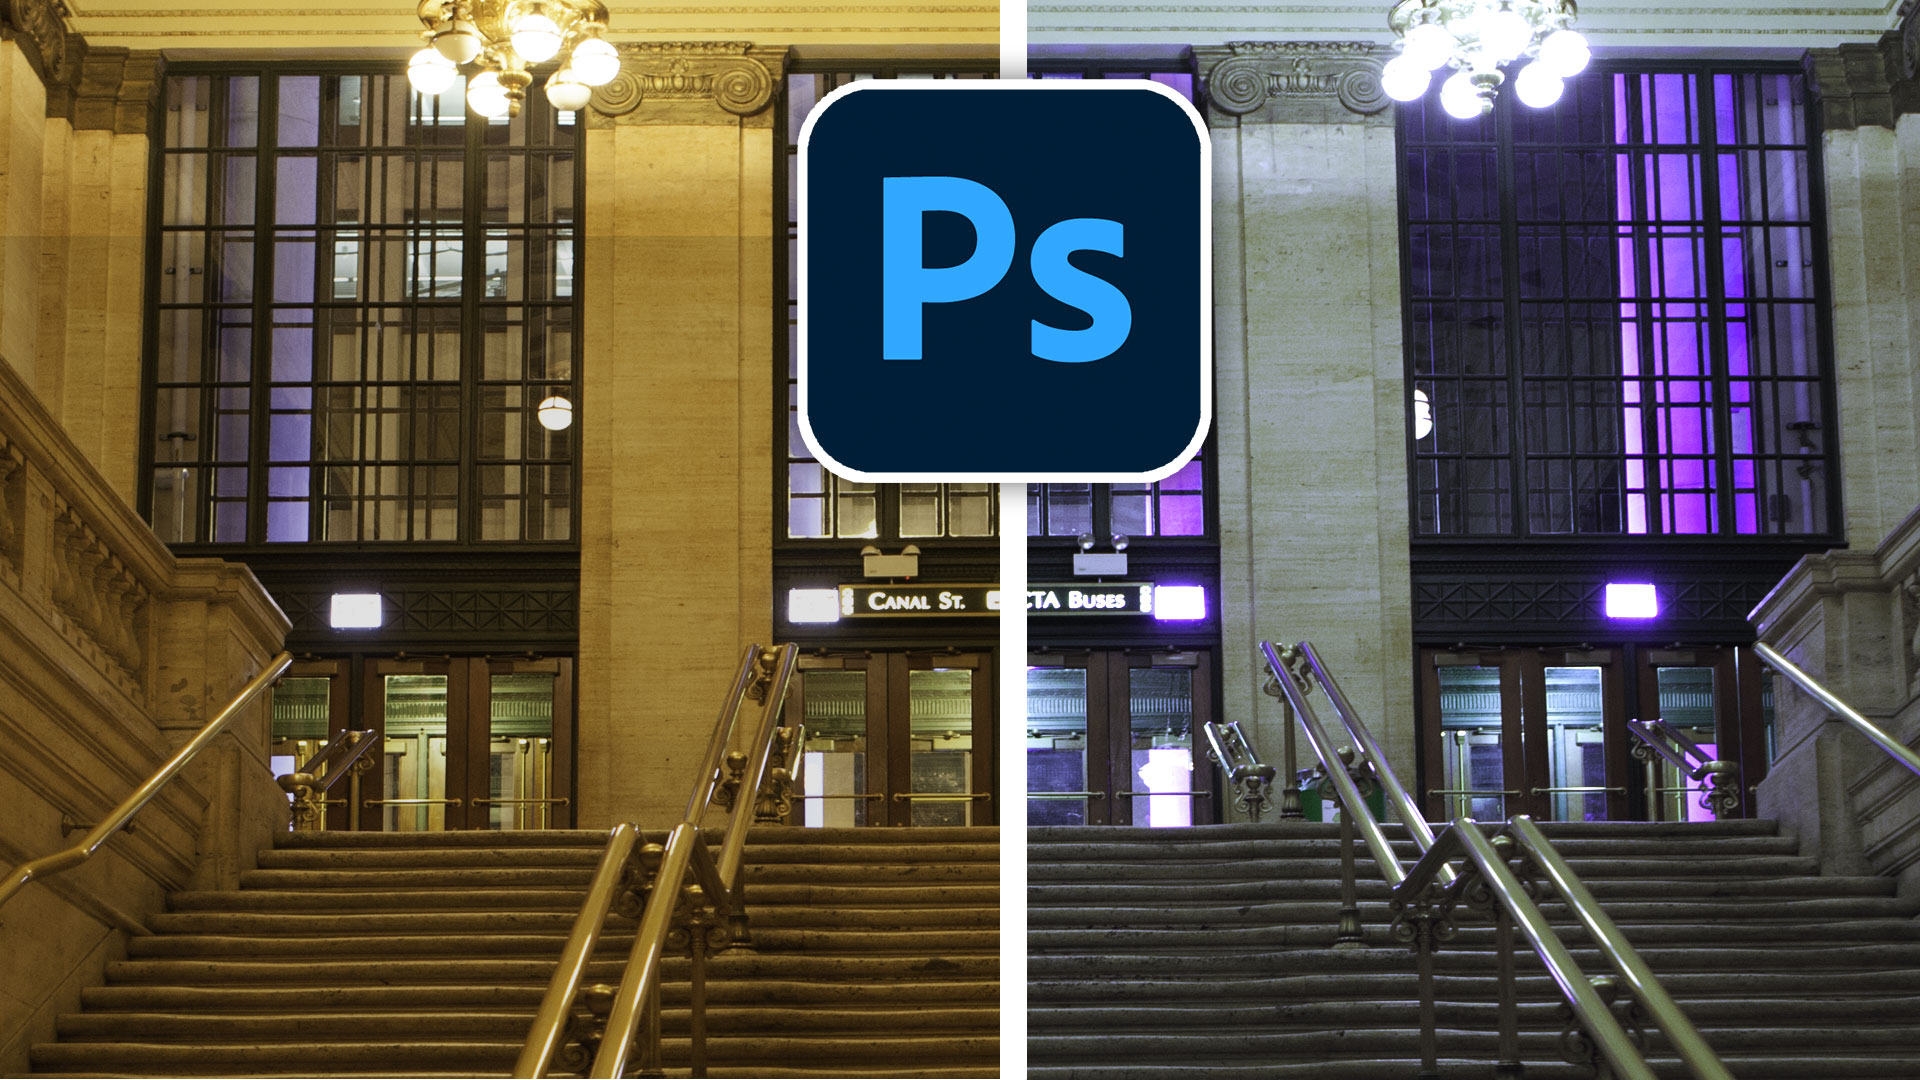
So here’s a photo with an obvious color cast. I Shot this in Chicago. You might recognize the scene from the beginning of a movie if you know what it is. Let me know win the comments.
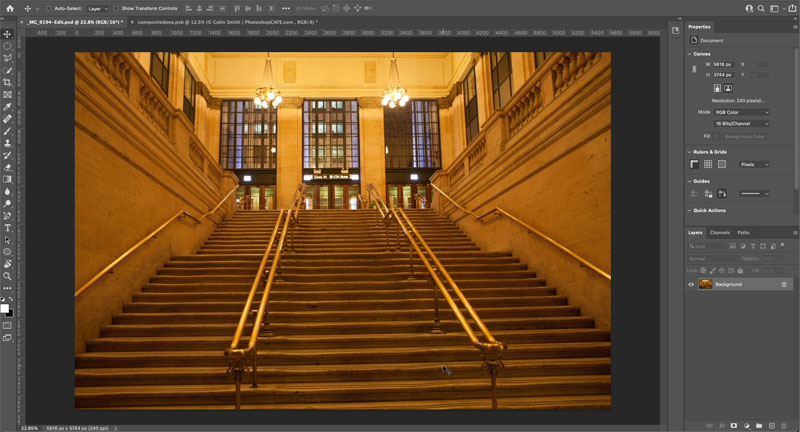
All right. So let’s do this. We’re just going to choose image. Then we’re going to go under adjustments and then we’re going to go down to match color. And this amazing button, it’s very simple. It’s right here. It’s neutralize. If I turn on the neutralize button, boom gets rid of the colorcast just like that.
Some really useful options for a better result
All right. I’ve got a couple more things I want to show you now. I would use this as an adjustment layer or as a Smart object, but it doesn’t support those options, so we will dupliacte the layer instead.
Ctrl/Cmd+J duplicates the layer
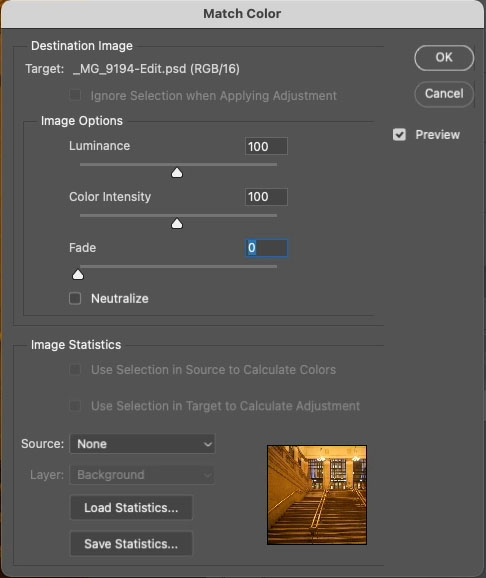
As above, choose image adjustments>match color.
Once again, we’re going to choose the neutralize option and click, OK, now we’ve applied this on a separate layer, but it gets better in the next step.
Right now the filter is affecting both the color and the luminosity. We only want to change the color.
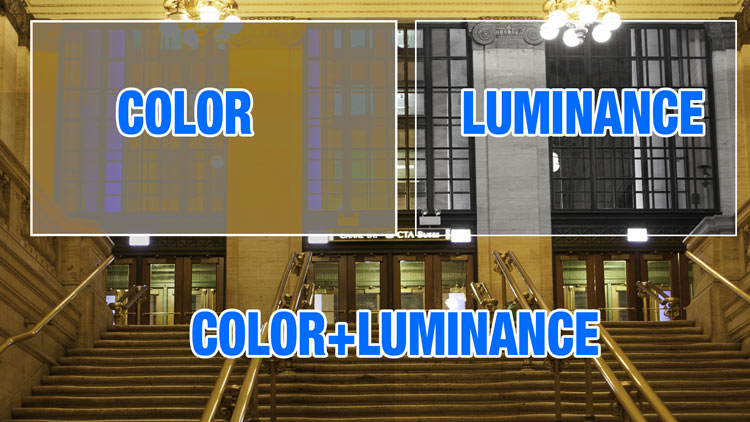
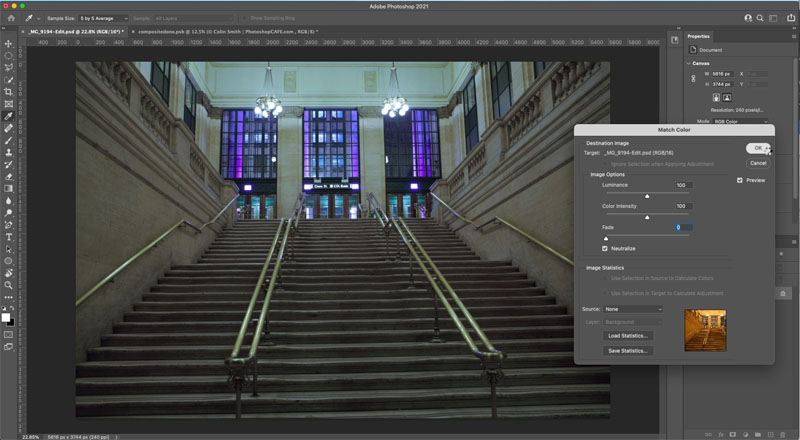
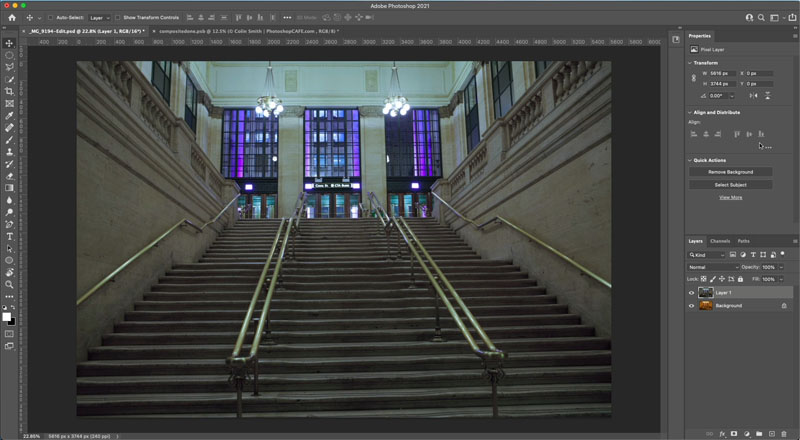
Where it says normal in the Layer blending mode in the Layers panel, change it to Color. Notice now it’s brighter. The adjustment is only changing the color now, and not the lightness (Luminance).
And notice it doesn’t look as dark and muddy as it did before in normal mode.
Matching color in multi layered composites
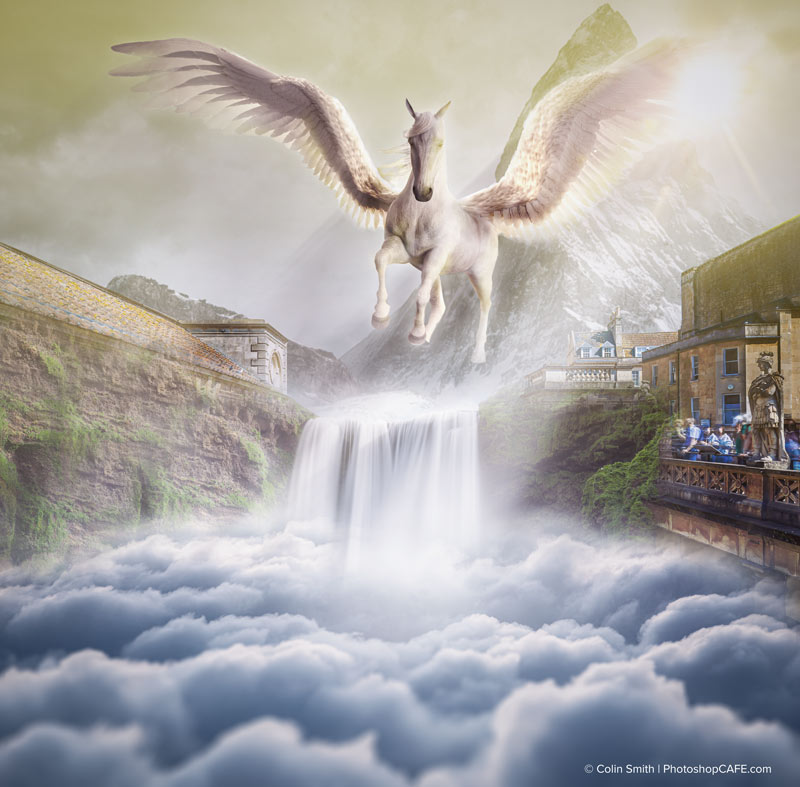
Let’s use it on a composite. This pegasus is what I did during an Adobe live stream. There are lots of layers. Let’s apply it to the entire image. Now, here’s a little trick.
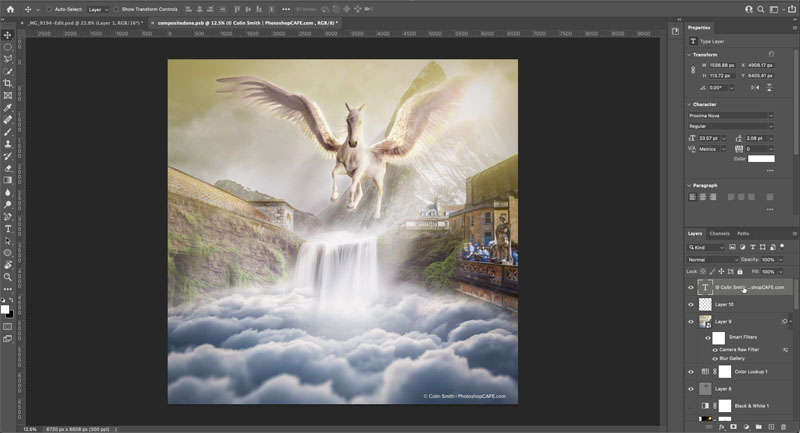
What you want to do is just choose the top layer, then hold down shift+option+command. That would be shift+Control+Alt on windows. While holding down these three modifiers, tap the E key, and this will create a layer on top. It’s literally creating a flattened layer of all the layers underneath.
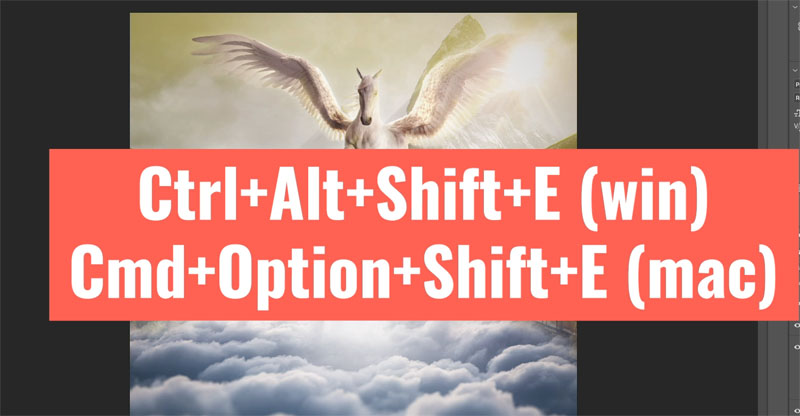
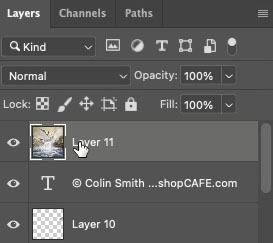
Image adjustments>Match color> neutralize, click, OK
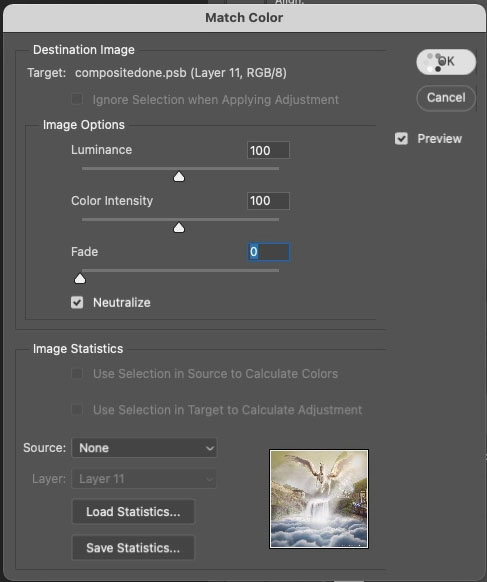
You can see it’s subtle on this images (every image is different), but it’s bringing everything together. And once again, we’re going to change this from normal to color blending mode.
This week was just a quick tip on that little button. I’m curious, did you guys know about that before? Let me know in the comments underneath and also let me know what you’d like to learn next.
And until next time, I’ll see you at the cafe.
PS Don’t forget to follow us on Social Media for more tips.. (I've been posting some fun Instagram and Facebook Stories lately)
You can get my free Layer Blending modes ebook along with dozens of exclusive Photoshop Goodies here

47 thoughts on “Hidden button to instantly fix color of photo in photoshop”
Leave a Reply

Photoshop 2020, new feature tutorials. PhotoshopCAFE Photoshop 2020 Superguide.
5 ways to fix every selection edge in Photoshop, the ultimate guide
Hidden way to convert your photos into different art styles using Generative ai inside Photoshop. Access Firefly settings inside Photoshop


Is it the untouchables movie?
Great tip… thank you.
Was the movie The Untouchables ??
I always learn something from Colin whether it’s a 90 minute long tutorial or a 5 minute quick YouTube video. Thanks!
Was that the Main Staircase at Grand Central Station?
I did not know about that button. Very interesting!
Night at the Museum
Movie is Untouchables
I didn’t know about that feature! Thanks I’m going to try it now in the editing I have to do.
the untouchables. but was it the beginning or the end? btw the stroller rolling down the stairs is also a tribute to another movie. a classic. do you know which one?
Its been a while, was it at the beginning and the end?
nice one! Im not sure
Many thanks Colin for all the fabulous instructions. I only wish that I had more time to watch and practice it all.
Generally speaking, I am trying to learn only what I think I may use, but that can be a shortsighted approach…
Many thanks for all of your hard work and for sharing your know-haw!
Oli
P.S.
Watching your intro video to the “Neural” Filters, I noticed that in your Photoshop, you have several more filter option that I have. Any Idea why? It is up to date, that is my Photoshop.
Thank you for revealing another hidden Photoshop secret – will certainly speed up the workflow!
ROCKY
I did not know about that button
I use Elements 2021, is there a way to use this hidden button with Photoshop Elements 2021, thank you.
I don’t know if Element has it, I haven’t opened Elements in over 10 years
That’s amazing! Thank you. Signing up for tips today .
A great tip. The film was the Untouchables. I have downloaded the free Photoshop vault but have no idea of how to get them onto my Photoshop 21 workspace I have an iMac operating Big Sur 14.1.
HI Colin, I am new to the Cafe and I love it. As for new subjects I am very interested in something about smart objects. I have yet to find a good discussion about when to use it. Thanks for what you do.
Search for my tutorial where I use potatoes to learn smart objects, you will never forget
Hey Colin …. Great info!! No, I did not know about this button. I was looking for this fix a week or so and couldn’t find how to do it!! I will now fix the photo (composite) I was working on.
Thanks!!
Thanks for the tip! That was a new one for me!
Thank you never saw that button or tried it. It works well on many different kinds of images.
Colin, thanks very much for the tip. While neutralize works well for images with slight casts, it has a problem with major casts. On these images it seems to do a good job restoring gray and white. it changes other colors and it also tends to reduce luminance and lowers saturation.
I recently used a high res film scanner to scan thousands of 35mm Kodak negative and slide film from the 1970’s and 1980’s. Over time, the blue channel faded and left a heavy yellow cast on the resulting scans. The only thing I have that performs the color correction with 1 button is Kodak’s ROC plugin. It is fast, accurate, and usually perfect. But there are impediments. The plugin only installed as a 32 bit program and could only be used up to PS-CS6. Kodak is out of business so the program can not be installed and activated. My version was registed on a 10 yr old PC and that’s the only machine I can run it on but it is an old clunker. As good as Photoshop is, it’s really a pain to have to restore images with neutralize, non linear curves, saturation, contrast and other fine tuning. It is really to bad that Kodak let ROC die and did not sell or transfer the code and the know-how.
Cheers, Murray
It wont work for every image, but it does work most of the time
You always have such great tips, Colin. I’ve already sent it on to a few people. I can’t find the “like” button.
That was great. No I did not know it before. Believe the station was from The untouchables.. Would love to learn more about videos editing I use Power Director and shooting.
great tip
Thanks
I don’t what edition of Photoshop you are using Colin, but in my edition, very recently updated, there is no Match Color in Adjustments. What could be the explanation?
Make sure you are in RGB mode? Its been there for years
Great tip, especially for composites – and new to me – thanks. The like button has gone AWOL so here’s a 👍 in lieu.
The like button is on youtube 🙂
thankc Colin i did not know about tjat one click button
Great tip indeed. Thanks so much.
Chicago Union Station! The city I have lived and worked in now for almost 30 years….first on a Quantel Graphic Paintbox, then a Shima Seiki , then the world moved over to MAC Photoshop!
Thanks always for your great input to the magic of PS.
The movie is the Untouchables
Quick and quick method to correct dominants on the photos, however, in my opinion, a cyan dominant persists on the wall above the windows
Didn’t know this. Very helpful. Many thanks, Colin!
thanks – I can really use the tip to create a flattened layer copy.
I watched your neural filter episode but mine won’t load – a common error comes up but none of the online soutions work.
Thanks Colin, I had no idea what this button did. I tried it on a shot of storm over Lake Michigan that was too blue and I couldn’t figure out how to handle it. This little trick did the job and is so simple. Thanks again!
thanks Colin – didn’t know about this neat little feature – looking forward to trying it some with composites to see if it will help them look more like they ‘belong together’
Thanks for this absolutely simple but fabulous advice.
Is it in a scene from the Untouchables with Kevin Costner?
thank you, did not know about this.
Many thanks Colin. Have been scanning some 60 year old Kodachromes and I wish I had your tutorial a couple of months ago. Still great for the future.
Isn’t that the Chicago City Hall from “The Blues Brothers?”
Cool tut!
Thank you!
Chicago Station in Silver Streak movie?