
Smooth Uneven Skies Using Point Color in Lightroom or Camera RAW
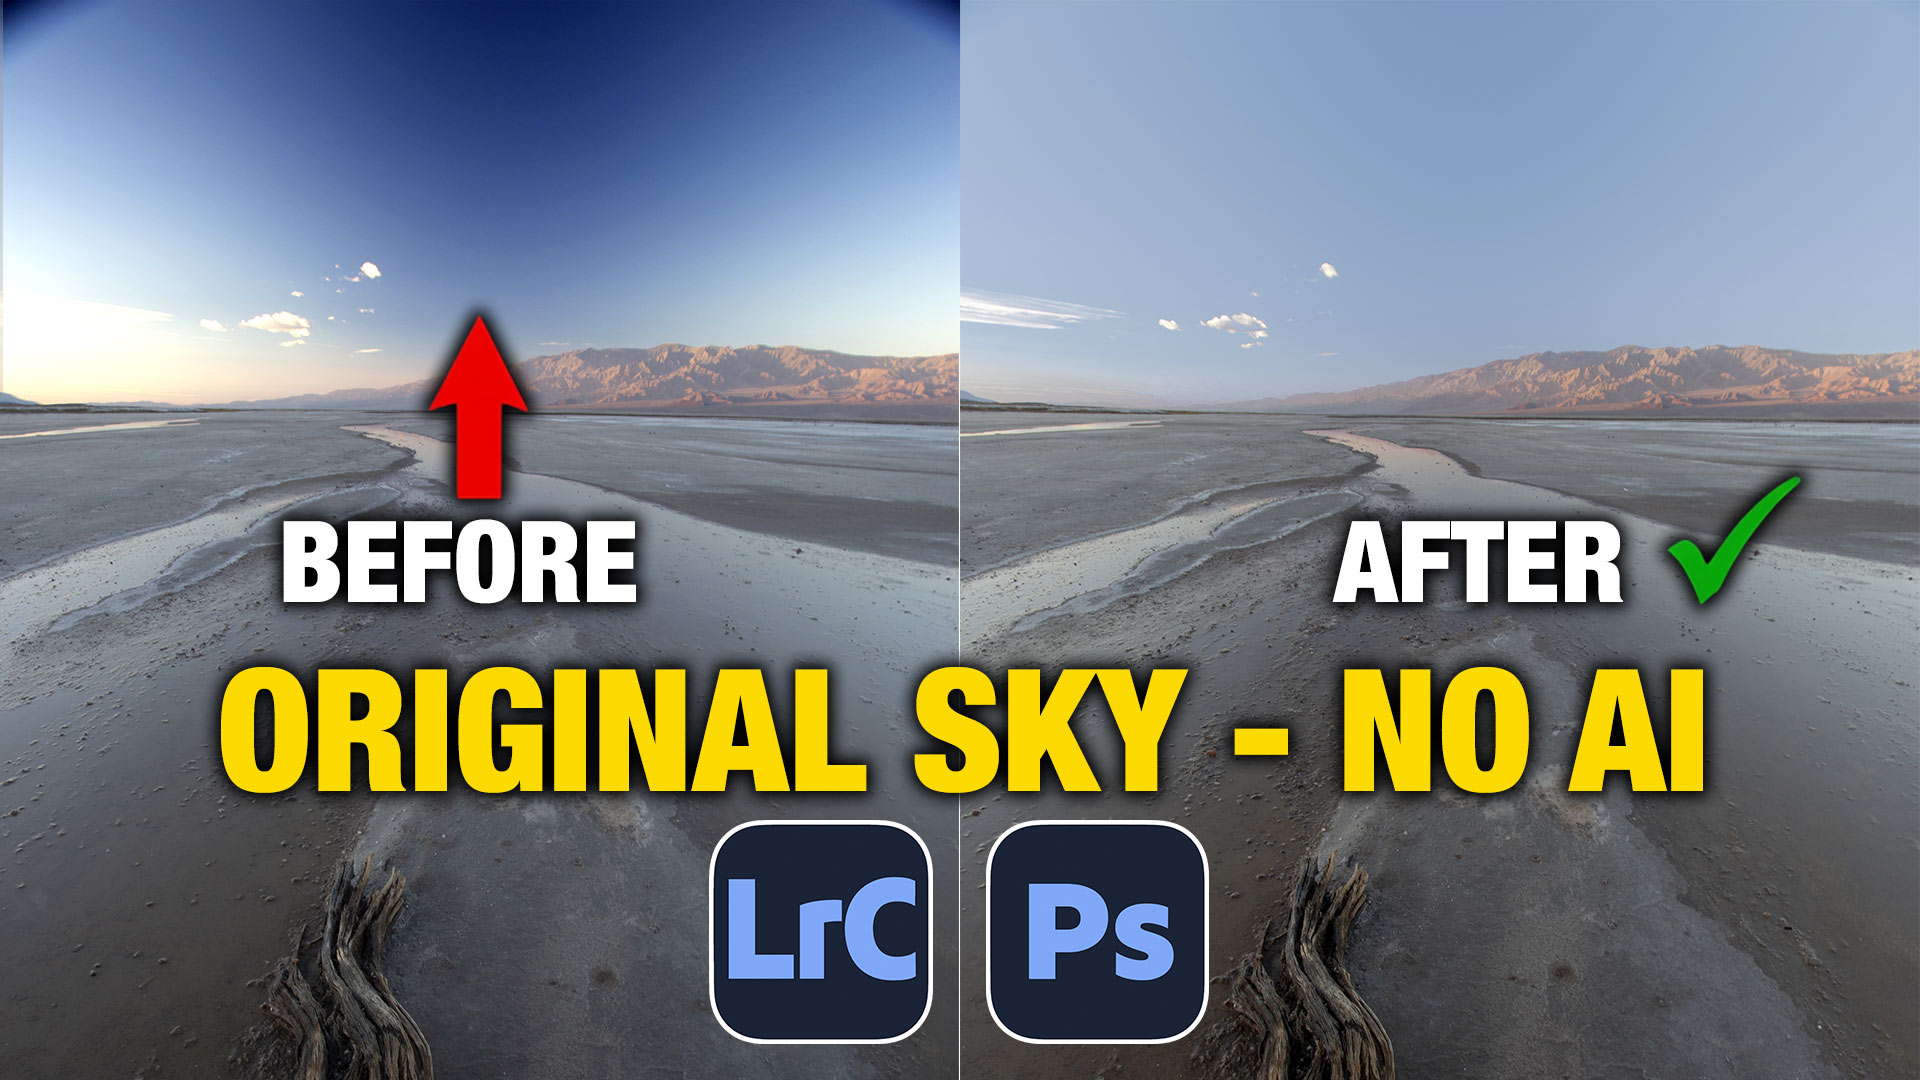
How to Fix Uneven Blue Skies Without Replacing Them
Do you ever look at your photos and notice the sky isn’t smooth or even? You’ll often see dark patches, uneven blue areas, or strange gradients that just don’t look natural. The good news is you don’t need to replace the sky to fix this. You can correct it quickly inside Camera Raw or Lightroom, and once you understand what causes it, you can help avoid it in the future. Depending on how extreme your vignette is, you may be able to do it with a single sample and minimum adjustments, you’ll see what I mean as you go through the tutorial.
Why This Happens in the First Place
This issue is most commonly caused by using a polarizing filter on a wide-angle lens. A polarizer doesn’t affect the sky evenly when the lens is very wide, so only part of the sky gets darkened. That’s why you end up with those blotchy blue patches.
Tip: Avoid using a polarizer on ultra-wide lenses when shooting big open skies.
Since Lightroom and Camera Raw share the same processing engine, the fix works identically in both.
Step 1: Apply Lens Profile Corrections
If you haven’t applied a Lens profile, this can help reduce the vignette.
Open the image in Lightroom or Camera Raw.
Go to the Lens Correction panel.
Enable Profile Corrections.
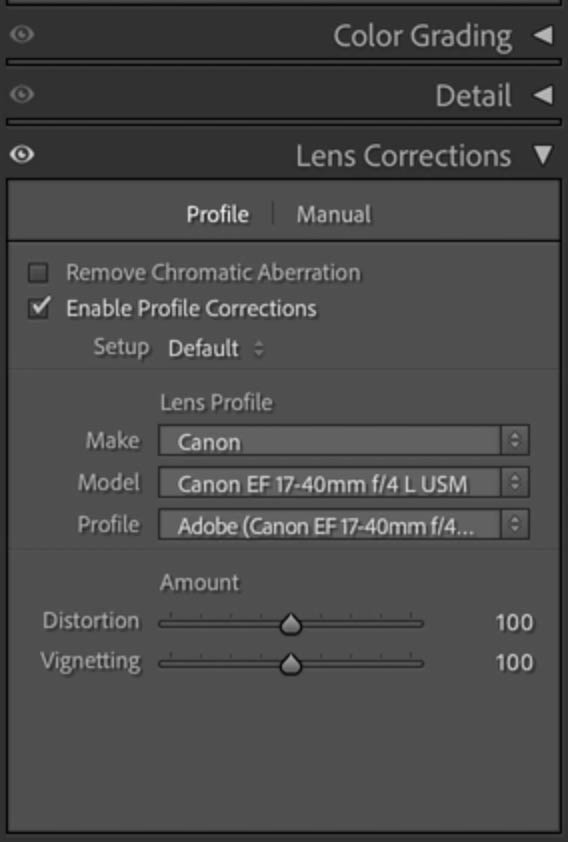
This automatically applies the correct camera and lens profile and removes a good portion of the vignetting caused by the lens. You’ll notice the sky already looks more even, even though the problem isn’t fully fixed yet.
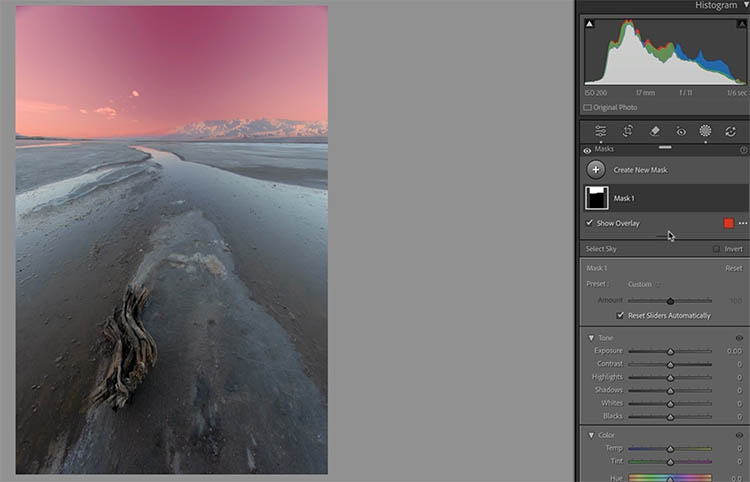
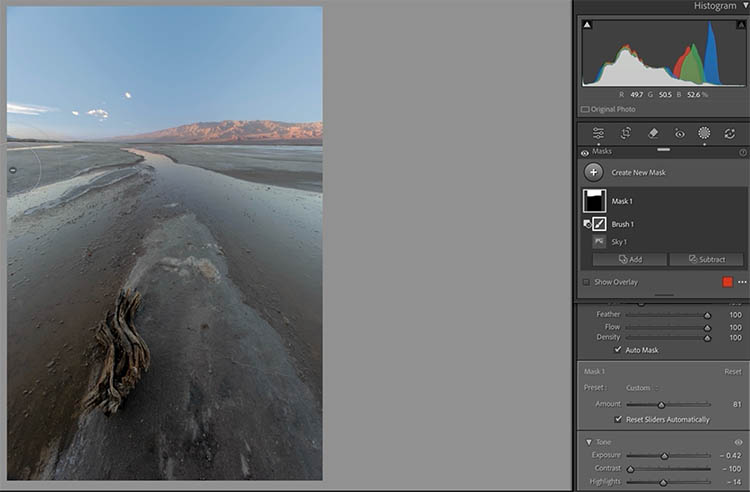
Step 2: Isolate the Sky
To avoid applying the adjustment to the entire image, let’s make a sky mask. This creates a mask that limits all adjustments to the sky only, keeping the landscape untouched.
Click the mask tool
Choose Sky.
Step 3: Use Point Color to Target Uneven Blues
Scroll down to Point Color and click the eyedropper.

The example I’m using is quite extreme. If your sky is more even than this, you can often fix it with a single sample, and in that case, choose the mid blue.
When the vignette is too extreme to get it in a single, sample, make 2.
Click directly in the darkest blue area of the sky.
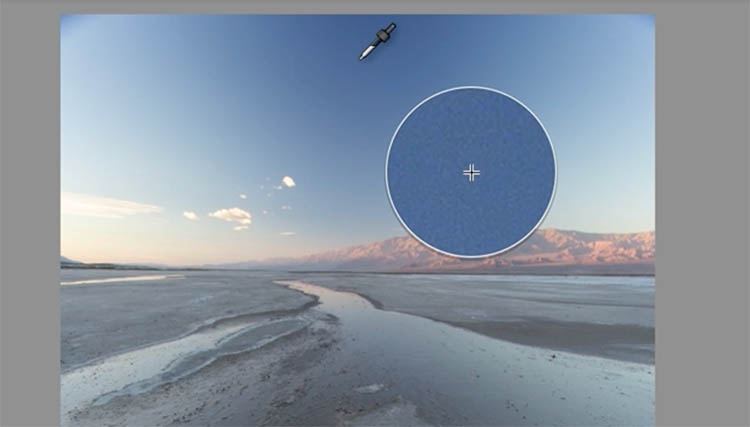
A color sample is added, and this is the tone you’ll be adjusting.
This is where the tip is and the point of this tutorial. We will be using the new Variance Slider.
Adjust the Variance slider to the left.
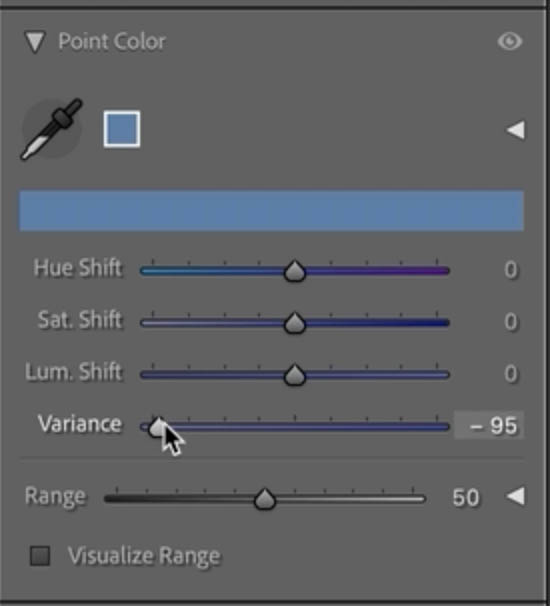
Dragging left expands the color range, while dragging right isolates it more tightly. You’re not adjusting a location—you’re adjusting that specific color wherever it appears in the image.
Step 4: Add a Second Color Sample
Click again, this time sampling a lighter blue area of the sky.
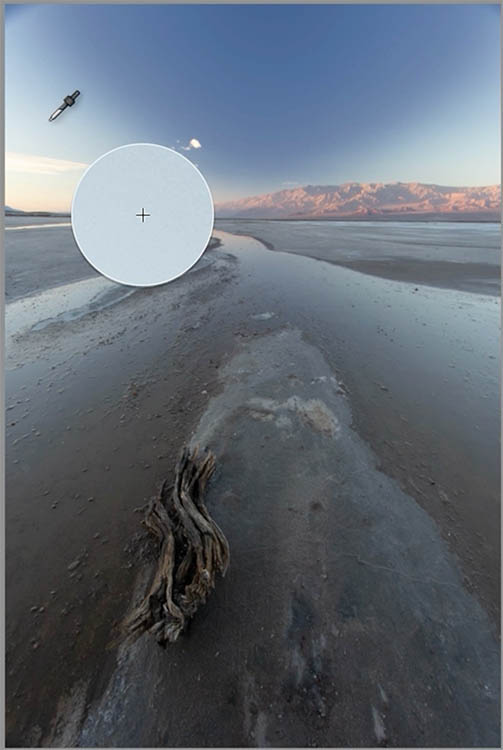
A second color sample appears.
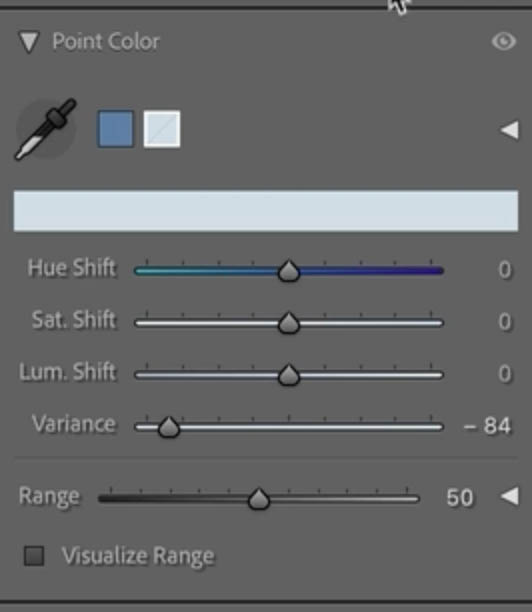
Adjust the Variance again to help blend the two tones together. At this stage, don’t worry about perfection—you’re just building a foundation.
Step 5: Balance the Sky Using Luminance and Saturation
Select the lighter blue sample.
Lower the Luminance slightly to darken it and reduce the harsh transition.
Increase Variance if needed to soften edges.
Add a small amount of Saturation to bring life back into the blue.

Now select the darker blue sample.
Reduce Saturation slightly.
Adjust Luminance until both tones blend naturally.
You’ll see the sky start to even out without losing realism.
Step 6: Make Global Adjustments to the Sky
With both point colors working together, move to the main adjustments for the sky mask.
Lower Temperature slightly to push the blue back.
Reduce Contrast to smooth remaining transitions.
Pull down Highlights just a touch.
Be careful not to flatten cloud detail—subtle adjustments go a long way here.
Final Result
When you compare before and after, the sky is noticeably smoother and more natural. The uneven patches are gone, the gradient feels realistic, and most importantly, you didn’t have to replace the sky or use AI. There is a little banding in the result here. To fix banding, bring out into Photoshop and select the blue sky and add a little blur.
What skies do you struggle with the most—wide-angle landscapes, seascapes, or city shots with lots of haze? Let me know in the comments.
It’s great to see you here at the CAFE
Colin
PS Don’t forget to follow us on Social Media for more tips.. (I've been posting some fun Instagram and Facebook Stories lately)
You can get my free Layer Blending modes ebook along with dozens of exclusive Photoshop Goodies here

One thought on “Smooth Uneven Skies Using Point Color in Lightroom or Camera RAW”
Leave a Reply

How to set up DJI Phantom 2 Vision Quadcopter Drone, how to fly, quick start, out of the box and...

Preparing your files for printing. Prepress and steps to prepare file for a commercial printing job, tutorial
How to Light a portrait photo in Photoshop, for dramatic and realistic results.


I have ps 2026 but ACR doesn’t have a lens correction panel. What am I missing?